
If you're hunting every secret in Journey to the Savage Planet, focus on three rewards first: Orange Goo for permanent health and stamina upgrades, Alien Alloys for suit and weapon improvements, and hidden chests tucked behind traversal puzzles. The fastest route is to explore each region twice—once during the story, then again after unlocking the Launch Thruster, Proton Tether, Bombegranate, Shock Fruit, and Blaster upgrades.
AR-Y 26 is designed to make you notice something impossible: a ledge just out of reach, a suspiciously empty wall, or a glowing object behind a cluster of alien growth. Those aren't decorative distractions. They usually point toward a cache, a Kindex discovery, an Orange Goo node, or a shortcut to a previously inaccessible section. This guide covers the important secret routes across the main campaign, the tools needed to open them, and the hidden rewards that are actually worth the detour.

What You Need Before Searching Every Secret
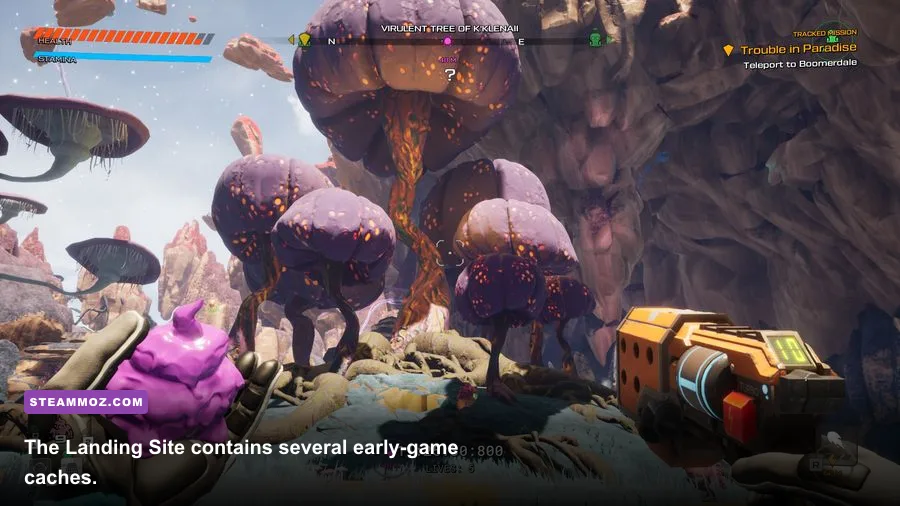
Don't attempt a full collectible sweep immediately after landing. Several secrets are deliberately locked behind gear that you won't receive until later. The Launch Thruster lets you cross wide gaps, the Proton Tether turns marked anchor points into climbing routes, and Bombegranates destroy cracked alien walls. The Blaster is equally important because many seemingly harmless creatures are actually guarding a cache entrance.
Your suit upgrades come from E.K.O., while materials come from harvesting plants, killing creatures, and opening chests. Orange Goo is especially valuable early because it permanently increases your maximum health and stamina. Alien Alloys are rarer and are used for higher-tier upgrades, so don't waste them on a weapon upgrade you aren't using. A fully upgraded stamina bar makes exploration dramatically easier because sprinting, tethering, and jet-assisted jumps all compete for movement resources.
| Tool or upgrade | Secret access it enables | Best time to backtrack | Reward usually found |
|---|---|---|---|
| Launch Thruster | Long gaps and elevated platforms | After the first major story boss | Orange Goo, chests, Kindex entries |
| Bombegranate | Cracked rock and sealed organic doors | As soon as the grenade is crafted | Alien Alloys and upgrade materials |
| Proton Tether | Anchor chains and vertical shafts | Mid-campaign | Hidden caches and shortcuts |
| Shock Fruit | Electrical alien mechanisms | Late mid-game | Research points and rare loot |
| Blaster upgrades | Armored creatures and distant switches | Before the final region | High-value chests and boss resources |
Before you leave a landing pad, open the map and look for unexplored dark pockets. The map doesn't reveal every chest, but it does expose caves, tunnels, and disconnected platforms. Also watch for purple or blue scan targets. Scanning isn't just flavor: completing research entries often unlocks crafting blueprints or advances optional tasks.

🎮 Journey to the Savage Planet
Looking to experience this game? Grab your digital key directly on our store for $5.99.
View on Steammoz Store →Landing Site and the First Hidden Caches
The Landing Site is the best place to learn the game's secret language. Start near the Javelin and circle the landing zone rather than heading straight toward the story objective. Look beneath the broken starter platforms, behind the first clusters of Pufferbirds, and along the cliff edge facing the open valley. These early pockets commonly contain crafting materials and the first Orange Goo nodes.
Under the starter platforms
Drop down from the route leading away from the ship and check the lower rock shelf. The entrance is easy to miss because it sits below eye level. Follow the shelf into the small recess, then use the nearby plants as a visual marker on the way back. This is a safe early pickup and a useful lesson: secret caves often appear as narrow black gaps in otherwise brightly colored terrain.
The first broken-wall detour
After crafting Bombegranates, return to the first area containing cracked rock. Throw the grenade from a short distance—standing too close can stagger you—and enter the newly opened tunnel. The reward is modest on a first visit, but the passage connects to a higher ledge that makes later movement much faster. If the chest isn't visible, clear nearby Pufferbirds and scan the walls; the breakable section can blend into the purple stone.
Cliffside Orange Goo
Near the route toward the Cliffs of Mt Gzarfyn, look for a narrow ledge overlooking the Landing Site. The Launch Thruster is required to reach it cleanly. Jump, fire the thruster at the top of your arc, and land with forward momentum rather than trying to hover. The Orange Goo sits in a small bowl-shaped nook. This is one of the easiest permanent upgrades to miss if you only follow objective markers.
While you're here, scan every unusual plant and creature. Early research targets are quick to complete and can reveal useful crafting options before the first serious combat encounters. Players who rush the main path often arrive at the first boss with less stamina, fewer healing options, and no idea why the surrounding environment is full of suspiciously convenient ledges.
Cliffs of Mt Gzarfyn and the Itching Fields
The Cliffs of Mt Gzarfyn reward vertical thinking. Most secrets are not far from the main path; they're above it or underneath it. Follow the cliff route until you reach the first broad area with multiple rock shelves. Instead of taking the obvious ramp, inspect the lower shelf for a Proton Tether anchor. The tether route leads around the cliff and ends at a chest containing upgrade materials.
Another cache sits behind a cracked wall near the cliffside creatures. Use a Bombegranate, then immediately move away because the blast can attract hostile fauna. The chest may contain an Alien Alloy or a random material bundle depending on your progression state. If you see a resource container but can't interact with it, leave the area and return after the relevant story upgrade; some pickups don't become active until the game advances.
Itching Fields: the goo route
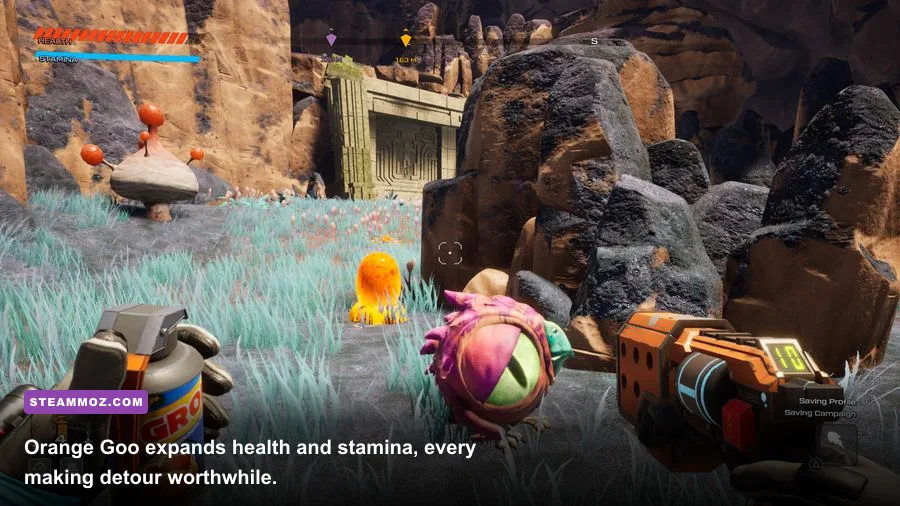
In the Itching Fields, prioritize Orange Goo over ordinary material nodes. Search the bases of tall mushrooms, the underside of floating islands, and the narrow channels between the yellow vegetation. A common trap is following the brightest path through the field. Instead, stand on a high platform and look for isolated green-orange glows. Goo nodes are intentionally visible from odd angles.
The region's hidden combat reward is usually behind a creature encounter. Clear the area before grabbing the item, especially if you see Pufferbirds near explosive plants. Luring enemies toward the plants can save ammunition, but don't shoot the plant while standing beside it. The explosion has a wider radius than the visual effect suggests and can launch you off a ledge.
| Area | How to spot the secret | Required tool | Typical reward |
|---|---|---|---|
| Mt Gzarfyn lower shelves | Anchor point below the main trail | Proton Tether | Chest materials and shortcut |
| Mt Gzarfyn cracked wall | Faint seams in purple rock | Bombegranate | Alien Alloy or crafting parts |
| Itching Fields mushroom bases | Orange glow beneath vegetation | Launch Thruster | Orange Goo |
| Itching Fields enemy pocket | Isolated platform with hostile fauna | Blaster and bait | Chest and research progress |
Festering Chasm and the Verdant Wilds

Festering Chasm is where the game starts hiding rewards behind environmental danger instead of simple jumps. Watch for toxic pools, gas vents, and organic surfaces that look climbable but collapse. The safest strategy is to scan the route before committing. If a ledge has no clear return path, assume it leads to a secret rather than a required objective.
Use the Proton Tether to reach the side platforms around the chasm's larger pits. Tether the nearest anchor first, then look for a second anchor behind you or above the platform. Many players stop after the first swing and miss the continuation. The deepest side route contains a chest and a scan target; its value is less about the random material and more about opening a shortcut around the poisonous lower floor.
In the Verdant Wilds of Zyl, inspect waterfalls and oversized roots. The game frequently places cave entrances behind water curtains, and the entrance can be hidden until you're almost touching it. Check both sides of every waterfall rather than assuming the central opening is the only route. Some caves hold Orange Goo, while others contain alien tablets and research objects that contribute to optional completion.
How to handle the wildlife guarding these secrets
Don't burn your entire magazine on armored creatures. Use bait to pull Pufferbirds away from a chest, then target weak points with controlled Blaster bursts. Against larger enemies, circle rather than backpedal in a straight line. Their lunges track your position at the start of the animation, but they usually cannot correct sharply once the attack commits. A quick side step followed by a charged shot is safer than trying to trade damage.
Keep a healing plant or consumable route in mind before opening a cache. Secret rewards are often positioned as bait: the chest is visible, but the arena around it contains a second wave of enemies. Loot after the area is quiet. There is no bonus for opening a chest under fire.
Elevated Realm, Towering Crystals, and Late-Game Secrets
The Elevated Realm contains some of AR-Y 26's most satisfying hidden routes. Once you have the Launch Thruster and Proton Tether, revisit the high platforms around the region's central routes. Look for anchor points placed behind pillars, not just along the obvious climbing line. A chain of two or three tethers often leads to an isolated island with an Alien Alloy or a high-tier crafting component.
Alien ruins are another reliable clue. If you see broken architecture away from the objective, walk around its outer walls before entering. Secret paths may begin behind the structure, while the visible doorway leads nowhere. Scan tablets and unusual devices as soon as you find them because some discoveries can be difficult to relocate later.
The Towering Crystals region uses line-of-sight puzzles. Search for reflective crystal surfaces, distant switches, and raised platforms that seem to have no entrance. Stand at the edge of each large arena and rotate the camera slowly. The game's vivid lighting can conceal a narrow passage, but a bright interactable or anchor usually becomes visible when the camera clears the foreground crystal.
Late-game combat cache
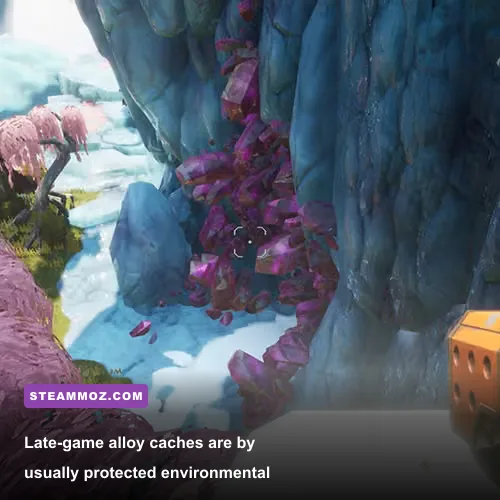
Near the larger crystal arenas, expect an ambush rather than a quiet pickup. Clear smaller enemies first and save your strongest shots for the creature with an exposed weak point. The reward chest is usually more useful before the final mission than after it, so make the detour during your final free-roam visit. If a chest remains locked, check nearby switch mechanisms and scanable objects; late-game caches are more likely to be puzzle-gated than grenade-gated.
| Secret type | Visual clue | Common mistake | Best response |
|---|---|---|---|
| Vertical cache | Anchor hidden behind a pillar | Stopping after the first tether | Look for the next anchor before releasing |
| Crystal puzzle | Bright surface or distant switch | Searching only at ground level | Scan from the arena perimeter |
| Ruins stash | Broken alien architecture | Entering through the obvious doorway | Circle the exterior first |
| Combat chest | Chest in an open arena | Looting during the ambush | Clear enemies, then collect the reward |
Hidden Rewards, Optional Tasks, and Completion Route
Not every secret is a chest. Optional research tasks, alien tablets, science experiments, and ship-related objectives can unlock rewards that don't appear as ordinary treasure. Check the mission log after major story beats, then revisit the Javelin before assuming you've exhausted the planet. E.K.O.'s upgrade menu is the practical checkpoint: if a blueprint is still locked, look for the associated research task or material rather than endlessly opening random containers.
For a clean completion route, clear the Landing Site and early Cliffs secrets after getting Bombegranates. Return to the Itching Fields and Festering Chasm with the Proton Tether. Sweep the Verdant Wilds once the Launch Thruster is available. Finish the Elevated Realm and Towering Crystals during your final pre-ending free-roam window. This order minimizes repeated travel while ensuring every major movement tool is available.
Use the in-game map aggressively. Mark locations mentally by landmarks—the waterfall, the broken ruin, the oversized mushroom, the crystal arena—not by vague compass directions. AR-Y 26's terrain can look radically different when approached from the opposite side, and a coordinate that seems useful on paper won't help much once cliffs and vertical layers are involved.
For players chasing 100 percent, scan creatures before killing them, inspect every alien tablet, and revisit any area where a map pocket remains dark. Complete side objectives before the final story sequence if you want the smoothest cleanup. The campaign remains the priority, but the best upgrades come from taking short, deliberate detours rather than wandering randomly.
That rhythm is what makes Journey to the Savage Planet work: follow the story until the environment teaches you a new trick, then turn around and punish every previously unreachable ledge. If you enjoy games that reward observation over raw combat, Steamoz's beginner exploration tips for In Other Waters are worth a look. For performance-minded players, our guide to maximizing FPS in Iratus also covers the same kind of practical settings mindset.
Before your final departure, make one last sweep for Orange Goo, Alien Alloys, and isolated chests. Check every waterfall, cracked wall, lower cliff shelf, tether chain, and suspicious ruin. The game rarely hides rewards through obscure logic; it hides them by placing the clue just outside your normal camera angle. Slow down, look up, and AR-Y 26 gives up nearly everything.
For the official PC version and current platform details, check the Journey to the Savage Planet Steam page. You can also compare updates through the Typhoon Studios developer site and publisher information from 505 Games. If you want another exploration-heavy recommendation after finishing AR-Y 26, Steamoz's roundup of games like Force of Nature 2 is a natural next stop.