
Quick Answer: Best Gold Farming Spot in Dungeon Quest
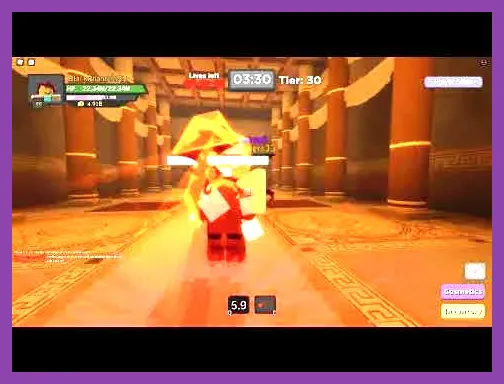
If you want to earn gold quickly in Roblox Dungeon Quest the most efficient method is to run the Abyssal Rift on floor 12 solo. This route yields about two thousand five hundred gold per clear and can be completed in under five minutes with the right gear and skill setup. The Abyssal Rift features a linear layout with minimal enemy density allowing you to focus on killing the mini boss at the end for a bonus gold drop. Equip the Blazing Sword which has an attack rating of one hundred twenty and a fifteen percent critical chance pair it with the skill Whirlwind Slash that deals two hundred fifty percent weapon damage and has an eight second cooldown. By chaining Whirlwind Slash on groups of enemies you can clear each room in seconds. After defeating the mini boss you receive a gold chest that contains roughly eight hundred gold in addition to the base drop from regular enemies. This method is reliable because the spawn rates are consistent and there are no random events that interrupt your run. For more details on the game visit the official page Dungeon Quest on Roblox.
Understanding Gold Economy in Dungeon Quest

Gold serves as the primary currency for purchasing weapons upgrading gear and unlocking new skill tiers in Dungeon Quest. Unlike some Roblox games that use multiple currencies Dungeon Quest relies solely on gold for progression making efficient farming essential. Standard enemies drop between fifty and two hundred gold depending on their level and type while mini bosses and chest rewards can grant from five hundred to over one thousand five hundred gold. The game also features a daily login bonus that adds a flat gold amount but this is negligible compared to dedicated farming runs. Knowing the exact drop values helps you calculate the most profitable routes and decide when to invest in temporary boosts such as game passes or event multipliers. To learn more about game mechanics consult the community wiki Dungeon Quest Wiki.
Solo Farming Abyssal Rift Floor 12 Breakdown
To maximize gold per hour you need to know the exact layout of Abyssal Rift floor 12. The dungeon consists of twelve rooms arranged in a straight line each containing a set of enemy spawns. The first six rooms host low level skeletons that drop sixty to ninety gold each. Rooms seven to nine introduce armored knights that drop one hundred twenty to one hundred sixty gold per kill. The final three rooms contain a mix of knights and a mini boss known as the Rift Warden. The Rift Warden has a health pool of three thousand five hundred and deals a moderate melee attack that can be dodged by sidestepping its telegraph. Defeating the Rift Warden guarantees a gold chest drop worth between nine hundred and one thousand two hundred gold. By using the Blazing Sword with Whirlwind Slash you can clear each room in an average of eight seconds. This translates to roughly forty five rooms per hour which yields an estimated gold income of ninety thousand to one hundred twenty thousand gold per hour depending on crit rolls and chest variability. For additional RPG progression tips see our guide on Dragons Dogma 2 best starting build Dragons Dogma 2 Best Starting Build Guide.
Group Farming Forgotten Catacombs Boss Run

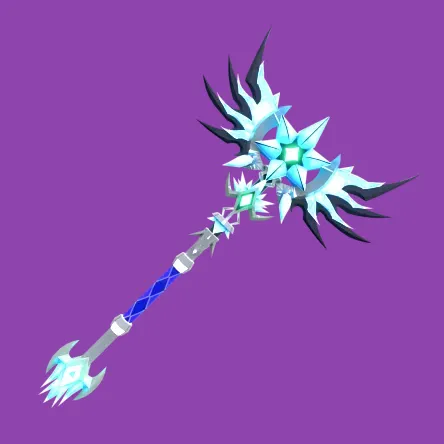
If you prefer to play with friends the Forgotten Catacombs offers a high yield boss run that can be completed in a party of up to four players. The dungeon consists of three stages each ending with a distinct boss. The first boss the Crypt Skeleton King has two thousand health and summons skeletal minions that drop eighty gold each upon defeat. The second boss the Ghoulish Overseer possesses three thousand two hundred health and releases poison clouds that deal damage over time. The final boss the Catacomb Lich has four thousand five hundred health and casts a periodic ice nova that can be interrupted by a well timed stun skill. Each boss drops a gold chest that contains between one thousand five hundred and two thousand two hundred gold. In addition each stage rewards a bonus gold payout of three hundred to five hundred gold for completing the stage without any player deaths. With a coordinated team using the Frostbane Staff (attack rating one hundred ten and twenty percent critical chance) paired with the skill Arcane Blast (three hundred percent weapon damage six second cooldown) you can defeat each boss in under ninety seconds. A full clear of the Forgotten Catacombs therefore yields approximately six thousand to eight thousand gold per run and can be repeated every twelve minutes accounting for respawn timers resulting in an hourly rate of thirty thousand to forty thousand gold. For more vocation advice check out our Dragons Dogma 2 best vocation for solo players Dragons Dogma 2 Best Vocation for Solo Players.
Optimal Gear and Skill Setup for Gold Farming

Choosing the right equipment dramatically influences your gold per hour output. For solo Abyssal Rift farming the Blazing Sword remains the top choice due to its high base damage and reliable critical chance. Pair it with the Crimson Cape which adds ten percent to attack speed and the Iron Greaves that provide fifteen percent damage reduction against physical hits. Your skill bar should contain Whirlwind Slash as your primary damage skill and Shield Bash as a secondary skill that stuns enemies for two seconds allowing you to regroup when overwhelmed. For group Forgotten Catacombs runs the Frostbane Staff outperforms other weapons because its frost damage applies a slowing effect that makes bosses easier to kite. Combine the staff with the Mystic Robe which increases mana regeneration by twenty percent and the Guardian Boots that reduce cooldown times by ten percent. The recommended skill setup includes Arcane Blast as your main damage spell and Frost Nova as a crowd control ability that freezes enemies for three seconds. Remember to upgrade your gear to at least plus ten enhancement level to maximize stat bonuses; each enhancement level adds five percent to the base attribute of the item. For crafting material strategies refer to our Dragons Dogma 2 crafting guide Dragons Dogma 2 Crafting Guide Best Materials to Farm.
Advanced Tips Boosting Gold Yield with Game Passes and Events

Roblox developers frequently release limited time events that temporarily increase gold drop rates across all dungeons. During the Summer Gold Rush event for example all enemy gold drops are increased by fifty percent and chest rewards receive an additional twenty five percent bonus. Participating in these events can effectively double your hourly earnings without changing your gear or strategy. In addition to events certain game passes provide permanent boosts. The Gold Hunter pass costs four hundred Robux and grants a permanent ten percent increase to all gold earned from enemies and chests. The VIP Server pass allows you to create a private server where you can control enemy spawn rates and reduce wait times between runs. By combining the Gold Hunter pass with an active event multiplier you can achieve a cumulative boost of up to one hundred twenty percent over base rates. Another tip is to sell unwanted weapons on the Roblox marketplace; rare weapons upgraded to plus fifteen can fetch several thousand Robux which can be converted into gold through the official Roblox exchange rate though this method requires careful market timing. For fast travel tips in other games see our Dragons Dogma 2 fast travel guide Dragons Dogma 2 Fast Travel Oxcarts Portcrystals and Mounts.
Common Mistakes to Avoid When Farming Gold
Many players unknowingly reduce their gold per hour by making avoidable errors. One frequent mistake is ignoring enemy telegraphs which leads to unnecessary damage and forces you to use healing items that cost gold to replenish. Always watch for the red glow that precedes a heavy attack and sidestep or block accordingly. Another error is overloading your inventory with low value items; selling these items takes time and interrupts your farming loop. Keep your inventory limited to essential gear and consumables only. A third mistake is neglecting to upgrade your gear; running with plus zero weapons reduces your damage output significantly and increases clear times. Aim to enhance your gear to at least plus five before attempting high level floors. A fourth mistake is failing to coordinate with teammates in group runs; poor communication results in overlapping attacks and wasted damage. Use simple voice chat commands or pre agreed signals to assign roles such as tank damage dealer and support. Finally avoid farming during peak server hours when latency can cause delayed skill activations and reduce overall efficiency. Schedule your sessions during off peak times for the smoothest experience. For endgame weapon strategies see our Dragons Dogma 2 legendary weapons guide Dragons Dogma 2 How to Get Legendary Endgame Weapons.