The Heavy Machine Gun is Dino Crisis 2's best general-purpose weapon, while the Anti-Tank Rifle and Missile Pod dominate boss fights. Regina's Grenade Gun is the smarter crowd-control pick, and her Flame Thrower is superb against close-range packs. The key is not simply choosing the weapon with the biggest explosion: ammunition, reload rhythm, movement speed, hit-stun, and the game's combo economy all matter. This ranking covers Dylan and Regina's practical arsenal, including which weapons deserve purchase points and which are better saved for specific encounters.
Dino Crisis 2 does not use a modern rarity system or character build screen. You buy weapons and ammunition with points earned from dinosaur kills, and every purchase competes with healing items, armor, and ammo upgrades. That makes the order of your spending unusually important. A weapon that looks powerful on paper can be a poor early investment if it burns through ammunition or locks you into a slow firing animation.

How This Dino Crisis 2 Weapon Tier List Works
The rankings measure four things: reliable damage, ammunition efficiency, safety while firing, and how broadly a weapon performs across the Jungle, Military Facility, Research Facility, and underwater sections. I also weigh whether a weapon helps maintain a combo. A long combo is more than a score-chasing trick: it produces more points, which lets you buy the equipment that makes later boss encounters easier.
There are also character-specific considerations. Dylan's Machete remains a genuine combat tool, not a decorative starter weapon, because it can interrupt or finish weakened dinosaurs without spending ammunition. Regina's Stun Gun is similarly useful for conserving resources, although neither weapon should be treated as a replacement for firearms during a crowded encounter.
| Tier | Weapon | Character | Best Role | Why It Ranks Here |
|---|---|---|---|---|
| S | Heavy Machine Gun | Dylan | General combat | Fast, consistent damage with excellent safety and crowd control |
| S | Anti-Tank Rifle | Dylan | Boss damage | Massive burst damage and strong stopping power |
| S | Grenade Gun | Regina | Groups and chokepoints | Explosive area damage creates breathing room and combo value |
| A | Missile Pod | Dylan or Regina | Boss encounters | Huge damage potential, limited by ammo and firing commitment |
| A | Flame Thrower | Regina | Close-range packs | Excellent sustained damage when enemies stay in its cone |
| B | Shotgun | Dylan | Emergency defense | Strong at short range, but its reach and capacity limit consistency |
| B | Chain Mine | Regina | Prepared ambushes | Powerful setup tool, less useful when enemies rush from multiple angles |
| C | Handgun and Stun Gun | Both | Ammo conservation | Useful starters and finishers, but too slow for serious late-game pressure |

🎮 Dino Crisis 2
Looking to experience this game? Grab your digital key directly on our store for $4.99.
View on Steammoz Store →S-Tier Weapons You Should Prioritize
Heavy Machine Gun
Dylan's Heavy Machine Gun is the best weapon for the largest portion of the campaign. It does not have the theatrical impact of the Anti-Tank Rifle, but its sustained fire lets you control raptors, compies, and flying enemies without constantly waiting for a reload. The weapon's real advantage is recovery: you can keep moving, correct your aim, and continue firing instead of committing to a long stationary animation.
Use short bursts rather than holding the trigger through every encounter. Dino Crisis 2 rewards accurate target selection, and wasting bullets on a dying raptor damages both your reserves and your next combo opportunity. Against a single aggressive dinosaur, fire while backpedaling, then swap to the Machete for the final hit if the enemy is already staggered.
Anti-Tank Rifle
The Anti-Tank Rifle is Dylan's premium answer to large targets. It belongs in S tier because it solves problems that ordinary firearms cannot: boss armor, long attack windows, and enemies that refuse to stay staggered. Its drawback is commitment. You need a clean line, enough distance to fire safely, and the discipline to avoid spending rounds on ordinary enemies.
Save it for major fights such as the Giganotosaurus and other large dinosaur encounters. Watch the enemy's telegraph first, evade the charge or lunge, then fire during the recovery window. Trying to shoot during an active attack animation is how this weapon turns from a boss killer into a costly mistake.
Regina's Grenade Gun
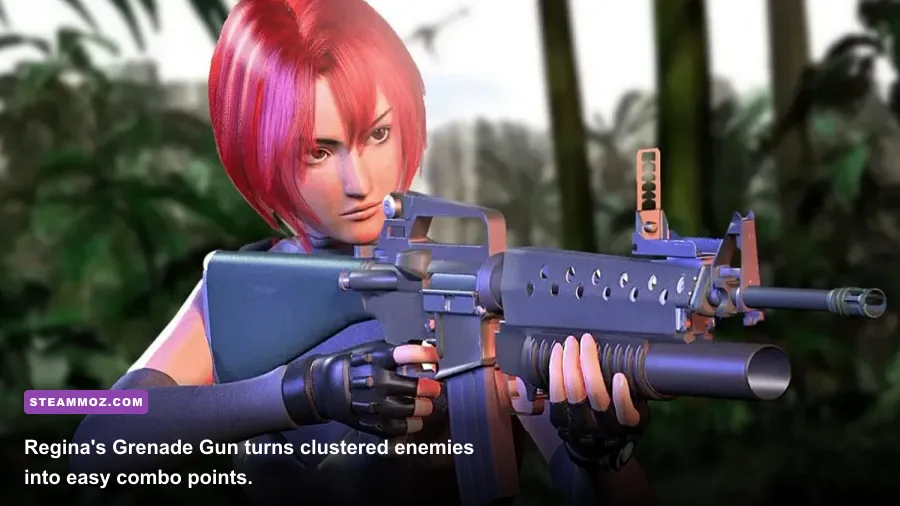
The Grenade Gun is arguably the best weapon for earning and protecting combo points. Its splash damage lets Regina hit multiple dinosaurs without needing pixel-perfect aim, and the explosion can create the distance required to reload or reposition. It is especially effective in corridors, facility rooms, and any arena where enemies funnel through a narrow entrance.
Don't fire directly into a lone target at point-blank range unless you have no alternative. Explosive weapons are strongest when the blast catches two or more enemies. Regina can also use the Grenade Gun to soften a pack before switching to a faster weapon for clean finishes.
A-Tier Equipment for Specific Encounters
Missile Pod
The Missile Pod has the highest spectacle-to-ammunition ratio in the arsenal. It can erase a large chunk of a boss's health, but its slow firing rhythm and limited ammunition prevent it from replacing the Heavy Machine Gun. Treat it as a finisher or phase-breaker, not as your default weapon.
The best timing is immediately after a boss completes a charge, leap, or sweeping attack. Those animations give you the extra second needed to fire without being interrupted. If the arena is cramped, switch away after launching your shot; staying committed to the weapon while a dinosaur closes the distance is rarely worth it.
Flame Thrower
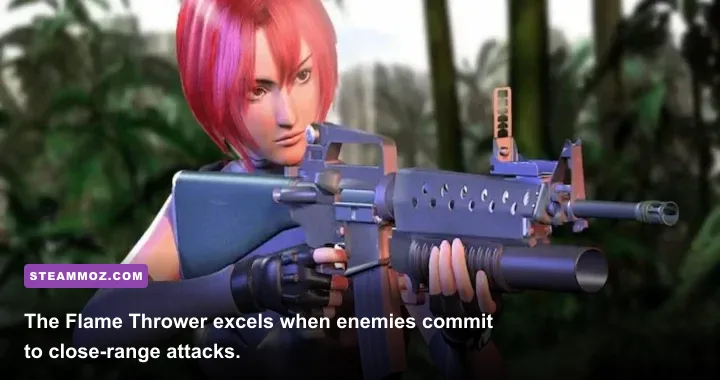
Regina's Flame Thrower is one of the most satisfying weapons in the game and a strong answer to enemies that approach in groups. Its continuous stream does not demand the same precision as a rifle, and the burning cone can keep several smaller dinosaurs from reaching melee range. It performs best when you stand at the edge of the attack radius rather than directly on top of the pack.
Its weakness is positioning. The Flame Thrower loses value in open spaces where enemies spread out, and the firing commitment can leave Regina exposed to a second attacker. Use it in facility corridors or against a group that has already committed to the same path. Against a lone boss, the Anti-Tank Rifle or Missile Pod is usually a better investment.
Chain Mine
The Chain Mine is a setup weapon, and that makes it more powerful for experienced players than for first-time players. Place it before triggering a group or while an enemy is locked into a predictable route. The resulting damage can be excellent, but the mine's value collapses when you are reacting to enemies already inside melee range.
| Weapon | Primary Strength | Main Risk | Best Use |
|---|---|---|---|
| Heavy Machine Gun | Mobile sustained fire | Ammo waste during panic firing | Raptors, compies, flyers, and mixed groups |
| Anti-Tank Rifle | High single-target burst | Slow commitment and scarce ammunition | Giganotosaurus and large boss openings |
| Grenade Gun | Area damage and stagger | Dangerous at point-blank range | Chokepoints and clustered dinosaurs |
| Missile Pod | Exceptional burst damage | Limited shots and slow handling | Boss phase transitions |
| Flame Thrower | Reliable close-range suppression | Short reach and firing commitment | Corridors and committed enemy packs |
| Chain Mine | Pre-planned explosive damage | Needs setup time | Ambushes and predictable routes |
B-Tier Weapons That Still Earn Their Keep
Dylan's Shotgun is the classic emergency weapon. At close range, it delivers a wide hit that can stop a dinosaur trying to collapse your spacing. It is less impressive when you are forced to fight at distance, and its limited capacity means missed shots hurt more than they do with the Heavy Machine Gun. Keep it equipped for sudden raptor pressure, but don't make it your only serious damage option.
The Handgun and Regina's Stun Gun belong in the conservation category. They are useful for finishing weakened enemies, preserving premium ammunition, and maintaining control when a target is already nearly defeated. Their low pressure becomes obvious in the Research Facility, where tougher enemies and multi-directional attacks punish slow damage.
Dylan's Machete deserves special mention. It has no ammunition cost and can be surprisingly effective against an isolated, staggered dinosaur. The danger is greed: a melee swing is a commitment, and a second dinosaur can punish you before the animation finishes. Use it as a finisher, not as an invitation to duel a healthy raptor.
This resource-minded approach fits the broader survival-horror logic discussed in Steamoz's weapon ranking guide for Far Cry New Dawn and the Gato Roboto gear breakdown: the strongest item is not always the one with the largest damage number. It is the one that solves the next danger without wrecking your inventory.
Best Purchase Order and Combat Loadouts
Early purchases should improve consistency before they chase maximum burst. Buy the weapon that covers your most common encounters, then protect its ammunition with careful finishing attacks. Dylan benefits most from building around the Heavy Machine Gun while keeping the Shotgun for emergencies. Regina should use the Grenade Gun to control groups, then reserve the Flame Thrower for spaces where its cone can actually hit multiple targets.
| Character | Core Loadout | Secondary Tool | Combat Rotation |
|---|---|---|---|
| Dylan | Heavy Machine Gun | Machete or Shotgun | Backpedal, burst-fire, stagger, then finish safely |
| Dylan | Anti-Tank Rifle | Heavy Machine Gun | Evade the boss telegraph, fire one burst, reposition immediately |
| Regina | Grenade Gun | Flame Thrower | Group enemies, blast the center, burn survivors in a corridor |
| Regina | Chain Mine | Grenade Gun | Prepare the route, trigger the pack, then control the escape path |
For a fresh run, don't buy every weapon as soon as it appears. Points are also needed for ammunition and recovery items, and a fully stocked primary weapon is more valuable than a spectacular secondary weapon with no rounds. If you're playing through an emulator, prioritize stable frame pacing and accurate controller input rather than aggressive visual filters; a missed dodge is still a missed dodge, even when the jungle looks sharper.
Steamoz's guides on stutter and low-FPS troubleshooting and performance-focused settings are useful references if your modern setup introduces input delay or uneven emulation. Dino Crisis 2's combat is built around fast reactions, so responsiveness matters more than cosmetic enhancements.
Final Ranking and Verdict
The Heavy Machine Gun takes the overall crown because it is useful in almost every room, against almost every enemy, without demanding perfect conditions. The Anti-Tank Rifle is the best specialist weapon for large targets, and Regina's Grenade Gun is the premier crowd-control choice. The Missile Pod has the highest burst ceiling, but its limitations keep it just below the universal S-tier picks.
For a practical playthrough, Dylan should prioritize the Heavy Machine Gun, preserve the Anti-Tank Rifle for major targets, and use the Machete to finish weakened dinosaurs. Regina should build her combat around the Grenade Gun, switch to the Flame Thrower in tight spaces, and prepare Chain Mines when an encounter gives her time. That loadout keeps ammunition under control while still giving you a strong answer to every major threat.
Capcom's official games portal remains the best place to track the publisher's current classic catalog, while the official PlayStation games library provides useful platform context for older releases. For the broader survival-horror mood, Steamoz's new-player survival tips are worth a look too. But for Dino Crisis 2 itself, the winning rule is simple: buy reliable damage first, save explosive ammunition for the monsters that deserve it, and never let a flashy weapon replace good spacing.