
The absolute fastest way to level up fast in Palworld is to maximize the 12-Pal Capture Bonus for every species, farm high-level Alpha Bosses on cooldown, and automate high-yield base crafting routines like Cement and Sphere manufacturing. Capturing 12 of a single Pal species scales directly with your current player level, giving exponentially higher experience yield per capture than grinding wild combat. By combining full species capture bonuses with high-level Alpha Pal rotations across Palpagos Islands, you can power level from Level 1 to the max Level 55 cap in under 20 hours of play.
The 12-Pal Capture Bonus: The Single Best XP Source

The single most efficient experience generator in Palworld is the capture bonus system. Every time you catch a Pal of a specific species, you earn a flat base experience payout plus a bonus scaler. This bonus applies to the first 12 Pals caught of every single species in the Paldeck. Catching your 1st Lamball yields high early XP, but catching your 12th Lamball grants a massive burst of scaling experience based on your current character level.
Because the capture bonus scales dynamically with your active character level rather than the target Pal's level, catching early-game weak Pals like Chikipi, Lamball, Cattiva, Lifmunk, and Vixy at character Level 40 will reward tens of thousands of experience points per throw. To execute this fast leveling strategy effectively, follow this progression pipeline:
- Levels 1–15: Clear out full 12-catches for low-level starter zones around Plateau of Beginnings and Grassy Behemoth Hills. Focus on Lamball, Cattiva, Chikipi, Lifmunk, Foxparks, Fuack, and Sparkit. Use basic Pal Spheres mass-crafted at a Primitive Workbench.
- Levels 16–30: Move to Twilight Dunes and Ice Wind Island. Target Pals like Dumud, Digtoise, Arsox, and Reindyrm. Craft Mega Spheres and Giga Spheres at a Sphere Factory I using Paldium Fragments and Refined Ore.
- Levels 31–45: Travel to Mount Obsidian and the Desecrated Church areas. Complete 12/12 catches on Ignis, Vanwyrm, Bushi, and Jormuntide Ignis using Hyper Spheres and Ultra Spheres. Check out basic survival setups in our beginner gameplay strategies for resource optimization hints.
- Levels 46–55: Expedition into the Sakurajima update region and Frostbound Mountain. Focus on Yakumo, Dazemu, Selyne, and Xenogard using Legendary Spheres and Ultimate Spheres.
Never ignore common Pals when visiting lower-level zones. Open your Paldeck, filter by captured count, and immediately track down any species sitting below 12 captures to claim massive instant EXP drops.
Alpha Pal & World Boss Farming Routes

Alpha Bosses—marked with giant helmet icons on your map—provide substantial experience bounties upon first defeat or capture, along with massive repeatable XP every time they respawn. Alpha Pals operate on a 1-ingame-day respawn timer (approximately 45 real-time minutes). Establishing a strict farming circuit across overworld Alpha Pals delivers huge character experience, Ancient Technology Points, and high-tier crafting schematics.
To maximize efficiency, target Alpha Bosses that fall within 2 to 5 levels below your character level. Fighting higher-level bosses without appropriate elemental counter-Pals creates long, drawn-out fights that slow down experience per minute. Maintain a strict counter-element rotation:
- Early Route (Levels 10–25): Alpha Chillet (Level 11, Ice/Dragon - weak to Fire), Alpha Penking (Level 15, Water/Ice - weak to Electric/Fire), Alpha Grintale (Level 17, Neutral - weak to Dark), and Alpha Azurobe (Level 23, Water/Dragon - weak to Electric/Ice). Defeating these gives fast early levels and unlocks essential Ancient Technology upgrades.
- Mid Route (Levels 26–40): Alpha Kingpaca (Level 22), Alpha Beakon (Level 29, Electric - weak to Ground), Alpha Elphidran (Level 30, Dragon - weak to Ice), and Alpha Mammorest (Level 38, Grass - weak to Fire).
- Late Route (Levels 41–55): Alpha Blazamut (Level 49, Fire - weak to Water), Alpha Frostallion (Level 50, Ice - weak to Fire), Alpha Jetragon (Level 50, Dragon - weak to Ice), Alpha Paladius and Necromus (Level 50 dual boss), and Sakurajima's Alpha Xenogard.
Always attempt to capture the Alpha Boss rather than outright killing it when your health pool allows. Capturing an Alpha Boss yields double value: you claim the high elimination XP, fulfill a slot in your 12-Pal capture bonus list, and gain a powerful high-stat battle Pal for your team. If you enjoy optimizing progression paths, inspect our action RPG progression tips to refine your combat loops.
Speed-Clearing Dungeons and Oil Rig Raids
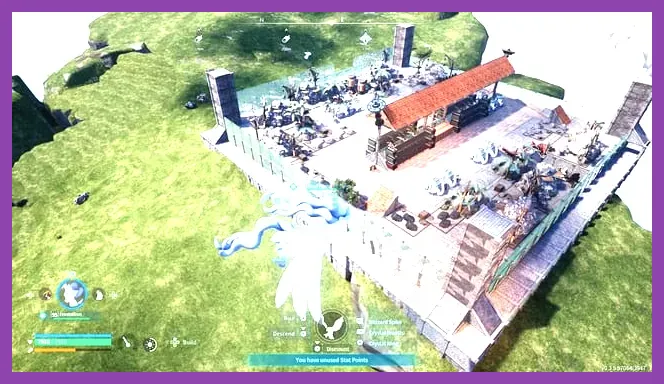
Dungeons scattered across Palpagos Islands offer dense concentrations of high-tier Pals, isolated Alpha Boss chambers, and valuable loot chests containing Technical Manuals that award free skill points. Entering dungeons at appropriate level bands acts as an experience accelerator, provided you run through them with movement-optimized mounts.
To speed-run dungeons, bypass trash mobs in hallways whenever possible. Summon a swift terrestrial ground mount such as Fenglope (equipped with Cloud Tempest skill) or Rayhound (equipped with Charge). Speed past minor rooms directly to the end chamber. The final chamber always features an Alpha Boss surrounded by two sub-minions. Catch or slay the main Alpha Boss, open the two reward chests, and step into the teleport crystal to exit. Dungeons reset on dynamic timelines, allowing you to cycle between regions:
Dungeon Locations by Level Range
Match your character level to specific dungeon cave types for maximum EXP yield and minimal risk:
- Hillside Caverns (Level 13): Found near windswept hills. Best for fast mid-early level boosts.
- Ravine Caverns (Level 29): Located across bamboo groves and center islands. Fast drops for Mega and Giga Sphere materials.
- Volcano Caverns (Level 40): Mount Obsidian region. Drops high-level Fire Pals and Flame Organs required for late-game gear. Check our guide on crafting material gathering for parallel farming techniques.
- Sakurajima Dungeons (Level 52–55): The ultimate dungeon experience source added in recent updates, offering massive player XP and drop rates for high-tier Lotus items.
Additionally, the Sakurajima Oil Rig stronghold offers high-density enemy mercenary encounters. Slaying Rayne Syndicate elite troops and clearing defense turrets provides thousands of character experience points per clear, along with Crude Oil for endgame gear production.
Base Automation for Passive Leveling
Crafting items at your base generates continuous player and Pal experience. While low-tier crafting like Wood Cutting or Stone Mining yields minimal XP, mass-producing high-tier architectural items, ammunition, and capture spheres provides tens of thousands of experience points passively while you wander or AFK.
Setting up optimized base supply lines creates an automated leveling machine. The best items for power-leveling passive XP are:
- Cement: Unlocked at Level 19. Crafted using 50 Stone, 1 Bone, and 1 Pal Fluids at a High Quality Workbench or Production Assembly Line. Producing Cement stacks in batches of 500 generates massive passive character XP while supplying material for high-grade structures and Spheres.
- Sphere Assembly Line II (Legendary Spheres): Producing Legendary and Ultimate Spheres requires Pal Metal Ingots, Carbon Fiber, Cement, and Paldium Fragments. Running continuous queue commands with high-workload Handwork Pals yields massive character leveling bursts.
- Electric Furnace Ingot Refining: Converting Ore and Coal into Refined Ore and Pal Metal Ingots generates steady experience chunks. Pair an Electric Furnace with a Jormuntide Ignis (Kindling Level 4) for maximum throughput speed.
To maximize your base crafting yield, deploy optimal workforce Pals equipped with Level 4 work suit traits. Assign Anubis for Handwork 4, Jormuntide for Watering 4, and Lyleen for Planting 4. Review similar build optimization principles in our material farming overview to optimize efficiency across open-world games.
World Settings and EXP Multiplier Optimization
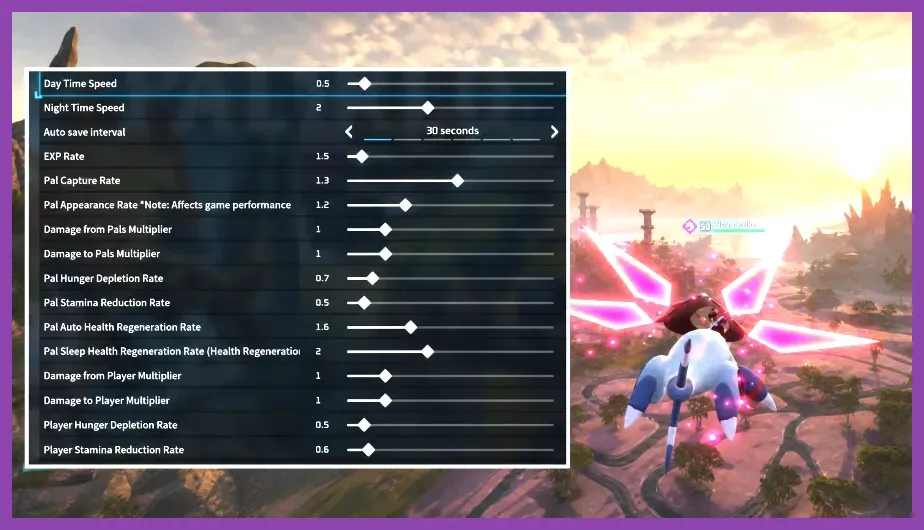
If you are hosting a single-player world or running a private dedicated server on Pocketpair's official system, you can adjust world setting sliders directly from the world selection menu without installing mods or using console cheats. Adjusting these parameters lets you tailor the experience rate to match your preferred gameplay pace.
Open World Settings -> Custom Settings prior to loading your save file and adjust these key parameters:
- EXP Rate Multiplier: The default slider sits at 1.0. Increasing this value up to 20.0 multiplies all experience gained—from catching, killing, mining, and crafting—by up to twenty times. Setting this to 2.0 or 3.0 offers a smooth, grind-free progression, while 20.0 allows you to reach Level 55 instantly.
- Pal Appearance Rate: Increasing this value from 1.0 to 2.0 or 3.0 triples the density of wild Pals spawning in the world. This triples your catch opportunities per area, allows you to catch 12/12 species targets in minutes, and doubles or triples Alpha Boss spawns in overworld arenas.
- Damage to Pals Multiplier / Player Damage Taken: Decreasing damage taken and boosting player output allows you to clear high-level dungeons and boss towers effortlessly at lower levels.
- Death Penalty: Set to "No Items Dropped" to ensure that dying in high-level zones during power leveling attempts does not cause you to lose your hard-earned Ultra/Legendary Spheres or gear loadouts.
For players seeking a smooth single-player experience without tedious grinding, setting the EXP multiplier between 2.0 and 5.0 provides a balanced power curve while retaining core gameplay progression.
Optimal Stat Allocations and Combat Loadouts for Power Leveling
Leveling up grants Stat Points that permanently enhance your character's capabilities. Misallocating these points slows down your gathering, survival, and boss-killing efficiency. To maintain high leveling speed, follow an optimal stat allocation path:
Stat Priority Order
- Weight Capacity (Highest Priority): Put your first 10–15 points directly into Weight. Having a Weight capacity of 1,000+ allows you to carry hundreds of Pal Spheres, heavy mining drops, and heavy weapons without getting encumbered. Encumbrance drastically slows down capture loops.
- Stamina: Allocate 5–10 points here. Higher stamina allows you to climb cliffs faster, dodge boss AoE attacks, and sprint longer distances before catching your breath.
- Health: Invest points continuously as zone levels increase. At higher levels (40+), Alpha Bosses like Frostallion and Jetragon can easily one-shot low-HP players. Target 1,500 to 2,000 HP for end-game safety.
- Work Speed / Attack: Keep Work Speed at base level if you rely on Pals at your base. Place remaining points into Attack to scale your weapon damage alongside high-tier firearms.
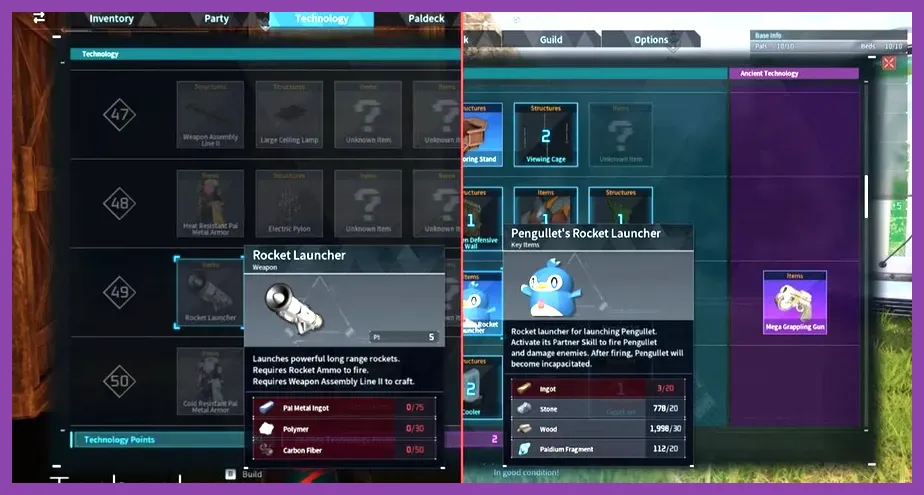
Pair your stats with powerful long-range weapons. Craft the Handgun, Assault Rifle, Rocket Launcher, and Laser Rifle as soon as they unlock on the Technology Tree. High burst damage allows you to rapidly weaken wild Pals into capture threshold percentages (under 10% HP) without accidentally killing them, ensuring smooth 12-Pal capture cycles across all regions.
For more hardware performance optimization during demanding boss battles, take a look at our guide on maximizing FPS and graphic settings, or consult the Palworld Official Wiki for complete item database tables.
Level Band Power-Leveling Checklist
To summarize your path from Level 1 to Level 55, follow this quick structural checklist during your Palworld playthrough:
- Levels 1–10: Catch 12/12 of every starter Pal around the spawn area. Build a Primitive Workbench and establish automated Ore/Wood gathering.
- Levels 11–20: Defeat Alpha Chillet and Alpha Penking. Expand capture lists to 20 full species. Build a High Quality Workbench and farm Cement.
- Levels 21–35: Transition to Mega and Giga Spheres. Run Ravine Cavern dungeons. Capture mid-tier elemental Pals across Twilight Dunes and Obsidian Volcano borders. Optimize base operations using tips from our solo loadout optimization guide.
- Levels 36–45: Mass-produce Hyper/Ultra Spheres. Run Volcano Dungeons and farm Alpha Bosses like Blazamut and Kingpaca Cryst.
- Levels 46–55: Craft Legendary/Ultimate Spheres. Explore Sakurajima Island, clear Oil Rig encounters, complete 12/12 catches for high-tier Sakurajima Pals, and capture Legendary Pals (Jetragon, Frostallion, Paladius, Necromus) to cap off your experience grind.