
Filament’s secret locations are not conventional treasure chests: the hidden rewards are optional puzzle panels, crew records, and story discoveries tucked away from the critical path aboard The Alabaster. To find them all, clear every branch from a hub before riding the cable onward, revisit unlocked sections after major story puzzles, and treat suspicious empty rooms as deliberate clues rather than dead ends.
This matters because Filament rarely announces that you have missed something. There is no glowing collectible trail, no minimap with a completion percentage, and no friendly quest marker pointing at a crew log. The game’s best secrets are found by reading the ship’s layout. A cable that bends around a sealed bulkhead, a room with one conspicuously unused panel, or a corridor that seems to lead nowhere can all signal an optional route.
This guide focuses on the secret-hunting process and the known hidden-reward routes across The Alabaster. It also explains what each reward is actually worth, when to return, and how to avoid the classic mistake of assuming that every unsolved panel is permanently missable. If you’re coming back after a long break, Steamoz’s Cossacks 3 secret-location guide uses a similar sweep-and-return philosophy.
How Filament’s Secret System Actually Works
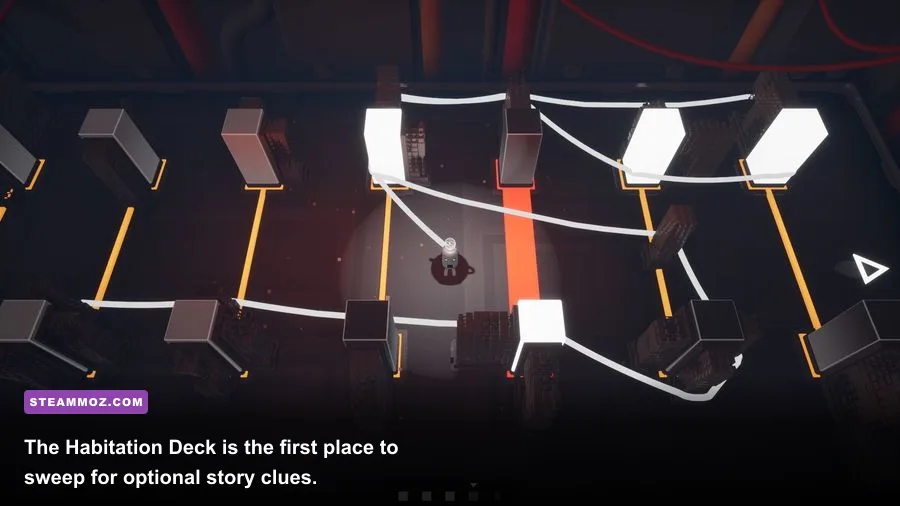
Filament’s puzzles are built around the cable. You control the remote drone, route the cable through coloured posts, and satisfy the panel’s rules without crossing forbidden spaces. The main route generally teaches a new rule and then asks you to apply it. Secret panels are different: they’re often placed beside familiar mechanics, but solving them is optional and the route to them may require backtracking.
The key distinction is between a blocked puzzle and a hidden puzzle. A blocked puzzle has a visible panel but cannot be solved with the tools or knowledge currently available. A hidden puzzle is usually accessible immediately, but it is positioned off the obvious line between hubs. Don’t waste an hour brute-forcing a panel that introduces a mechanic you haven’t seen yet. Mark it mentally, finish the nearby story cluster, and return when the ship opens another route.
There are four practical rewards to track:
- Crew records: optional text and audio-style story material that fills in the disappearance aboard The Alabaster.
- Secret puzzle completions: extra challenges that test combinations of rules rather than advancing the central path.
- Access discoveries: new rooms, shortcuts, and doors that make later sweeps faster.
- Completion progress: the satisfaction—and achievement progress—of leaving no optional panel untouched.
There is no combat build to worry about, but there is still a progression curve. Early optional puzzles are excellent practice for cable routing. Mid-game secrets punish careless movement and force you to plan the order of posts. Late-game secrets combine rule interactions that are much easier if you sketch the route before moving the drone. For performance advice on older PCs, compare Filament’s low-demand presentation with Steamoz’s PC specification guide; stable input matters more here than chasing high frame rates.
| Reward Type | Where It Usually Appears | How To Recognize It | Why It Matters |
|---|---|---|---|
| Crew record | Side rooms and residential areas | Quiet terminal, log prompt, or isolated panel | Reveals character and story context |
| Optional puzzle | Branch corridors near hubs | Panel outside the main cable route | Tests mechanics without blocking the story |
| Shortcut | Bulkheads and connector rooms | Door or route opened after a nearby solve | Makes future backtracking quicker |
| Completion reward | Final optional clusters | Last unresolved branch in a sector | Supports full-clear and achievement runs |

🎮 Filament
Looking to experience this game? Grab your digital key directly on our store for $3.39.
View on Steammoz Store →Habitation Deck Secrets and Crew Records

The Habitation Deck is the easiest place to miss a reward because it looks like a tutorial zone. Once the central rooms become available, do not follow the cable straight to the next story panel. Walk the perimeter first. Check both sides of the residential corridor, especially the short branches that end in an apparently decorative doorway or a single unused wall panel.
First sweep
Start at the main Habitation hub and take every branch clockwise. Solve the obvious panel nearest the hub, then return to the junction before moving deeper. This prevents the cable from hiding a second entrance behind the camera angle. The first side puzzle is deliberately forgiving and teaches the value of planning around the cable’s return path. If you are crossing your own route repeatedly, you are probably trying to solve it in the wrong order.
Next, inspect the crew-room corridor. The important clue is not a bright object; it’s the change in room dressing. A small private room with no active panel can still contain a story interaction. Approach terminals and wall consoles directly rather than relying on the cursor to advertise them. The reward here is narrative, but it also confirms that the ship’s crew records are separate from the main puzzle count.
What to leave for later
Some Habitation panels look solvable but rely on a rule introduced farther into the ship. Don’t interpret that as a bug. Filament expects you to remember locations. Make a note of the room and return after clearing the next major area. The fastest full-clear route is not “solve every panel before leaving”; it is “clear every currently accessible branch, then revisit the stubborn panels after a mechanic unlock.”
A useful trick is to watch the cable rather than the drone. The cable’s anchor point shows whether a room is genuinely connected to your current route. If the line disappears behind a bulkhead and reappears at an unexpected angle, there may be a connector corridor nearby. That visual oddity is one of Filament’s strongest secret-location tells.
| Habitation Target | Search Route | Likely Reward | Common Mistake |
|---|---|---|---|
| Residential side branch | Sweep both corridor directions from the central hub | Optional puzzle | Following the cable without checking the return path |
| Quiet crew room | Inspect isolated terminals after the first hub solve | Crew record | Assuming inactive rooms are decoration |
| Sealed-looking connector | Revisit after opening the next sector | Shortcut or delayed panel | Brute-forcing a late-rule puzzle early |
Garden Deck and Workshop Hidden Routes
The Garden Deck is where Filament starts hiding secrets in plain sight. Its visual clutter—planters, maintenance structures, and broad open rooms—makes it harder to read the geometry. Use fixed landmarks instead of memory. When you enter a garden chamber, identify the nearest hub, the cable exit, and every door that sits at a right angle to the main route.
The most reliable method is a three-pass sweep. On pass one, take the main route and learn the puzzle’s rule. On pass two, return to the entrance and inspect side doors that were outside the camera’s original framing. On pass three, check behind the central structures and along the outside wall. Optional panels frequently sit where the room’s visual symmetry breaks.
Garden puzzles also teach a nasty habit: solving the first obvious panel can make the second route appear less obvious, not more. If a solved panel opens a door, walk back through the entire room. The newly accessible branch can be behind you, and the game does not always give you a dramatic sound cue. The reward is usually another optional panel or a crew-related discovery rather than a new ability.
Move to the Workshop only after checking the Garden’s corners. Workshop secrets are easier to identify because the rooms are more functional. Look for maintenance bays that contain a panel but are not connected to the shortest cable path. If the puzzle board is surrounded by machinery and sits away from the obvious hub, it is almost certainly optional.
Solving without wasting resets
For difficult side puzzles, map the required posts before committing to a route. Filament punishes exploratory movement when a wrong cable crossing invalidates the board. Start with the most restrictive colour or symbol, then build outward. Leave flexible posts for the end. This is especially important in Workshop rooms, where a route that looks open can trap the cable against a wall and force a full reset.
Do not confuse a reset with failure. Resetting is often faster than trying to repair a route after the cable has boxed itself in. The game’s puzzles are deterministic, so each failed attempt should answer one question: which post order makes the remaining space impossible?
Observatory, Bridge, and Late-Game Optional Panels
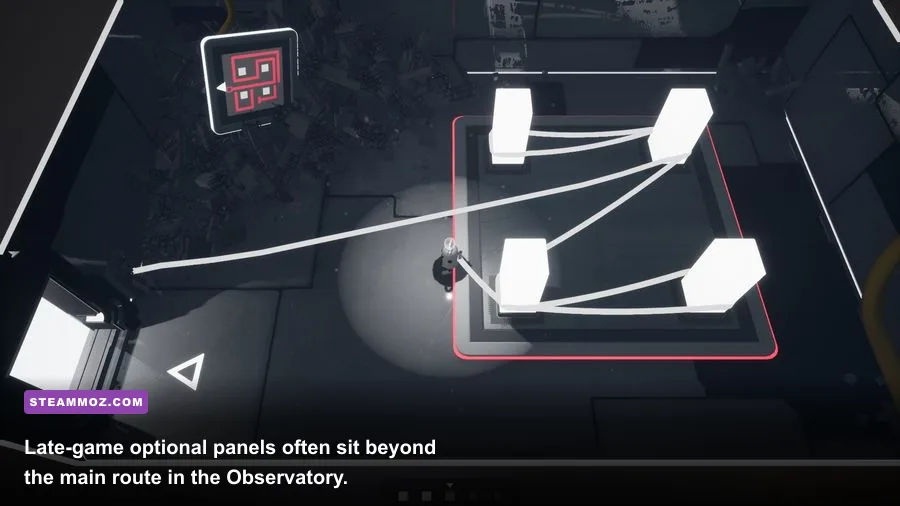
Late-game secrets are the easiest to miss because the main objective pulls you through the ship with real momentum. Before entering a major story panel, turn around and inspect the room you just crossed. Filament loves placing optional branches one junction behind the dramatic destination.
In the Observatory, search the outer ring first. The central route is visually dominant, while side panels are positioned on the perimeter or beyond short connector corridors. Check every landing before interacting with the main objective. If you see a panel that uses a familiar rule in a room with no story marker, treat it as optional and record its location.
The Bridge works differently. It is less about hidden rooms and more about delayed access. A door that appears irrelevant during your first visit may become part of the full-clear route later. Return after major progress and walk the Bridge from both ends. This is also where the cable can create misleading sightlines: a path that looks continuous may actually terminate at a locked transition.
Late puzzles often combine several earlier ideas, so avoid relying on trial and error. Identify hard constraints first: posts that can only be approached from one direction, spaces that cannot be crossed, and corners where the cable has no room to turn. Then solve the flexible middle. The order is more important than speed, and a clean plan saves far more time than quick drone movement.
| Late-Game Area | Best Search Pattern | Main Danger | Counter Strategy |
|---|---|---|---|
| Observatory outer ring | Walk the perimeter before the central objective | Missing a side panel behind the camera | Return to each landing and inspect both angles |
| Bridge connectors | Sweep from both ends after story progress | Assuming a delayed door is decorative | Revisit previously quiet transitions |
| Final optional cluster | Clear every unsolved branch before departure | Rushing into the ending route | Use a sector-by-sector checklist |
Best Full-Clear Route for Every Hidden Reward
There is no shame in using a checklist. Filament’s map is deliberately understated, and a single missed side panel can mean revisiting several rooms. The cleanest route is a repeated sector sweep rather than a frantic search after the credits.
- Clear the current hub: solve the obvious story panel, but do not leave immediately.
- Sweep clockwise: inspect every branch, terminal, side room, and dead-end wall.
- Return to the hub: confirm that no cable branch or unopened door remains.
- Mark blocked panels: note anything that uses an unfamiliar rule or inaccessible route.
- Advance one major sector: learn the next mechanic and clear its accessible optional panels.
- Backtrack deliberately: revisit only the marked rooms, then repeat the sweep.
- Final pass: walk the ship from the main hub outward before committing to the ending sequence.
For completionists, the most useful rule is simple: never trust visual completion. A room can look empty and still hold a record interaction. A solved panel can hide the branch it opened behind your starting position. And a door can remain irrelevant for hours before becoming the entrance to a secret route.
Keep the game’s official materials nearby if you want to verify puzzle terminology: the official Filament Steam page is the best starting point, while Beard Envy’s developer site provides background on the studio. The Steam Community guides can help cross-check a stubborn puzzle, but use them as a last resort—the game is at its best when you solve the route yourself.
Finally, don’t rush the hidden rewards. Filament’s optional content is not busywork pasted onto the campaign. Those quiet crew records explain why The Alabaster feels abandoned, while the side puzzles sharpen the exact skills needed for the final challenges. If you sweep each deck, revisit delayed routes, and read every suspicious terminal, you’ll leave the ship with both the story’s missing context and a genuinely complete puzzle run. For more older-PC optimization pointers, Steamoz’s Dungeons 3 settings breakdown is also worth bookmarking.