
The fastest way to clear Back 4 Blood’s core secret hunt is to replay ten campaign missions on Recruit, disable speed-running habits, and inspect the marked landmarks below for golden skull collectibles. Each skull unlocks a secret achievement or trophy; none gives a permanent gun, card, Cleaner skin, or stat bonus, so the real rewards are achievement progress, completion bragging rights, and a reliable reason to explore levels most squads normally sprint through.
These secrets are also much easier in a private run than in Quickplay. Recruit lowers incoming damage and Ridden pressure, while a four-player lobby lets one Cleaner hold the horde at a choke point as another searches. Bring a mobility card such as Cross Trainers, a stamina card like Energy Drink, and one defensive option such as On Your Mark. You’re hunting collectibles, not farming kills, so there’s no prize for arriving at the saferoom with zero copper spent.

How Back 4 Blood secrets actually work
The core secrets are small golden skulls placed in fixed campaign locations. They usually sit outside the critical path, above eye level, behind a climbable object, or inside a side room that looks like environmental decoration. Walk directly into the skull to trigger the achievement. There is no pickup animation you need to hold, and the achievement can pop several seconds after interaction if the level is still loading enemies.
Use the mission select screen rather than relying on a full campaign clear. Select the required chapter, load Recruit, and leave after the achievement appears. If you’re playing with bots, avoid opening alarmed doors and don’t trigger scripted events until the skull is secured. The AI can handle ordinary Ridden, but it won’t reliably protect you while you climb, search a crypt, or backtrack through a horde.
| Secret type | What you receive | Best farming approach |
|---|---|---|
| Core campaign skull | Secret achievement or trophy | Mission Select on Recruit |
| DLC campaign secret | Additional achievement progress | Load the relevant expansion chapter |
| Ordinary loot room | Copper, weapons, attachments, or cards | Explore after securing the skull |
That distinction matters because Back 4 Blood contains plenty of hidden rooms that look like secrets but only hold loot. The guide below focuses on the fixed collectible locations tied to achievements, while noting the nearby landmarks that make each one easier to identify.
🎮 Back 4 Blood
Looking to experience this game? Grab your digital key directly on our store for $5.99.
View on Steammoz Store →Act 1 secret locations

The Crossing — Paid the Toll
Start The Crossing and push across the bridge until you reach the ferry section. After descending toward the ferry, resist the urge to follow the squad directly into the next combat lane. Look for the climbable route around the ferry structure and work upward toward the upper deck. The golden skull is tucked into the ferry’s elevated area, where railings and the surrounding metalwork can hide it from a ground-level scan.
The cleanest method is to clear the nearby Ridden first, then have a Cleaner with full stamina make the climb. Holly is useful here because her melee stamina economy makes accidental close-range interruptions less dangerous, while Karlee’s Professionalism gives the team a small edge when the run turns messy. Interact with the skull before triggering the next major bridge sequence. The achievement is Paid the Toll.
Book of Worms — Bell Hop
In Book of Worms, search the library section rather than rushing through its central route. The skull is positioned in the upper part of the building, near the bookcase and balcony-style architecture. Check the shelves, stairs, and raised walkways carefully; the collectible is deliberately placed where a player looking only at floor-level doorways will miss it.
Use your flashlight even in bright rooms. The gold finish can blend into warm interior lighting, especially when a horde is burning the screen with hit effects. If you hear sleepers, clear them before climbing because one sleeper pin can knock the searching player into a bad corner. This collectible unlocks Bell Hop.
Search and Rescue — Dangerous to Go Alone
The secret in Search and Rescue is found in the bar or tavern-like area during the mission’s early indoor route. Search the side rooms and inspect the shelving around the bar instead of staying on the main staircase. The skull is concealed in a tucked-away interior spot that looks like set dressing until you approach the correct corner.
Don’t trigger the alarm while searching. A single alarmed door can turn a ten-second collectible stop into a full team retreat, and the skull’s narrow approach leaves little room for revives. Have Doc carry Support Scavenger or a healing item so the squad can absorb chip damage during the search. The reward is the Dangerous to Go Alone achievement.
The Clog — Cooped Up
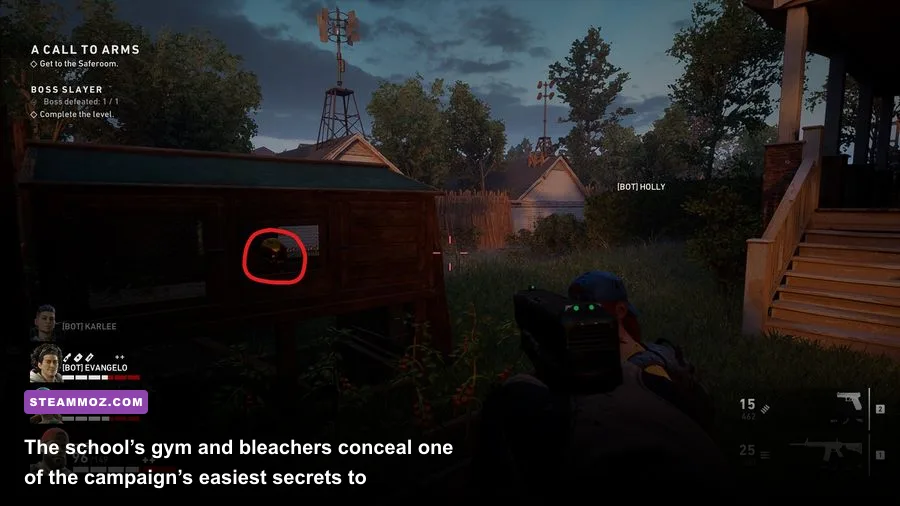
The Clog hides its skull around the outdoor settlement and trailer area. After moving through the early section, look for a backyard-style structure with a raised coop or shed. The collectible is off the obvious road, and the route to it is easier to spot when you deliberately scan rooftops, fences, and small wooden platforms.
Clear the surrounding sleepers before jumping or climbing. The Clog’s cramped spaces make a Stinger’s acid particularly punishing, and one acid pool can force you away from the exact interaction point. Once collected, Cooped Up should unlock immediately.
Act 2 secret locations
Grave Danger — Cryptozoologist
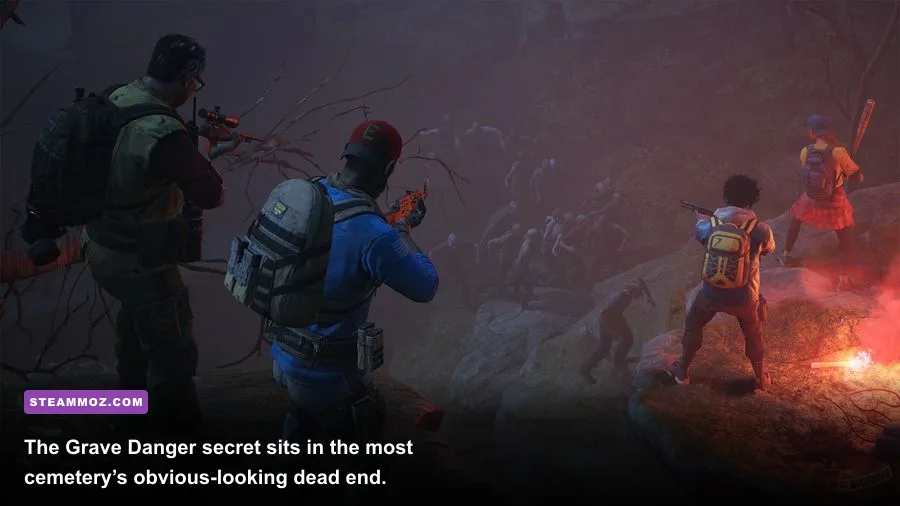
During Grave Danger, reach the church and cemetery section. Search the graveyard’s crypts and stone structures instead of following the road straight toward the objective. The golden skull sits inside the cemetery area, tucked into a crypt-like side route that can be obscured by darkness and tombstone geometry.
This is one of the easiest secrets to lose during a public match because the objective keeps pulling the team forward. Tell teammates you’re searching before opening the next route. Walker’s precision-focused damage helps remove Stingers and Hockers before they interrupt the explorer, while Hoffman’s ammo generation is useful if the group has to fight in place. The skull unlocks Cryptozoologist.
Garden Party — Night of the Living Hedge
Garden Party contains one of the game’s most memorable secrets. Enter the hedge maze and follow its branches instead of treating it as a straight sprint. Explore the dead ends and inspect the corners where the hedges form small pockets. The golden skull is hidden inside the maze, away from the route most players take when the objective marker appears.
Keep the team together in pairs. The maze blocks sightlines, so a lone Cleaner can be grabbed by a Stalker or trapped behind a Tallboy. Sharice is excellent for a slow search because her armor support helps against chip damage, but any Cleaner works if the squad controls the lanes. Collecting the skull awards Night of the Living Hedge.
Making the Grade — Extra Credit
In Making the Grade, search the school’s gymnasium and bleacher area. Move into the gym, clear the first wave, and check the upper sections around the bleachers and raised platforms. The collectible isn’t sitting in the center of the court; it’s positioned where the gym’s vertical layout makes players focus on the objective instead of looking above and behind them.
Use a mobility card or a Cleaner with a strong stamina pool to reach the elevated route. Evangelo’s team movement bonus makes the backtrack less painful, but don’t spend stamina recklessly before the climb. The Extra Credit achievement confirms the location was correct.
| Mission | Landmark to search | Achievement | Main danger |
|---|---|---|---|
| The Crossing | Ferry upper route | Paid the Toll | Bridge and ferry horde |
| Book of Worms | Library shelves and upper walkways | Bell Hop | Sleepers during the climb |
| Search and Rescue | Bar or tavern side rooms | Dangerous to Go Alone | Alarmed doors |
| The Clog | Coop or raised shed area | Cooped Up | Acid and cramped yards |
| Grave Danger | Church cemetery crypts | Cryptozoologist | Stingers and objective pressure |
| Garden Party | Hedge maze dead ends | Night of the Living Hedge | Separated teammates |
| Making the Grade | School gym bleachers | Extra Credit | Vertical combat |
Act 3 and Act 4 secret locations

The Diner — Pallet Cleanser
The Diner places its secret in the area behind and around the diner itself. Once the squad reaches the diner, sweep the rear service area and inspect stacks of wooden pallets. The golden skull is hidden among this industrial clutter, which is why it disappears visually when you’re focused on Special Ridden approaching from the road.
Finish the immediate wave before searching, but don’t activate the diner’s major defense sequence until everyone knows the escape route. A shotgun Cleaner such as Jim can delete Tallboy weak spots at close range, while Doc can keep the searcher alive through chip damage. Touch the skull to unlock Pallet Cleanser.
The Abomination — Mind Your Step
The final core-campaign secret appears during The Abomination, the Act 4 finale. Progress into the tunnels and carefully inspect the cave route around the large drops and ledges. The skull is placed in a dangerous-looking side position where the environment itself is the warning: if you sprint, you can run straight past it or fall while trying to reach it.
Use the ledges methodically. Clear enemies, stand still to confirm the route, and let the player with the best movement control make the approach. Evangelo’s breakout ability is valuable if a Stalker grabs the explorer, and a pipe bomb can buy the seconds needed to interact safely. Mind Your Step is the achievement attached to this collectible.
The Abomination fight itself can make this search awkward. During the boss sequence, prioritize exposed weak spots, avoid standing in the mouth’s direct line, and rotate when the arena pressure forces you away from the tunnel route. If you’re only collecting the skull, there’s no shame in replaying the chapter and leaving once the achievement registers.
Best Cleaners, cards, and settings for a secret run
Secret hunting favors consistency over damage-per-second. You need enough stamina to reach elevated objects, enough awareness to avoid sleepers, and enough crowd control to stop the team from being swallowed while someone searches. Melee builds are strong on Recruit, but they can also create bad habits: clearing a room with Holly doesn’t make an alarmed door safe, and it doesn’t protect against a hidden Hocker.
| Priority | Recommended choice | Why it works | Trade-off |
|---|---|---|---|
| Mobility | Cross Trainers or Energy Drink | More stamina for climbs and backtracking | Less room for damage cards |
| Team safety | On Your Mark | Improves recovery after alarms and horde events | Lower personal damage |
| Medical support | Doc with support cards | Reduces attrition during searches | Slower clear speed |
| Close defense | Holly with melee sustain | Controls common Ridden in narrow routes | Weak against ranged Specials |
| Emergency escape | Evangelo | Breakout helps against grabs and traps | Less raw team utility than support Cleaners |
On PC, prioritize a stable frame rate over visual effects when searching. Keep textures at High if your VRAM allows it, but lower shadows and post-processing if horde effects make gold objects hard to distinguish. Motion blur should be off. A locked 60 fps is more useful than an unstable 100 fps here because climbing, spotting ledges, and reacting to a sleeper all benefit from consistent frame pacing.
What counts as a hidden reward
Back 4 Blood’s wording can make these collectibles sound more generous than they are. The skulls don’t unlock secret weapons, exclusive cards, copper bundles, or permanent Cleaner bonuses. Their rewards are achievement and trophy unlocks, plus progress toward a completionist profile. That’s still worthwhile if you’re chasing 100 percent, but players expecting a hidden legendary shotgun will be disappointed.
For broader co-op tactics, Steamoz’s Dead Island secret locations guide is a useful comparison, while the Borderlands 2 Commander Lilith coverage digs into another shooter’s replay value. You can also sharpen your general campaign planning with Blackguards 2 campaign tips and check performance-focused advice in Steamoz’s low-FPS fixes.
For official reference material, check the Back 4 Blood Steam page, Turtle Rock Studios’ official developer site, and the game’s official website. If an achievement doesn’t trigger, replay the mission from its opening checkpoint, touch the skull directly, and wait until the notification appears before quitting. That simple rule prevents most false negatives and makes this ten-stop hunt far less frustrating.