We have all experienced that special kind of heartbreak in the Lands Between: carrying 80,000 runes, walking round a dark corner in a dungeon, getting ambushed by an oversized imp, and losing every single drop. Elden Ring does not pull its punches. Whether you are struggling to get past Margit the Fell Omen or trying to pad out your stats so you can wield that massive colossal sword, grinding levels is an essential part of the Tarnished experience.
Farming runes does not mean spending endless hours mindlessly swinging at weak hollows in Limgrave. If you know where to look, you can rake in tens of thousands—or even millions—of runes in just a few minutes. If you want to optimize your frame rate and hardware settings before embarking on your grinding journey, check out our guide on Elden Ring PC system requirements and performance tweaks. Now, let us dive into the best rune farming methods across every stage of the game.
Maximizing Your Yield: Essential Rune Multipliers and Buffs

Before you run off to chop down enemies, you need to make sure you are getting the absolute maximum payout per kill. Elden Ring features several stacking mechanics that drastically boost the number of runes you pick up.
The Golden Scarab Talisman
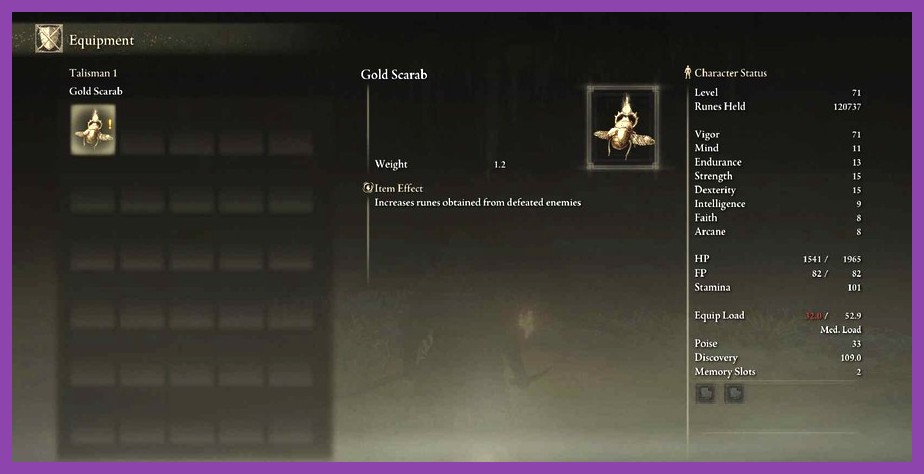
The single most important item for any dedicated farmer is the Golden Scarab talisman. When equipped, it increases all rune acquisition by a flat 20%. You can find this talisman in Caelid inside the Abandoned Cave, located east of the Smoldering Wall Site of Grace. Navigating the cave requires dealing with scarlet rot, and the cave culminates in a double boss fight against two Cleanrot Knights. If you are struggling early on, grab a summoned spirit or a friend to help clear the dungeon—the 20% passive boost for the rest of your playthrough is worth every bit of trouble.
Gold-Pickled Fowl Feet and Consumables
To stack even more bonuses on top of the Golden Scarab, craft Gold-Pickled Fowl Feet. Eating one boosts rune gain by another 30% for three minutes. You can buy the recipe book (Missionary's Cookbook [2]) from Patches at Murkwater Cave for 800 runes. The ingredients are simple: Rowa Fruit, Four-Toed Fowl Feet (dropped by seabirds along coastlines), and Gold Fireflies (found floating near waters in Limgrave and Weeping Peninsula). Combining the Golden Scarab and a Gold-Pickled Fowl Foot gives you a massive 56% total bonus to rune gain!
The Overkill Mechanic
Here is a hidden trick many players overlook: if you deal at least 150% of an enemy's maximum health in a single strike, you trigger an Overkill bonus. This grants an extra 20% runes for that specific kill. When combined with heavy weapon skills, stealth backstabs, or massive area-of-effect spells, overkilling enemies makes your farming sessions noticeably faster.
Early Game Rune Farming Spots: Fast Levels Before Stormveil
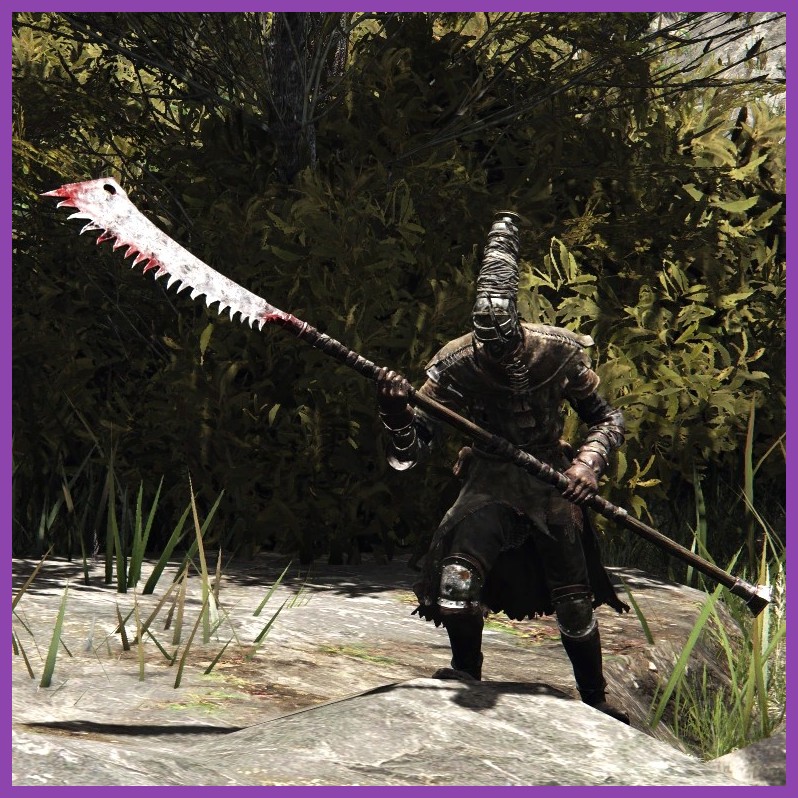
When you start a new character, your vigor is low, your weapons are unupgraded, and hitting a wall against early bosses is completely normal. Rather than throwing yourself against Margit twenty times in a row, use these early spots to gain 20 to 30 levels fast.
1. The Stormhill Troll Meadow (Limgrave)
Located on the plateau southeast of the Warmaster's Shack, five giant Trolls roam the grassy field. Each Troll yields 1,000 runes upon defeat. For fresh characters, fighting them one-on-one on Torrent is safe and easy: dodge their heavy stomps, bait their slow weapon swings, and strike their legs to stagger them. If you manage to make the Trolls hit each other with their wide swings, you can clear the field even faster. Clearing all five takes under two minutes, yielding 5,000 runes per run without stepping foot into high-danger zones.
2. The Sleeping Elder Dragon Greyoll (Dragonbarrow)
This is the ultimate starter jumpstart. Head over to Dragonbarrow in northern Caelid and rest at the Fort Faroth Site of Grace. Right next to the grace lies Greyoll, a titanic sleeping dragon surrounded by smaller dragons. Greyoll herself will not attack you directly, but she possesses a massive health pool.
To kill her effortlessly, grab any weapon with an inherent Bleed effect, such as the Reduvia dagger or the starter Uchigatana. Stand at Greyoll's tail end (safely away from her dragon offspring) and spam light attacks. Bleed buildup deals percentage-based damage, shredding her massive health bar within a minute or two. Once she dies, she drops a whopping 50,000 runes (or nearly 75,000 with the Golden Scarab and Fowl Foot active!).
Pro-Tip: If you immediately hop on Torrent the second Greyoll dies, rush back to the Fort Faroth Site of Grace, and sit down before her death animation completely finishes, she will respawn! You still receive the massive stack of runes, but Greyoll remains alive, allowing you to repeat this process indefinitely. If you enjoy games with high-stakes survival loop mechanics, browse through our top picks for the best solo survival games.
Mid-Game Rune Spots: Efficient Grinding in Caelid and Liurnia

Once you have conquered Godrick the Grafted and ventured into Liurnia of the Lakes or eastern Caelid, early-game trolls will no longer cut it. You need thousands of runes per minute to meet the rising attribute requirements for mid-game weapons and spells.
1. The Vulgar Militia Near Bestial Sanctum
You can access the Bestial Sanctum in northeastern Dragonbarrow extremely early by using a hidden waygate behind the Third Church of Marika in Limgrave. The area outside the sanctum is patrolled by dozens of small, scythe-wielding Vulgar Militia enemies.
Despite their small size, each Vulgar Militia member awards over 1,094 runes (over 1,300 with the Scarab). They hit hard if they catch you off guard, but they have terrible physical poise and are extremely susceptible to stealth backstabs, staggering weapon arts, and stance breaks. Sneak behind them, land a critical backstab, finish them while they stand up, and reset at the grace. A quick sweep takes down 10 to 15 militia members, netting roughly 15,000 to 20,000 runes per fast run.
2. Lenne's Rise AFK Boulder Trap
If you want a low-effort, zero-combat method while listening to a podcast or watching a video, head to Lenne's Rise in eastern Dragonbarrow. From the Lenne's Rise Site of Grace, ride Torrent down the sloping dirt trail beneath the bridge.
A glowing magic boulder will spawn behind you as you hit a specific trigger point on the hill. As soon as you hear the spawning sound, turn Torrent around and double-jump out of the way. The boulder will plunge off the cliff edge and break, granting you roughly 1,952 runes every single time. Turn around, fast-travel back to the Lenne's Rise Site of Grace, and repeat. You can earn around 100,000 runes an hour with almost zero effort or risk of dying.
Late Game & Endgame: The God-Tier Mohgwyn Palace Ledge

When it comes to raw efficiency, no other spot in FromSoftware history compares to Mohgwyn Palace. Whether you are aiming for level 150 for competitive PvP or level 300+ for New Game Plus runs, this is where every player eventually sets up camp. For players interested in exploring expansive virtual worlds, feel free to check out our collection of the best beginner-friendly MMORPGs.
How to Access Mohgwyn Palace Early
Normally, Mohgwyn Palace is an endgame zone accessed via a portal in the consecrated Snowfield. However, you can reach it within your first two hours of playing by following White-Mask Varre's questline:
- Speak to Varre at the First Step grace in Limgrave.
- Defeat Godrick the Grafted and talk to Finger Reader Enia at the Roundtable Hold.
- Meet Varre at the Rose Church in Liurnia of the Lakes.
- Use the Festering Bloody Fingers he gives you to invade other players three times (or defeat the Magnus NPC in Altus Plateau).
- Soak the Pureblood Knight's Medal in maiden blood (found at the Church of Inhibition).
- Return to Varre to receive the Pureblood Knight's Medal item. Use it from your inventory to instantly teleport to Mohgwyn Palace!
Once there, grab your horse and sprint past the blood-red swamps up to the cliffside grace named Palace Approach Ledge-Road.
Method A: Sniping the Monstrous Crow (Low Level / Any Build)
Stand on the edge of the cliff right next to the Palace Approach Ledge-Road Site of Grace. Look across the deep chasm toward the red lake. You will see a giant, mutated red-headed crow walking around a tree.
Equip any bow or crossbow and shoot the crow once. The arrow does not need to deal heavy damage—it just needs to draw aggro. The bird will charge furiously toward you, path straight off the edge of the ravine, and fall to its death. This grants roughly 11,000 runes (over 13,000 with the Golden Scarab) in under 6 seconds! Turn around, rest at the grace, stand up, and shoot it again. You can comfortably farm over 1 million runes per hour using this simple tactic regardless of your character level.
Method B: Albinauric Genocide with Sacred Relic Sword (Endgame Mastery)
Once you beat the final boss of the main game and acquire the Elden Remembrance, trade it at Roundtable Hold for the Sacred Relic Sword. This weapon features a unique skill called Wave of Gold, which sends a massive, wide-spreading wave of holy energy forward across half the battlefield.

Stand at the top of the hill at Palace Approach Ledge-Road, line yourself up with the dozen sleeping Albinaurics resting along the path, and activate Wave of Gold once or twice. The golden wave obliterates the entire hillside of enemies in one sweep. With maximum runes buffs enabled, a single activation nets between 40,000 to 80,000 runes in 3 seconds flat. Resting at the grace right behind you lets you pull off multiple cycles a minute, yielding upwards of 5 million to 10 million runes per hour!
If you have not beaten the final boss yet, alternative area-of-effect skills like Starscourge Radahn's Starscourge Greatsword skill (Starcaller Cry) or high-tier Faith incantations like Burn, O Flame! also work very well on the Albinaurics.
Shadow of the Erdtree DLC: Farming in the Realm of Shadow
With the release of the Elden Ring: Shadow of the Erdtree DLC on Steam, players entered the Realm of Shadow facing ruthless bosses like Messmer the Impaler and Promised Consort Radahn. While character levels are supplemented by Scadutree Fragments in the expansion, raw runes remain crucial for leveling up attributes, upgrading new DLC weapon categories like Light Greatswords and Beast Claws, and purchasing expensive crafting materials.
1. First Tower Church (Ancient Ruins of Rauh)
In the Ancient Ruins of Rauh, the area around the First Tower Church Site of Grace hosts dense groups of Shadow Spirits and aggressive Bloodfiends. Using wide-reaching area attacks like Wave of Gold or blasphemous spells clears these mobs almost instantly, yielding heavy rune amounts appropriate for New Game+ scaling.
2. Castle Ensis Encampment
Before challenging Rellana, Twin Moon Knight, the outer fort surrounding Castle Ensis features high concentrations of Messmer Soldiers and Black Knights. Backstabbing the patrolling Black Knights yields immense rune rewards while providing great practice for parrying human combatants. For more tactical guides on deep progression systems, take a look at our comprehensive gaming guides section.
Essential Tips to Keep Your Runes Safe
Farming runes is only half the battle; keeping them long enough to spend them at a Site of Grace is what separates veteran Tarnished from casual victims. Here are three critical safety guidelines:
- Keep Sacrificial Twigs Handy: If you die while carrying hundreds of thousands of runes, equip a Sacrificial Twig talisman before attempting to recover your bloodstain. If you accidentally die again on your way back, the Sacrificial Twig breaks, but your original massive bloodstain remains on the map!
- Spend Surplus Runes on Consumables: If you are near a level-up but do not want to risk losing your hard-earned cash in a dangerous dungeon, visit merchants like the Isolated Merchant in Caelid or Smithing Master Iji. Buy high-grade Smithing Stones, Somber Stones, and Kukri. These items hold their value well and can be resold or used later.
- Master the Emergency Fast-Quit: If you drop off a high ledge by accident or get trapped in a grab attack that will clearly kill you, quickly pause the game, navigate to System, and choose quit to desktop/title screen. When you reload, the game places you safely on stable ground prior to your fatal drop.
For more detailed breakdowns on FromSoftware titles, RPG builds, and hardware optimization, check out our dedicated RPG section and browse the latest articles on PC gaming news and guides on Bandai Namco's official Elden Ring page!