The best beginner build for Alien: Isolation’s Lost Contact is a stealth-first resource build: keep the motion tracker ready, craft medkits and noisemakers before flashy explosives, save flamethrower fuel for unavoidable encounters, and treat the revolver as a last resort. Lost Contact has no character classes, skill tree, or permanent stat allocation, so “build” really means your starting priorities, crafting order, weapon discipline, and route through the challenge.
That distinction matters. You’re not creating a damage dealer or a tank; you’re assembling a survival kit for Amanda Ripley while the Xenomorph learns your habits. The DLC’s compact challenge structure makes every wasted component hurt more than it does in the campaign. A single panic-shot can attract the Alien, burn through scarce ammunition, and turn a manageable room into a desperate chase.
The beginner build that actually works
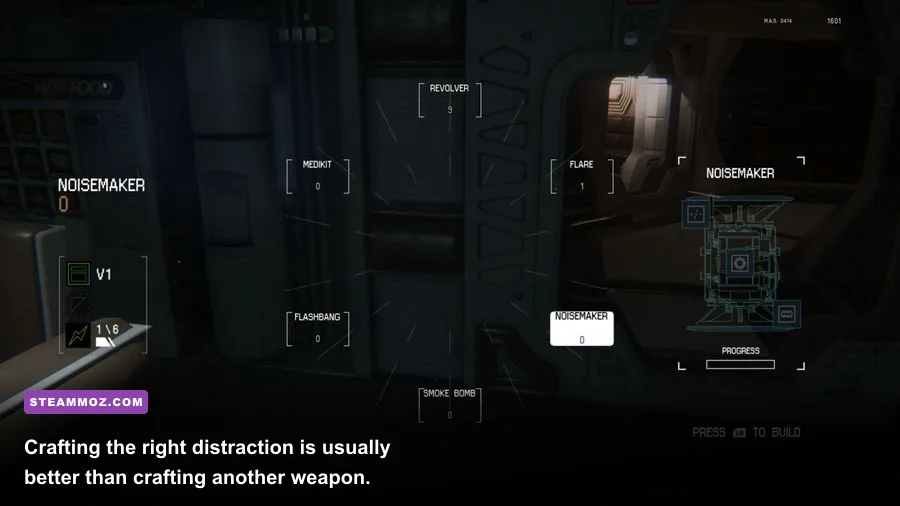
Start with a conservative setup built around information, healing, and controlled distractions. Your first priorities should be the motion tracker, medkit, noisemaker, and flamethrower. The tracker tells you whether movement is safe; the medkit protects the run from one bad fall or human ambush; the noisemaker redirects the Alien; and the flamethrower is your emergency reset button.
Don’t rush to craft every available item. Components are more valuable when converted into tools that solve several problems at once. A noisemaker can pull the Alien away from a doorway, separate hostile humans, or create a safe route through a corridor. An EMP mine can disable androids and electronics, but it’s often less useful against the Alien itself. A medkit, meanwhile, preserves your ability to sprint after an injury without entering the next encounter already compromised.
| Priority | Item or system | Why beginners should favor it | When to spend it |
|---|---|---|---|
| S-Tier | Motion Tracker | Provides direction, distance, and warning before a patrol reaches you | Check briefly at intersections, vents, and objective rooms |
| S-Tier | Medkit | Restores health and prevents one mistake from ending the run | Heal before entering a dangerous section, not during a chase |
| S-Tier | Noisemaker | Creates a reliable distraction without requiring direct combat | Use to move the Alien or clear a blocked route |
| A-Tier | Flamethrower | Repels the Alien and buys time when stealth collapses | Use short bursts only when it is close or committed to an attack |
| A-Tier | EMP Mine | Excellent against Working Joes and electrical hazards | Reserve for android encounters and locked-down rooms |
| B-Tier | Revolver | Useful against humans but extremely loud and limited by ammunition | Only when escape or stealth is no longer realistic |
The key is to keep at least one defensive answer in reserve. If you have a flamethrower but no fuel, you don’t really have a flamethrower. If you carry a full crafting inventory but never build a noisemaker, those components are doing nothing for you. The best beginner loadout is deliberately boring because boring is how you finish Lost Contact.
Players coming from action-heavy horror games may find our Alone in the Dark beginner build guide useful for a similar reason: survival tools should support your route, not tempt you into unnecessary fights.
🎮 Alien: Isolation Lost Contact
Looking to experience this game? Grab your digital key directly on our store for $3.99.
View on Steammoz Store →What to craft first and what to leave alone
Crafting in Alien: Isolation is deliberately component-hungry. Recipes use items such as ethanol, bonding agent, compound B, sensor modules, blasting caps, and charge packs. Because the same materials can feed several recipes, the smart move is to avoid filling your inventory with low-value gadgets before you know what the next room demands.
First crafting pass
Craft a medkit as soon as you have the materials and your health is not full. The recipe uses compound B, ethanol, bonding agent, and an injector. Making it early turns otherwise wasted health recovery into a stored safety net. Next, build a noisemaker when you have a safe hiding place and a clear route away from the distraction. Its recipe uses a blasting cap, sensor, and bonding agent.
After those two, look at the threat in front of you. Against Working Joes, an EMP mine is a strong investment because it can disable androids and buy time around machinery. Its bonding agent, charge pack, and sensor requirements make it expensive, so don’t build one automatically when the next objective contains only the Alien. Against a human patrol, a flashbang or smoke bomb can be more useful than a pipe bomb because the goal is to escape, not clear the room.
| Crafting choice | Core components | Beginner value | Common mistake |
|---|---|---|---|
| Medkit | Compound B, ethanol, bonding agent, injector | High; preserves a run after damage | Waiting until critical health, then crafting under pressure |
| Noisemaker | Blasting cap, sensor, bonding agent | Very high; redirects threats and opens routes | Throwing it without planning the escape path |
| EMP Mine | Bonding agent, charge pack, sensor | High against Working Joes and electronics | Spending rare parts when no android is nearby |
| Flashbang | Blasting cap, sensor, ethanol | Medium; strong emergency crowd-control tool | Using it near the Alien and assuming it will solve the encounter |
| Pipe Bomb | Blasting cap, sensor, ethanol, bonding agent | Medium; powerful but loud and resource-heavy | Crafting it early instead of a medkit or noisemaker |
| Molotov | Blasting cap, ethanol, compound B | Situational; better for humans than the Alien | Burning fuel and components for a fight you could avoid |
Keep your inventory below the cap whenever possible. Picking up a component while already full means losing a future crafting opportunity. A practical rhythm is to craft one medkit, keep enough materials for a noisemaker, and only then consider explosives. The official Lost Contact Steam listing confirms the DLC’s challenge-focused format, which is why flexible utility beats a specialized damage setup.
How to manage the Alien, humans, and Working Joes
Lost Contact becomes much easier once you stop treating every enemy as a combat encounter. The Xenomorph is the central threat, but humans and Working Joes are usually dangerous because they force noise, movement, or resource expenditure at the wrong time.
Against the Xenomorph
The motion tracker shows nearby movement, but it doesn’t replace your ears. A fast pulse usually means the Alien is moving; a slowing signal suggests it is close to your position. Check the tracker for one or two seconds, then put it away so you can hear footsteps, vents, hissing, and the distinctive scrape of claws.
When the Alien enters your area, freeze your movement. Don’t sprint for the nearest locker unless it has already seen you. Lockers and hiding spots can work, but overusing them teaches the AI to investigate them. Crawl under tables, break line of sight around corners, and use vents only when the route is genuinely safer. If the creature begins a committed approach, tap the flamethrower in short bursts. A sustained stream wastes fuel and can still leave you exposed after the fire stops.
Against humans
Humans are the one enemy type where the revolver and shotgun can be justified, but gunfire should still be your second plan. Listen for shouted commands and watch patrol spacing. A noisemaker can pull a group away from an objective, letting you slip through without spending ammunition. If combat is unavoidable, aim deliberately and move immediately after the shot. Remaining in the same position invites both survivors and the Alien to converge.
Against Working Joes
Working Joes are slower than humans but hard to discourage with ordinary stealth mistakes. Avoid letting one corner you. An EMP mine is the cleanest answer, while a stun baton can create an opening at close range if you have no better option. Don’t waste flamethrower fuel on androids unless the Alien is also present and you’re using the fire to control both threats.
| Threat | Telegraph | Best response | Bad response |
|---|---|---|---|
| Xenomorph | Tracker movement, hiss, vent sounds, heavy footsteps | Break line of sight, crouch, distract, then relocate | Sprinting in a straight line or hiding in the first locker you see |
| Human survivors | Shouting, flashlight beams, grouped patrols | Use cover or a noisemaker; fight only when boxed in | Trading loud shots for minor positional gains |
| Working Joe | Mechanical voice lines and steady pursuit | EMP mine, stun baton opening, or route around | Allowing it to pin you against a dead end |
For broader stealth habits, our Creaks beginner guide covers the same valuable principle: identify the patrol pattern before committing to movement.
The Lost Contact route for a first clear
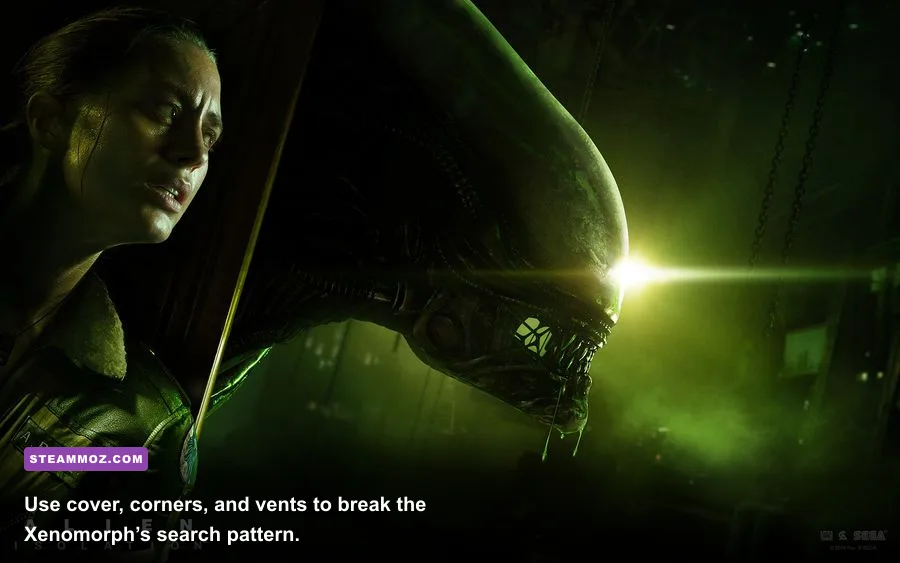
Beginners should play Lost Contact as a sequence of information checks rather than a race between objectives. At the start of each section, pause and identify three things: your nearest cover, the likely exit, and the direction of the current threat. Only then should you interact with terminals, doors, or mission objects.
Move crouched by default, but don’t confuse crouching with invisibility. Slow movement still creates sound, and the Alien can investigate repeated activity. Use corners to peek, avoid crossing open floors unless the tracker is quiet, and leave yourself a retreat path before starting an interaction. If a terminal takes several seconds, position yourself so you can break away without running directly into a dead end.
Your first successful run should prioritize completion over score. Ignore optional exploration when it takes you away from the objective route, and don’t chase every collectible component if the Alien is actively searching. Once you understand the map’s loops and hiding points, return for a higher-score attempt with more aggressive resource control.
Use this decision sequence whenever the next area looks dangerous:
- Scan briefly. Check the motion tracker, listen, and locate cover.
- Read the threat. Decide whether the room contains the Alien, humans, androids, or a combination.
- Choose the quiet solution. Crouch past, wait for a patrol, or use a noisemaker.
- Spend one defensive tool. Use an EMP, flashbang, or flamethrower only when it creates a clear escape.
- Relocate. After any loud action, leave the area instead of admiring the result.
Save your most expensive resources for the final objective push. The game’s tension comes from uncertainty, and spending everything early makes the last stretch much harder than it needs to be. A run with two medkits, one noisemaker, and a modest reserve of flamethrower fuel is usually healthier than a run carrying several explosive recipes but no way to recover from damage.
Difficulty and performance settings for a cleaner run
For a first Lost Contact attempt, Novice or Easy is the right choice if your goal is to learn the map and enemy behavior. Harder modes reduce your margin for error and make resource decisions much less forgiving. After you can finish without panic-firing, move to Medium or Hard. Nightmare is a separate discipline: the motion tracker is unreliable, resources are scarcer, and mistakes become much harder to recover from.
On PC, stable frame pacing matters more than chasing extreme visual quality. Alien: Isolation is built around darkness, reflections, volumetric lighting, and detailed shadows. If performance is inconsistent, lower shadow quality and ambient occlusion before turning down texture quality. Keep the field of view comfortable, but avoid making it so wide that distant movement becomes harder to read.
| Setting | Beginner recommendation | Performance impact | Visual trade-off |
|---|---|---|---|
| Resolution | Native monitor resolution | High | Lower only if GPU load is consistently high |
| Texture Quality | High if VRAM allows | Low to medium | Preserves sharp environmental detail |
| Shadow Quality | Medium | Medium to high | Usually the safest major cut for smoother frames |
| Ambient Occlusion | SSAO or medium | Medium | Lower settings flatten dark corners slightly |
| Volumetric Effects | Medium | Medium | Reduces fog and lighting density |
| Anti-Aliasing | FXAA or the game’s default | Low to medium | Higher options may soften the image |
If the game stutters, start with the practical fixes in our PC stutter troubleshooting guide, then check the official Alien: Isolation PC information and Creative Assembly’s official game site. Stable performance helps more than people expect: a missed audio cue or delayed input can turn a stealth escape into a fatal chase.
Finally, don’t judge the build by how many enemies it kills. Judge it by how often it lets you leave a room without spending ammunition. Keep the tracker quiet, make the Alien search somewhere else, heal before the next objective, and save the flamethrower for the moment stealth genuinely fails. That’s the Lost Contact beginner build—and it remains the strongest foundation even when you start chasing leaderboard scores.