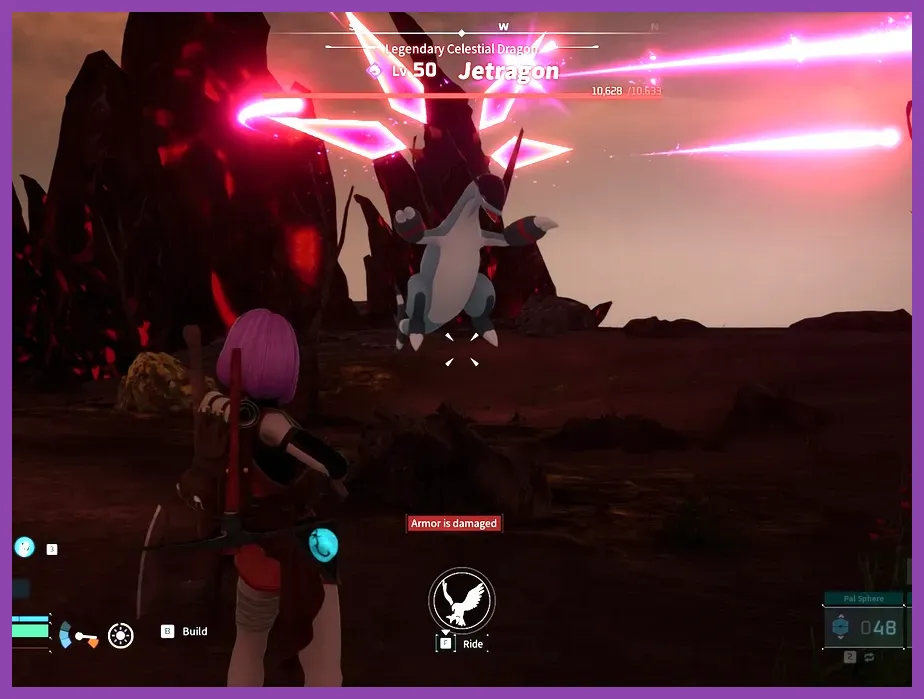
The best solo player build in Palworld is the Vanguard Pal-Buffer (Ranged Player DPS) class archetype, which combines direct player firepower with passive stat-boosting party Pals. Because Palworld does not feature rigid class trees, solo viability depends on allocating Stat Points into Health (15–20 points), Attack (15–20 points), and Carrying Capacity (15–20 points), while carrying a team composed of four Gobfins (equipped with the Vanguard and Stronghold Strategist passives) and one high-tier elemental converter mount like Frostallion, Chillet, or Jetragon. This setup boosts the player's personal damage by up to 120%, allowing you to solo Alpha Bosses and Level 55 Tower Bosses like Victor & Shadowbeak in under two minutes without relying on co-op allies.
The Optimal Solo Playstyle: The Vanguard Pal-Buffer Build
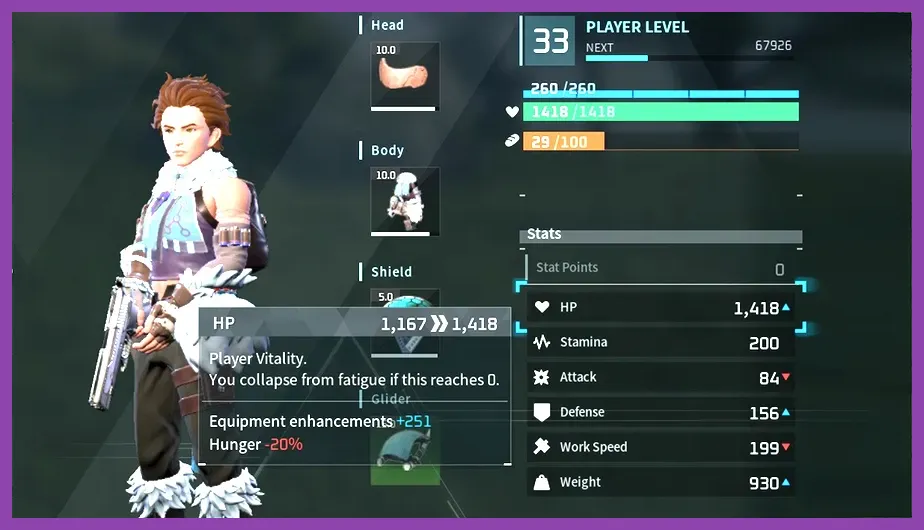
Playing Palworld as a solo player presents distinct challenges compared to multiplayer servers. Without allies to revive you, draw boss aggro, or divide crafting burdens, your character must operate as a self-contained damage machine and logistics hub. While many beginners rely entirely on their Pals to deal damage while taking a passive back-seat role, high-level boss fights in the end-game reveal the flaw in this strategy: Pal AI can be predictable, slow to execute cooldowns, and susceptible to heavy area-of-effect (AoE) wipeouts. Similar to the high-stakes lone-wolf survival mechanics covered in our Helldivers 2 best solo class guide, mastering solo play in Palworld requires taking direct control of your offensive tempo.
The Vanguard Pal-Buffer playstyle shifts the primary damage burden onto the player character using high-tier firearms while converting passive Pals in your active party into stat sticks. By equipping weapons like the Legendary Rocket Launcher or Legendary Assault Rifle, combined with four passive Gobfins in your party, your personal shot damage scales dramatically. Gobfin's unique Partner Skill, Angry Shark, passively increases the player's attack power simply by existing in the current party. When all four Gobfins are fully condensed to Rank 4 using the Pal Essence Condenser, each Gobfin provides a massive +20% boost to player attack. Combined with passive traits inherited through breeding, your personal damage multiplier far exceeds what any individual combat Pal can achieve on its own.
To view official game updates, patch balance notes, and developer announcements regarding combat updates, visit the Palworld Steam Page and check the regular announcements from developer Pocketpair.
Stat Point Allocation Strategy for Solo Survival
Stat allocation in Palworld is permanent unless you craft a Memory Wipe Medicine at an Electric Medicine Workbench (which requires 99 Beautiful Flowers, 50 Horns, 50 Bone, and 20 High Quality Pal Oil). Because stat points are scarce, spending them inefficiently early on will severely limit your solo combat end-game capabilities. Solo players must balance survivability, offensive output, and exploration convenience.
Recommended Level 55 Stat Point Distribution:
- Health (15 Points - 2,000 Total HP): Provides a safety buffer against one-shot mechanics from Level 50+ Alpha Pals like Frostallion, Jetragon, and Blazamut.
- Stamina (5 Points - 150 Total Stamina): Allows continuous dodge-rolling during frantic boss encounters and extended climbing/flying without running out of air.
- Attack (20 Points - +20% Base Player Attack): Amplifies every player-focused damage multiplier, including weapon schematics, party passive buffs, and food items.
- Weight / Carrying Capacity (15 Points - 2,000 Total Weight): Absolute necessity for solo players gathering ores, carrying heavy ammo, and stocking up on gear during long dungeon runs without over-encumbering.
- Work Speed (0 Points): Completely useless for solo combat. Base Pals handle 99% of crafting, smelting, and construction at your bases. Investing points here is a wasted resource.
Early in the game (Levels 1 to 20), prioritize Carrying Capacity up to 1,000 and Health up to 1,200. This setup ensures you do not get stuck constantly running back to base when gathering resources, similar to optimizing yield when following our crafting resource guide for heavy loot gathering. Once you reach mid-game (Levels 21 to 40), start investing heavily into Attack to keep pace with boss health pools.
Essential Solo Pals: S-Tier Party Composition
For a solo build to function at maximum output, your party must be structured with strict synergies. Every Pal in your team must serve a specific utility or stat-buffing purpose rather than acting as standalone combat units.
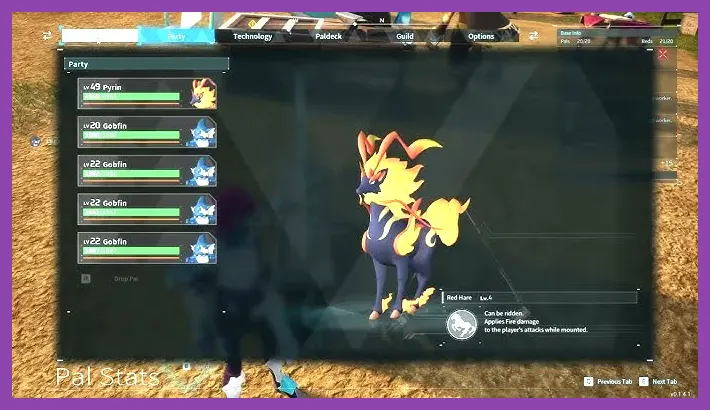
1. The Core Stat Buffers: Gobfin (x4)
Located in the Gobfin's Turf region (around coordinates -150, -200), Gobfins are easily farmable in large numbers. Catch or breed four Gobfins with the following setup:
- Partner Skill (Angry Shark): Increases player attack power. At Rank 0, it gives +10% Attack per Gobfin (+40% total). At Rank 4 (condensed), it grants +20% Attack per Gobfin (+80% total).
- Required Passive 1: Vanguard: Grants a +10% Player Attack boost. Stacks across all four Gobfins (+40% total).
- Required Passive 2: Stronghold Strategist: Grants a +10% Player Defense boost. Stacks across all four Gobfins (+40% total).
With four fully condensed Gobfins carrying Vanguard and Stronghold Strategist, your player character receives an immediate baseline passive bonus of +120% Attack and +40% Defense before accounting for weapons, armor, or food.
2. The Elemental Converter Mount (1 Slot)
Your fifth party slot is reserved for a mount that converts your personal player damage into a specific elemental type while mounted, granting an additional +50% to +100% elemental damage bonus based on the partner skill's rank.
- Frostallion (Ice Damage Converter): Converts player attack to Ice damage and heavily increases Ice damage output. Best used against Dragon-type bosses like Jetragon.
- Chillet (Dragon Damage Converter): Early to mid-game power house. Converts player attack to Dragon damage, which deals double damage against Dark-type Alpha Pals and bosses like Shadowbeak.
- Pyrin / Ragnahawk (Fire Damage Converter): Converts player attack to Fire damage, inflicting continuous burn status effects on Grass and Ice-type targets.
- Jetragon (Mobility & Direct Firepower): The fastest flying mount in the game. Excellent for solo map clearing, fast travel, and raw explosive rocket pod damage.
Best Weapons and Armor Loadout for Solo Players

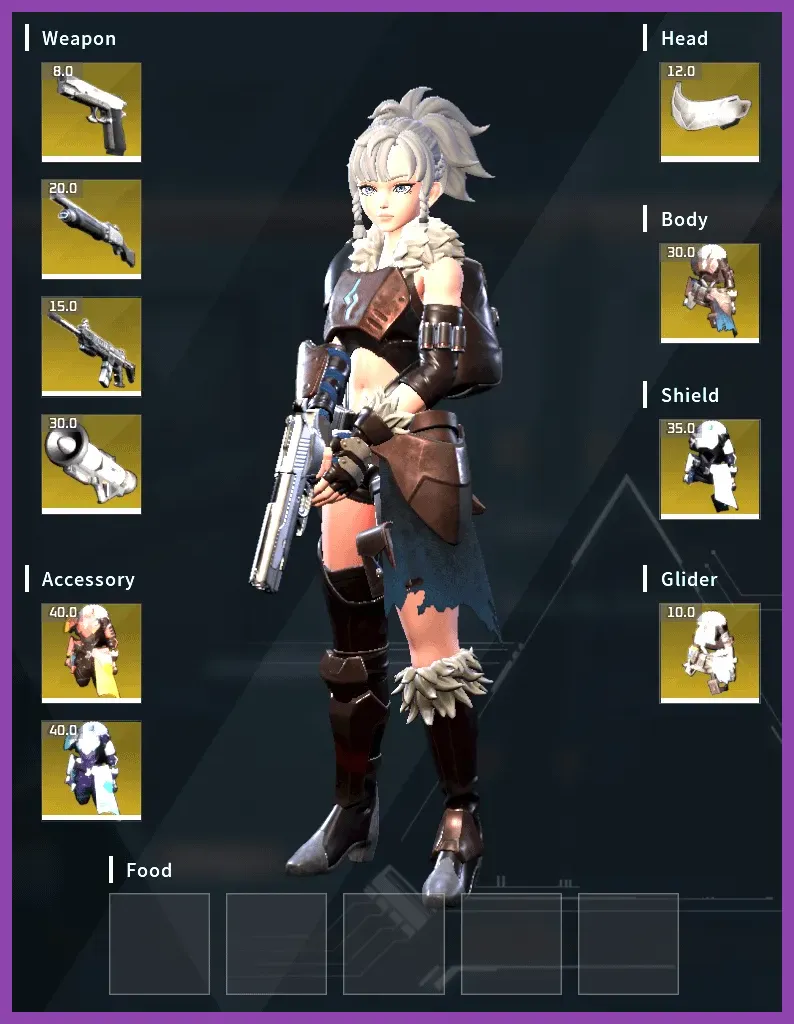
To maximize the massive multipliers provided by your Gobfin party, you need top-tier weapons. Weapon schematics can be dropped by end-game Alpha Bosses or found inside high-level Dungeon chests at the Sanctuary islands. Detailed weapon database mechanics can be referenced on the Palworld Official Wiki.
Primary Weapons
- Legendary Rocket Launcher (Schematic 4): Dropped by Alpha Jetragon (Level 50). Deals 14,000 base damage per shot with massive area splash damage and high knockback. Knockback is crucial in solo play as it interrupts dangerous boss cast animations.
- Legendary Assault Rifle (Schematic 4): Dropped by Alpha Blazamut (Level 49). Provides 560 base attack with high fire rate and sustained single-target DPS. Perfect for shredding boss weak points (headshots) when mounted on Chillet or Frostallion.
- Single-Shot Rifle / Pump-Action Shotgun: Excellent mid-tier options while progressing toward Level 50. The Legendary Pump-Action Shotgun (dropped by Alpha Suzaku) delivers devastating burst damage at close range.
Armor & Accessories
Solo survival requires high damage mitigation so that a missed dodge-roll does not force a respawn. Managing your gear durability and stat bonuses is just as critical as selecting the right weapon tier, similar to analyzing armor stats in our Helldivers 2 weapons tier list guide.
- Cold-Resistant Pal Metal Armor / Heat-Resistant Pal Metal Armor: Provides 300+ Defense and 1,200+ Durability along with full environmental protection for extreme biomes like Mount Obsidian and Astral Mountains.
- Hyper Shield or Giga Shield: Your shield absorbs damage before your health bar takes hit points. Shield points regenerate automatically when avoiding damage for 5 seconds. Always prioritize upgrading your Shield blueprint immediately.
- Attack Pendant +2: Equipping two Attack Pendants (+2) adds a flat +10% Attack boost per pendant (+20% total).
- Thermal Undershirt +2: Grants resistance to both Hot and Cold environments, freeing up your armor slot so you can wear high-defense Plasteel Armor without changing gear for temperature changes.
Passives and Breeding Priority for Solo Domination

To get the absolute maximum performance out of your solo build, breeding is non-negotiable. You must breed passive traits onto both your passive Gobfin buffers and your combat/mount Pals. If you have practiced min-maxing mechanics in other action RPGs, as demonstrated in our guide on finding crafting materials in Black Myth Wukong, Palworld's breeding system rewards targeted trait optimization.
Ideal Traits for Gobfin Buffers:
Because Gobfins will stay in your active party slots and are rarely summoned directly onto the battlefield, focus exclusively on traits that buff player stats or overall utility:
- Vanguard: +10% Player Attack (Essential).
- Stronghold Strategist: +10% Player Defense (Essential).
- Mining Supervisor: +25% Player Mining Efficiency (Utility).
- Logging Supervisor: +25% Player Logging Efficiency (Utility).
Ideal Traits for Combat Mounts (e.g., Frostallion, Jetragon):
When breeding your primary mount/combat Pal, focus on raw Pal movement speed and offensive output:
- Legend: +20% Attack, +20% Defense, +15% Movement Speed (Inherited from Alpha Legendaries).
- Musclehead: +30% Attack, -50% Work Speed (Work speed penalty does not affect combat).
- Ferocious: +20% Attack.
- Swift / Elemental Emperor: +30% Movement Speed (for mounts) OR +20% Elemental Damage (such as Divine Dragon or Ice Emperor).
Solo Boss Combat Rotation and Survival Mechanics
Executing boss fights completely solo requires mastery over target switching, cooldown timing, and roll-invincibility frames (i-frames). Following a structured combat rotation will guarantee victory over late-game encounters.
Step-by-Step Solo Combat Rotation:
- Pre-Buff with Consumables: Before entering a boss arena or engaging an Alpha Pal, consume Eikthyrdeer Loin or Mozzarina Cheeseburger for a 20-minute +20% Attack boost. Pair this with Rushoar Bacon for a +20% Defense boost.
- Summon Mount & Convert Damage: Mount your elementally aligned Pal (e.g., Chillet for Dark bosses, Frostallion for Dragon bosses). Mounting applies the elemental attack transformation to your firearm immediately.
- Apply Stun Knockback: Open the encounter with a shot from the Legendary Rocket Launcher. This knocks the boss down for 3 to 4 seconds, interrupting their initial devastating attack phase.
- Sustained Headshot DPS: While the boss is knocked down or recovering, swap to your Legendary Assault Rifle. Aim directly at the head or glowing elemental weak point, firing continuous bursts. With four Vanguard Gobfins and food buffs active, your assault rifle will deal 300–500 damage per bullet.
- Aggro Swap and Defense: If the boss unleashes a large, tracking AoE attack (like Jetragon's Meteorain or Shadowbeak's Divine Disaster), dismount immediately and recall your Pal. Recalling your Pal eliminates their hit-box instantly, preventing them from taking lethal damage. Dodge-roll directly through the attack animation using your dodge i-frames.
- Repeat Knockdown Cycle: Swap back to the Rocket Launcher, re-summon your mount, and fire another rocket to knock down the boss again once the weapon recoil resets.
To establish a quick foundation on general survival controls, stamina conservation, and early-game world exploration before attempting these complex endgame combat rotations, consult our beginner tips and tricks overview.
Solo Base Automation for Resource Maintenance
Maintaining high rocket fuel ammo counts and Assault Rifle bullets demands heavy production chains. As a solo player, you cannot manually craft ammunition without falling behind. Establish three dedicated bases focused on specific resource loops:
- Base 1 (Mining Hub): Located at coordinates (190, -40) or (-255, -370). Stocked with 8 Ore nodes and 6 Coal nodes. Assign Pals with Level 3+ Mining (Anubis, Astegon) and Level 3 Transporting (Helzephyr) to generate endless Refined Ingot supplies automatically.
- Base 2 (Oil & Production Hub): Located in the Sakurajima desert biome with Crude Oil extractors running on Electric Power Generators powered by Level 4 Electricity Pals (Orserk).
- Base 3 (Farming & Breeding Hub): Contains 4 Breeding Farms, Wheat Fields, Tomato Plantations, and Milk/Egg Ranches. Run by Lyleen (Planting/Harvesting), Jormuntide (Watering), and Beagarde (Honey production) to sustain unlimited Cake production for breeding your Vanguard Gobfin army.
By adopting the Vanguard Pal-Buffer strategy, optimizing your level stats into Health, Weight, and Attack, and maintaining fully automated resource bases, you can systematically conquer every boss, dungeon, and tower in Palworld without relying on co-op teammates.