The reliable way to get legendary items in State of Survival is to target the correct reward system: craft and enhance Chief Gear with legendary designs and materials, earn event chests and milestone rewards, and spend alliance or event currency on guaranteed fragments instead of gambling on random boxes. Legendary hero shards follow a separate route through Hero Search, daily missions, recruitment events, and limited-time shops.
That distinction matters. “Legendary item” is often used to describe both gold-rarity equipment and legendary heroes, but they are not farmed from the same menu. Chief Gear improves your Chief’s troop bonuses, while legendary hero shards unlock or promote characters such as Maddie & Frank, Nikola, Trish, Wolfe, Lucky, Zoe, and Jeb. The fastest account progression comes from choosing one target, checking its exact exchange source, and refusing low-value purchases that delay the next guaranteed upgrade.
What Counts as a Legendary Item?
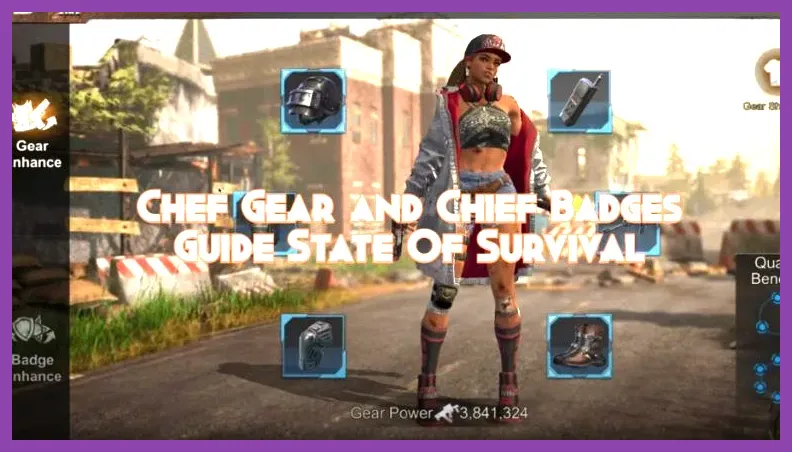
State of Survival has several progression layers, so identify the item before farming it. Legendary Chief Gear is the orange or gold-tier equipment attached to the Chief Gear screen. It is not the same as a hero’s orange shard, a hero gear component, or a decorative profile item. Legendary equipment generally requires a combination of a design or blueprint, lower-rarity gear, and upgrade materials before it can be crafted or enhanced.
Legendary hero items are usually Legendary Hero Shards. A shard count appears on the hero’s recruitment or promotion screen, and the required total varies by the hero and the current version of the game. Do not assume every legendary hero costs the same number of shards. Check the summon panel before spending Search Tickets or event currency.
The practical rule is simple: open the item’s description and tap Get or Source. That button shows the currently active locations, events, shops, or bundles for that exact item. Reward tables change during new hero releases and seasonal events, making the in-game source panel more trustworthy than an old farming chart.
How to Get Legendary Chief Gear
1. Unlock the Chief Gear system first
Chief Gear becomes meaningful after your account reaches the relevant headquarters and workshop progression. Upgrade the buildings and research that unlock the Chief Gear interface, then open Chief > Gear to see the six equipment slots and their available sets. Your first goal is not to collect every legendary piece. It is to complete useful set bonuses and improve the troop type your settlement actually marches with.
Use the gear screen’s Craft, Enhance, or Get button to inspect the exact recipe. Depending on the gear tier and server age, recipes can require Chief Gear Designs, Chief Gear Components, enhancement materials, and lower-tier pieces. Save these resources until you can complete a guaranteed craft; randomly upgrading several weak pieces usually produces less account power than finishing one important slot.
2. Farm designs and components through events
Chief Gear Designs and components are most efficiently collected from alliance and solo events rather than normal infected attacks. Watch the event calendar for point milestones, ranking ladders, and exchange shops that list Chief Gear materials directly. Common opportunities include spending, construction, research, troop training, gathering, rally, and kill-event milestones. The exact event names and prizes rotate, but the valuable pattern is consistent: score points during activities you were already going to perform, then claim every milestone before the timer ends.
Alliance events are especially important for free-to-play players. Join an active alliance before the event begins, complete alliance tasks, participate in rallies when your march is strong enough, and collect alliance ranking rewards. A dead alliance can cost more legendary progress than a slightly weaker individual account because many materials are locked behind collective milestones.
3. Use the Alliance Store carefully
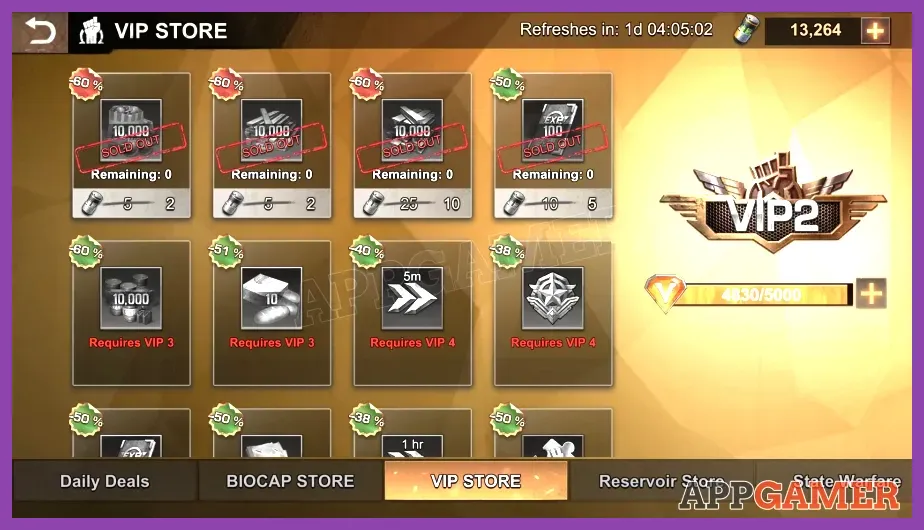
Open the Alliance Store after earning alliance honor and compare the available materials. The shop’s stock and prices can change with updates, so prioritize the Chief Gear item that completes your next recipe. Avoid spending all honor on speed-ups or low-impact resource packs when a design, component, or event ticket is available and directly advances a legendary craft.
Donate consistently to alliance technology, help allies, answer assists, and complete daily alliance objectives. These actions create a repeatable honor income without relying on premium currency. If your alliance cannot activate technology, launch rallies, or reach event thresholds, moving to a competitive but welcoming group is one of the strongest “free” legendary-item upgrades available.
4. Buy only targeted bundles
Premium packs may include Chief Gear Designs, components, enhancement materials, or choice chests, but a bundle is useful only when it completes a specific craft. Never value a pack by its advertised total alone. Check whether its materials belong to your current gear tier, whether the chest is random, and whether the item is locked behind a purchase milestone.
For a no-spend route, use official event announcements and the game’s own reward preview. The official State of Survival website and the game’s official social channels frequently advertise event windows and new hero campaigns. Plan your saved resources around those windows instead of spending immediately after a reset.
How to Farm Legendary Hero Shards

Hero Search and recruitment tickets
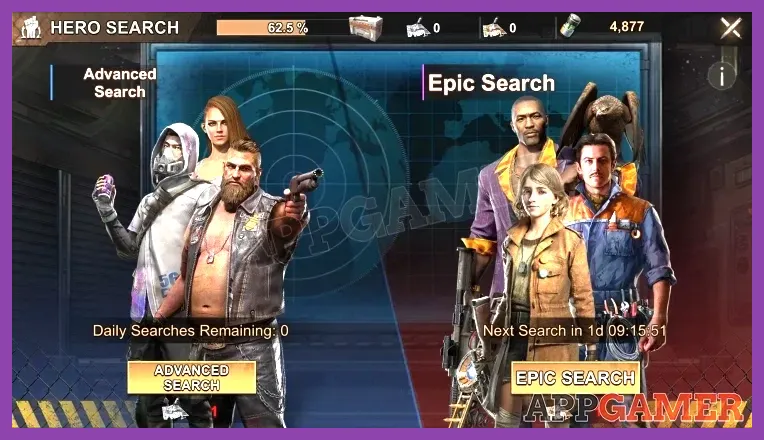
For legendary heroes, open Heroes > Search and inspect the current recruitment pool. Search Tickets, advanced recruitment currency, and event-specific tokens can award shards, but the pool is not permanently identical. Some heroes are available through normal searches, while newer or limited heroes may be tied to an event, premium recruitment banner, or exchange shop.
Save tickets for a banner that contains a hero you can realistically unlock or promote. A few random pulls rarely beat a guaranteed milestone. If the event has a ten-pull reward, cumulative points, or a choice chest, calculate the total tickets required before beginning. Spending halfway through a banner and missing the final milestone is a common way to lose legendary shards.
Daily missions, exploration, and recurring rewards
Complete daily activity objectives, exploration stages, Intel missions, and any campaign tasks that list hero shards in their preview. These sources are slower than a major event but compound over weeks. Claim the rewards manually when required; an unclaimed chest does not help your promotion progress simply because the activity was completed.
Check the hero’s source panel before investing. Some early heroes are supported by regular gameplay, while event heroes may have no permanent shard farm after their introductory campaign. If the source panel shows an event shop, prioritize that currency over generic resources until you have secured the guaranteed shard bundles.
Event shops and choice chests
Limited-time events frequently let you exchange points for legendary shards or a choice chest. Choose one main hero rather than spreading tokens across five characters. A promoted hero with a usable skill set is more valuable than several characters sitting just below their next star level.
For combat roles, match the hero to your march plan. Maddie & Frank is associated with the Rider role, Nikola with Infantry, and Trish with Hunter-focused progression in the game’s hero ecosystem. The exact skill balance changes with patches and hero generations, but the resource principle does not: build the hero whose troop type already receives your best research, Chief Gear, and troop bonuses.
Best Free-to-Play Legendary Farming Route
Use this weekly loop to maximize legendary progress without wasting speed-ups or premium currency:
- Check every source panel. Pick one Chief Gear piece or one legendary hero and record the required designs, components, shards, and currency.
- Join every alliance activity. Complete assists, donations, rallies, and alliance missions before collecting individual rewards.
- Finish daily objectives. Claim activity chests, Intel rewards, exploration prizes, and free event points every day.
- Save for milestone events. Hold recruitment tickets, construction speed-ups, training queues, and premium currency until an event gives points for spending them.
- Buy guaranteed exchanges first. Take a fixed legendary shard bundle or required gear component before random chests, unless the chest is the only route to your target.
- Craft one meaningful upgrade. Complete a full recipe or promotion threshold instead of scattering materials across multiple pieces.
This approach resembles efficient progression in other collection-heavy games: identify the guaranteed reward, then schedule your currency around it. Steamoz’s guides to early character investment and team synergy apply the same principle, but State of Survival adds alliance timing and troop-specialization decisions.
Which Legendary Upgrades Should You Prioritize?
Prioritize the legendary item that improves your main march and can be completed soonest. If your account consistently leads with Infantry, do not craft a Rider-focused piece just because its icon looks stronger. A lower-level item supporting your primary troop type can deliver more practical rally and infected-hunting power than an isolated off-role legendary.
Chief Gear priority
Finish set bonuses before chasing perfect substats. Concentrate your best designs and components on the slots required for the next bonus, then enhance those pieces in a controlled order. Inspect the displayed troop attack, defense, and lethality values after each upgrade. If the next level consumes rare materials for a minor increase, save them for a new legendary craft or event exchange.
Hero priority
Promote a hero whose abilities support your actual activity. Rally leaders need heroes that improve the relevant troop march or rally performance; solo players may prefer a durable march for infected hunting and exploration. Avoid leveling every legendary hero at once because hero XP, skill manuals, badges, and promotion materials are bottlenecks.
Read each skill description rather than judging a hero by rarity. A legendary label does not automatically make a hero the best choice for your current troop composition. Compare skill effects, march position, troop specialty, and the number of shards needed for the next promotion. A fully developed, role-appropriate hero will usually outperform a newly unlocked legendary with untouched skills.
Common Mistakes That Delay Legendary Items
- Opening every random chest immediately: Save choice boxes until you know which component completes your next recipe.
- Spreading alliance honor too thin: Buy the material that finishes a guaranteed upgrade before convenience items.
- Ignoring event previews: Recruitment and spending events often reward saved tickets and speed-ups more efficiently than ordinary use.
- Changing troop specialties constantly: Build one primary march first; switching between Infantry, Rider, and Hunter gear multiplies material costs.
- Buying outdated guides’ recommended heroes: Pools and balance change. Verify the current source panel and skill text in your own client.
- Confusing unlocks with promotions: Unlocking a legendary hero is only the first threshold. Count the additional shards required for each star or skill improvement.
Also avoid unofficial APKs, generators, and websites promising free legendary items. They cannot legitimately add Chief Gear Designs or hero shards to your account and can expose your login details. Use the official Google Play listing or the supported store version, and keep purchases inside the game’s verified payment flow.
How Long Does Legendary Progress Take?
The answer depends on server age, alliance strength, event rotation, spending, and whether you are chasing gear or a hero. A free-to-play player should think in event cycles rather than expecting a legendary item from one day of infected hunting. Daily rewards create the base income; alliance milestones and limited-time exchanges provide the major jumps.
Track progress with a simple note: target item, current shards or materials, next guaranteed source, event end date, and required currency. When the target is complete, immediately choose the next upgrade that uses a related material type. This prevents wasted purchases and keeps your account moving through the Chief Gear tiers.
For broader mobile optimization and resource-management habits, see Steamoz’s free-to-play progression guide and mobile performance tips. In State of Survival, the winning formula is patience plus precision: follow the item’s live source list, exploit alliance and event milestones, save currency for guaranteed exchanges, and invest every legendary reward into the march or gear set you actually use.