
Short answer: the best Death Howl Deluxe Edition equipment is the gear that gives your deck a reliable combat plan, not the flashiest card or the biggest single hit. Rank direct-damage tools and efficient defensive equipment in S Tier, put narrow control pieces in A Tier, and treat slow, setup-heavy options as B Tier until your deck can consistently support them. Most importantly, the Deluxe Edition does not appear to create a separate pay-to-win weapon pool; the ranking applies to the core game’s weapon and equipment choices.
That distinction matters because Death Howl is not a conventional action RPG where you simply compare attack values in a menu. The game from The Outer Zone mixes exploration, tactical positioning, resource management, and deckbuilding in a dark journey through the Mourning Lands. A weapon can look mediocre in isolation yet become excellent when it fits your draw pattern. The reverse is also true: a powerful-looking attack can be dead weight if it costs too much, needs a setup turn, or leaves you exposed after the enemy’s response.
This tier list therefore ranks equipment by practical value across a full run: consistency, action economy, safety, scaling, and how early the item starts pulling its weight. Because the public game information does not provide a permanent, universal damage chart for every possible card interaction, I’m not going to invent fake attack numbers. Instead, this guide uses the factors that actually decide fights in Death Howl: cost, range, targeting flexibility, defensive timing, discard pressure, and synergy with the rest of your deck.
If you’re new to this kind of hybrid, Steamoz’s Crowntakers weapon tier list is a useful comparison point. The lesson carries over: an item’s ranking comes from how often it solves a real problem, not how impressive it looks in a perfect screenshot.
How this Death Howl tier list works
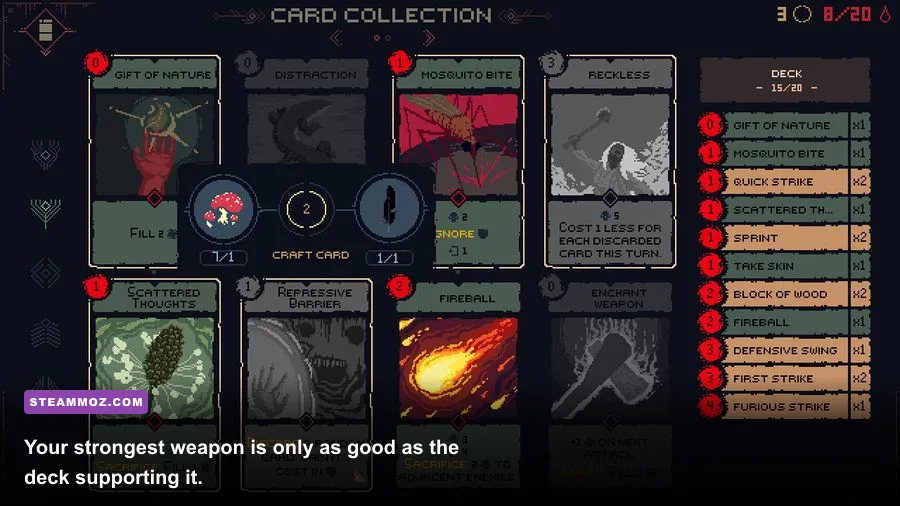
The rankings below judge weapons and equipment against five practical tests. First is reliability: can you draw and use the item when it matters, or does it sit in your hand waiting for several other cards? Second is tempo: does the equipment help you remove a threat before it acts, or does it merely promise better results several turns later?
Third is coverage. Flexible targeting, useful range, and the ability to answer both a close enemy and a dangerous backline threat are worth more than a tiny amount of bonus damage. Fourth is survivability. A defensive card that prevents damage, creates space, or buys a clean turn can be stronger than an attack that deals slightly more damage. Finally, there’s scaling: the best late-game equipment keeps improving as your deck gains more cards, upgrades, and synergies.
One warning before you start copying a tier list: Death Howl rewards adaptation. A weapon that ranks S Tier for a ranged, patience-focused deck may be only B Tier in a build that wants to end every encounter immediately. Use these rankings as a starting filter when choosing rewards and upgrades, not as a command to ignore every unusual card.
| Ranking factor | What a strong item does | Why it matters |
|---|---|---|
| Reliability | Works without several prerequisite cards | Reduces bad draws and dead turns |
| Tempo | Deals damage, blocks danger, or creates space immediately | Stops enemies from snowballing |
| Coverage | Answers multiple enemy positions or threat types | Keeps the item useful across encounters |
| Survivability | Prevents damage or protects your next turn | Preserves healing and exploration resources |
| Scaling | Benefits from upgrades and deck synergies | Stops the item falling off later |

🎮 Death Howl Deluxe Edition
Looking to experience this game? Grab your digital key directly on our store for $16.35.
View on Steammoz Store →S Tier weapons and equipment
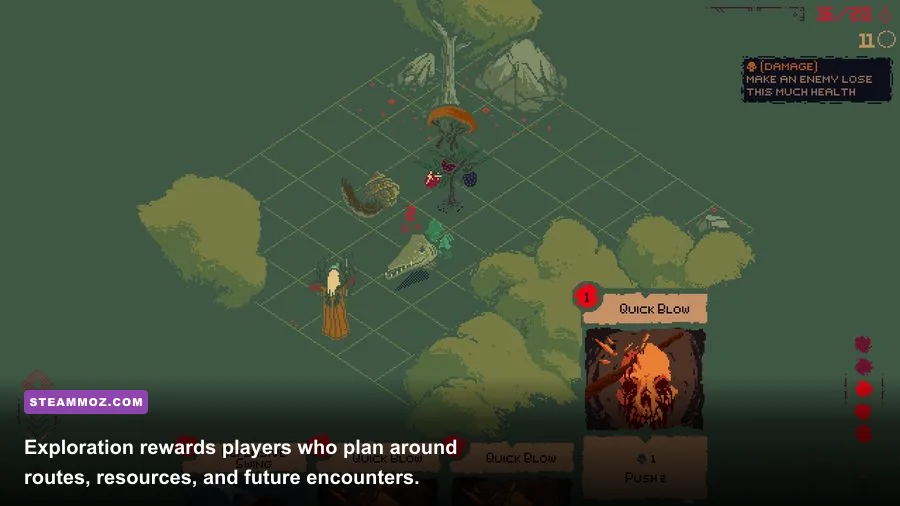
Reliable direct-damage weapons
The safest S Tier category is any weapon that gives you dependable damage at a reasonable cost and does not demand a complicated combo. In a deckbuilder, consistency beats theoretical maximum damage. If a direct attack can remove a weak enemy, finish a wounded elite, or pressure a boss without forcing you to discard half your hand, it deserves priority.
These weapons are especially valuable early in a run. Your deck is smaller, your defensive options are limited, and every extra turn spent setting up increases the chance that an enemy’s attack pattern catches you without a response. Take the plain, efficient damage card over a spectacular finisher if the finisher only works once every few encounters.
Flexible ranged equipment
Ranged equipment belongs in S Tier when it lets you attack while preserving a safe position. Positioning is not cosmetic in Death Howl; it determines which enemies can reach you, which attacks can be avoided, and whether you can spend a turn drawing or preparing instead of trading health. A ranged tool that hits a priority target without forcing you to walk into danger has value even when its raw damage looks ordinary.
The best use is not mindlessly staying at maximum distance. Watch enemy intent, identify the threat that can punish movement, and use ranged damage to break the encounter’s rhythm. If a close enemy is about to act, remove it first. If the entire group is still approaching, use the safe turn to improve your hand or establish defense. That’s where flexible equipment earns its ranking.
Efficient defensive tools
Defensive equipment reaches S Tier when it does more than delay damage. The ideal defensive card blocks a meaningful attack while also creating a positional advantage, improving your next draw, or allowing you to attack safely on the following turn. Pure defense can become a trap if it consumes actions without changing the board. Efficient defense changes what the enemy is allowed to do.
Prioritize these tools when your deck has strong attacks but weak protection. They smooth out boss fights and reduce the amount of healing you need between destinations. Don’t wait until you’re nearly defeated to value defense; prevention is strongest before an encounter becomes a crisis.
| Equipment role | Tier | Best quality | Best situation |
|---|---|---|---|
| Efficient direct damage | S | Low setup and dependable targeting | Early routes, elites, and finishing wounded enemies |
| Flexible ranged attack | S | Damage without surrendering safe positioning | Groups with dangerous melee attackers |
| Action-efficient defense | S | Blocks damage while preserving future tempo | Boss turns and difficult exploration fights |
| Pure burst finisher | A | Excellent payoff but higher setup | Boss windows and prepared combo turns |
A Tier choices that need the right deck
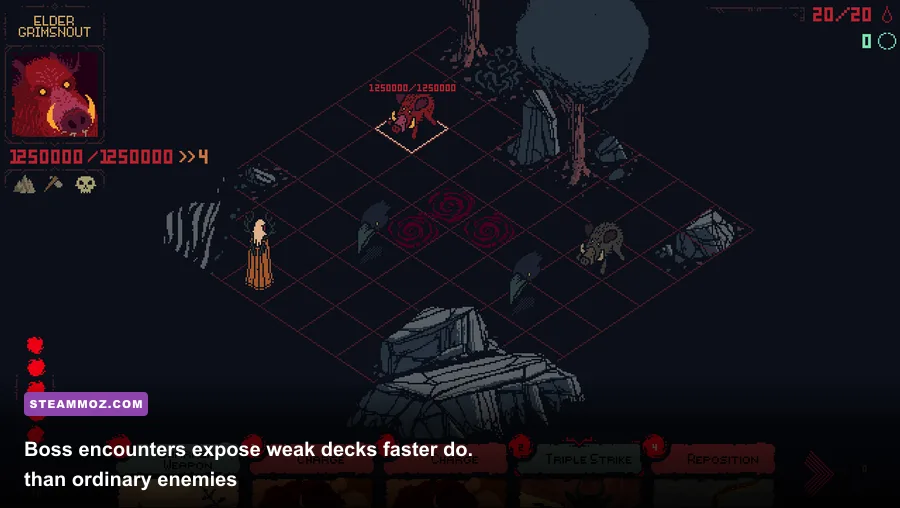
Burst and execution tools
High-damage finishers are A Tier rather than automatic S Tier because they’re often conditional. They become outstanding when an enemy is already wounded, vulnerable, isolated, or exposed to a particular status effect. They become frustrating when drawn too early, when the target is protected, or when using the card leaves you unable to answer the next attack.
Use burst equipment as a planned closer. Keep track of the enemy’s health, your remaining actions, and the cards likely to appear next. A common mistake is spending the finisher on the first target that enters range, only to discover that a more dangerous enemy was about to activate. Burst is strongest when it ends a threat, not when it merely makes a health bar look smaller.
Control and repositioning equipment
Control tools are excellent in the hands of a player who reads enemy intent. Anything that slows an approach, forces a bad route, creates distance, or buys time can turn a crowded encounter into a series of manageable one-on-one decisions. Their weakness is that control often has no value after the battlefield is already under control.
That makes them a deckbuilding question. If your deck already has reliable damage and defense, one control card can provide the breathing room needed for difficult fights. If your deck is short on damage, loading up on control simply postpones the problem. Take one or two pieces that solve a clear weakness, then stop adding them unless the run consistently presents threats they answer.
Scaling equipment
Scaling items are A Tier because they can become the backbone of a strong late-run deck, but they are not automatically good on the first map. A card that grows with repeated use, upgrades, or a specific resource is only valuable if you have enough encounters left to realize the investment.
Choose scaling equipment when the rest of your deck is already stable. Don’t sacrifice your only dependable attack for a promise of future power. A run usually fails because the player cannot survive the next three encounters, not because the final deck lacked one more late-game multiplier.
B Tier gear and when it can still work

Slow setup weapons
B Tier does not mean unusable. Setup-heavy weapons can perform brilliantly if you control the battlefield, but they’re risky when enemies attack quickly or arrive in groups. Their biggest cost is opportunity: every preparation turn is a turn in which you aren’t removing a threat or protecting yourself.
If you take one, pair it with reliable defense and a way to control distance. Avoid filling your deck with multiple cards that all need preparation. You want a curve where at least one useful action is available immediately, followed by the setup piece when the board gives you room.
Highly specialized counters
Specialized equipment belongs in B Tier until you know the route ahead. A narrow counter may feel incredible against the enemy type it was designed to answer and completely blank everywhere else. That is a poor trade when deck space and card draws are limited.
There’s a place for these tools in a targeted run, especially after you’ve learned a boss or a region’s encounter patterns. But on a first attempt, prioritize coverage. The best general-purpose deck may not produce the most exciting turns, yet it gives you more opportunities to recover when exploration doesn’t go according to plan.
Overpriced defensive equipment
Defensive cards that consume too much of your turn without creating an advantage are also B Tier. They can save you from one hit, but if the enemy remains active and you lose the next turn recovering, the exchange may be worse than simply attacking or repositioning.
Test these cards against the full encounter rather than one attack. Ask whether the defense allows a better follow-up, protects a valuable resource, or changes the enemy’s route. If the answer is no, cut it when you find a more efficient option.
Best equipment by playstyle
There isn’t one universal Death Howl loadout, so the better question is what your deck wants each turn. An aggressive setup should favor efficient damage, short routes to finishing blows, and enough defense to survive a bad draw. Don’t overbuild for burst. If the attack misses its timing, an aggressive deck can collapse quickly.
A ranged control setup values distance, flexible targeting, and cards that let you attack without surrendering the safest tile. It should still carry a close-range answer. Players often assume that a ranged plan means every enemy must be kited forever; in practice, a clean close-range finisher is what prevents one fast enemy from ruining the plan.
A defensive scaling setup is slower but safer. It wants efficient mitigation first, then an engine that converts additional turns into damage or card advantage. The danger is becoming too passive. If you cannot end encounters, you will spend more resources navigating them and eventually run out of room to recover.
| Playstyle | Priority equipment | Common mistake | Correction |
|---|---|---|---|
| Aggressive | Reliable damage, burst finisher, emergency defense | Taking too many setup cards | Keep immediate damage available in every hand |
| Ranged control | Flexible range, repositioning, priority-target attacks | Ignoring enemies that breach distance | Carry a close-range answer and plan escape tiles |
| Defensive scaling | Efficient mitigation and repeatable damage | Playing too passively | Set a damage deadline for every encounter |
| Balanced | One reliable attack, one defense, one control option | Adding cards without removing weak ones | Trim redundancy after each upgrade opportunity |
How to build and upgrade around your best weapon
Once you find an S Tier weapon, stop treating every reward as an upgrade. The strongest deck is usually smaller and more focused than the reward screen encourages. Remove cards that are too expensive, too conditional, or redundant with a better tool. A weapon drawn frequently is more valuable than a theoretically stronger card buried under filler.
Build your early deck around a simple combat loop. You want an immediate way to damage a priority target, a way to avoid or mitigate the next dangerous attack, and a route to regain tempo after that exchange. If your chosen weapon needs a particular resource, reserve enough of that resource for the enemy’s activation rather than spending everything on the first attack.
Upgrades should improve consistency before spectacle. Better targeting, lower cost, extra range, or a defensive side benefit can outperform a modest damage increase. The right upgrade makes the weapon useful in more situations. That is particularly important for Deluxe Edition players, who may be tempted to chase bonus content instead of learning the underlying system.
For broader deckbuilding ideas, Steamoz’s guide to Soul Smugglers rewards and the breakdown of Borderlands 2’s best weapons both illustrate the same useful principle: strong equipment is defined by repeatable value, not a single highlight-reel moment.
Deluxe Edition value and final ranking advice
The official Steam listing is the place to verify the current Deluxe Edition contents before buying. Unless the publisher adds a clearly documented gameplay pack, assume the Deluxe Edition is a presentation and bonus-content upgrade rather than a separate equipment advantage. The developer’s official site and Steam announcements should also be your source for balance patches, new cards, and changes that could move an item between tiers.
My final ranking is straightforward. Put dependable damage, flexible ranged attacks, and action-efficient defense in S Tier. Put burst finishers, control tools, and scaling cards in A Tier when your deck can support their conditions. Keep slow setup equipment, narrow counters, and expensive defensive cards in B Tier until the route or your build gives them a specific job.
The best Death Howl equipment is the card you can trust on an ugly turn. It should help when the draw is awkward, the enemy is already moving, and your preferred combo is nowhere to be seen. Build around that standard and your Deluxe Edition run will feel less like chasing a perfect deck and more like mastering the Mourning Lands one dangerous encounter at a time.
If you enjoy this kind of tense, systems-heavy decision-making, our guides to Amnesia’s best survival tools and Barotrauma’s performance settings are worth bookmarking next.