
If you want to level Ro quickly and keep a healthy gold reserve in Death Howl, stop treating every encounter as a mandatory grind. The fastest route is a repeatable loop: clear short combat pockets, collect every visible reward, spend gold only on cards that support one damage engine, then return to earlier cleared areas when your deck can win without burning defensive resources. Exploration, not random battles, is where the best gains hide.
Death Howl is built around a dangerous tension. Ro grows stronger by learning the spirit world and improving her deck, but a bloated deck can make every future fight slower. That matters for farming because gold per minute is more important than gold per encounter. A twenty-minute run that ends with a failed elite fight is worse than three controlled loops that each produce modest rewards.
This guide focuses on the practical side of the game: which fights are worth repeating, how to route through a region, when to buy cards, how to protect a farming run, and how to turn level gains into a build that clears faster rather than merely surviving longer. For the latest balance changes, compare your build against the official Death Howl Steam page and its current patch notes.
The fastest leveling loop is short and repeatable
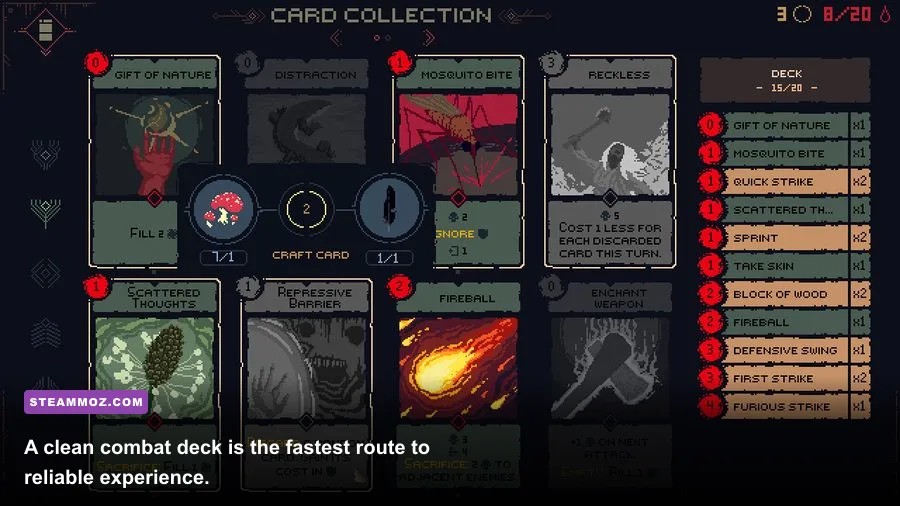
Experience in Death Howl is most efficiently earned by completing fights consistently, not by gambling on the hardest available encounter. Start from a safe checkpoint or the most recent unlocked travel point, then map a loop containing ordinary enemies, one reward branch, and a manageable final fight. Skip a long detour if it adds only a single chest but forces you to spend healing, defensive cards, or a valuable consumable.
Run the loop once without rushing. Mark three things mentally: the enemy group you defeat with the fewest turns, the branch with the most reliable reward, and the encounter that regularly damages Ro before she can establish her hand. On the next attempt, make that easy group your opener. Early victories matter because they let you test your opening hand and generate momentum before facing a more complicated enemy pattern.
The ideal farming encounter has four traits:
- It can be won with your core damage cards rather than emergency tools.
- Its enemies expose a predictable attack pattern.
- The reward appears close enough that collecting it does not create a dangerous detour.
- You finish with enough health and resources to fight the next group immediately.
Don't reset after every imperfect draw. A good farming deck should survive an average hand. If one bad draw ruins the entire route, the answer isn't more gold; it's a smaller, more focused deck and better early-game card access.
| Encounter Type | Leveling Value | Gold Value | Recommended Action |
|---|---|---|---|
| Standard spirit group | Reliable | Reliable | Farm when cleared in a few turns |
| Elite encounter | High but risky | High but inconsistent | Attempt after your main engine is online |
| Optional puzzle branch | Indirect | Often valuable | Take it when the route is safe |
| Boss arena | Large one-time gain | Large one-time gain | Prepare specifically; don't use as routine farming |
| Unexplored dead end | Low to moderate | Variable | Search once, then skip if the reward is weak |

🎮 Death Howl
Looking to experience this game? Grab your digital key directly on our store for $13.99.
View on Steammoz Store →Build Ro around one damage engine
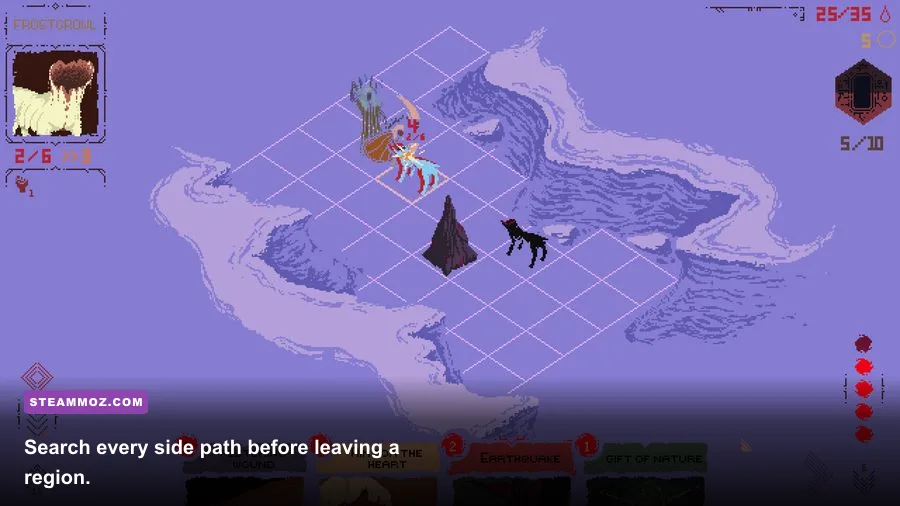
Fast leveling becomes much easier when your cards perform distinct jobs. The strongest early structure is usually a compact damage engine supported by a small amount of defense and one answer for the enemy mechanic most common in your current region. That means you shouldn't buy every attractive card. A card that looks powerful in isolation can make your best opening hands less likely to appear.
Think of the deck in three layers. Your first layer is the reliable damage package: cards you want to see in almost every fight. The second is setup, such as effects that improve a later attack, create a resource, or make the next draw more useful. The third is protection: blocking, repositioning, cleansing, or a way to interrupt a dangerous turn. If a new card doesn't strengthen one of those layers, leave it at the shop.
For farming, direct damage normally beats elaborate scaling. A slow combo may win a boss battle, but a simple attack sequence clears ordinary enemies faster and costs less health. Keep high-cost cards only when their payoff ends fights immediately or prevents a lethal enemy turn. Otherwise, they sit in your hand while cheaper cards do the actual work.
| Deck Slot | Priority | What to Look For | Farming Role |
|---|---|---|---|
| Core damage | S-Tier | Low-cost, repeatable attacks | Ends standard fights quickly |
| Setup cards | A-Tier | Draw, resource generation, or efficient scaling | Improves the second and third turns |
| Defense | A-Tier | Protection that also advances your plan | Preserves health between encounters |
| Specialist answers | B-Tier | Counter to a specific status or telegraph | Useful for elites and bosses |
| Expensive finishers | B-Tier | Large payoff with a clear setup condition | Keep one if it shortens difficult fights |
The practical rule is simple: after each shop visit, ask whether the purchase makes your average hand better. If the answer is no, bank the gold. This is especially important early, when one poor purchase can delay the card or upgrade that turns your deck from awkward to dependable.
Gold farming means spending less, not just earning more
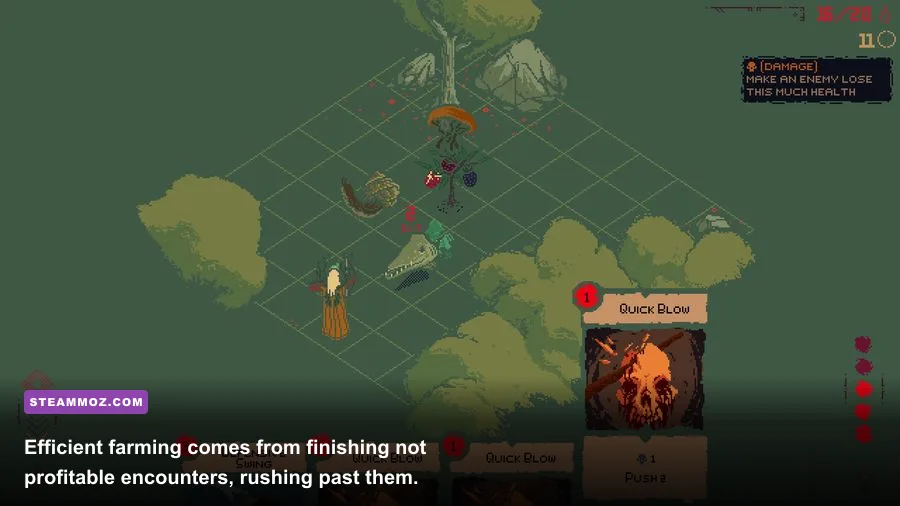
Gold is easiest to waste in Death Howl because shops make immediate power feel irresistible. A farming route should have a spending rule before you enter it. Save for a card that completes your damage plan, buy a defensive option only when your current deck cannot answer the region's threat, and avoid paying for cards that duplicate an effect you already draw consistently.
Prioritize rewards in this order: guaranteed card upgrades or build-defining cards, permanent progression that improves future runs, healing when it prevents a reset, then general-purpose cards. Cosmetic or low-impact purchases should wait until your deck clears the route comfortably. The goal is not to finish every run with zero gold. The goal is to convert gold into faster future clears.
Search the edges of each map before committing to the exit. Death Howl often places value just outside the most obvious path, and the time spent checking a side room is worthwhile when it contains a resource cache, a card reward, or a shortcut that improves later routing. However, don't repeatedly revisit a dead end after you know it contains nothing relevant. Efficient farming is built on information gathered during the first clear.
Elite encounters deserve a separate calculation. If an elite takes twice as long as a normal fight and leaves Ro damaged, its larger reward may still be worse per minute. Farm elites only when your main damage engine can execute before their escalation mechanic becomes active. This is also where a combat log or post-fight screen helps: compare actual clear time and health cost, not just the headline gold payout.
Players who enjoy optimizing economies in other games may also like Steamoz's Legend of Keepers rewards guide. The underlying lesson carries over: a reward is only valuable when it improves the next decision.
Use enemy telegraphs to protect your farming run
The biggest gold loss is a failed run, and failed runs usually begin one turn before the defeat screen. Watch the enemy intent or animation before spending your hand. If an enemy is preparing a heavy strike, don't empty every damage card simply because lethal looks close. Calculate whether the attack will still be lethal after defense, then keep enough protection to survive the worst realistic outcome.
Against groups, remove the enemy that creates pressure rather than automatically attacking the one with the lowest health. A weak enemy that applies a status effect or increases another spirit's damage can be more dangerous than a larger target. Your first turn should answer the encounter's most punishing mechanic, even if that means leaving a nearly defeated enemy alive for one extra turn.
Use a three-step combat rhythm:
- Read the turn: identify the incoming damage, status effect, summon, or escalation.
- Secure the exchange: block, interrupt, or remove the threat that can damage the run.
- Spend the remainder: use cheap damage and setup cards only after survival is guaranteed.
This approach may look slower than an all-out opener, but it produces better experience per hour because Ro arrives at the next encounter healthy. A farming run is a chain; one reckless turn breaks the chain.
| Threat Signal | Risk | Counter Priority | Common Mistake |
|---|---|---|---|
| Large incoming attack | Health loss or run reset | Defend or interrupt first | Chasing low-health targets |
| Status preparation | Several weak turns become one lethal sequence | Cleanse or remove the source | Ignoring setup because damage is available |
| Summoning animation | Board becomes harder to control | Kill or disrupt the summoner | Splitting damage across every target |
| Escalation phase | Elite becomes inefficient to farm | Use the finisher immediately | Saving the best card for a perfect hand |
For more turn-by-turn discipline, Steamoz's Blackguards 2 campaign tips are worth a look. Different combat systems, same principle: protect the next turn instead of celebrating the current one.
When to stop farming and push the story
Don't overlevel just because a familiar route feels safe. Once Ro clears ordinary encounters without spending emergency resources, the next meaningful upgrade usually comes from advancing into a new area, unlocking stronger rewards, or learning the mechanic that your current zone cannot teach. Farming should remove a progression problem, not become the progression itself.
A good checkpoint for pushing forward is a deck that can do three things: produce damage from the first hand, survive one bad draw, and answer the main status or attack pattern of the next region. If you have those pieces, enter the new area with your gold intact. New shops and rewards are more valuable than squeezing another small payout from old fights.
Boss preparation is different from gold farming. Remove narrow cards that work only against ordinary enemies, add the defensive answer required by the boss's telegraph, and keep your strongest finisher available for the phase where the encounter escalates. Don't spend your entire reserve immediately before the arena unless the purchase directly solves the boss mechanic.
| Progression Check | Ready to Advance? | Why It Matters |
|---|---|---|
| Standard fights are consistent | Yes | Your route no longer depends on perfect draws |
| Health survives a full loop | Yes | You can explore without forcing a reset |
| Deck contains several situational cards | No | Trim before buying more options |
| Elite wins require emergency resources | No | Return after a build-defining upgrade |
| Next region's mechanic is understood | Yes | Preparation beats raw level grinding |
Settings and habits that improve gold per hour
Performance matters more than many players expect in a route-based game. Keep the frame rate stable enough that card animations, enemy telegraphs, and input timing remain readable. On a mid-range PC, start with a capped frame rate, medium shadows, high texture quality, and reduced post-processing. Shadows and effects usually cost more performance than textures, while excessive motion blur makes attack cues harder to read.
Use the game's fastest reliable transition method between cleared areas, but don't skip reward collection. Turn off distracting overlays only if they obscure combat information, and keep damage numbers enabled while learning a new encounter. Once your route is memorized, faster menu navigation and fewer shop visits will save more time than chasing a tiny graphics gain.
| Setting | Recommended Value | FPS Impact | Visual Note |
|---|---|---|---|
| Textures | High if VRAM allows | Low to moderate | Preserves environment detail |
| Shadows | Medium | Moderate to high | Good performance gain with limited clarity loss |
| Effects | Medium | Moderate | Reduces visual clutter during crowded fights |
| Post-processing | Low or medium | Moderate | Keeps telegraphs easier to read |
| Motion blur | Off | Minimal | Sharper card and enemy animations |
If you're troubleshooting performance in another atmospheric PC game, Steamoz's Ankora: Lost Days settings guide offers a useful comparison. Stable presentation helps optimization, but don't sacrifice the visual cues that tell you when an enemy is about to act.
The farming blueprint to use on every run
Begin each run by choosing a compact route rather than the longest unexplored path. Clear the first safe encounter with your cheapest reliable cards, inspect side branches, and record which rewards are actually worth the detour. At the first shop, buy only a card that improves your core damage, draw consistency, or survival against the region's defining threat.
After that purchase, repeat the route until ordinary fights feel automatic. Leave elites alone if they require healing or a perfect opening hand. When your deck clears the loop while preserving health and defensive resources, push the story instead of hoarding experience. Spend the next gold spike on a build-defining upgrade, not five mediocre additions.
The winning mindset is controlled repetition. Death Howl rewards players who learn how a region behaves, reduce their deck to its strongest ideas, and turn each encounter into a predictable exchange. Farm the route that you can finish cleanly, protect Ro from greedy turns, and let better deck quality—not endless grinding—do the heavy lifting.
For another perspective on choosing upgrades rather than blindly collecting them, see Steamoz's Cossacks 3 upgrade rankings and Atomic Heart beginner build guide. The games differ, but efficient progression always comes down to the same question: does this decision make the next fight faster, safer, or both?
Finally, check the developer's official site and the Steam listing after major updates. Balance changes can alter reward values, card costs, enemy patterns, and the best farming route. The loop above remains durable because it is built around efficiency: focused decks, safe clears, selective spending, and pushing forward as soon as the next area offers more value than another old patrol.