The best Assassin’s Creed Origins starting build for beginners is a Warrior-Hunter hybrid: unlock Weapon Bearer, Overpower, Regeneration, Hunter’s Instinct, and Predator Bow first, then add Shield Charge and Chain Assassination. This setup gives Bayek a dependable sword-and-shield core, lethal ranged openings, stronger stealth, and enough healing to survive mistakes without forcing you to commit to one playstyle.
Origins is much more demanding than the older Assassin’s Creed games. Enemies have levels, shields matter, weapons have different movesets, and a careless assassination can leave Bayek in a full melee fight. The answer isn’t grinding every side quest before touching the story. It’s building a character who can scout an area, remove one or two targets silently, and still win when the alarm goes up.
Build the Warrior-Hunter foundation first
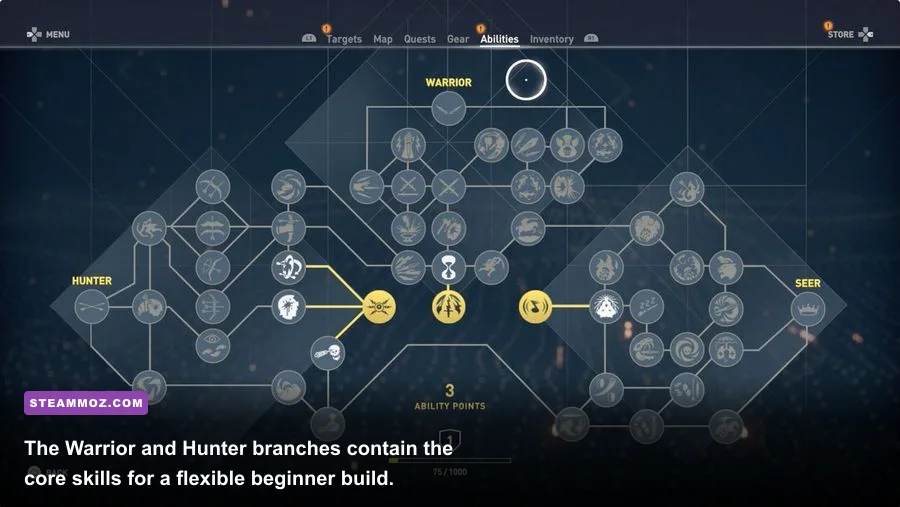
Bayek’s skill tree has three branches: Warrior, Hunter, and Seer. For a first playthrough, Warrior-Hunter is the strongest starting route because it improves the two things beginners use constantly: surviving close combat and landing reliable ranged damage. The Seer branch is useful, especially for Sleep Darts and Smoke Screen, but it becomes more valuable after your basic combat loop is already working.
Spend your first ability points on Weapon Bearer in the Warrior branch. It lets Bayek carry a second melee weapon and switch between them, which is more important than it sounds. Keep a fast sword or regular sword equipped for normal soldiers, then carry a heavy blade or blunt weapon for shielded enemies and armored targets. You’ll stop wasting time trying to force one weapon into every matchup.
Next, take Overpower. Bayek’s adrenaline meter fills as he deals and receives damage, and Overpower converts that meter into a powerful special attack. With a sword, it can delete a regular enemy’s health bar; with a heavy weapon, it becomes an excellent answer to an elite guard who has already been softened by arrows. Don’t fire it the instant it becomes available. Save it for a captain, a shielded enemy, or the moment a crowded fight starts turning ugly.
Regeneration is the next priority. It doesn’t make Bayek immortal, but it lets him recover health during combat instead of treating every mistake as a trip to the inventory menu. That passive healing is especially valuable while learning enemy animations, because Origins punishes panic dodges and missed parries far more harshly than its stealth sections do.
On the Hunter side, unlock Hunter’s Instinct and then work toward Predator Bow. Hunter’s Instinct improves Senu’s scouting information, while Predator Bow gives you direct control over an arrow after it’s fired. That controlled projectile is ideal for captains, alarm-bearers, and enemies positioned behind partial cover. It also makes headshots practical at longer distances rather than leaving you to guess the arc.
| Priority | Skill | Why it matters | Best early use |
|---|---|---|---|
| 1 | Weapon Bearer | Unlocks a second melee weapon slot | Switch between fast and heavy weapons |
| 2 | Overpower | Turns adrenaline into burst damage | Captains, elites, and emergency kills |
| 3 | Regeneration | Restores health during combat | Recovering after a missed dodge or parry |
| 4 | Hunter’s Instinct | Improves Senu’s scouting utility | Marking guards and identifying objectives |
| 5 | Predator Bow | Allows guided arrows | Long-range headshots and alarm-bearers |
| 6 | Shield Charge | Adds a strong shield-based opener | Stunning shielded or clustered enemies |
After those five core skills, buy Shield Charge. It’s not the flashiest ability in Origins, but it gives beginners a controlled way to start a fight. Hold the shield button to charge, release it near an enemy, and Bayek can stagger the target long enough for a heavy strike or quick combo. It’s particularly useful against enemies who turtle behind shields and refuse to expose their bodies.
For a broader look at how Steamoz approaches beginner-friendly RPG progression, compare this route with our Ankora: Lost Days starting build and the bruiser-focused approach in Dragonkin: The Banished.

🎮 Assassin's Creed Origins
Looking to experience this game? Grab your digital key directly on our store for $8.99.
View on Steammoz Store →Use the right weapons for every enemy type

Don’t judge an Origins weapon only by its damage number. The moveset, speed, reach, and special perk can matter more than a small level difference. A regular sword is the safest beginner weapon because it has quick recovery, reliable light attacks, and enough reach for most human enemies. A sickle sword is similarly comfortable, while dual swords produce aggressive damage but leave less room for defensive mistakes.
Keep a heavy blade or heavy blunt weapon in the second melee slot. Heavy weapons swing slowly, but they stagger enemies, break through guards, and punish exposed targets. Use them after a dodge, following Shield Charge, or when an enemy has just completed a long attack animation. Don’t mash light attacks with a heavy weapon; its value comes from deliberate, high-impact hits.
Shields aren’t optional equipment in this build. A shield can block arrows, interrupt certain attacks, and give you a safe moment to read a group’s formation. Against several soldiers, hold block while circling, wait for the first enemy to commit, then parry or dodge rather than immediately attacking. A successful parry creates the opening for a short sword combo, but blocking is the safer default until you learn each enemy’s timing.
Your two bow slots should eventually cover different ranges. A Hunter Bow is the general-purpose option for charged headshots and medium-distance kills. The Predator Bow is for precision work: captains, alarm mechanisms, explosive jars, and targets tucked behind cover. A Warrior Bow fires a spread of arrows and works well at close range, but it burns ammunition quickly and is less forgiving when you’re trying to land one important shot.
| Slot | Recommended weapon | Strength | Beginner warning |
|---|---|---|---|
| Main melee | Regular Sword or Sickle Sword | Fast attacks and easy recovery | Don’t attack into an active shield guard |
| Second melee | Heavy Blade or Heavy Blunt | Stagger power and high burst damage | Slow recovery leaves you open if mistimed |
| Bow 1 | Hunter Bow | Reliable charged headshots | Requires aiming for maximum damage |
| Bow 2 | Predator Bow | Guided precision arrows | Limited arrows make wasteful shots costly |
| Shield | Level-appropriate shield | Blocks arrows and stabilizes melee fights | Blocking is not a replacement for dodging heavy attacks |
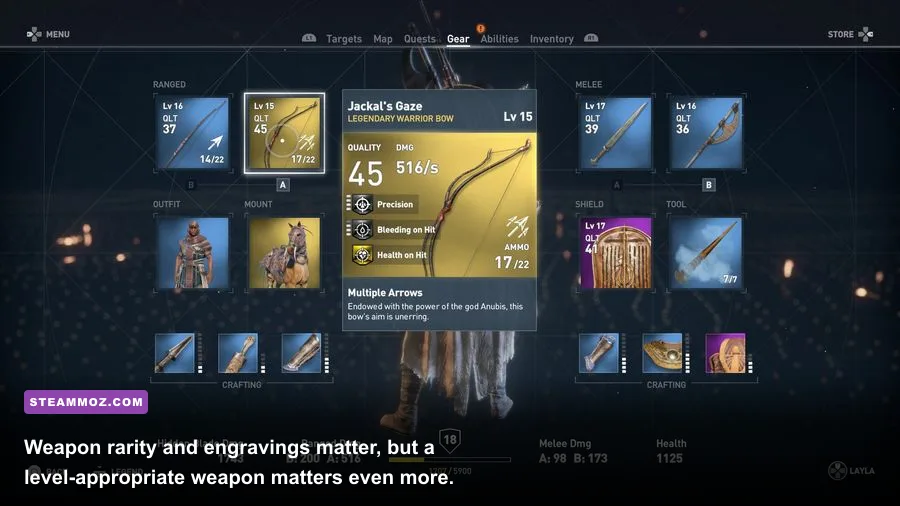
Loot constantly, but don’t obsess over legendary gear during the opening hours. A level-appropriate blue weapon often performs better than an old purple weapon that is five or six levels behind Bayek. Upgrade the hidden blade, breastplate, quiver, and bracer at a blacksmith whenever you have enough resources. The hidden blade upgrade is especially important: if an assassination leaves an enemy alive, the entire outpost can become a messy brawl.
For more equipment-management habits, our Dungeons 4 beginner build guide covers the same useful principle: spend early resources on upgrades that improve every encounter rather than chasing flashy endgame options.
Follow this combat rotation when stealth breaks
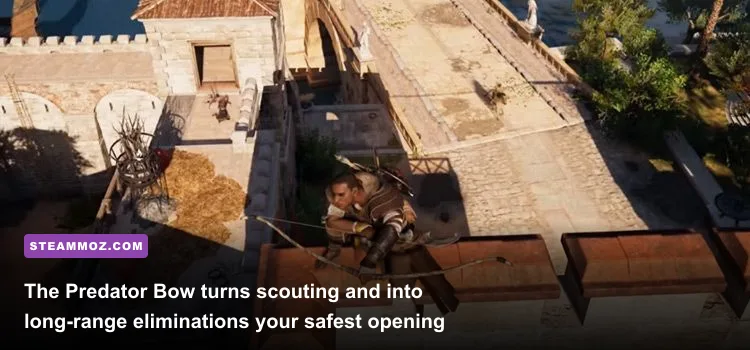
Origins combat becomes much easier when you stop treating it like a button-mashing duel. Start every encounter by locking onto the most dangerous enemy, usually a captain or an elite soldier. Use a charged Hunter Bow headshot if the target is exposed. If the enemy is too far away or behind cover, switch to the Predator Bow and guide the arrow into the head or the alarm-bearer’s torso.
- Scout first: use Senu to tag captains, elites, loot, objectives, and alarm bells.
- Remove the alarm threat: kill or isolate the guard who can summon reinforcements.
- Open at range: fire a charged Hunter Bow shot or a guided Predator Bow arrow.
- Enter with control: use Shield Charge against a shielded target or clustered enemies.
- Use short combos: land two or three light attacks, then dodge away instead of chasing damage.
- Spend adrenaline deliberately: trigger Overpower on an elite, captain, or packed group.
- Reset the fight: break line of sight, heal through Regeneration, and return to stealth when possible.
The most important defensive lesson is that the dodge has two purposes. A quick tap moves Bayek out of danger, while repeated dodges can carry him through a wide attack pattern. Don’t dodge backward automatically; sideways movement often keeps you close enough to punish a whiffed strike. Heavy enemies telegraph their swings with a broad wind-up, while spearmen and shielded soldiers often punish frontal attacks with a quick counter. Watch the weapon, not Bayek’s animation.
Parrying is powerful but not mandatory. Hold the shield button as an enemy attack lands to absorb or deflect the hit, then answer with a fast combo. Against groups, however, parrying one soldier can leave you exposed to another. Blocking, circling, and waiting for a clean opening is a perfectly valid beginner strategy. If you see a red attack indicator, dodge rather than trying to parry; those attacks generally demand movement and can break through a stationary defense.
Use Overpower when the adrenaline meter is full and the battlefield gives you space. It’s tempting to spend it on the first normal soldier, but that wastes the build’s strongest burst tool. A better sequence is Predator Bow into Shield Charge, two light attacks, then Overpower when the elite is staggered. Against bosses and Phylakes, save it for a recovery window rather than activating it into an incoming red attack.
| Threat | Telegraph | Counter | Best tool |
|---|---|---|---|
| Shielded soldier | Shield raised and body turned away | Circle behind, use Shield Charge, or heavy attack | Sickle Sword plus Shield Charge |
| Heavy enemy | Long wind-up and wide swing | Dodge sideways, then punish recovery | Heavy Blade or Overpower |
| Spearman | Quick forward thrust | Stay mobile and avoid predictable frontal attacks | Hunter Bow or short sword combo |
| Archer | Drawn bow and distance indicator | Break line of sight or rush from cover | Predator Bow or shield block |
| Elite captain | Higher armor and red attack cues | Soften with arrows, then use Overpower | Predator Bow plus Overpower |
Spend ability points without ruining the build
Once the core route is complete, move toward Chain Assassination in the Hunter branch. It turns a successful assassination into a second silent kill and is excellent for thinning camps before combat begins. Pair it with Senu’s marking: identify two low-level guards near each other, assassinate the first, and let Bayek’s follow-up eliminate the second before either can raise an alarm.
Sleep Darts and Smoke Screen are the best Seer additions for players who prefer infiltration. Sleep Darts can neutralize a guard long enough to loot, hide a body, or set up a second assassination. Smoke Screen creates breathing room during a failed stealth attempt, but don’t waste it as a panic button when a normal dodge would work. It’s most valuable when multiple enemies have surrounded Bayek or when you need to disappear from a high-level patrol.
Buy Bow Bearer if you’re using archery constantly, then consider Elite Ranger for a bow-focused variant. The Hunter branch also contains assassination upgrades that increase your ability to remove targets before the fight starts. If you’re struggling in direct combat, return to Warrior and pick up additional adrenaline or weapon-focused skills before chasing advanced stealth perks.
Skill points aren’t permanently locked into bad decisions. Origins lets you reset abilities and reclaim points, so experiment. A player who begins with Warrior skills can later switch toward a stealth-heavy setup for an infiltration mission. The key is not wasting points on scattered one-off abilities before your main loop is online.
| Playstyle | Next skill targets | Gear priority | Combat identity |
|---|---|---|---|
| Balanced beginner | Chain Assassination, Bow Bearer | Health, melee damage, ranged damage | Scout, soften, then fight safely |
| Stealth specialist | Sleep Darts, Smoke Screen, assassination upgrades | Hidden blade and ranged damage | End camps before alarms begin |
| Melee bruiser | Adrenaline upgrades, heavy-weapon skills | Health, melee resistance, adrenaline | Break guards and win prolonged fights |
| Archer | Elite Ranger and Predator Bow upgrades | Ranged damage, critical chance, quiver | Control encounters from distance |
For additional progression-minded tips, check Steamoz’s Bounty Train survival tips. The games are very different, but both reward spending early upgrades on consistency rather than gambling everything on a specialized strategy.
Upgrade gear, crafting, and stealth in the right order
Crafting materials come from hunting animals, dismantling unwanted gear, and completing activities across Egypt. Your early priority should be the hidden blade, because a failed assassination is the fastest way to turn a clean infiltration into a level-disadvantaged fight. After that, improve the breastplate for health and the quiver so your Predator and Hunter Bow ammunition lasts through a full outpost.
The bracer improves melee damage, while the tool pouch increases the number of tools Bayek can carry. Neither should be ignored, but the hidden blade and breastplate create the biggest early jump in reliability. If you’re regularly running out of arrows, move the quiver ahead of the bracer. If you’re winning stealthily but losing open fights, upgrade the breastplate and bracer together.
Engravings add another layer to the build. Prioritize health, melee damage, ranged damage, critical hit chance, and adrenaline regeneration. A weapon with a useful perk and a level close to Bayek’s is usually better than an old legendary item. Avoid cursed weapons early. They can deal dramatically higher damage, but they also slash Bayek’s health and leave almost no margin for a missed dodge or surprise archer.
Don’t ignore the mount stable. A camel is slower but sturdy, while horses move faster on roads. Either can make travel between objectives less tedious, and mounted combat can help you pick off exposed enemies before dismounting. At an outpost, though, park outside the detection area. Riding directly through a guarded entrance is funny once; it’s not a reliable build strategy.
Always check enemy levels before accepting a side quest or wandering into a new region. A red-level enemy can absorb an assassination, shrug off arrows, and kill Bayek in a few hits. The game encourages exploration, but the level system is telling you when to return later. If a mission is more than two levels above Bayek, clear nearby locations, hunt animals for crafting materials, or complete a lower-level side quest first.
Use Senu to turn every outpost into a puzzle
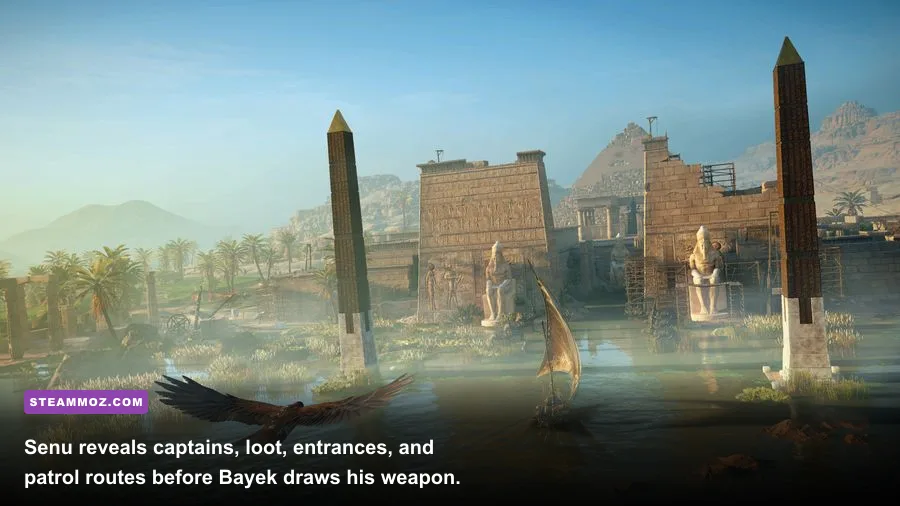
Senu is the hidden engine of this beginner build. Before entering an enemy camp, fly above it and mark every visible guard. Look specifically for the captain, the commander, the alarm-bearer, loot chests, and cages containing prisoners or animals. Senu can also reveal entrances and useful elevation changes, allowing you to choose whether the camp is best approached from a roof, cliff, river, or rear gate.
Start with the alarm system. If a guard is carrying an alarm bell or can reach one quickly, remove that threat before assassinating ordinary soldiers. Killing three enemies silently means very little if a survivor rings the alarm and summons higher-level reinforcements. When possible, sabotage the alarm route by moving bodies away from the bell and closing the distance between Bayek and the remaining guards.
Use the environment as part of the build. Tall grass lets you chain assassinations, rooftops provide clean Predator Bow angles, and fire jars can damage groups or create temporary area denial. Don’t shoot explosive containers just because they’re nearby; the sound and fire can expose Bayek before he’s ready. Save them for a group that has already entered combat or for a captain positioned beside several guards.
For official background on the game’s systems and updates, visit the Assassin’s Creed Origins Steam page, browse Ubisoft’s official Origins page, and check the official support hub for platform-specific fixes. If you’re also tuning other PC games, Steamoz’s guide to higher FPS in Back 4 Blood is a useful companion read.
The final version of this build is deliberately flexible. Keep a fast sword and a heavy weapon, carry a Hunter Bow and Predator Bow, use Senu before every serious engagement, and spend adrenaline on the dangerous target rather than the nearest target. With Weapon Bearer, Overpower, Regeneration, Hunter’s Instinct, Predator Bow, Shield Charge, and Chain Assassination online, Bayek can approach nearly every early-game mission on his own terms. That’s exactly what a beginner build should do: make mistakes survivable while still leaving room to grow into the playstyle you enjoy.