The fastest way to survive Bounty Train is to treat every trip as a logistics problem, not a straight race. Keep fuel and spare parts ahead of your next leg, recruit a compact crew with complementary roles, accept contracts that fit your route, and never let a profitable delivery leave you too damaged to continue. These 10 tips will make your first campaign far less punishing.
Bounty Train on Steam looks like a railroad adventure, but its real challenge is balancing fuel, cargo, repairs, crew health, combat readiness, and deadlines. The game is at its best when a simple delivery turns into a tense calculation: do you detour for supplies, pay for repairs, or risk one more hostile encounter?
1. Learn What Your Train Can Actually Carry
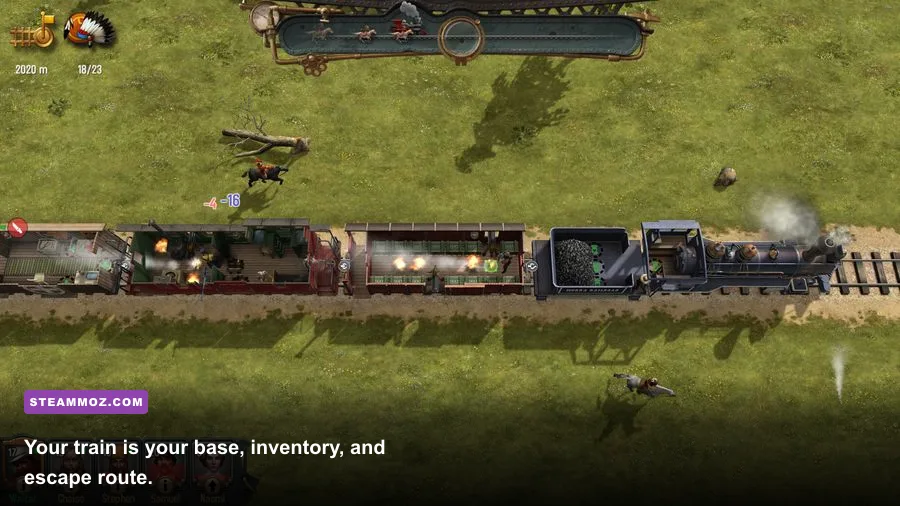
Your locomotive and cars are not just cosmetic purchases. They define your campaign’s economy. A train with more cargo capacity can earn more from contracts, but extra cars also increase operating costs and make a poorly maintained convoy harder to rescue. Early on, avoid buying every attractive upgrade. A smaller train with reliable performance is much safer than a bloated consist that constantly runs short of fuel.
Before accepting a job, inspect the cargo requirement, destination, payment, deadline, and likely route danger. Then compare those demands with your current fuel, durability, storage, and repair supplies. The reward shown on a contract is not your real profit if the trip forces you to buy emergency fuel or repair an expensive locomotive afterward.
| Train Priority | Why It Matters | Early-Campaign Advice |
|---|---|---|
| Fuel capacity | Determines how many route legs you can survive | Keep a reserve instead of spending every dollar on cargo space |
| Durability | Protects the run after hazards and attacks | Repair before long routes, not after the damage becomes critical |
| Cargo capacity | Raises income from delivery contracts | Add cars only when your cash flow can support them |
| Speed | Helps with deadlines and reduces exposure on some routes | Prioritize it when timed missions become common |

🎮 Bounty Train
Looking to experience this game? Grab your digital key directly on our store for $0.99.
View on Steammoz Store →2. Build a Fuel-and-Repair Buffer Before Leaving

Running out of fuel is one of the most avoidable ways to lose momentum in Bounty Train. The map may make a destination look close, but encounters, detours, and station choices can stretch a trip. Never spend down to the last portion of your budget before departure. Set aside money for fuel, repairs, and at least one emergency purchase.
The same rule applies to train durability. A damaged locomotive can still move, which makes it tempting to postpone maintenance. That decision becomes expensive when a random event or bandit fight pushes the train into a worse condition. Repairing in a safe town is usually cheaper than trying to recover from a breakdown while carrying time-sensitive cargo.
A useful habit is to create a “return budget.” If a contract pays well enough to cover the outward journey but leaves nothing for the trip home, it is not a good contract yet. Sell excess cargo, complete a shorter job, or visit a station with better supplies first.
3. Hire a Small Crew With Clear Jobs

More crew members do not automatically mean a stronger train. Every recruit adds wages and consumes resources, while an oversized roster can dilute your upgrades. Early campaigns work better with a compact team whose combat and utility roles overlap.
Look at each character’s attributes and special abilities rather than hiring purely for their name or appearance. You want at least one dependable damage dealer, one character who can handle support or repairs, and enough ranged capability to punish enemies before they reach your cars. A crew member with strong combat statistics but poor survivability may still be useful if positioned behind tougher allies.
Keep your best people in the safest positions during an ambush. Enemies can turn a vulnerable character into a liability quickly, especially when that character carries an important weapon or has a valuable ability. If a recruit’s wages are draining your cash and they are rarely contributing, dismissing them is better than protecting a bad investment for sentimental reasons.
| Role | Useful Strength | Best Use | Common Mistake |
|---|---|---|---|
| Front-line fighter | Health and close-range damage | Holding attackers away from fragile allies | Sending them forward without support |
| Ranged attacker | Damage before enemies close in | Focusing dangerous targets from cover | Leaving them exposed on the edge of a car |
| Support specialist | Healing, utility, or repairs | Keeping the group effective during long encounters | Treating them like a primary damage dealer |
| Generalist | Flexible statistics | Filling gaps while the roster is small | Upgrading them in every direction at once |
| Contract Type | Take It When | Reject or Delay When |
|---|---|---|
| Short local delivery | You need cash, supplies, or reputation quickly | The cargo blocks a more profitable timed job |
| Long-distance delivery | Your fuel, durability, and repair budget are healthy | You cannot afford the return journey |
| Timed contract | Your locomotive has enough speed and a direct route | Several detours or repairs are unavoidable |
| Combat-heavy objective | Your crew has ammunition, healing, and useful positioning | Key fighters are injured or under-equipped |
7. Treat Stations as Planning Hubs
Stations are more than loading screens between encounters. They are where you turn a fragile run into a sustainable one. Check shops, available contracts, recruitment options, repairs, and fuel before committing to the next destination. Prices and opportunities can vary, so do not automatically buy the first item you see.
Use safe stops to reset your priorities. Repair the locomotive, refill essential supplies, and sell low-value cargo before taking on another dangerous route. If you have injured crew members, consider delaying an ambitious mission rather than letting weakened characters enter combat. The campaign is a sequence of small advantages; a single efficient station visit can improve the next three trips.
8. Save Before Risky Decisions and Learn the Event System
Random events are part of Bounty Train’s tension, but they are also lessons. Save before a major departure or expensive purchase, then pay attention to what the event is testing: cash, supplies, crew traits, cargo, or combat readiness. Reloading every surprise removes some of the game’s character, but using saves to understand systems and avoid a completely doomed run is sensible while learning.
Read event choices instead of clicking the option with the biggest immediate reward. A decision that earns money can cost durability or health, while a cautious choice may preserve the resources needed for a better contract. Record which routes repeatedly create trouble and plan around that information. Your first campaign should teach you the map’s rhythm, not just chase a perfect result.
9. Upgrade the Train Before Chasing Luxury
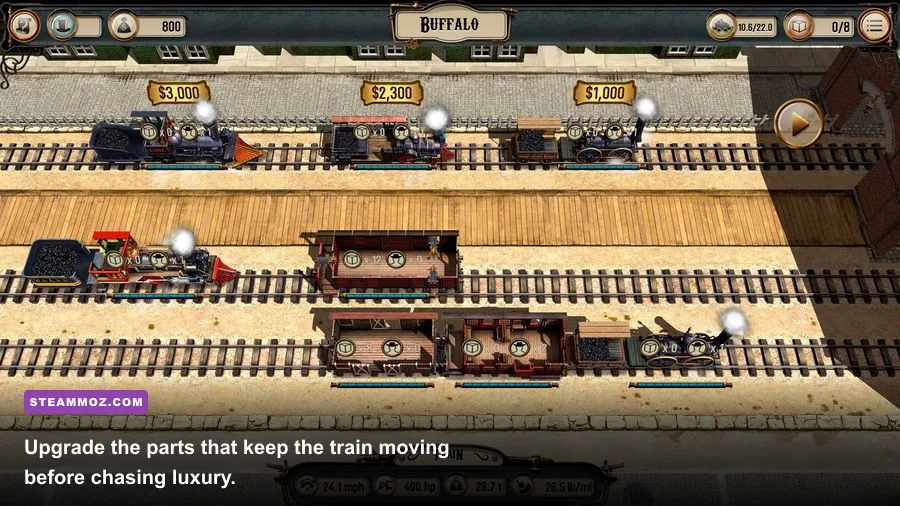
Upgrade priorities should follow the problems actually ending your runs. If fuel is the constant bottleneck, increase capacity or efficiency. If combat damage keeps forcing expensive repairs, strengthen the crew and improve weapons before buying decorative or marginal train upgrades. If deadlines are failing, speed becomes more valuable than extra cargo.
There is no universal best locomotive because your campaign economy determines the correct choice. A faster train with limited carrying capacity suits a contract-focused strategy, while a larger cargo setup can work when you have reliable routes and enough money to feed it. Check the numbers after every purchase and ask whether the upgrade improves income, survival, or both.
For technical stability, the game’s relatively modest visual demands mean performance problems are more likely to come from drivers, background applications, or unusual display settings than from cutting every visual option. If you encounter crashes or low frame rates, our guide to PC fixes for crashes and low FPS is a useful troubleshooting companion.
10. Know When to Abandon a Bad Run
Experienced players do not protect every campaign forever. If the locomotive is badly damaged, the crew is injured, the treasury is empty, and the next contract requires a long hostile route, continuing may only deepen the hole. Retreat to a nearby station when possible, sell nonessential cargo, and rebuild around a simpler route.
When a run is genuinely unrecoverable, restart with the knowledge you gained. Your next attempt should be faster because you already understand which contracts are bait, which crew roles overlap, and how much fuel a route really consumes. That learning curve is the heart of Bounty Train.
A Safer First-Campaign Route
Start with short deliveries near your opening stations, keeping enough cash for fuel and repairs. Recruit only the crew members who solve an immediate problem, then equip one reliable ranged attacker and one front-line fighter. Stack contracts in the same direction, stop for maintenance before the train becomes critical, and postpone long-distance jobs until your locomotive and supplies can support them.
For more resource-focused strategy, compare these ideas with Steamoz’s gold farming and fast-leveling tips or the route-planning lessons in our Generation Zero survival guide. Bounty Train rewards the same mindset: prepare before danger appears, spend with a purpose, and never confuse a large payout with a profitable trip.
You can also check the official Steam listing, the Corbie Games website, and the game’s Steam Community discussions for patch information and player-tested route advice. Master the logistics, and the wild west becomes much less interested in robbing you blind.