If Gone Viral is crashing, freezing between runs, or dropping below a playable frame rate, start with three changes: verify the Steam installation, use the 1080p performance profile below, and disable overlays before launching again. Most low-FPS problems come from shadows, effects, resolution scaling, or shader compilation rather than the game's core combat. Crashes are more often tied to damaged files, outdated GPU drivers, overlays, permissions, or unstable overclocks.
Gone Viral is a particularly good stress test for a gaming PC because its first-person roguelite arenas can fill the screen with enemies, projectiles, pickups, explosions, and environmental effects at once. A computer that looks perfectly comfortable in a quiet corridor may still hitch when a full horde reaches the arena. The goal isn't simply to chase the highest average FPS; it is to keep frame times consistent when the action gets ridiculous.
Before changing anything, check the current Gone Viral Steam listing for the developer's latest system requirements and patch notes. Early-access and frequently updated games can change their recommended hardware or graphics options, so treat the store page as the final word on compatibility.
Start With This Gone Viral Performance Profile
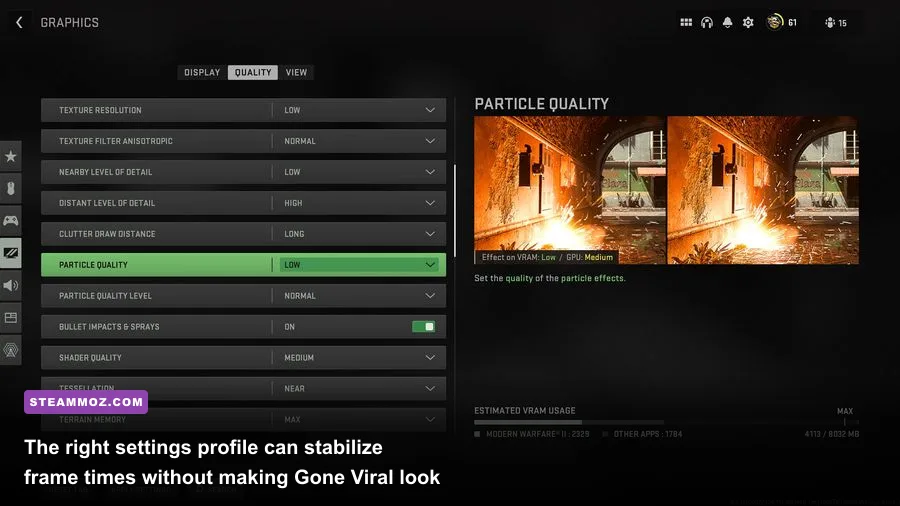
Use the following profile as a clean baseline at 1920x1080. It is aimed at a mid-range PC with a six-core processor, 16GB of memory, and a graphics card around the GTX 1660, RTX 2060, RX 5600 XT, or better. If your system is closer to the game's minimum specification, keep the same priorities but reduce resolution or use a lower render scale first.
| Setting | Recommended Value | FPS Impact | Visual Note |
|---|---|---|---|
| Display Mode | Fullscreen | Low | Usually gives Windows less opportunity to interrupt frame delivery. |
| Resolution | 1920x1080 | High | Drop to 1600x900 before lowering every quality option. |
| Frame Limit | 60 or 90 FPS | Improves consistency | Set the cap near your monitor's stable refresh rate. |
| V-Sync | Off initially | Variable | Use it only if tearing bothers you and frame pacing remains stable. |
| View Distance | Medium or High | Medium | Keep this higher than shadows because it preserves arena readability. |
| Shadows | Low | High | One of the safest settings to reduce during crowded encounters. |
| Effects | Medium | High | Lower it if explosions and enemy waves cause the biggest drops. |
| Post Processing | Low | Medium | Reduces bloom, blur, and other image effects with modest visual cost. |
| Anti-Aliasing | Medium | Low to Medium | Lower only after testing resolution and shadows. |
| Motion Blur | Off | Small | Sharper movement makes fast first-person aiming easier. |
There is a useful rule here: lower a setting that affects many objects before lowering one that affects the entire image. Shadows and effects can be recalculated across a busy arena, while reducing resolution makes every surface softer. If you are GPU-limited, try 90 percent render scale or 1600x900. If you are CPU-limited, lowering resolution may barely help because the processor is still simulating enemies and combat logic at the same rate.
Cap the frame rate rather than leaving it unlimited. A steady 60 FPS usually feels better than a range that swings from 110 to 48 whenever an arena fills up. On a 120Hz or 144Hz monitor, try a 90 FPS cap first. If the game cannot hold that number during heavy fights, use 72 or 60 instead. Avoid setting a cap your hardware can only reach in empty rooms.

🎮 Gone Viral
Looking to experience this game? Grab your digital key directly on our store for $3.99.
View on Steammoz Store →Why Gone Viral Drops FPS During Horde Fights
Gone Viral's worst performance moments are normally connected to scene complexity, not ordinary movement. When several enemies, hit effects, projectile trails, pickups, lighting changes, and destruction effects overlap, the GPU must render far more transparent and dynamic material work. At the same time, the CPU is tracking enemy navigation, collision, attacks, and spawning. That creates two very different kinds of slowdown.
Tell a GPU bottleneck from a CPU bottleneck
Install or open a performance overlay such as the one provided by your GPU software. Watch GPU usage, CPU thread usage, VRAM, RAM, FPS, and the frametime graph during a repeatable section. A GPU stuck around 95-99 percent while FPS falls means the graphics card is the limit. Lower resolution, render scale, shadows, effects, and anti-aliasing in that order.
If GPU usage drops while one or two CPU threads spike, lowering resolution will not solve the problem. Reduce view distance, effects, enemy-density-heavy visual options if available, and background applications. A frame-time spike that occurs only once while entering a new area may be shader compilation. A repeating spike every time an attack or effect appears suggests an asset, driver, or game-side stutter problem.
| Symptom | Likely Cause | First Test | Best Fix |
|---|---|---|---|
| GPU at 99%, low FPS | Resolution or visual quality limit | Lower render scale to 90% | Reduce shadows, effects, and resolution. |
| GPU below 80%, one CPU core busy | Simulation or background process | Close browsers and overlays | Use a frame cap and reduce CPU-heavy view distance. |
| Short hitch when a new effect appears | Shader compilation | Repeat the same route | Update drivers and allow the shader cache to rebuild. |
| FPS is high but feels uneven | Bad frame pacing | Check frametime graph | Use one frame limiter and test V-Sync or VRR. |
| VRAM fills before a crash | Texture or driver memory issue | Lower textures and restart | Remove texture mods and update the driver. |
Do not confuse input latency with low FPS. Motion blur can make aiming feel smeared, while V-Sync can add a noticeable delay if the computer misses its refresh target. For competitive-feeling mouse control, start with fullscreen, motion blur off, V-Sync off, and a stable cap. If you use G-Sync or FreeSync, enable variable refresh in the monitor and driver, then cap the game a few frames below the panel's maximum refresh rate.
Also watch temperatures. A laptop or compact desktop may run Gone Viral smoothly for ten minutes and then throttle after the CPU or GPU reaches its thermal limit. If clocks fall at the exact moment FPS collapses, clean the vents, raise the laptop's rear edge, select the manufacturer's performance mode, and avoid playing on a soft surface.
Fix Gone Viral Crashes Before Reinstalling
Reinstalling is rarely the best first move. Work through these steps in order, launching the game after each major change so you know which fix helped.
1. Verify the Steam files
Open Steam, right-click Gone Viral in your library, choose Properties, open Installed Files, and select Verify integrity of game files. Steam will replace missing or corrupted files without deleting your save data. This is especially useful after a patch, interrupted download, or sudden power loss.
2. Remove overlays and injectors
Temporarily disable Steam Overlay, Discord Overlay, Xbox Game Bar, GeForce Experience or AMD overlay features, MSI Afterburner and RivaTuner's on-screen display, ReShade, and recording tools. Overlay hooks can collide with a rendering update even when they worked perfectly in another game. Test with every overlay closed, not merely hidden.
3. Perform a clean GPU driver test
Update your NVIDIA, AMD, or Intel graphics driver from the manufacturer's official support page. If the crash began immediately after a driver update, use the previous stable driver instead. A clean installation is worth trying when ordinary updating does nothing, but save it for persistent problems: remove the driver in Safe Mode with a trusted display-driver cleanup utility, reboot, and install only the graphics driver and essential control panel components.
The NVIDIA driver download page and AMD's official driver support page are safer than third-party driver sites. Intel Arc users should use Intel's Download Center.
4. Reset launch options and configuration files
Remove old Steam launch options, particularly ones copied from another Unreal Engine game. Arguments that force a renderer, alter shader compilation, or disable features can turn a minor patch incompatibility into a startup crash. If the game crashes before reaching its menus, back up its save directory, then rename its configuration folder rather than deleting it. The next launch should create fresh settings files.
Do not delete saves blindly. User configuration and save locations can vary by build, so check the game's Steam Cloud status and the developer's support notes first. If Steam Cloud restores a broken configuration repeatedly, temporarily disable synchronization, create a clean local configuration, then re-enable it after confirming the game launches.
5. Test permissions, security software, and Windows components
Run Steam normally first; administrator mode is not a universal crash fix and can create permission mismatches. If antivirus software quarantined an executable or DLL, restore it only after confirming the file belongs to the official Steam installation. Add the game's folder as an exception only when you understand the security trade-off.
Install pending Windows updates, update motherboard chipset drivers, and repair Microsoft Visual C++ Redistributables if the crash message mentions a missing runtime. Avoid downloading random DLL files. The official Steam Support portal is the right place to document a repeatable crash after these checks.
Low FPS Fixes for Weak and Mid-Range PCs
On a weaker machine, use a controlled downgrade instead of setting every option to Low. Keep textures at Medium if your graphics card has enough VRAM, because texture quality mostly affects memory capacity and image sharpness rather than raw GPU compute. Lower shadows and effects first. They are the settings most likely to fall apart when a horde fills the screen.
| Hardware Target | Resolution | Profile | Expected Goal |
|---|---|---|---|
| Entry-level desktop or older laptop GPU | 1600x900 or 1280x720 | Low shadows, Low effects, Medium textures, 60 FPS cap | Stable play over maximum sharpness. |
| Mainstream 1080p PC | 1920x1080 | Medium quality, Low shadows, Medium effects, 60-90 FPS cap | Consistent arena performance. |
| Modern 1080p gaming PC | 1920x1080 | High textures, Medium shadows, Medium effects, 90-120 FPS cap | Sharper image without uncontrolled spikes. |
| Modern 1440p PC | 2560x1440 | High textures, Medium shadows, capped 60-90 FPS | Prioritize stable frame pacing during hordes. |
Leave at least 15-20 percent of your system drive free. Shader caches, temporary patch files, and Windows updates all need working space. Install Gone Viral on an SSD if possible. An SSD will not magically raise average FPS, but it can reduce loading pauses and make asset streaming less disruptive than a heavily fragmented mechanical drive.
Close launchers, browser tabs, RGB utilities, cloud-sync clients, and hardware-monitoring tools that you don't need. Browser video playback can consume GPU acceleration resources, while aggressive power-saving modes can prevent the graphics card from holding its intended clock. In Windows, set the game to the high-performance GPU under Settings > System > Display > Graphics if you have integrated and dedicated graphics.
For laptops, connect the charger and choose the manufacturer's performance profile. Battery mode often cuts CPU and GPU power enough to look like a game problem. Never use a third-party “FPS booster” that kills Windows services or edits registry values without showing exactly what it changes. Those tools make troubleshooting harder and can destabilize other games.
Stutter, Shader Cache, and Frame-Time Cleanup
Stutter deserves its own diagnosis because a game can report 90 FPS and still feel awful. Average FPS measures the total number of frames over time; frame time measures how evenly those frames arrive. A single 100-millisecond spike feels like a hitch even if the counter immediately returns to 90.
After a driver update, the first run through a location can stutter as shaders compile. Let the game sit at the menu for a minute, then play the same route twice. If the second pass is smoother, the shader cache was probably involved. Do not repeatedly clear the cache as a routine “optimization.” Clearing it forces compilation again and can make the next session worse.
Use one limiter. Stacking an in-game cap, NVIDIA or AMD driver cap, RivaTuner cap, and V-Sync can produce confusing latency and pacing behavior. Start with the in-game limiter. If it behaves poorly, test a driver-level cap, then compare frametime graphs. With a variable-refresh monitor, a conservative cap is usually more useful than allowing the game to slam into the panel's maximum refresh rate.
When to report a genuine game bug
If Gone Viral crashes at the same location, after the same weapon pickup, or during the same effect regardless of settings, it may be a reproducible game bug rather than a weak PC. Record the exact arena or run stage, the weapon or mutation involved, your GPU and driver version, resolution, graphics preset, and whether overlays were enabled. Include the crash time and attach the game's log files if the developer requests them.
Check the developer's official Steam community hub for current pinned reports before posting. Search the exact error text first. A useful report says “crash after opening the second chest with Effects set to High on driver version X,” not simply “game broken.” That detail helps developers reproduce the fault and helps other players avoid wasting an evening on random tweaks.
For more PC troubleshooting workflows, compare our guides to Citizen Sleeper 2 crash and FPS fixes, Deadlight: Director's Cut performance fixes, and Eiyuden Chronicle's max-FPS settings. The same basic discipline applies: change one variable, test a repeatable scene, and measure frametimes instead of trusting a single FPS number.
The Fastest Order of Operations
Run this short checklist before you start changing advanced Windows settings. It solves the majority of Gone Viral crashes and low-FPS complaints without risking saves or system stability.
- Restart the PC and close every overlay, recorder, browser, and hardware monitor.
- Verify Gone Viral's files through Steam.
- Update the GPU driver, or roll back if the problem started after an update.
- Use fullscreen at 1080p, motion blur off, shadows Low, effects Medium, and a 60 FPS cap.
- Watch GPU usage, CPU usage, temperatures, VRAM, and frametime during a crowded fight.
- If GPU-limited, lower render scale and shadows; if CPU-limited, close background tasks and lower view distance.
- Test the game with overclocks, undervolts, ReShade, and overlays disabled.
- Only then reset configuration files or perform a clean driver installation.
The best Gone Viral setup is the one that survives its ugliest fight, not the one that looks impressive in an empty room. A locked 60 FPS profile with medium textures, restrained shadows, controlled effects, and clean frame pacing will make aiming and movement feel dramatically better than a fluctuating Ultra-style setup. Once the game is stable, raise one setting at a time and keep the change only if the frametime graph stays clean when the horde arrives.