Ambulance Life: A Paramedic Simulator doesn’t contain a traditional collectible checklist. The locations players often call “secret” are tucked-away incident areas, side-road callouts, and landmarks that only become useful after the right campaign district unlocks. The real hidden rewards are extra experience, better mission ratings, equipment progression, and scenario variety. This guide explains where to look, how to trigger those encounters, and how to avoid wasting a shift searching places the game never treats as collectible zones.
That distinction matters. You won’t find a row of glowing packages scattered across San Pelicano, and there’s no official in-game menu showing 100 percent completion for secret spots. Instead, the game quietly rewards players who leave the obvious GPS route, inspect unusual roadside scenes, and complete optional objectives without rushing the patient into the ambulance. Think of these as hidden opportunities rather than treasure chests.
How secret locations actually work in Ambulance Life

Ambulance Life is structured around emergency shifts, campaign unlocks, and explorable city districts. Most calls are delivered through the dispatch system, but the environment also contains secondary routes and incident spaces that can be easy to overlook when you follow the blue navigation line. Some locations only become relevant after story progress unlocks a new part of San Pelicano, while others appear when you are already travelling to a standard call.
The first important rule is simple: don’t abandon an active emergency just to hunt for secrets. The game’s scoring is built around response time, safe driving, examination quality, correct treatment, and transport decisions. A missed optional scene is usually less damaging than arriving late to a critical patient. If you want to explore, use the free-drive opportunities between shifts or replay familiar mission types after your equipment has improved.
There are three reliable signs that a road or lot is worth checking:
- Dispatch chatter changes: an unscheduled incident may be announced while you are driving, even if the GPS keeps pointing toward the original call.
- Emergency props appear: flashing hazard lights, stopped vehicles, crowds, smoke, cones, or a person waving near a roadside area usually signal more than decoration.
- The route looks deliberately inconvenient: service roads, dead-end parking areas, industrial access lanes, and side streets are common places to find optional activity.
For the broader progression structure, the official Steam page confirms the core loop: drive to emergencies, assess patients, provide care, and bring them to the hospital. The hidden-content strategy below builds on that loop rather than treating the game like an open-world collectible hunt.

🎮 Ambulance Life: A Paramedic Simulator
Looking to experience this game? Grab your digital key directly on our store for $11.99.
View on Steammoz Store →All location types worth checking in San Pelicano

Because call generation can vary by shift and progression, fixed street-by-street coordinates would be misleading. The most dependable way to find every secret-style encounter is to sweep each location type whenever it appears on your route. The table below separates genuine gameplay opportunities from scenery that looks suspicious but has no reward attached.
| Location type | What to look for | Likely reward | Best approach |
|---|---|---|---|
| Roadside pull-offs | Parked vehicles, hazards, injured bystanders | Optional patient XP and rating progress | Slow down before junctions and bends |
| Industrial access roads | Workers, machinery, blocked lanes, smoke | Extra diagnosis and treatment practice | Check side entrances during daytime shifts |
| Parking lots and service yards | Crowds gathered around a vehicle or person | Additional incident variation | Turn off the route briefly and scan the perimeter |
| Residential side streets | Open gates, parked cars, distressed NPCs | Experience from optional calls | Use the siren sparingly and watch corners |
| Coastal and recreational roads | Collapsed pedestrians, collisions, isolated callers | Mission-grade improvement and unlock progress | Search after story districts become available |
| Construction and damaged-road zones | Barriers, debris, workers, unusual traffic | Higher-risk scenario practice | Approach slowly; the safest route is rarely the shortest |
Industrial yards and service roads deserve special attention because their entrances can sit behind the main avenue. The GPS may show the destination as a nearby building while the actual patient is around the rear access lane. If you arrive at the marker and see no patient, don’t immediately restart. Circle the block, check the second entrance, and look for the interaction prompt near vehicles or crowds.
Residential areas work differently. Their hidden value is less about a single landmark and more about learning how the game places pedestrians and vehicle incidents. Search cul-de-sacs and narrow side roads only when the current emergency is stable. Ambulance Life can punish careless driving, so clipping parked cars while hunting for a secondary prompt costs more than the encounter is worth.
Hidden rewards and what actually unlocks
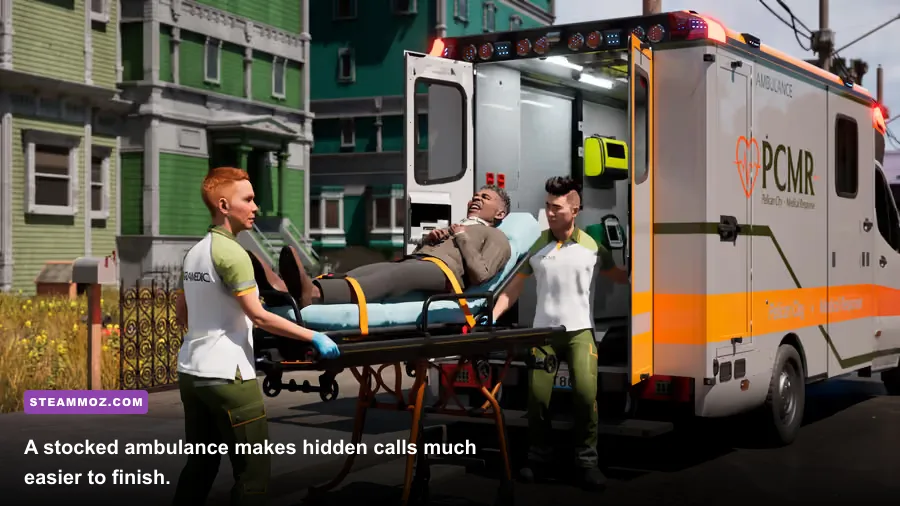
Optional incidents don’t normally hand you a named secret weapon or a collectible trophy. Their rewards feed the same systems used by regular calls: experience, professional performance, mission evaluation, and access to later equipment or scenarios. A clean examination can be more valuable than a fast arrival because misdiagnosis damages the final assessment.
The most useful hidden reward is practice with symptoms that do not appear in every standard shift. Use optional patients to improve your examination rhythm: observe the patient, ask available questions, inspect visible injuries, measure vital signs, and only then choose treatment. Jumping straight to a familiar tool can produce a quick animation but still leave the diagnosis incomplete.
Equipment progression also changes the value of secret calls. Early in the campaign, you may be limited to basic examination and treatment tools. Later shifts give you a broader kit, which means previously awkward incidents become much easier to solve correctly. Don’t judge an optional area by your first failed attempt; revisit it after a new tool or medical procedure becomes available.
| Reward source | What improves | Why it matters | Common mistake |
|---|---|---|---|
| Optional patient completed | Experience and mission evaluation | Builds skill through extra diagnoses | Leaving before completing the examination |
| Correct treatment | Professional score | Protects the shift rating | Using equipment before confirming symptoms |
| Safe arrival and departure | Driving performance | Prevents avoidable penalties | Speeding through narrow side streets |
| Complete transport decision | Case outcome quality | Rewards appropriate patient handling | Choosing speed over patient stability |
| Repeated district coverage | Progression and scenario familiarity | Reveals more of the game’s incident pool | Assuming one shift reveals every event |
For a useful comparison, the exploration logic here is closer to hunting optional encounters in Journey to the Savage Planet’s secret locations than collecting a conventional set of map icons. The environment is a prompt, not a checklist.
How to trigger missed incidents consistently

If you’ve driven through a district several times without seeing anything extra, change the conditions instead of repeating the same route. Start a different shift type, use a different time of day when available, and progress the campaign before searching again. Emergency scenarios are not all available from the opening hours, and some locations only make sense after the game introduces the relevant medical or driving mechanic.
Use a controlled scouting loop
Pick one district and create a loop using its main road, side streets, industrial entrances, and parking areas. Drive it once without stopping, then repeat it at a slower pace. The first lap teaches you traffic flow; the second gives you time to notice hazard lights, crowds, and prompts. Keep the ambulance supplied before you start, because returning to the hospital halfway through a possible side incident wastes the opportunity.
Stop at the scene, not just the marker
Some players search for a floating symbol and drive straight past the actual interaction point. Park safely, exit the ambulance, and walk the immediate area. Check behind the vehicle involved, along barriers, and around the edge of the crowd. The patient may not be standing directly beside the GPS destination, especially in cramped lots or roadwork zones.
Finish the case completely
A hidden encounter only counts as useful progression if you complete its medical sequence. Examine first, identify the likely condition, apply the correct treatment, and transport when appropriate. Leaving after the initial interaction may remove the chance to receive the strongest evaluation. If the game presents a choice about transport, base it on the patient’s condition rather than the distance to the hospital.
Keep notes outside the game. Record the district, shift type, time, incident appearance, and reward screen. That is more reliable than claiming a universal coordinate list because the game’s scenario availability changes as you unlock content. It also helps separate a genuine optional call from a decorative NPC event.
The best medical and driving setup for secret hunting

Secret hunting is easiest when your setup minimizes mistakes rather than maximizing speed. Carry the examination equipment you use most often, learn the ambulance interaction layout, and avoid taking a high-risk shortcut through traffic. The fastest route is useless if you arrive with a damaged vehicle, miss the patient prompt, or lose points for reckless driving.
| Priority | Recommended habit | Benefit during exploration | Trade-off |
|---|---|---|---|
| 1 | Complete the initial examination | Prevents incorrect treatment | Takes longer than guessing |
| 2 | Keep core medical tools ready | Reduces trips back to the ambulance | Requires kit management |
| 3 | Drive below maximum speed near side roads | Improves reaction time and scene visibility | Longer response times |
| 4 | Use sirens on open roads, not blind corners | Clears traffic without reckless turns | Less dramatic shortcut potential |
| 5 | Replay after equipment unlocks | Raises completion quality | Repeats familiar routes |
On PC, performance affects this more than you might expect. A stable frame rate makes pedestrians, traffic gaps, and interaction prompts easier to read. If the city stutters, lower shadows and reflections before sacrificing texture quality. The visual difference is small, but smoother driving gives you more time to brake when a side-road incident appears.
Players who enjoy demanding simulation systems may also like Steamoz’s Bus Driver Simulator coverage. The same principle applies: consistency beats reckless speed, especially when the game grades your route as part of the job.
What is not a secret location or hidden reward
Several things can look like secret content without offering a real reward. Decorative interiors, blocked doors, repeated parked vehicles, distant buildings, and ordinary pedestrians are usually set dressing. If there is no interaction prompt, dispatch message, patient animation, or case objective, there is probably nothing to collect there.
Likewise, don’t confuse campaign unlocks with map secrets. New districts and equipment appear through normal progression, not because you found a concealed object. If a route is inaccessible, continue the main emergency schedule and check again later. Trying to force your way into a blocked zone can create a navigation bug rather than reveal a hidden room.
The same caution applies to online lists that promise exact “all secret rewards.” Unless a location is supported by an observable patient, dispatch trigger, or reward screen, treat it as unverified. The Aesir Interactive website and the game’s official Steam Community hub are better places to check patch-related changes than old launch-week map claims.
A practical 100 percent secret-location routine
- Finish the current story objective and unlock the district you want to search.
- Begin a shift with a fully prepared ambulance and enough time to explore safely.
- Follow the dispatch route once, noting side roads, yards, lots, and unusual landmarks.
- On the return route, slow down at every likely incident area and scan for hazards, crowds, or smoke.
- Exit the ambulance when something looks deliberate and check behind nearby vehicles and barriers.
- Complete every medical step before transporting the patient.
- Record the district and outcome, then repeat under another shift condition if nothing appears.
- Revisit older districts after major equipment or campaign unlocks.
That routine is the closest thing Ambulance Life has to an all-secrets checklist. It catches the meaningful hidden content without pretending that every inaccessible building contains a reward. More importantly, it improves the skills the game actually measures: observation, diagnosis, controlled driving, and patient-first decision-making.
For players who want a simulation with exploration layered over progression, that’s the satisfying part. San Pelicano’s secrets aren’t flashy loot; they’re the calls you almost miss because you were staring at the GPS. Slow down, learn each district’s service roads, and revisit old routes after unlocking more equipment. The hidden rewards follow naturally when you treat every suspicious roadside scene like a real emergency instead of a collectible waiting for a screenshot.