If you're starting Tower of Fantasy, focus on three things immediately: build a compatible three-weapon team, save your premium currency instead of chasing every banner, and raise your Suppressor and equipment level together. The game looks like a standard open-world anime RPG, but its shield-breaking, weapon-resonance, pity, matrix, and world-level systems punish unfocused progression. Learn those systems early and you'll reach Vera, Domain 9, and the later endgame with far less wasted time.
Build Around Weapons, Not Your Wanderer's Appearance
Your Wanderer is mostly a visual identity. The actual combat build comes from the three weapons equipped in your quick-swap slots. Every weapon has a role, element, discharge skill, weapon skill, shatter rating, and charge rating. The strongest early teams usually cover one on-field damage dealer, one shield breaker, and one support or sustain option.
For example, Samir is a ranged Volt damage weapon with excellent sustained damage once you become comfortable maintaining aerial attacks. King's Scythe of the Crow is a practical early shield breaker, while Nemesis's Venus offers healing turrets and Volt support. You don't need all three specific weapons, but the structure matters: damage alone struggles against shields, while three slow breakers can leave you unable to finish timed encounters.
Weapon resonance gives another reason to specialize. Two weapons with the same element activate an elemental resonance effect, while two damage-oriented weapons activate Attack Resonance and two defensive weapons activate Fortitude Resonance. A mixed team is perfectly usable during story content, but a focused element becomes more valuable once your gear and matrices start scaling.
| Team Slot | What It Should Do | Useful Early Examples | Common Mistake |
|---|---|---|---|
| Main DPS | Stay active and spend stamina or skills | Samir, Crow, Cobalt-B | Using a support weapon as your only damage source |
| Shield Breaker | Raise shatter quickly before a boss attack | King, Meryl, Huma | Ignoring the shield icon under the boss health bar |
| Support | Heal, buff, group enemies, or provide off-field value | Nemesis, Zero, Coco Ritter | Swapping too early and losing a discharge effect |
Don't level every new weapon equally. Pick three, take them to your current cap, and only then experiment. A level 40 weapon with upgraded skills and matrices will usually outperform a level 60 weapon you haven't invested in properly. Check the official Tower of Fantasy site for current banner information before committing resources, because balance changes and reruns can change the best long-term choice.
Understand Shields, Discharges, and Combat Timing
Combat isn't simply about holding attack. Enemies display a shield bar beneath their health, and shielded targets take reduced damage until you break that protection. Attacking with a high-shatter weapon is the fastest answer, but the important trick is knowing when to stop attacking and start preparing a discharge.
Each weapon has a charge gauge that fills while you attack with another weapon. When the gauge is full, swapping triggers that weapon's discharge attack. Discharges often deal heavy burst damage, apply crowd control, or create a valuable field. If a boss is about to expose its shield, switch to your breaker with a full charge rather than spending the discharge randomly on a weak mob.
Perfect dodges also matter more than raw gear during difficult fights. A successful dodge creates a short window of slowed time, commonly called Phantasia, if you evade just as the attack connects. This is your opportunity to unload a discharge, break a shield, or safely perform a long animation. Don't mash dodge repeatedly: the game rewards one accurately timed evade, not panic movement.
A practical combat rotation
- Open with your support weapon's skill or field effect.
- Swap to the shield breaker and build or spend charge against the boss shield.
- Trigger Phantasia when the telegraph is about to connect, then use the breaker discharge.
- Swap to your main DPS after the shield breaks and use its skill immediately.
- Return to support before buffs, healing fields, or off-field effects expire.
Watch enemy animations rather than only the user interface. Robarg raises its limbs before a broad area attack, Frost Bot leans back before its ice beam, and many elite enemies briefly glow before a lunging strike. Learning those tells gives you more Phantasia activations, which means more damage and fewer forced healing breaks.
| Encounter Signal | Danger | Best Response | Recommended Tool |
|---|---|---|---|
| Shield bar appears | Reduced incoming damage and incoming special attack | Swap to the highest-shatter weapon | King's Scythe, Rosy Edge, or Huma |
| Enemy attack flash or wind-up | Large hit, knockback, or stun | Single timed dodge for Phantasia | Any weapon with a ready discharge |
| Boss enters vulnerable state | Short damage window | Use DPS skill and discharge together | Samir, Crow, or your chosen main carry |
| Party health collapses | Death spiral in co-op content | Place healing field and stop greedy attacks | Nemesis, Coco Ritter, or Zero |
For more general performance troubleshooting, Steamoz's guide to stopping crashes and rescuing FPS covers the same PC habits that help here: update drivers, close overlays, and test changes one at a time.
Spend Dark Crystals Carefully and Use Every Pull System
The biggest beginner mistake is treating every banner currency as interchangeable. Dark Crystals are premium currency and should usually be converted into Red Nucleus for limited banners. Gold Nucleus is used on the standard banner, while Black Nucleus comes mainly from exploration and does not use the same pity structure. Spending Dark Crystals on Gold Nucleus because the button is available is one of the easiest ways to delay a limited weapon you actually want.
Limited weapon banners traditionally use a 120-pull flame-gold exchange path: each pull awards a flame gold, and 120 flame gold can guarantee the featured weapon through the store. Banner rules can change, so always read the active event description before pulling. The standard banner uses a separate Black Gold currency, and duplicate weapons can eventually be purchased there. This makes standard pulls useful, but not a reason to burn your limited savings.
Don't confuse a guaranteed SSR with a guaranteed featured SSR. The pity counter and the exchange shop are separate safety nets, and losing an event-banner chance can make a future plan much more expensive. A good rule is to save enough for the complete guarantee before spending. If you can't reach it before the banner ends, waiting is often smarter than stopping halfway with an incomplete plan.
Exploration is your early premium-income engine. Open-world supply pods, scenic points, quests, achievements, puzzles, and region progression all feed your account. Use the in-game map filters and interactive map tools, but don't obsess over 100 percent completion during the story. Unlock fast travel points first, then return for difficult environmental puzzles when your Suppressor and movement tools are stronger.
Progression Has Multiple Caps, So Raise Them Together
Tower of Fantasy separates character progression into several connected systems. Weapon level determines much of your immediate combat power. Weapon advancement improves a weapon when you obtain duplicates, while skills consume weapon materials and gold. Matrices add set effects and stat bonuses. Equipment pieces raise your basic attack, resistance, HP, and critical value. The Suppressor gates exploration and acts as a broad account-progression checkpoint.
Weapon and equipment level caps also follow the game's time-gated progression structure. If you hit a cap, don't assume your account is broken; some content unlocks through the daily reset or story progression. Spend vitality consistently on Joint Operations, Interstellar Exploration, Dimensional Trials, and other activities rather than letting the resource sit at its maximum.
For matrices, matching a two-piece or four-piece set is usually more valuable than equipping random higher-rarity pieces with no synergy. A DPS weapon wants offensive stats and a set that works while the weapon is active. A support weapon can benefit from effects that trigger after skill use or improve team damage. Matrix enhancement materials are scarce early, so don't push every blue and purple piece to the maximum level. Use them as temporary gear and replace them gradually with gold matrices.
| System | Early Priority | Why It Matters | Where Beginners Waste Resources |
|---|---|---|---|
| Weapon Level | Max three core weapons first | Improves base attack and skill damage | Leveling every SSR and SR weapon equally |
| Weapon Skills | Upgrade your main DPS skill and breaker | Raises practical rotation damage | Spending rare materials on unused weapons |
| Matrices | Use coherent two-piece sets | Provides conditional damage or utility | Maxing temporary blue gear |
| Equipment | Upgrade attack-focused pieces first | Raises account-wide combat stats | Ignoring random-stat upgrades forever |
| Suppressor | Upgrade when materials and level permit | Unlocks areas and improves survivability | Saving materials while exploration remains locked |
Suppressor progression is especially important in regions such as Aesperia and Vera. Omnium Towers, supply pods, and high-level areas can be effectively gated by your suppressor requirement. Look for Omnium Crystals and region-specific materials during exploration, then upgrade as soon as the requirement is met. The game becomes much less confusing when you treat exploration rewards as part of your combat build rather than a separate collectible hunt.
Exploration Rewards Are Worth More Than They Look
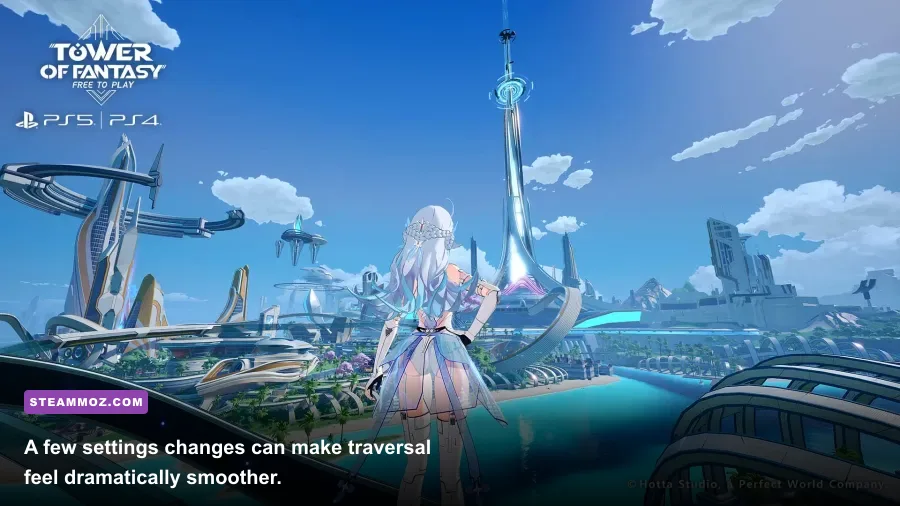
Don't sprint through the main quest and ignore the map. Tower of Fantasy hides useful currency and upgrade materials in activities that take seconds: opening password chests, solving Chowchow and Earthphyte puzzles, activating Omnium Pillars, and collecting supply pods. Black Nucleus pulls won't directly solve your limited-banner plans, but they produce standard weapons, duplicates, and upgrade resources at no premium cost.
Use your jetpack, Cybernetic Arm, Omnium Handcannon, and other relics as traversal tools, not just combat gadgets. The Omnium Handcannon creates temporary platforms that can reach elevated supply pods, while the jetpack handles vertical gaps and the Cybernetic Arm pulls you toward distant anchor points. Some puzzles are intentionally designed around these tools, so changing relics before leaving town can save a surprising amount of backtracking.
World bosses are another efficient habit. Robarg in Astra, Apophis near Banges, Frost Bot in Navia, and Lucia in Crown can be challenged with nearby players. Their chests may require a Perfect Decipher or a Forced Decipher. Perfect Deciphers use a gold chip for better rewards, but don't spend those chips blindly on every early boss. Save them for bosses or reward tables that remain relevant to your current weapon plan.
Join a crew when possible. Crew missions, assistance rewards, joint content, and basic social conveniences make the resource curve smoother. You don't need to be a voice-chat regular; a friendly active crew is valuable simply because world bosses and co-op activities become easier to organize.
Use These PC Settings Before You Chase More Damage
Tower of Fantasy feels dramatically better at a stable frame rate. A locked 60 FPS is more useful for dodge timing than a fluctuating 90 FPS that drops into the 40s during world bosses. On PC, start with the preset on Medium or High, then reduce shadows, vegetation, and distant character quality before sacrificing resolution. Those settings usually deliver the biggest performance gain with the smallest visual cost.
Keep motion blur off if you want clearer enemy telegraphs. Lowering render distance can reduce the number of distant objects drawn, but it may make the world look flatter. If your GPU supports it, test DLSS or another available upscaling option at Quality first. Don't stack aggressive upscaling with a low internal resolution unless you're on older hardware; shimmering foliage and muddy UI text can make exploration unpleasant.
| Setting | Recommended Value | FPS Impact | Visual Trade-Off |
|---|---|---|---|
| Frame Rate Limit | 60 FPS, or stable monitor refresh target | Reduces spikes and heat | Less fluid than an actually stable 90 FPS |
| Shadows | Medium | High gain in busy areas | Softens contact shadows |
| Vegetation | Medium | Moderate gain while exploring | Fewer distant plants and less density |
| Anti-Aliasing | Medium or SMAA | Low to moderate cost | Lower values create jagged edges |
| Motion Blur | Off | Small performance gain | Clearer dodges and camera movement |
| Upscaling | Quality, if available | Moderate GPU gain | Some fine detail may shimmer |
On mobile, prioritize a stable frame rate over maximum effects. Lower reflections, shadows, and world detail, keep the device cool, and avoid playing while charging if thermal throttling causes sudden drops. If another game is causing similar stutters, Steamoz's FPS settings guide and crash-and-stutter fixes offer useful platform-agnostic checks.
Finally, make your first week about consistency, not perfection. Clear daily bounties, spend vitality, claim event rewards, upgrade three weapons, and explore enough to fund your next guaranteed banner plan. You don't need the perfect meta team on day one. You need a focused roster, a reliable shield-break rotation, and enough patience not to spend tomorrow's currency today. That foundation is what turns Tower of Fantasy from a noisy gacha checklist into a genuinely rewarding open-world RPG.
For official announcements, patch notes, and account information, use the Tower of Fantasy Steam page and the Level Infinite game page. If you're also hunting hidden rewards in another open-world adventure, Steamoz's secret-locations guide is a good companion read.