If you want every major secret in Eternal Destiny, start with the Moonwell Shrine, Sunken Archive, Blackthorn Watch, and Ashen Observatory. Those four locations contain the most useful hidden rewards, including Aether Shards, permanent stat upgrades, rare crafting materials, and the Observatory’s optional boss drop. The important trick is to revisit each zone after unlocking movement abilities: several entrances stay invisible until you can wall-run, dive, or activate corrupted obelisks.
This guide focuses on rewards that permanently improve your character rather than ordinary side-quest loot. Before hunting anything, turn on the full map overlay, raise brightness one step above your usual setting, and carry at least three healing charges. A few secrets sit behind environmental traps, and dying before a checkpoint can force you to repeat the entire route.
Moonwell Shrine hides the best early upgrade

The Moonwell Shrine is in the northern section of Verdant Hollow, west of the first fast-travel altar. The main story sends you through the hollow’s central bridge, but the shrine is reached by following the shallow stream uphill. Look for three pale-blue moths circling a broken statue. That visual marker remains present even after the story moves you into the next chapter.
How to open the shrine vault
Interact with the three moon discs around the statue in this order: crescent, half-moon, then full moon. The correct sequence is hinted at by the phases painted on the fallen pillars. Activating them in the wrong order spawns two Hollow Stalkers, but it doesn't permanently lock the puzzle. Once the sequence is correct, the water drains from the lower chamber and reveals the Moonwell Reliquary.
The reliquary contains one Aether Shard, 180 silver, and the Moonlit Resolve passive. Moonlit Resolve restores 2% of maximum health whenever you defeat an enemy while your stamina is above 75%. It is modest during crowded fights, but it makes early exploration much safer because weak enemies become reliable healing sources. The passive is especially strong on dual-blade builds that finish targets quickly.
| Moonwell step | What to look for | Reward or danger | Best response |
|---|---|---|---|
| Reach the stream | Blue moths near broken statue | Two Hollow Stalkers | Save stamina for a dodge |
| Activate discs | Crescent, half-moon, full moon | Vault opens | Follow the painted pillar order |
| Enter lower chamber | Drained pool and cracked floor | Moonlit Resolve | Loot the reliquary before leaving |
Don't confuse this room with the nearby Moonwell checkpoint. The checkpoint only restores health and fast travel; it does not count as the shrine secret. For more efficient early progression, pair this route with the gold advice in our fast leveling and gold farming guide.

🎮 Eternal Destiny
Looking to experience this game? Grab your digital key directly on our store for $1.99.
View on Steammoz Store →Find the Sunken Archive below the ruined aqueduct
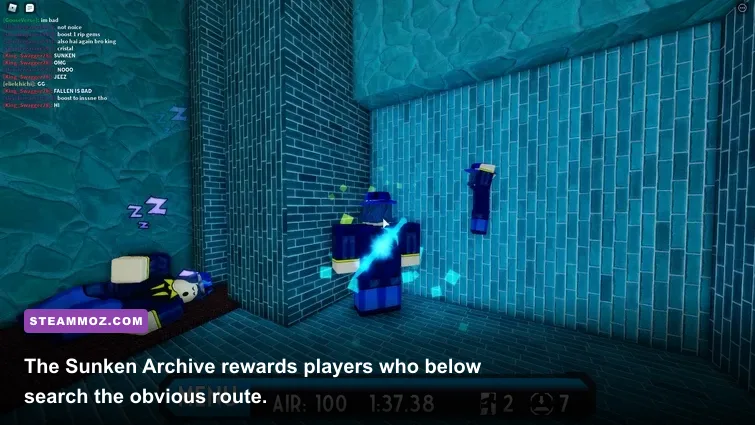
The Sunken Archive is the easiest secret to miss because its entrance is underwater and the world map marks only the upper aqueduct. Travel to the western edge of Sable March, then drop into the collapsed canal beside the three vertical stone arches. You need the Deepbreath Sigil, earned during the “Drowned Oath” story mission, before this route becomes accessible. Trying to swim through without it usually leaves you one breath short of the archive door.
Inside, the first room contains four pressure plates and rotating shelves. The solution is not random: each shelf shows a symbol matching one of the wall lamps. Activate the plates from left to right according to lamp height—lowest, second-lowest, third, highest. The shelves stop moving and expose a narrow passage to the archive’s sealed study.
The study contains the Archivist’s Lens, 2 Aether Shards, and six Dawnsteel fragments. The Lens adds 12% damage to attacks against enemies affected by a status condition, but the bonus applies only to the marked target. This makes it excellent for poison, frost, and stagger-focused builds. It doesn't multiply damage against an entire group, so spend it on elites rather than wasting the effect on basic mobs.
The archive trap that catches most players
When you collect the Lens, the floor floods and three Tidebound Sentinels appear. Their first attack is always a delayed water spear. The blue ring on the floor is the danger zone; dodge after the ring reaches its brightest point, not when the enemy raises its weapon. Breaking the glowing core on a Sentinel interrupts the second spear and gives you enough time to reach the exit ladder.
If the game is stuttering during water effects, reduce volumetric fog before lowering texture quality. Texture resolution affects image clarity, while fog and reflections create the larger performance spikes. Our FPS-first troubleshooting guide explains the same priority order for demanding effects.
Climb Blackthorn Watch for a permanent stat boost

Blackthorn Watch stands on the eastern cliff in Ember Coast. The obvious route ends at the locked watchtower gate, which makes many players assume the location is decorative. The actual entrance is behind the tower: jump from the broken supply platform to the ivy-covered ledge, then use the wall-run ability to cross the gap.
Inside the tower, defeat the two Ashbound Wardens and pull the lever beside the bell. Do not ring the bell first. The bell summons four extra enemies and resets the lever puzzle. After the lever is pulled, climb the interior scaffolding and shoot the three red lanterns. The upper platform opens only when all three lanterns are dark.
The chest holds the Blackthorn Clasp, which grants +5% maximum stamina and reduces sprint stamina drain by 10%. That sounds less exciting than a weapon, but it changes exploration and boss combat because you can reserve a dodge after sprinting into range. It is one of the best universal rewards in the game, particularly for heavy weapons with slow recovery animations.
| Reward | Effect | Best build | Why it matters |
|---|---|---|---|
| Moonlit Resolve | 2% health on high-stamina kills | Dual blades | Improves early sustain |
| Archivist’s Lens | 12% damage to afflicted targets | Status builds | Melts marked elites |
| Blackthorn Clasp | +5% stamina, -10% sprint drain | Heavy weapons | Creates safer dodge windows |
| Observatory Core | +8% critical damage | Precision builds | Scales through late-game gear |
Unlock the Ashen Observatory and its secret boss
The Ashen Observatory is the late-game secret hidden in the southern volcanic zone. You need all three Star Keys before the entrance activates. The keys come from the optional shrines in Verdant Hollow, Sable March, and Ember Coast—not from the main bosses. If the observatory door remains inert, check your inventory rather than restarting the chapter; the game adds the keys silently after each shrine challenge.
At the observatory, rotate the central telescope toward the red star, then interact with the floor seal. The red star is the brightest object visible through the lens. Choosing the blue star opens a shortcut to the exit, but it skips the boss and the reward chest. Once the seal breaks, the arena drops below the tower and begins the Star-Eater Avaris encounter.
Star-Eater Avaris phase breakdown
Avaris has three phases. In phase one, stay near the outer ring and punish the two-hit claw combo after the second shockwave. The first wave is a feint; the second knocks you down. In phase two, four orbiting crystals appear. Destroy only the crystal currently glowing orange, because breaking a blue crystal heals Avaris for 6% of its health. Phase three begins at 30% health and adds a rotating beam that covers three-quarters of the arena. Move clockwise and dodge through the beam when it passes rather than backing away.
| Phase | Key danger | Counter strategy | Optimal tool |
|---|---|---|---|
| One | Delayed second shockwave | Dodge after the first wave | Fast weapon combo |
| Two | Wrong crystal heals boss | Hit the orange crystal only | Ranged attack |
| Three | Rotating arena beam | Move clockwise and roll through | Instant-heal consumable |
Defeating Avaris grants the Observatory Core, 3 Aether Shards, and the Star-Eater weapon skin. The Core adds 8% critical damage, but it only activates while your health is above 60%. Keep a defensive skill equipped; greedily chasing the final hit can disable the bonus for the rest of the encounter.
Hidden rewards that are not marked on the map
Not every secret has a named dungeon. Several rewards appear only when you interact with environmental objects in the correct order. Search for cracked walls, unlit braziers, bells with missing ropes, and statues facing away from the nearest road. These are consistent design signals, not random decoration.
Three reliable cleanup checks
- Revisit after movement upgrades: wall-run, dive, and air-dash abilities reveal different categories of secrets. A locked ledge usually means “return later,” not “find a key nearby.”
- Check the map after every shrine: completing a shrine challenge can reveal nearby hidden chambers, but only after you exit the activity and reload the regional map.
- Listen for audio cues: a low metallic hum indicates a hidden mechanism, while a soft chime usually means a collectible is within one room. Turn music down temporarily if environmental audio is hard to hear.
Use a manual note for each region and mark secrets as opened, not merely visited. This matters because some chests have ordinary versions and upgraded versions. A chest that gives silver before you obtain the relevant Star Key can respawn with its unique item afterward.
Best order for collecting every secret reward
The fastest route is Moonwell Shrine first, Sunken Archive second, Blackthorn Watch third, and Ashen Observatory last. This order follows the ability curve and avoids unnecessary backtracking. Moonwell Resolve improves sustain, the Archivist’s Lens boosts status damage, Blackthorn Clasp fixes stamina problems, and the Observatory Core is designed for endgame critical builds.
- Clear Verdant Hollow and collect the Moonwell Reliquary before leaving the region.
- Complete “Drowned Oath,” equip Deepbreath Sigil, and return to the Sable March aqueduct.
- Unlock wall-run, then climb Blackthorn Watch from the rear supply platform.
- Collect all three Star Keys and bring a ranged skill to the Ashen Observatory.
- Defeat Star-Eater Avaris, then reopen the regional map to collect any revealed side chambers.
For stability, cap your frame rate to your monitor’s refresh rate and disable motion blur during the observatory fight. The rotating beam is easier to read without blur, and a stable 60 frames per second is more valuable here than a fluctuating higher number. If you run into crashes or unusually long loading screens, compare your setup against our PC crash and FPS fixes.
Keep the game updated through the official Steam listing, and check the developer’s Steam announcements before farming a chest repeatedly. Patch changes can move reward tables, reset event flags, or alter whether hidden rooms remain available after a new chapter begins. For more secret-hunting ideas, our Everspace 2 secret locations guide covers the same kind of exploration-first route planning.
Once all four major locations are cleared, spend the Aether Shards on permanent upgrades rather than temporary consumables. The hidden rewards are strongest when combined: Moonlit Resolve supports aggressive stamina management, Archivist’s Lens rewards status application, Blackthorn Clasp expands your defensive window, and Observatory Core finishes a critical-hit setup. That combination turns secret hunting from a completionist detour into one of the most efficient progression paths in Eternal Destiny.