The fastest way to level in Empires of the Undergrowth is to build a food-positive colony, clear safe objectives, and reinvest Royal Jelly into permanent upgrades—not hunt for a traditional gold currency. The game’s economy revolves around food, territory, larvae, and Royal Jelly. Once you understand that distinction, fast progression becomes much more consistent: workers keep the nest fed, combat ants gain experience through controlled fights, and every mission pushes your Formicarium forward.
This guide focuses on the campaign and Freeplay systems that actually accelerate progress. It also covers the best food layouts, safe experience routes, Royal Jelly priorities, leafcutter production, difficulty choices, and the common traps that make a colony look rich while quietly starving it. For broader resource-management ideas, our town survival tips have a similar lesson: production only matters when your defenses can protect it.
First, Understand What “Gold Farming” Means Here
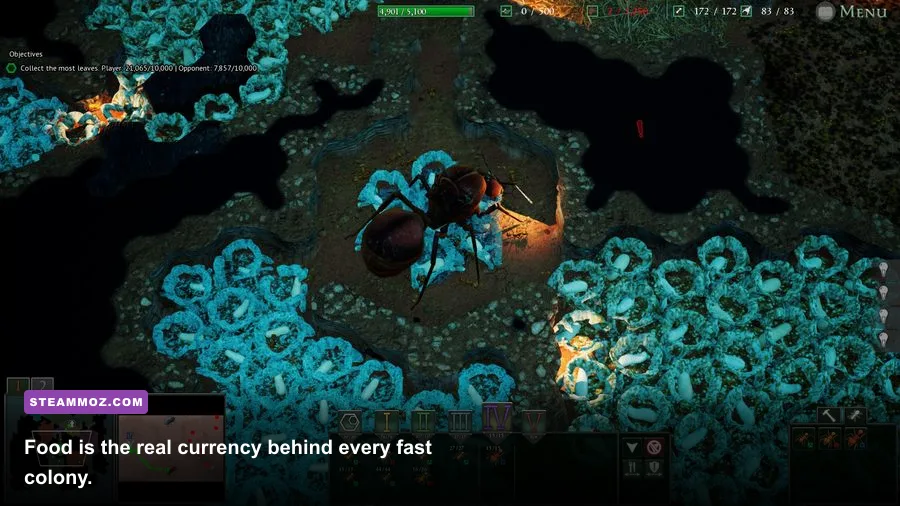
Empires of the Undergrowth does not use gold as the main spendable resource in the way an RPG or classic fantasy RTS does. Food pays for most colony actions. You spend it on larvae, upgrades, new ants, territory expansion, and the reinforcement of your underground chambers. Royal Jelly is the long-term progression resource, earned by completing objectives and mission challenges, then spent in the Formicarium to unlock stronger starting options.
That means a good “gold farm” is really a food-and-Royal-Jelly loop. Food increases your immediate army size and lets you maintain workers. Royal Jelly improves the baseline of later runs. Territory determines how much production space you can create, while brood tiles and chamber design determine whether your income reaches the front line quickly enough.
| Resource | How You Get It | What It Pays For | Best Farming Habit |
|---|---|---|---|
| Food | Workers gather surface and nest food sources | Larvae, ants, upgrades, expansion | Keep workers assigned and storage close to brood |
| Royal Jelly | Mission objectives, challenges, progression rewards | Permanent Formicarium upgrades | Replay short objectives instead of only chasing wins |
| Territory | Digging new tiles and completing map objectives | More rooms, storage, brood, and defensive space | Expand toward valuable food and safe chokepoints |
| Experience | Combat participation and unit progression | Higher-level ants with better battlefield performance | Let dedicated combat groups take controlled fights |
Never spend every food unit the moment it arrives. A colony with 500 food and no reserve can collapse after one wave, while a colony with a smaller army and a food buffer can keep producing through a bad encounter. Treat your reserve as combat stamina.

🎮 Empires of the Undergrowth
Looking to experience this game? Grab your digital key directly on our store for $8.99.
View on Steammoz Store →The Fastest Opening Build for Campaign Missions

Your opening should create momentum without overbuilding. Start by digging a compact chamber near the Queen and placing only the brood and storage you need to establish worker income. Workers are your first investment because they gather food, carry corpses, excavate, and keep every later system moving. A glamorous early army without enough workers is a trap.
Opening sequence
- Dig a short worker chamber. Avoid a huge empty room. Every unnecessary tile delays the first useful brood expansion and creates more walking distance.
- Produce workers until gathering is stable. Add combat ants only when you have a visible food source or a mission objective that demands them.
- Place storage beside the main traffic route. Ants waste time when food must cross the entire nest before reaching storage or larvae.
- Open one safe route to the surface. Multiple entrances expose your nest to more attack paths and split your response force.
- Build a compact fighting chamber at a choke. Rooms with a narrow approach let fewer ants hold a larger enemy force.
For most early missions, a practical production ratio is roughly two worker groups for every dedicated combat group. The exact number changes with map distance and difficulty, but the principle is reliable: workers should outnumber fighters until food income is clearly positive. If your food counter repeatedly falls during reinforcement, stop expanding and add workers.
Use rally points aggressively. A rally point near the entrance prevents newly hatched ants from wandering through the whole nest before reaching combat. It also makes experience distribution cleaner because the same group repeatedly participates in battles rather than random workers stumbling into danger.
Why compact rooms level faster
Ants gain more from repeated, survivable engagements than from one reckless push. A compact nest shortens travel time, lets wounded units retreat, and keeps reinforcements arriving in a steady stream. Large decorative chambers look impressive, but they increase walking distance and make every food delivery less efficient. Build for traffic first; beautify later.
How to Farm Food Without Starving Your Army
Food farming is the engine of fast leveling because it funds both larvae and combat replacements. The strongest approach changes by species and map, but the rule stays the same: secure a nearby, repeatable food route before reaching for distant rewards. A worker carrying food across the map is unavailable for defense for the entire trip, and long routes become dangerous when predators refresh.
Prioritize food sources in this order: safe food beside your entrance, repeatable surface sources with short travel distance, corpses you can harvest after fights, and dangerous high-value sources that require a dedicated escort. Do not send workers alone through a hostile section simply because the resource icon looks large.
Leafcutter colonies
Leafcutter ants are the most obvious long-term farming option because they convert harvested leaves into colony food. Their strength is sustained production, not an explosive first minute. Build the leaf storage and processing area close to the entrance, then keep the route between surface harvesters and underground production as short as the map allows.
Protect the leaf line with a combat group. If predators repeatedly interrupt the route, your effective income can drop below that of a smaller, safer colony. It is often better to harvest a modest patch continuously than to claim a large patch that forces workers into ambushes.
Generalist and black ant colonies
Black ants benefit from corpse collection after controlled fights. Pull enemies toward a defensive chamber, let the army finish them, then assign workers to retrieve the remains once the area is safe. This turns defense into income and experience at the same time. Don’t chase fleeing targets deep into unexplored terrain; the next encounter can wipe out the group that was supposed to carry the food home.
| Farming Method | Risk | Experience Value | Best Use |
|---|---|---|---|
| Nearby safe food | Low | Low to moderate | Opening economy and emergency reserves |
| Leafcutter harvesting | Moderate | Low direct combat XP | Long missions and sustained army production |
| Corpse collection | Moderate | High when paired with defense | Turning predictable waves into food |
| Dangerous distant resources | High | Variable | Late mission pushes with escorts |
Keep a reserve before every planned expansion. A useful checkpoint is enough food to hatch several replacement waves plus one emergency defensive upgrade. The precise amount depends on colony size and difficulty, but the test is simple: if a surprise attack would force you to cancel production, you expanded too early.
If you enjoy games where economy and survival collide, compare this approach with our Death Howl leveling guide. The same broad rule applies, but Empires of the Undergrowth is much more sensitive to travel distance and unit placement.
Best Ways to Level Combat Ants Quickly and Safely
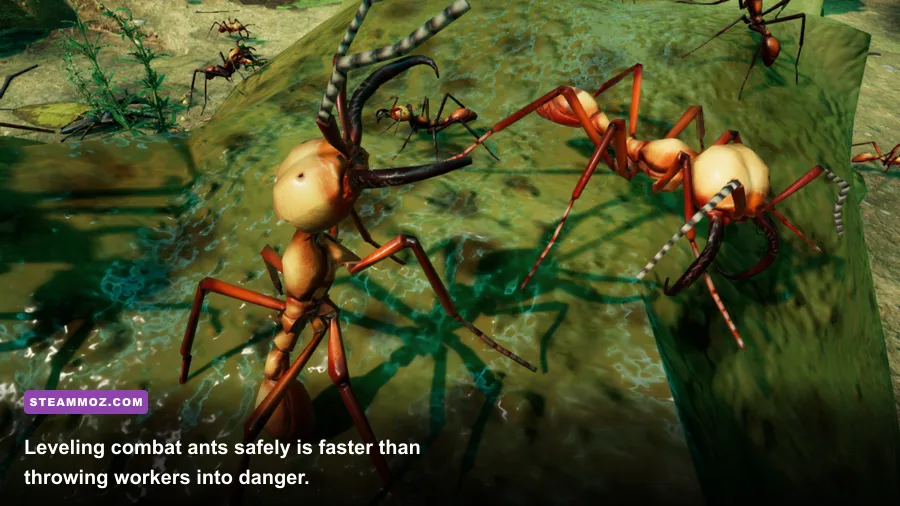
Combat experience is easiest to farm when you control the battlefield. Don’t use workers as disposable damage dealers, and don’t send your entire colony into an unexplored room just to force a level-up. Instead, create a repeatable fight near a chokepoint, keep a rally point behind the front line, and rotate injured ants away from the attack tile.
Use the right unit for the job
Black ants are dependable frontline units for early pressure and defensive holding. Wood ants are valuable when you need ranged damage and can protect their firing position. Leafcutter soldiers excel when their colony economy is already online, giving you the food supply needed to maintain a larger specialized army. Fire ants and other advanced options can be powerful, but they should not replace a stable worker economy.
Unit levels matter most when the ant survives long enough to benefit from them. A high-level group that gets surrounded is still a dead group. Keep melee ants at the entrance of a fight, position ranged units behind them, and avoid stacking every unit on one tile where area attacks can punish the entire force.
The safe XP loop
- Scout the next encounter. Reveal the route with a small group or expendable unit instead of your entire army.
- Clear the nearest threat. Pull it toward your nest rather than fighting at maximum distance from reinforcements.
- Hold the choke. Let enemies enter the same narrow approach while your back line attacks safely.
- Withdraw damaged ants. A wounded veteran is more valuable than a fresh replacement because it already carries experience.
- Collect corpses after combat. The same victory can refill your food stores and finance another reinforcement cycle.
Pause frequently when a fight becomes messy. The game rewards tactical control, and pausing lets you redirect a damaged group, move a ranged unit behind cover, or set a new rally point before the next enemy reaches the chamber. This isn’t slow play; it’s how you prevent a profitable XP route from becoming a colony reset.
| Army Role | Recommended Position | Main Strength | Common Mistake |
|---|---|---|---|
| Worker ants | Behind the combat line | Food transport and recovery | Sending them into unexplored fights |
| Black ants | Frontline choke | Reliable melee pressure | Chasing enemies away from support |
| Wood ants | Second line | Ranged damage | Allowing enemies to reach them directly |
| Leafcutter soldiers | Frontline with sustained support | Scalable colony defense | Building them before leaf income is stable |
Royal Jelly Priorities That Speed Up Every Future Run
Royal Jelly is your permanent progression currency, so spend it on upgrades that improve consistency rather than flashy options that only help a narrow mission. The best early purchases are the ones that increase your ability to start a colony, gather food, hatch useful units, or survive the first serious attack.
Upgrade priorities should generally follow this order: worker economy, storage and colony stability, core combat performance, then specialist units and situational bonuses. If you’re failing because the opening is too slow, another expensive combat option won’t fix the problem. If your food income is excellent but the first predator wave destroys the nest, move defensive improvements ahead of another economy upgrade.
| Upgrade Priority | Why It Matters | When to Buy It | Result |
|---|---|---|---|
| Worker and economy upgrades | Improves the resource engine behind every army | First purchases | Faster brood and more reliable reserves |
| Storage and colony capacity | Prevents overflow and supports longer missions | After basic income is stable | Less wasted production time |
| Core melee improvements | Makes early chokepoints easier to hold | Before raising difficulty | More survivable XP farming |
| Ranged and specialist options | Solves specific map and enemy problems | Once your baseline is dependable | Flexible late-game compositions |
Objectives are often better Royal Jelly targets than endless grinding. Check the mission challenge list before starting and shape your run around two or three achievable goals. A short replay with a clear objective can beat a long mission where you barely survive and collect no additional progression reward.
Difficulty also changes the value of an upgrade. Higher settings increase pressure on food and defense, so economy improvements gain value before damage bonuses. On lower settings, faster combat upgrades can help you clear objectives quickly. Choose the upgrade for the bottleneck you’re actually feeling, not the one that sounds strongest in the menu.
Freeplay Farming Routes and Difficulty Settings
Freeplay is the best place to test a farming route because it separates colony design from campaign objectives. Start on a forgiving map and use the first phase to establish worker income, storage, and one defensive room. Don’t rush every available enemy. Let safe creatures approach your kill zone, collect the resulting food, and use the income to expand in measured steps.
As the colony grows, create separate traffic lanes. One route should carry food toward storage and brood. Another should move combat ants toward the active threat. Crossed routes create congestion, especially when a large worker group blocks reinforcements during a wave. A few extra tiles of space can save more time than an additional brood chamber.
Raise difficulty only when you can meet three conditions: your opening food income remains positive, your main army survives a full attack without total replacement, and your workers can collect from at least one source while combat is happening. If any of these fail, the problem is usually structure rather than mechanical skill.
| Difficulty Approach | Best Farming Plan | Primary Danger | Adjustment |
|---|---|---|---|
| Learning difficulty | Test room layouts and unit roles | Building inefficient habits | Practice short routes and rally points |
| Standard difficulty | Balance food, XP, and objectives | Expanding before reserves exist | Pause after every major food upgrade |
| Harder difficulty | Farm safe enemies and defend chokepoints | Attrition and interrupted gathering | Prioritize economy and retreat discipline |
| Challenge runs | Target specific Royal Jelly objectives | Overcommitting to optional fights | Reset quickly when the opening collapses |
Performance can matter in crowded colonies. If late-game battles become difficult to read, lower shadow quality and effects before sacrificing the game’s zoom level or interface clarity. A stable frame rate helps you spot attack paths, select injured units, and pause before a line collapses. For more PC optimization reading, see our low-FPS troubleshooting guide and frame-saving settings breakdown.
The Biggest Farming Mistakes to Stop Making
Overexpanding the nest: More territory is not automatically more progress. Unused tiles consume time and create long routes. Dig toward production and defensive value, then stop.
Growing the army before the economy: Every combat ant adds ongoing food pressure. If the army cannot be reinforced, its apparent strength is temporary. Add workers and storage before doubling your fighters.
Fighting away from home: A distant victory can still be an economic loss if wounded ants cannot retreat and workers cannot safely collect the corpses. Fight where your rally point and reinforcements matter.
Ignoring mission objectives: Winning a mission is useful, but targeted challenges are often the fastest route to Royal Jelly. Read the objectives before committing to a standard clear.
Mixing every unit into one blob: A single mass is easy to select but hard to manage. Keep workers, melee ants, and ranged units in roles with separate rally points. Your colony will gather more, fight cleaner, and lose fewer high-level ants.
For official information, check the Empires of the Undergrowth Steam page, the developer’s Slug Disco website, and the community-maintained Empires of the Undergrowth Wiki for current unit and mission details. If you like this style of progression guide, Steamoz’s fast progression breakdown is another useful comparison.
The winning loop is straightforward: establish workers, secure a short food route, hold enemies at a chokepoint, collect the aftermath, and spend Royal Jelly on upgrades that make the next opening stronger. Stop treating food as something you spend immediately and start treating it as the fuel for both experience and safety. Once your colony can produce ants without draining its reserve, leveling stops feeling grindy—and your “gold farming” route becomes a reliable machine.