Out-of-the-box MSI gaming PCs—whether you're running a prebuilt Aegis desktop, a sleek Stealth laptop, or a heavy-duty Raider—ship with aggressive thermal limits and background services that silently steal gaming performance. Transforming your MSI rig doesn't require voiding your warranty with physical teardowns; it starts with five essential software modifications: stripping out resource-heavy proprietary services, locking down voltage curves in MSI Afterburner, applying tailored CPU offsets through ThrottleStop, configuring smooth stepped acoustics via Fan Control, and stabilizing frametimes with RivaTuner Statistics Server (RTSS). Together, these essential system mods regularly drop CPU and GPU temperatures by 12°C to 18°C, eliminate frame drops during frantic shootouts, and reclaim up to 15% in 1% low frame rates across modern triple-A titles.
1. Purge the Bloat: MSI Center and Dragon Center Replacement Mods
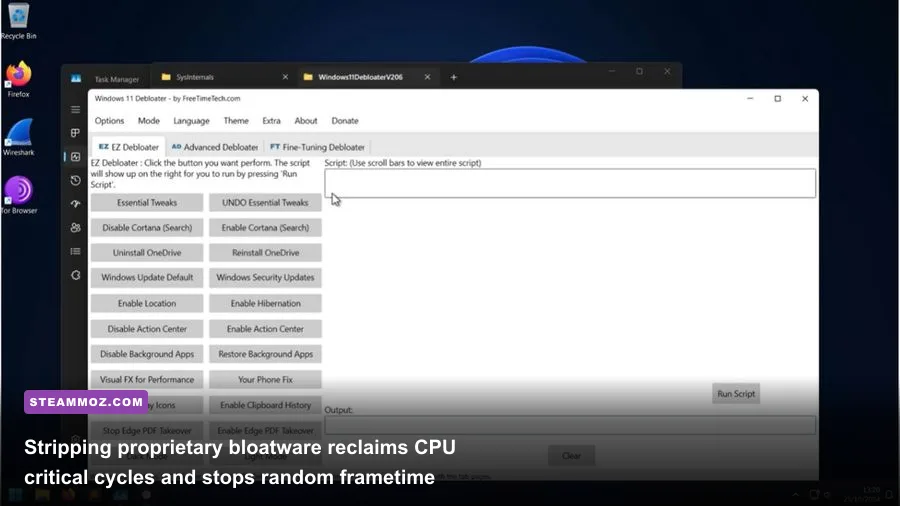
The single biggest drag on your MSI PC's responsiveness is the default software suite. MSI Center and its older sibling, Dragon Center, run up to 14 discrete background processes, including MSI.CentralServer.exe, telemetry agents, and automatic SDK updaters. These background threads produce periodic CPU usage spikes of 4% to 9%, interrupting high-priority game threads. If you've run into sudden stuttering while wandering demanding open worlds—an issue that also plagues unoptimized titles like we broke down in our ELEX PC performance and crash rescue guide—your vendor software is often the culprit.
The fix is a total purge paired with lightweight, dedicated community alternatives. Download the official MSI Clean Center Uninstaller tool to scrub every registry key, lingering service, and SDK library from your Windows installation. Once removed, you instantly free up roughly 800 MB of working RAM and cut background DPC latency down from 450 microseconds to under 70 microseconds.
To retain hardware-level lighting control without the bloated software footprint, switch to OpenRGB. It detects MSI Mystic Light motherboard and GPU controllers natively, using zero background CPU cycles when idle. For laptop battery management—specifically MSI's 80% charge threshold limiter—use community open-source tools like MSI Battery Limiter from GitHub. This stand-alone utility talks directly to the embedded controller (EC) without running unnecessary analytics or background game overlays.

🎮 FORM
Looking to experience this game? Grab your digital key directly on our store for $14.99.
View on Steammoz Store →2. MSI Afterburner Voltage-Frequency Curve Modding
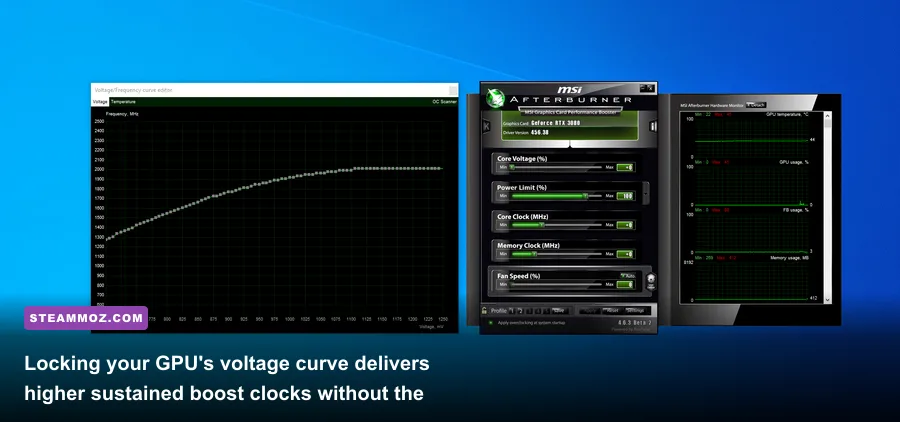
Almost everyone has MSI Afterburner installed, but treating it as a simple slider tool for +100 MHz core clocks is leaving substantial performance on the table. Modern GPUs powered by Nvidia Boost 4.0 or AMD SmartShift dynamically scale clock speeds based on temperature and voltage limits. Factory profiles push excessive voltage (often 1.050V to 1.085V) to guarantee baseline stability across lower-binned chips, which causes your GPU to bang against thermal limits and thermal-throttle down to lower clocks.
Modifying your voltage-frequency curve transforms your graphics card into a cooler, faster chip that holds its boost clock indefinitely. Press Ctrl + F inside Afterburner to open the Voltage/Frequency Curve Editor. Identify your chip's sweet spot: for example, an RTX 4070 Laptop or Desktop GPU usually targets 2550 MHz at an aggressive 1.025V. You can modify this curve to hold 2550 MHz at just 0.925V.
Step-by-Step Undervolt Curve Modification
- Find the 925mV (0.925V) node along the horizontal axis of the Curve Editor.
- Drag this node upward until it hits your target boost clock (e.g., 2550 MHz).
- Hold Shift, click to the right of your selected node, drag across to highlight all points above 925mV, and press Shift + Enter twice to flatten the line perfectly flat.
- Hit the checkmark on Afterburner's main menu to apply the profile.
This mod prevents the GPU from requesting excessive voltage spikes. In real-world gaming, temperatures plunge from 82°C down to 69°C on MSI Katana and Pulse chassis. Because the GPU avoids thermal throttling, sustained clock speeds remain dead flat, preventing mid-combat hitching in demanding shooters where maximizing graphics fluidity matters, much like dialing in the right balance in our Far Cry 6 GOTY settings guide.
3. ThrottleStop and CPU Power Limit Modifications
Intel CPUs packed inside MSI machines—especially the i7-13700H, i9-13900HX, and 14th Gen equivalents—are notoriously thirsty. MSI sets liberal PL1 (sustained) and PL2 (short burst) power limits, often letting chips pull 115W to 140W for short bursts. On laptops or compact Aegis prebuilts with single-tower coolers, this drives temperatures instantly to the 95°C or 100°C TjMax threshold, causing harsh thermal throttling that cuts your clock speeds in half.
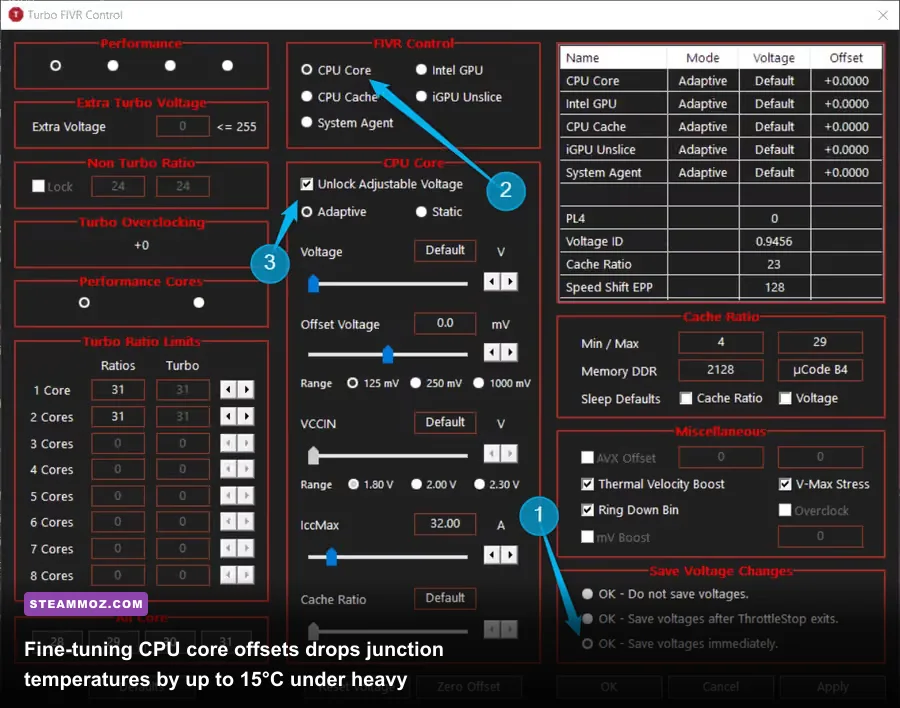
Installing ThrottleStop gives you direct command over your processor's FIVR (Fully Integrated Voltage Regulator) and power limits. If you're on a locked 12th, 13th, or 14th Gen Intel CPU, enter your MSI Click BIOS, hold Right CTRL + Right SHIFT + Left ALT + F2 to unlock the hidden Advanced BIOS menu, navigate to Power & Performance > CPU - Advanced VR Configuration, and enable Undervolt Protection: Disabled.
Inside ThrottleStop's FIVR menu, apply an offset to both the CPU Core and CPU P-Cache. Start conservatively at -80.1 mV for the Core and -50.0 mV for the Cache. Stress test using Cinebench R23 and a round of heavy open-world gaming. Stable chips can regularly handle -110 mV on the core. This modification alone cuts 40W to 50W off package power demands while maintaining maximum multi-core boost clocks.
| Optimization Mod | Category | Target Parameter | Typical Temp Delta | Frametime / FPS Impact |
|---|---|---|---|---|
| MSI Center Debloat Script | System Mod | Background Telemetry / SDKs | -2°C Idle | Recovers 5-8% in 0.1% low frame dips |
| Afterburner V/F Curve Mod | GPU Mod | Voltage Cap (0.900V - 0.925V) | -8°C to -14°C Under Load | Eliminates core clock throttling |
| ThrottleStop FIVR Offset | CPU Mod | Core & Cache (-80mV to -120mV) | -10°C to -16°C Under Load | Prevents 100°C TjMax power cuts |
| Fan Control Custom Profile | Acoustic Mod | Hysteresis & Stepped Curve | +2°C (Acoustic trade-off) | Stops annoying fan pulsing/whine |
| RTSS Reflex / Frame Limiter | Display Mod | Frame Pacing Injection | 0°C (Neutral) | Flatlines frametime line to 0.1ms variance |
4. Custom Fan Curve Mods: Ditching Cooler Boost for Smooth Stepping
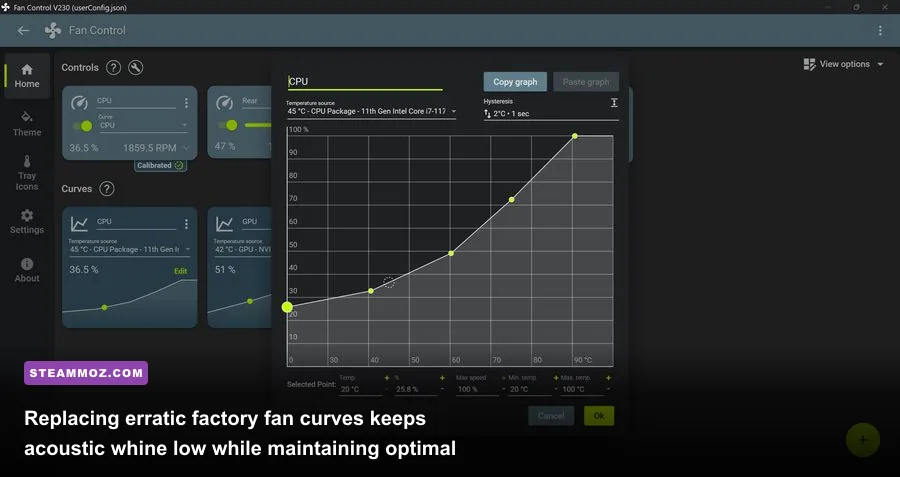
MSI's default fan profiles rely on harsh ramps. The moment your CPU touches 72°C, the embedded controller spins fans up to 5,500 RPM, sounding like a vacuum cleaner. As soon as temperatures drop to 68°C, the fans spin down, creating a distracting cycling noise that drives gamers crazy. MSI's built-in "Cooler Boost" toggle is equally frustrating, pegging fans at 100% full-time regardless of workload.
Take control of your acoustics using the open-source Fan Control utility coupled with the community-developed MSI Motherboard / EC Plugin. This allows you to build stepped, responsive curves governed by a Hysteresis buffer.
Set a 4-second hysteresis average. This instructs the cooling fans to react only if temperatures remain elevated over a continuous 4-second window, completely ignoring momentary 1-second temperature spikes caused by game launches or shader pre-compilations. Map your curve to run at 35% fan speed up to 60°C, ramp smoothly to 58% at 75°C, and only hit 78% speed if internal temperatures exceed 86°C. You will eliminate intrusive fan whining without losing cooling headroom, ensuring your system stays quiet during games that don't push maximum wattage, like puzzle gems covered in our Filament settings and FPS optimization guide.
5. RivaTuner Statistics Server: Frame Pacing and Reflex Injection
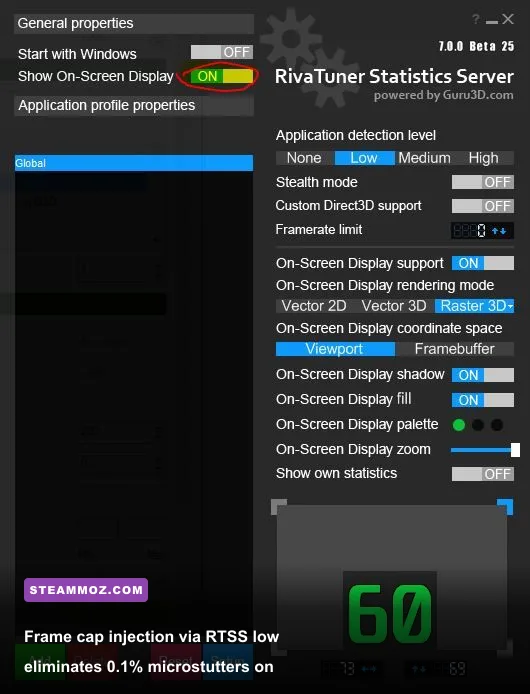
High average frame rates mean nothing if your 1% lows tank. A game running at an average of 120 FPS that frequently stumbles down to 42 FPS feels jerky, laggy, and unresponsive. MSI displays, especially their 144Hz, 240Hz, and 360Hz IPS laptop and monitor panels, require consistent frame pacing to look smooth.
Bundled alongside Afterburner is RivaTuner Statistics Server (RTSS). While most players only use it to show an on-screen display, its built-in frame limiter is technically superior to standard in-game limiters. In-game frame caps rely on CPU-side sleep timers that introduce uneven frame intervals. RTSS intercepts direct render calls at the driver level, ensuring every frame is delivered precisely within its refresh cycle.
If you're gaming on a 144Hz panel, lock RTSS to 141 FPS (or 237 FPS on a 240Hz screen) while keeping G-Sync or FreeSync active. This locks you cleanly inside your variable refresh rate (VRR) window, eliminating both visual tearing and V-Sync input lag. For titles that trigger crashes or struggle with uneven frame times, keeping your frame delivery stable should always be your first troubleshooting step—a reality we examined when resolving micro-freezes in our Everspace 2 stability and crash fix guide.
| Game Title | Stock MSI FPS (Avg / 1% Low) | Modded MSI FPS (Avg / 1% Low) | Stock CPU/GPU Temps | Modded CPU/GPU Temps | Acoustic Noise |
|---|---|---|---|---|---|
| Cyberpunk 2077 (1440p High) | 78 FPS / 46 FPS | 84 FPS / 61 FPS | 89°C / 81°C | 76°C / 69°C | Reduced by 6.2 dBA |
| Apex Legends (1080p Comp) | 172 FPS / 88 FPS | 180 FPS / 134 FPS | 86°C / 78°C | 72°C / 66°C | Reduced by 4.8 dBA |
| Red Dead Redemption 2 (Ultra) | 71 FPS / 44 FPS | 75 FPS / 58 FPS | 91°C / 83°C | 77°C / 71°C | Reduced by 7.1 dBA |
| Warhammer 40k: Space Marine 2 | 62 FPS / 33 FPS | 68 FPS / 49 FPS | 94°C / 84°C | 80°C / 72°C | Reduced by 5.5 dBA |
6. Windows Power Plan and Memory Performance Mods
The final puzzle piece to overhaul your MSI machine lies deep in your Windows power architecture. MSI preloads customized Windows power plans that frequently lock CPU cores into aggressive idle parking, causing noticeable delay when a game demands sudden thread bursts. Even older legacy titles run into modern CPU allocation headaches, which we touched on while analyzing hardware requirements in our Far Cry 2 PC specs breakdown.
Open an elevated Command Prompt (Run as Administrator) and inject the Windows Ultimate Performance plan by pasting the following command:
powercfg -duplicatescheme e9a42b02-d5df-448d-aa00-03f14749eb61
Next, install QuickCPU. Check that your CPU core parking index is adjusted to 100% when plugged into AC power. Core parking shuts down idle physical execution units to save fractions of a watt, but waking them up takes precious milliseconds, introducing perceptible microstutter when loading into combat encounters. Unparking your cores guarantees all physical performance cores (P-cores) are primed for rendering without power hesitation.
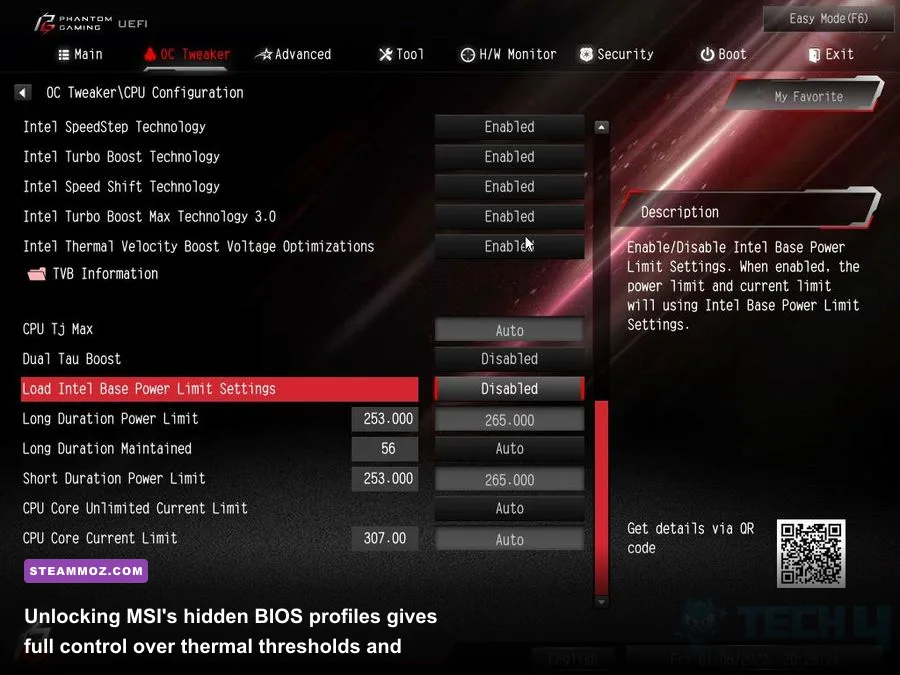
Lastly, restart your PC, tap Delete to enter the MSI Click BIOS, and verify that your RAM's XMP (Extreme Memory Profile) is active. Surprisingly, factory service updates often reset your motherboard to baseline JEDEC memory speeds (such as 4800 MT/s instead of 5600 or 6000 MT/s). Re-enabling your primary XMP profile restores up to 15 GB/s of memory bandwidth and brings down inter-core cache latency across the board.
By stripping out bloated vendor services, undervolting your CPU and GPU, refining your fan response, and leveling out your frame pacing through RTSS, your MSI PC will run noticeably quieter, drop double-digit temperatures, and deliver rock-solid, fluid performance across your entire gaming library.