The fastest way to clear Hunt: Showdown 1896’s Shrine Maiden’s Hell secrets is to visit the marked shrine spots before committing to the boss lair: Stillwater Bayou’s chapel edge, Lawson Delta’s church tower route, DeSalle’s upper courtyard, and Mammon’s Gulch’s forest shrine. Interact with each offering stand, collect the hidden quest item, then extract safely; the rewards rotate with the active event build, so check the in-game quest panel before hunting for a specific charm, weapon skin, or Hunter cosmetic.
This guide focuses on the locations that are easiest to miss, the safest approach to each one, and the traps that turn a two-minute detour into a full lobby fight. Shrine Maiden’s Hell is built around Hunt’s usual risk-reward loop: the reward is not valuable because it is difficult to click, but because every click creates sound, consumes time, and advertises your position to nearby teams.

What counts as a Shrine Maiden’s Hell secret?
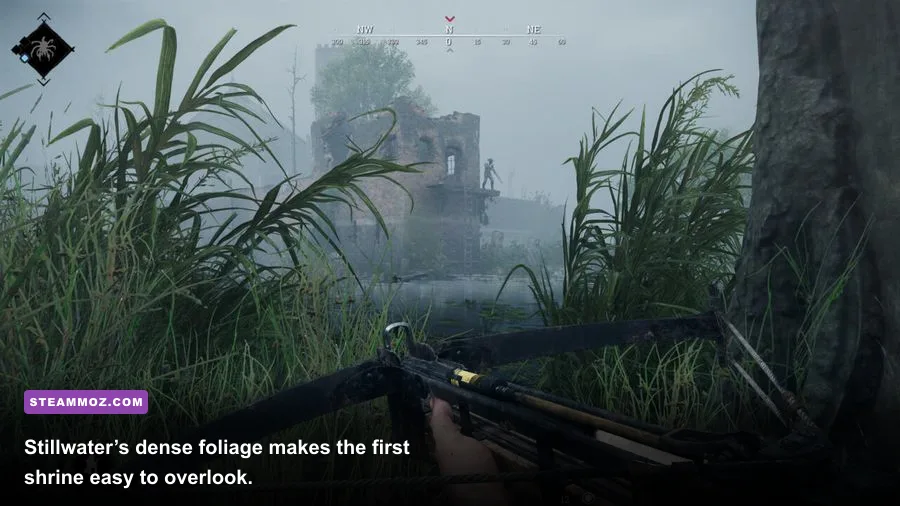
The questline uses small Japanese-style offering points rather than large objective markers. Look for a low wooden stand, paper talismans, red accents, candles, or a compact shrine tucked against an existing compound structure. The interact prompt may not appear until you are almost touching the object, and dark interiors can hide the prompt behind debris or foliage.
There are three useful visual rules. First, shrines are normally placed at the edge of a playable compound, not in the center of a boss arena. Second, they tend to sit beside an obvious vertical landmark such as a bell tower, chapel wall, rock face, or large tree. Third, the reward interaction is distinct from looting a box: hold the prompt until the animation finishes, then verify the quest tracker before leaving.
Do not assume that a shrine interaction completes the objective if another team destroys or steals the item afterward. The safest routine is to open the map, confirm the quest step changed, replenish stamina and healing, and only then rotate toward the extraction route. Crytek’s official Hunt: Showdown website and current event panel are worth checking when a patch changes the active reward table.
| Secret type | What to look for | How it registers | Main danger |
|---|---|---|---|
| Offering stand | Wooden platform, candles, talismans | Hold the interaction prompt | Audio reveals your position |
| Hidden quest pickup | Small charm or event object near the stand | Loot or interact after activation | Easy to miss in foliage |
| Reward cache | Supply box or marked container | Search after completing the step | Teams can camp the approach |
🎮 Hunt: Showdown 1896 - Shrine Maiden's Hell
Looking to experience this game? Grab your digital key directly on our store for $7.49.
View on Steammoz Store →Stillwater Bayou shrine location
Start at the chapel-side compounds and work the outer perimeter before entering the main buildings. The Stillwater secret is tucked near the boundary where the chapel structure, trees, and broken fencing create a narrow visual pocket. From the main approach, keep the building on your left and scan the shadowed tree line rather than the open road. The shrine sits low enough that a crouched hunter can walk past it without triggering the prompt.
AI is the first problem here. Grunts and hive swarms frequently occupy the route, and killing them with a loud weapon is a poor trade. Bring a knife or dusters, use choke bombs to deny a hive’s angle, and avoid stepping into deep water while carrying the event item. Water movement is loud, and a team rotating from the boss compound can hear the splash long before it sees you.
Once you find the stand, clear the immediate AI, close any nearby doors, and interact from cover. The best extraction line is not always the nearest one. Stillwater’s walls and reeds create several dead ends, so use Dark Sight after the interaction to check for nearby hunters and rotate through solid cover. If the boss is active in the neighboring compound, leave immediately rather than trying to loot every box on the way out.
Stillwater route
- Approach from the outside perimeter instead of crossing the compound center.
- Check the chapel-side tree line, broken fence, and low wooden platforms.
- Silently remove AI and interact with the offering stand.
- Confirm the quest tracker, then rotate through reeds and hard cover.
Lawson Delta’s tower and rooftop secret

Lawson Delta’s hidden location is vertical. Search the church and tower side of the relevant compound, then climb only after checking windows for hunters. The shrine is placed along the elevated route, close enough to the tower structure that players focused on the ground floor often miss it. Look beneath the stair approach, around the upper landing, and beside the exterior wall rather than searching the central courtyard.
This is the riskiest stop because the sound profile is terrible. Ladders, wooden stairs, and metal walkways broadcast every movement. A suppressed pistol is ideal for clearing a single grunt, while a silent throwing knife handles isolated targets without giving away your exact floor. Don’t sprint up the tower immediately after spawning; pause at each landing and listen for healing, doors, footsteps, or the telltale scrape of someone climbing.
Use the tower’s height to scout before taking the reward. Dark Sight can reveal nearby bounty carriers, but it won’t replace basic audio discipline. If the compound is contested, wait outside and let the other squad commit to the boss or rotate away. The reward is stationary; there is no reason to force a close-range fight for it.
| Approach | Speed | Noise | Best use |
|---|---|---|---|
| Exterior ladder | Fast | High | Only when the compound is clear |
| Interior stairs | Medium | Medium | Controlled solo approach |
| Roof rotation | Slow | Low to medium | Scouting before interaction |
| Ground-level flank | Slow | Low | Waiting out another team |
DeSalle’s courtyard reward cache

DeSalle hides its Shrine Maiden’s Hell objective around the upper courtyard and adjoining building edges. The reliable method is to enter from a side street, climb toward the raised section, and inspect the space behind stairs, awnings, and partial walls. The shrine blends into DeSalle’s cluttered architecture, so don’t search for a glowing marker. Search for a clean rectangular platform with paper decorations where the environment normally contains crates or barrels.
DeSalle’s sightlines make this a terrible place to stand still. Windows cover the courtyard, and a sniper on a neighboring roof can watch the interaction from farther away than you expect. Before touching the shrine, throw a decoy or blank fire toward the opposite side of the compound if you suspect a team is nearby. The goal is to make your interaction sound like part of a larger movement pattern, not a stationary player holding a prompt.
Bring a stamina shot if your route continues through the town. DeSalle rewards fast rotations between alleys, but stamina exhaustion leaves you vulnerable when crossing an open street. After collecting the hidden reward, avoid the obvious main road. Move through buildings, break line of sight, and only check the map once you are behind a solid wall.
For broader extraction-shooter route planning, Steamoz’s secret-location guide uses the same useful principle: identify the safest exit before touching the collectible.
Mammon’s Gulch forest shrine and final checks
Mammon’s Gulch places the secret in a wooded section near the mountain compounds. Search the forest edge, rock shelves, and the approach beneath the large timber structures. The shrine is easier to spot in daylight, but the open terrain makes the interaction more dangerous. Hunters on ridgelines can cover the entire approach, while a team below can hear your footsteps on loose ground and timber.
Scout from low ground first. Use the slope to keep the nearest ridge out of view, then move from tree to tree without sprinting. If you have a spyglass, this is one of the few quests where it earns its inventory slot. Check the shrine itself, the likely sniper ridge, and the nearest extraction path before committing. A choke bomb can create temporary visual clutter, but smoke is not a magic shield; experienced players will still pre-aim the interaction point.
The final reward is only worth taking if the exit is viable. If the bounty banishes nearby, abandon the shortcut and rotate wide. If the map is quiet, grab the item, confirm the tracker, and use the mountain’s dips to break sightlines. Players hunting the complete cosmetic set should repeat the route on another match if the prompt is absent. Event objectives can be patch-gated, already completed, or tied to a different map rotation.
Loadout for all four secrets
- Primary: suppressed Vetterli 71 Silencer or Winfield M1873C Silencer for quiet AI clearing and medium-range defense.
- Secondary: Nagant M1895 Officer for fast follow-up shots when a silent approach fails.
- Tools: Knife, Choke Bombs, Decoys, and a Medkit. Replace Decoys with a Spyglass on Mammon’s Gulch.
- Consumables: Stamina Shot, Vitality Shot, and two explosives. Concertina Bombs are stronger than dynamite for sealing a stairway after interaction.
For weapon-specific decision-making, compare this quiet objective loadout with Steamoz’s weapon tier-list approach, and use the official Hunt: Showdown 1896 Steam page for current system and update information.
How to secure the hidden rewards without losing them
Run the secrets as a route, not a checklist. Spawn-side shrines should be collected immediately, contested compounds should be delayed, and the last interaction should happen closest to your planned extraction. Keep one teammate watching the approach while another holds the prompt; solo players should place traps behind doors before interacting and leave one stamina bar available for the escape.
Remember that the quest tracker is the authority. A visual shrine, an old guide video, or a screenshot from a previous event build may not match the current objective. If a location looks correct but no prompt appears, check whether the step requires a different map, whether the reward was already claimed, and whether the event is active on your server. The official Hunt news page is the safest place to verify event changes.
Before queueing, bookmark the relevant route and decide which reward matters. The best Shrine Maiden’s Hell run is rarely the fastest one. It is the run where you make less noise than the team behind you, take the reward from cover, and reach extraction with enough health and stamina to survive the final ambush. For more collectible-focused routing, Steamoz’s hidden-reward guide offers another useful example of that same risk-first mindset.