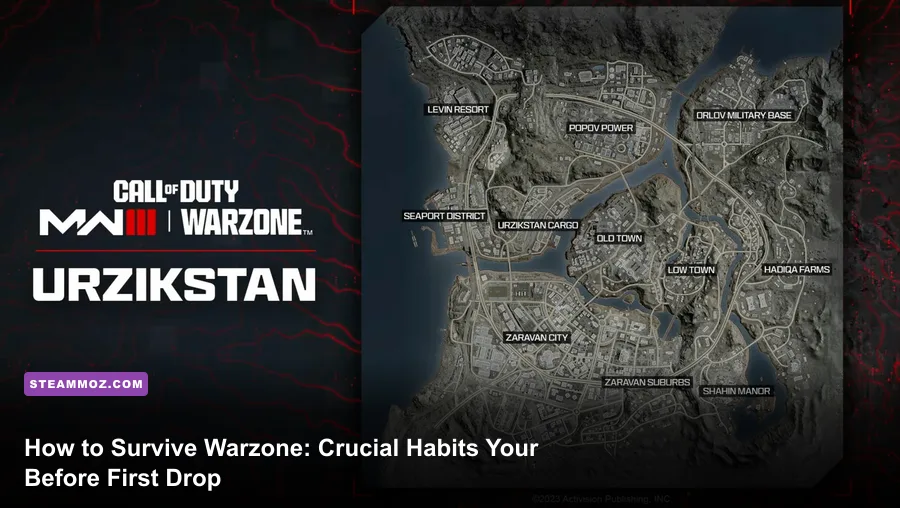
Warzone will chew you up and spit you out if you treat it like traditional multiplayer or a slow, stealthy battle royale. In Urzikstan, Rebirth Island, or Fortune's Keep, you are not just battling over a hundred trigger-happy players; you are constantly juggling a strict 300-HP armor economy, relentless movement mechanics, and unforgiving time-to-kill (TTK) margins. If you load into your first match expecting to crouch-walk quietly through buildings and snipe from bedroom windows, you will be staring at a Gulag loading screen inside three minutes. Winning requires deliberate crosshair centering, strict plate discipline, an aggressive cash-spending tempo at Buy Stations, and knowing precisely when to abandon a bad gunfight. Let's break down the foundational battlefield mechanics and critical habits you need to master before leaping from the cargo plane.
Master the Health Economy: Plates, TTK, and Resetting Gunfights
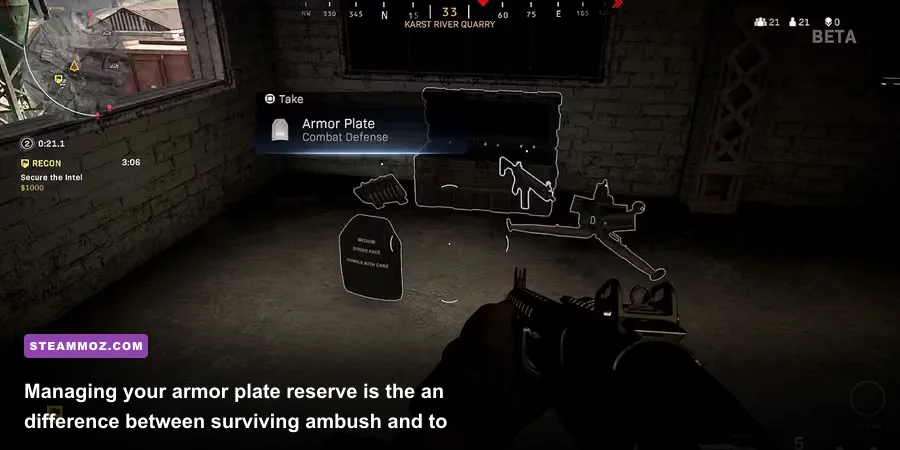
The single biggest mistake green recruits make is misunderstanding how health works under fire. Your operator has a base health pool of 150 HP, supplemented by three armor plates that grant 50 HP each, bringing your total pool to 300 HP. Because high-tier assault rifles and submachine guns spit bullets at rates capable of chewing through that 300 HP in roughly 600 to 750 milliseconds, you cannot afford to play loose with your defenses. When an enemy cracks your blue armor icon, you are one headshot or three stray chest hits away from collapsing into a downed state.
Never "ego-challenge" when you are damaged. If you take the first burst of fire and your armor breaks, immediately disengage. Dive behind hard cover, break line of sight, and replate before you even think about firing back. Experienced players always operate around the principle of resetting: break engagement, slam three plates into the vest, change angles slightly, and only then rechallenge. If you challenge an opponent while sitting on bare health, their time-to-kill against you drops below 300 milliseconds—faster than human visual reaction and server latency can process.
You should also respect your utility perks. Running perks like Quick Fix kicks off health regeneration the split second you insert an armor plate or drop an opponent, while Tempered cuts your plating needs down from three plates to two while preserving the full 150-armor bonus. Much like studying ranking weapon balance and tiers to know what guns hit the hardest, understanding your target's protective thresholds dictates how aggressively you can push.
| Weapon Archetype | Optimal Range Profile | Base TTK (300 HP Target) | Tactical Playstyle Role |
|---|---|---|---|
| Submachine Gun (e.g., Superi 46, HRM-9) | 0 to 12 meters | ~600 - 640 ms | Aggressive room clearing, stairwell pushes, mobility hip-fire |
| Assault Rifle (e.g., Holger 556, SVA 545) | 25 to 55 meters | ~720 - 790 ms | Mid-range lane control, roof suppressions, vehicle tagging |
| Battle Rifle (e.g., MTZ-762, BAS-B) | 30 to 65 meters | ~680 - 740 ms | High-recoil punch, tap-firing long corridors, anchor play |
| Sniper Rifle (e.g., KATT-AMR, Kar98k) | 50+ meters | Instant (Headshot Knock) | Long-range squad picks, counter-sniping, holding chokepoints |
| Light Machine Gun (e.g., Pulemyot 762) | 40 to 80 meters | ~710 - 760 ms | Sustained squad suppression, wall-banging, vehicle shredding |
When you knock an enemy down, do not instantly dump the rest of your magazine into their crawling body if you are caught in the open. Downed players are bullet sponges that soak up precious ammunition. If their squadmate is charging up the stairs, an empty magazine guarantees your death. Ping the downed enemy for your squad, use them as bait, reload, and clear the room before confirming the kill.
🎮 How to Survive
Looking to experience this game? Grab your digital key directly on our store for $3.74.
View on Steammoz Store →Dial In Your Movement: Centering, Tac Sprint, and Camering
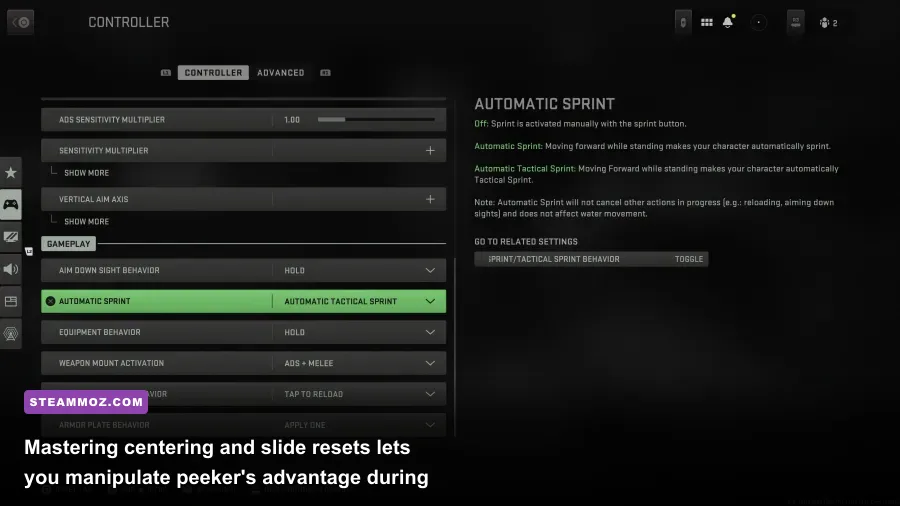
Warzone is an intensely physical first-person shooter. You cannot succeed with passive movement. Your gun barrel needs to act as a laser pointer glued to where an enemy's upper torso will emerge long before you see them. This fundamental mechanic is called "centering." Beginners constantly run around looking at the floor or aiming lazily at waist height. The moment an enemy rounds a corner, the beginner must spend 200 milliseconds dragging their crosshair upward while the veteran is already landing upper-chest and head shots. Keep your crosshair elevated, locked directly onto door frames, rooftop parapets, and window sills as you traverse the map.
Pair strict centering with tactical sprint management. Tactical sprint is your fastest ground movement speed, but it exhausts quickly and introduces an aggressive sprint-to-fire delay. By using slide canceling—initiating a slide and quickly standing or jumping out of it—you preserve lateral velocity while keeping your weapon ready to raise at a moment's notice. You don't slide around just to look flashy on a stream; you do it to reset your operator's sprint cooldown and distort your hitbox against snipers watching from high ground.
Understanding "peeker's advantage" is equally essential. Due to online networking and server interpolation tick rates, a player who aggressively sprints and jumps around a corner will visually register an opponent fractions of a second before the stationary defender's screen renders the attacker. Sitting motionless in a corner holding an angle puts you at an objective technical disadvantage. When you suspect an enemy is lurking inside a room, do not crawl through the doorframe; jump-peek wide, gather visual confirmation, snap your centered reticle to their head, and fire while moving.
Cash Flow and Buy Stations: How to Spend Your First Five Minutes
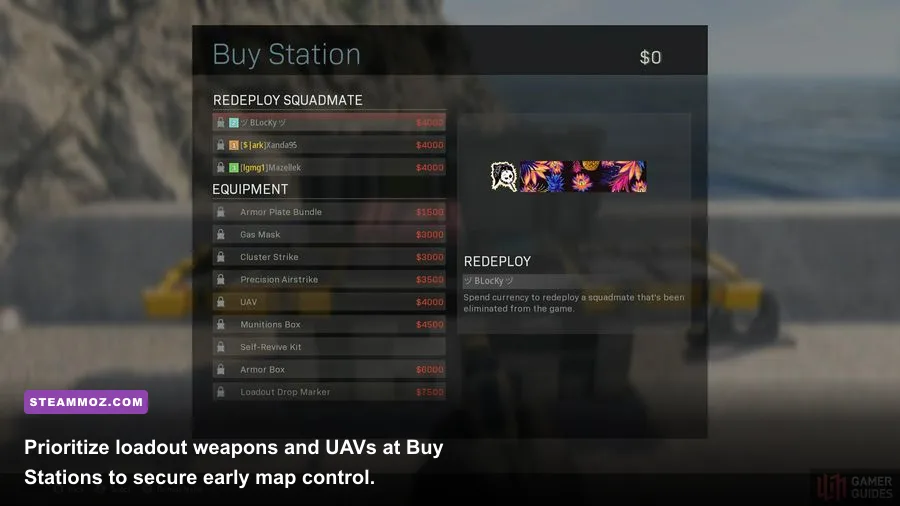
Looting in Warzone is not an endless treasure hunt where you gather trophies; it is an economic sprint designed to get lethal utility into your hands before the first circle finishes collapsing. The match is won or lost based on how efficiently your team converts loose ground cash into assets at the Buy Station. When searching for choosing the most lethal loadout gear, you quickly discover that customized guns with precision recoil tuning completely outclass the random green- and blue-tier floor loot scattered across Urzikstan's apartments.
Land directly on a contract to establish your bankroll. Scavenger contracts mark three supply crates containing guaranteed cash, plates, and ammunition, providing enough capital to make an immediate Buy Station push. If your squad prefers early action, grab a Bounty contract, which points you directly toward the nearest enemy team while paying out a lucrative bounty reward if they die by your hand or an unrelated third party.
| Purchase Item | Average Cash Cost | Tactical Priority Tier | Optimal Purchase Window |
|---|---|---|---|
| Custom Primary Weapon | $2,500 | S-Tier (Essential) | First 2 minutes; replaces weak floor loot immediately |
| Squad Loadout Drop Marker | $16,000 - $20,000 | S-Tier (Game Changing) | End of Circle 1; unlocks complete perk packages and secondary guns |
| UAV (Reconnaissance Plane) | $4,000 | A-Tier (Aggressive) | Mid-game rotations; paints unsuppressed enemies on radar |
| Self-Revive Kit | $3,000 | A-Tier (Insurance) | Before taking rooftop or long-distance sniper duels |
| Armor Box / Munitions Box | $2,000 / $1,500 | B-Tier (Situational) | Before rotating across open deserts, water, or wide highways |
| Redeploy Flare | $5,000 | B-Tier (Late Clutch) | Final circles when Buy Stations are closed or covered in gas |
Never hold onto piles of cash. A team that dies with $25,000 in their backpacks simply gifted a free victory kit to the squad that ambushed them. If your squad possesses enough money for a Loadout Drop, buy it instantly. If you have leftover funds, burn them on an emergency Self-Revive, call in a UAV to scan your rotation path, or drop an Armor Box to ensure your entire fireteam is sitting at maximum plate capacity. Visit the official Call of Duty Warzone portal to read up on patch notes whenever seasonal updates adjust item prices and kiosk availability.
Rotations and the Pinwheel Concept: Surviving the Gas Collapse
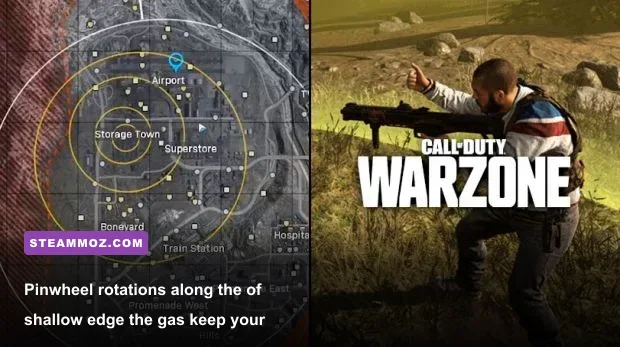
The advancing wall of toxic gas is not just a match boundary; it is the most lethal weapon on the map. The vast majority of beginner squads die not because they lost a fair gunfight, but because they ignored the match timer, got caught deep in the gas, and were systematically gunned down by a patient squad waiting on the safe edge. This slaughter is known as "gatekeeping." To avoid this trap, you must master the art of early, intentional rotations.
When the first circle reveals itself, immediately assess the map geography. Look for the "thin side" of the circle—the area where the distance between the safe white circle and the encroaching gas border is narrowest. The gas on the thin side travels far slower than on the wide side, allowing you to control your movement without sprinting in sheer terror. Use what veteran players call the "pinwheel rotation." Instead of sprinting straight toward the dead center of the map—where every rooftop camper in the lobby has line of sight on your squad—rotate smoothly along the perimeter with the gas hugging your shoulder.
By sweeping with the gas on your flank, you guarantee that no enemy squads can emerge from behind you. You clear your sector methodically, eliminating threats room by room while securing elevated positions. Urzikstan features massive vertical points of interest; holding the highest accessible roof or natural ridge along the rotation path allows you to rain suppressive fire down upon late-rotating squads choking in the open storm. Just beware of vertical ascenders and ziplines—without throwing smoke grenades to obscure the top anchor point, sliding up a cable is an easy way to deliver yourself directly into an enemy's crosshairs.
Audio and Visual Settings That Give You Legal Wallhacks
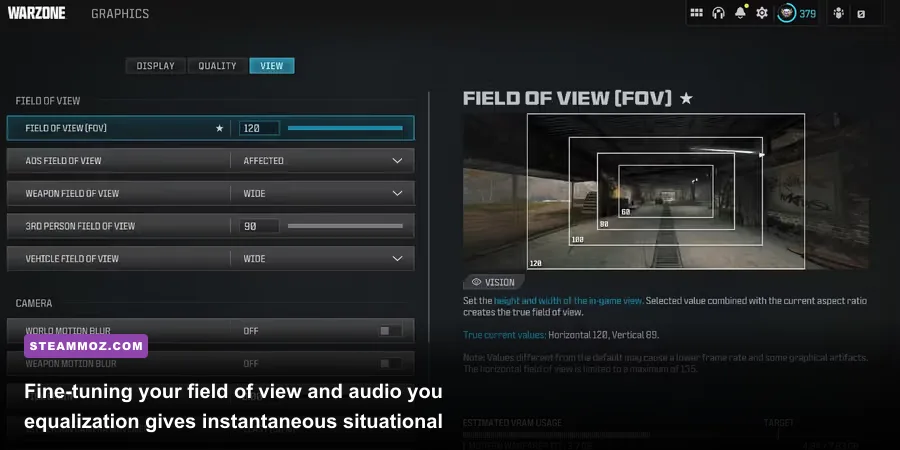
Warzone ships with default audio and visual settings tuned for cinematic presentation, not cutthroat competitive visibility. If you jump in without adjusting these toggles, your screen will be smothered in motion blur, distant targets will blur into background noise, and loud airstrike sirens will obliterate your ability to hear footstep audio. Taking five minutes in the menus will dramatically improve your tracking accuracy, much like applying aggressive settings optimization to gain clear frames in other open-world shooters.
Start with your Field of View (FOV). The default console FOV of 80 creates horrific tunnel vision that blinds you to enemies standing just outside your peripheral vision. Bump your FOV slider up to 105 or 115. Setting it higher than 120 can make distant targets look microscopic, turning long-range gunfights into an exercise in eye strain. Critically, locate the ADS Field of View setting and toggle it from "Independent" to "Affected." When set to Affected, your camera maintains a wider visual plane when aiming down sights, which drastically reduces the visual kick and perceived recoil of high-powered assault rifles.
| Setting Name | Competitive Value | Performance & Tactical Impact | Optimization Rationale |
|---|---|---|---|
| Field of View (FOV) | 105 – 115 | Low FPS cost; massive peripheral vision gain | Eliminates blind spots without making distant targets too small |
| ADS Field of View | Affected | Zero FPS cost; high stability benefit | Dramatically reduces visual recoil shake during sustained firing |
| World & Weapon Motion Blur | Disabled | Slight FPS gain; major clarity boost | Removes cinematic visual smearing during fast mouse turns |
| Film Grain | 0.00 | Zero FPS cost; removes visual visual static | Provides razor-sharp edges around distant enemy player silhouettes |
| Mini-Map Shape | Square | Zero FPS cost; expands tactical radar | Grants ~21% more visible radar surface area than the circular map |
| Audio Mix Profile | Headphone Bass Boost / PC | Zero system cost; heightens positional cues | Elevates footstep thumps and armor-plating sound cues |
Do not underestimate audio equalization. Set your Master Audio mix to PC or Headphone Bass Boost. Lower the deafening music volume to zero and drop the dialogue volume down to roughly 30%. You need to hear the creak of floorboards, the rattle of a zip-line latch, and the distinct sound of an enemy sliding behind you. If your game suffers from micro-stuttering or frame pacing issues during frantic aerial drops, review our guide on eliminating micro-stutters and frame drops to keep your frame delivery buttery smooth. For official client support and troubleshooting crash errors, keep the Activision Support knowledgebase handy.
Conquering the Gulag: Mindset, Utility, and Clutch Mechanics
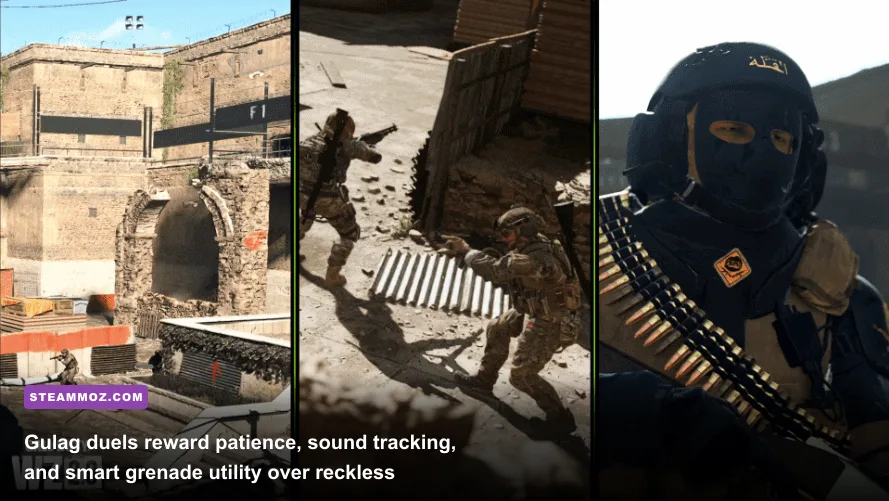
Death in Warzone is not the end of the line—it is an invitation to the Gulag. When you are eliminated for the first time before the late-game cutoff, you are cast into a compact 1v1 arena where only the winner redeploys back to their squad. Treating the Gulag like a coin flip is how squads crumble. Winning your 1v1 is a distinct skill set governed by patience, positional audio, and disciplined utility usage.
The moment you spawn inside the holding pen, listen carefully. Footstep audio is loud inside the tight Gulag arenas. Before the match timer even hits zero, you can often hear whether your opponent is sprinting left, right, or posting up behind their spawn barricade. When the countdown ends and the weapons unlock, do not instantly sprint down the center lane. The center lane is an open kill zone exposed to crossfire angles from both sides.
Instead, respect your utility items. You are typically spawned with a piece of tactical equipment (like a flashbang, stun, or smoke grenade) and a piece of lethal equipment (like a frag or thermite). Do not fling them blindly at the opponent's spawn wall in the first half-second. Use your equipment to deny space or punish aggressive rushers. Bouncing a stun grenade off an interior wall when you hear an enemy sliding around a corner leaves them frozen in place, turning your engagement into an effortless target-practice drill.
Finally, understand how to play the overtime objective. If neither combatant dies before the timer expires, an overtime capture flag or ascender cable drops in the center of the pit. Many inexperienced players panic, rushing blindly onto the flag while looking straight at the floor to capture it. Never do this. The flag acts as bait. Set up an angle overlooking the objective, wait for the panicked opponent to sprint toward it, and beam them down while they are caught in the open. Securing that win redeploys your operator straight back into the skies of Urzikstan with a fighting chance at claiming the champion banner. Keep these combat principles embedded in your approach, verify your setup via the Call of Duty Steam hub, and jump into your next drop with purpose.