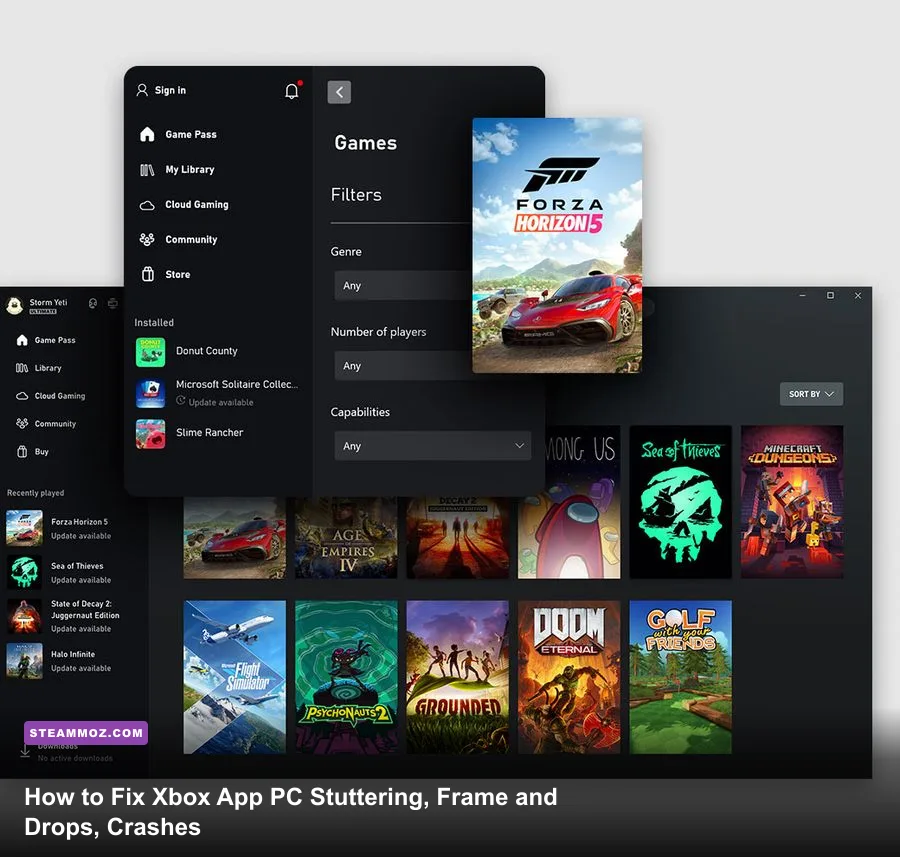
Persistent stuttering, sudden frame drops, and spontaneous desktop crashes across the Xbox PC app and PC Game Pass games almost always boil down to three root culprits: corrupted Microsoft Gaming Services dependencies, aggressive background I/O contention from Windows Delivery Optimization, and display overlay hook collisions. Because Xbox PC titles run inside specialized Universal Windows Platform (UWP) and virtualized Win32 MSIX containers rather than standard Win32 directories, standard troubleshooting methods rarely touch the actual bottlenecks. You can fix the vast majority of performance hitches immediately by terminating background Game Bar captures, resetting the Gaming Services package through an elevated PowerShell script, expanding your GPU driver shader cache to at least 10 GB, and enforcing dedicated virtual memory paging across your fastest solid-state drive.
Taming the Gaming Services Beast and Folder Permissions
The single most destructive point of failure on the Xbox PC platform is Microsoft Gaming Services. This background daemon handles digital rights management, cloud licensing handshakes, and virtualized file routing for the XboxGames and legacy WindowsApps folders. When this service encounters a desynchronized license key or a corrupted configuration index, games won't just fail to launch; they will run for ten minutes, violently hitch as the service attempts an intermittent license poll, and dump you straight back to the desktop without so much as an error prompt.
Standard Windows app repairs through the basic Settings panel only clean up superficial application caches. To eradicate deep registry deadlocks, you must cleanly purge and reinstall the service via an administrative terminal. Close the Xbox app completely, right-click your Windows Start button, select Terminal (Admin) or PowerShell (Admin), and execute the following removal string:
get-appxpackage Microsoft.GamingServices | remove-AppxPackage -allusersOnce the prompt clears, restart your PC. Do not open the Xbox app yet. Re-open your administrative PowerShell terminal and paste the direct Microsoft Store registry invocation:
start ms-windows-store://pdp/?productid=9MWPM2CQNLHNThe Microsoft Store will immediately launch on the official Gaming Services listing. Click Install, let the package download, and wait for Windows to register the fresh virtual services. If you've previously wrestled with bizarre engine crashes in unoptimized ports, much like we addressed in our Elex PC crash and FPS recovery guide, you know that low-level system permissions make or break your frame rate stability.
Next, inspect your installation directory permissions. Modern Xbox PC app versions permit installing games to custom folders (typically C:\XboxGames or D:\XboxGames). However, if your games remain nested inside the legacy, read-only WindowsApps folder, your system's security tokens frequently throttle write permissions whenever games try to stream asset caches or write save blocks. Open the Xbox app settings, navigate to General > Game Install Options, and verify that your default installation path points to a clean, user-accessible directory on an NTFS-formatted SSD. If a troublesome game sits on an older drive, use the app's internal management menu to move the installation to your primary NVMe drive. This resolves background input/output stalling instantly.
Eliminating Xbox Game Bar Overhead and Overlay Conflicts
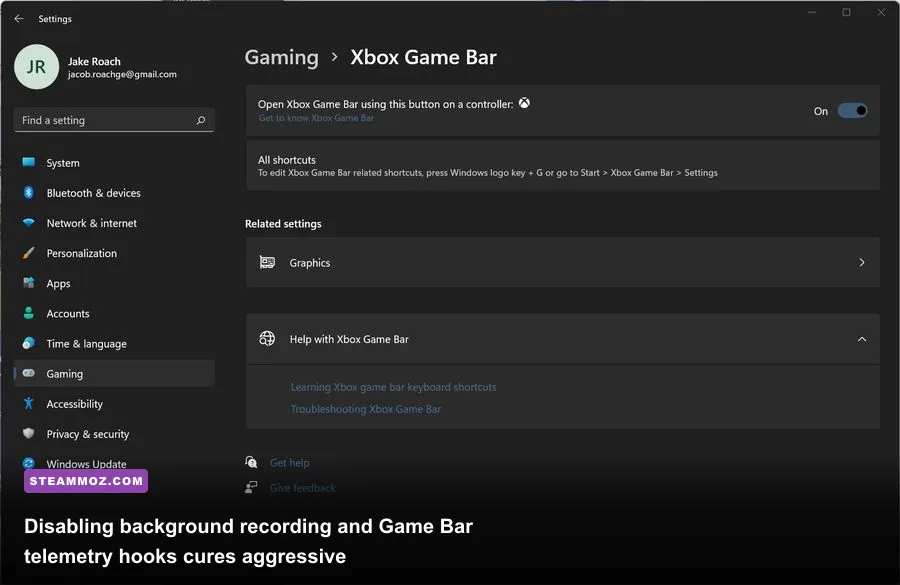
The Windows Xbox Game Bar acts as the built-in system overlay for party chat, performance monitoring, and clip capturing. Unfortunately, its hooking layer injects directly into the DirectX 12 swapchain. When a game runs in borderless windowed mode, Game Bar continually samples frame buffers and hardware utilization metrics. This background polling creates micro-stutters that show up on frame-time graphs as repetitive, saw-toothed spikes every two to three seconds, destroying the buttery smooth feel of high-refresh displays.
Even worse is the background capture engine (GameDVR). Even if you never actively press a hotkey to save a clip, Windows frequently defaults to rolling 30-second background video encoding. This forces your GPU's dedicated NVENC or AMF hardware encoder into constant use, while your system drive sustains an uninterrupted sequence of write-and-delete operations. To kill this performance thief:
- Press Windows Key + I to enter Windows Settings.
- Select Gaming from the left sidebar, then click on Captures.
- Toggle Record what happened firmly to Off.
- Set Capture audio when recording a game to Off.
- Head back to the Gaming menu, select Xbox Game Bar, and switch the top master toggle to Off if you do not actively use party voice chat or controller widgets.
Overlay collisions are just as lethal to frame pacing. If you run Discord Overlay, RivaTuner Statistics Server (RTSS), GeForce Experience In-Game Overlay, and the Xbox Game Bar simultaneously, four distinct third-party rendering hooks are fighting for ownership of your game's presentation thread. This tug-of-war frequently triggers classic memory access violation crashes (Exception Code 0xc0000005). If you run into constant dropouts during tense gameplay scenes, turn off every secondary overlay. Similar injection crashes often plague VR and simulator software, an issue we broke down thoroughly in our EscapeVR basement crash and FPS troubleshooting guide. Strip your background tasks down to essential hardware drivers, and watch your 1% frame-time minimums surge upward.
Windows 11 Deep Tuning: HAGS, VBS, and DirectStorage
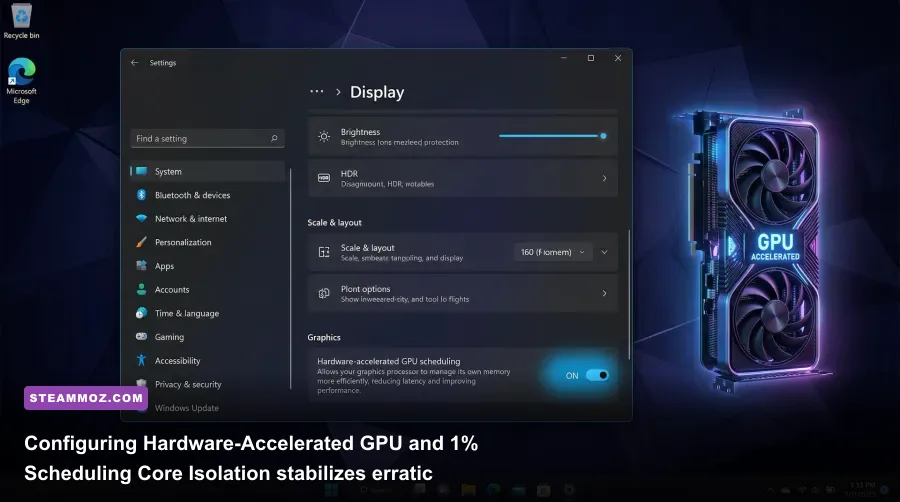
Windows 11 introduced aggressive security and graphical pipelines that dramatically reshape PC gaming. Two features in particular directly dictate whether your Xbox PC titles maintain lockstep frame rates or dissolve into jittery messes: Hardware-Accelerated GPU Scheduling (HAGS) and Virtualization-Based Security (VBS).
Hardware-Accelerated GPU Scheduling offloads high-priority display frame queuing from the CPU directly to the graphics card's dedicated scheduling processor. For modern hardware running titles with DLSS 3 Frame Generation, HAGS is mandatory. However, on mid-tier hardware or older graphics architectures, HAGS can overwhelm GPU command buffers, producing inexplicable frame-pacing micro-stutters in bandwidth-hungry titles like Forza Horizon 5 or Halo Infinite. You must test this feature on your specific rig: open Settings > System > Display > Graphics > Change default graphics settings, and toggle Hardware-accelerated GPU scheduling. Reboot your machine and evaluate whether your frame-time line flattens out.
Next up is Virtualization-Based Security (specifically Memory Integrity / Core Isolation). While outstanding for safeguarding enterprise machines against kernel-level malware, Memory Integrity forces every single CPU instruction through a secure virtual hypervisor. In CPU-limited scenarios, this virtualization barrier imposes a measurable 5% to 12% performance penalty on CPU frame times, dragging down your average frames per second and introducing violent asset-streaming hitches. If your gaming rig is dedicated primarily to entertainment, search for Core Isolation in the Windows search bar, switch Memory Integrity to Off, and reboot.
| System Feature | Default Windows State | Recommended Tuning | Frame-Time Impact | Primary Architectural Benefit |
|---|---|---|---|---|
| Memory Integrity (VBS) | Enabled (Win 11) | Disabled for Pure Gaming | +6% to +14% 1% Lows | Removes virtualization translation penalties on CPU draw calls. |
| Hardware-Accelerated GPU Scheduling | Varies by Vendor | Enabled (RTX 40/30) / Test (Older) | Eliminates Frame Drops | Allows GPU to govern its own VRAM memory queues directly. |
| Optimizations for Windowed Games | Disabled (Legacy) | Enabled | Smoother Frame Pacing | Upgrades legacy presentation modes to modern DX12 Flip Model. |
| Variable Refresh Rate (VRR) | System Controlled | Enabled Globally | Cures Display Tearing | Forces G-Sync/FreeSync syncing across non-standard borderless windows. |
| Game Mode | Enabled | Enabled | Reduces Micro-Stutter | Prioritizes thread scheduling on CPU performance cores. |
Another silent saboteur is the DirectStorage asset decompression pipeline. Microsoft built the Xbox app to interface directly with Microsoft DirectStorage architecture. When you install a DirectStorage-enabled game on a slow mechanical hard drive or a congested SATA SSD, the decompression runtime stalls the GPU pipeline while waiting for assets to load into VRAM. This manifests as complete screen freezes lasting 500 to 1500 milliseconds during rapid environmental transitions. Always install modern Game Pass blockbusters onto an internal NVMe PCIe 3.0 or 4.0 drive. Tuning engine variables correctly yields dramatic gains, a reality we often emphasize when highlighting optimal balance points, such as in our Far Cry 6 max FPS settings breakdown.
GPU Driver Profiles and Shader Cache Cleansing
On Steam, games frequently utilize pre-compiled shader caches compiled on Valve's server farms and pushed down directly to your machine. The Xbox PC platform does not share this pipeline. When an Xbox Game Pass title boots, it either attempts a rapid initial shader pass on your CPU or compiles shaders dynamically on the fly as assets load into memory. Dynamic compilation demands enormous instantaneous CPU bursts; when your processor momentarily hits 100% load compiling a dynamic lighting shader, your GPU starves for data, resulting in a sudden, jarring frame drop.
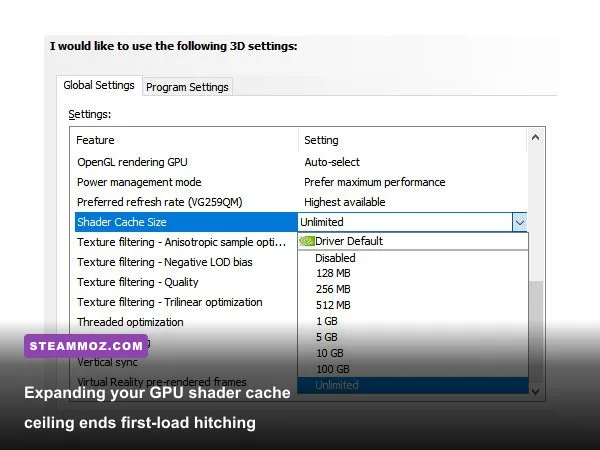
To eliminate dynamic compilation stuttering, you must give your GPU drivers sufficient disk headroom to store pre-compiled binary objects permanently. By default, display drivers set conservative cache limits (often 1 GB or 4 GB), causing your machine to purge and re-compile shaders repeatedly across play sessions.
If you run hardware powered by Nvidia GeForce Game Ready drivers:
- Right-click your desktop and open the Nvidia Control Panel.
- Navigate to 3D Settings > Manage 3D Settings > Global Settings.
- Scroll down to Shader Cache Size.
- Change the value from "Driver Default" to 10 GB (or Unlimited if you possess ample NVMe capacity).
- Under the same panel, change Power Management Mode to Prefer Maximum Performance to stop your GPU core clocks from throttling down during low-intensity menu transitions.
- Click Apply.
For systems outfitted with AMD Software Adrenalin Edition, dive into Gaming > Graphics > Advanced, locate Reset Shader Cache, click Perform Reset, and confirm that Radeon Anti-Lag is turned on to minimize queuing latency. Purging old, corrupted shader files forces the game to execute a clean compilation pass on its next launch, resolving chronic crash issues where bad cache references trigger invalid pointer calls. Similar shader corruption headaches are common across other heavy action games, as we detailed when troubleshooting in our Everspace 2 frame drops and crash fixes guide.
If you have updated drivers repeatedly without performing a clean wipe, manually clear your DirectX cache directories. Hold Windows Key + R, type cleanmgr, and press Enter. Select your primary C: drive, check the box specifically for DirectX Shader Cache, uncheck other sensitive items, and hit OK. The operating system will purge outdated binary blobs, clearing the stage for clean, stutter-free rendering runs.
Virtual Memory Sizing, Delivery Optimization, and Background Services
Perhaps the most misunderstood cause of sudden Xbox PC app crashes is virtual memory starvation. Many PC enthusiasts proudly assume that having 16 GB or even 32 GB of physical RAM means they can completely disable their Windows paging file or lock it down to a tiny 2 GB slice. Doing this is catastrophic for modern Game Pass titles. Because of how the Windows App execution environment handles committed virtual memory addresses, games like Starfield, Senua's Saga: Hellblade II, and Flight Simulator reserve vast swathes of virtual address space well beyond their actual working memory footprint.
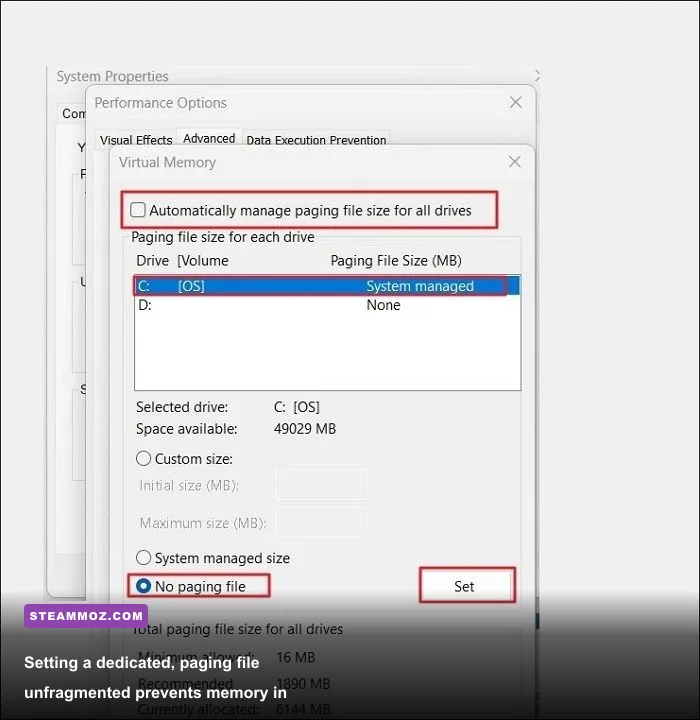
The moment a title requests a virtual memory commitment that exceeds your physical RAM combined with the active pagefile allocation, the Windows memory manager denies the request. The game's engine cannot process the allocation refusal, causing an instant, silent crash to desktop (CTD) with zero warning. You can solve this by configuring an unfragmented, system-managed paging file anchored exclusively to your fastest solid-state drive:
- Press Windows Key + R, type
sysdm.cpl, and press Enter to launch System Properties. - Switch to the Advanced tab and click Settings under the Performance section.
- In the Performance Options window, click the Advanced tab, then select Change under Virtual Memory.
- Uncheck Automatically manage paging file size for all drives.
- Highlight any mechanical HDDs or secondary drives and set them to No paging file.
- Select your primary fast NVMe SSD, click Custom size, and set both Initial size and Maximum size to 16384 MB (16 GB) or 24576 MB (24 GB). Matching the minimum and maximum sizes prevents the OS from constantly resizing the paging file on the fly, eliminating a notorious source of background stutter.
- Click Set, click OK, and reboot your PC.
Next, reign in Delivery Optimization (DoSvc). This background Windows service downloads Game Pass title updates peer-to-peer across local networks and internet rings. When left unchecked, Delivery Optimization frequently fires up in the middle of your play session, hijacking storage drive bandwidth and running high-priority CPU cycles to verify background package hashes. This causes violent, unexplained 200ms frame hitching while you are playing. Address this directly in Windows Settings by visiting Windows Update > Advanced Options > Delivery Optimization. Turn off Allow downloads from other PCs completely, or restrict bandwidth sliders under Advanced Options to absolute minimums.
| Error Code / Symptom | Probable Root Cause | Targeted Action Plan | Affected Windows Subsystem |
|---|---|---|---|
| Error 0x80070005 | Access Denied / Folder Lockdown | Change default install folder away from WindowsApps to C:\XboxGames. | NTFS File Permissions |
| Error 0x00000001 | Gaming Services Communication Failure | Purge and reinstall Gaming Services via PowerShell administrative script. | MSIX Gaming Runtime |
| Error 0x80073D12 | Missing Custom Drive Mounting | Verify secondary drive is formatted as NTFS (exFAT/FAT32 is unsupported). | Virtual Disk Manager |
| Sudden Silent Desktop Crash | Virtual Memory Allocation Exhaustion | Expand Windows Paging File on primary NVMe to 16 GB fixed size. | Windows Memory Manager |
| Sawtooth Frame-Time Spikes | Overlay Collision / Capture Hooking | Disable Game Bar background capture; shut down Discord and RTSS overlays. | DirectX Swapchain Presentation |
Finally, check that the Xbox app's auxiliary dependencies are fully updated. Open the Microsoft Store app, click the Library icon in the lower-left corner, and hit Get Updates. Ensure the Xbox App, Gaming Services, Windows Web Experience Pack, and DirectX Runtime packages are completely current. Similar fine-tuning practices pay off across many modern puzzle and narrative adventures, as shown in our Filament Marmalade Edition frame optimization guide. By tackling operating system virtualization layers, purging stubborn background capture services, and optimizing storage and memory pipes, you convert the Xbox PC platform from an unstable, stuttering mess into the rock-solid, high-frame-rate powerhouse it was meant to be.