
Hotline Miami 2: Wrong Number's main hidden reward is The Abyss, a secret level unlocked by collecting all 27 puzzle pieces. The pieces are tucked into dead-end rooms, side corridors, and areas that become dangerous after the main route opens. There are no traditional treasure chests or secret mask pickups to find: masks, weapons, and character abilities come from story progression, scores, and specific playable characters. This guide separates the genuine collectibles from the game's many misleading-looking corners.
What secrets actually exist in Hotline Miami 2?
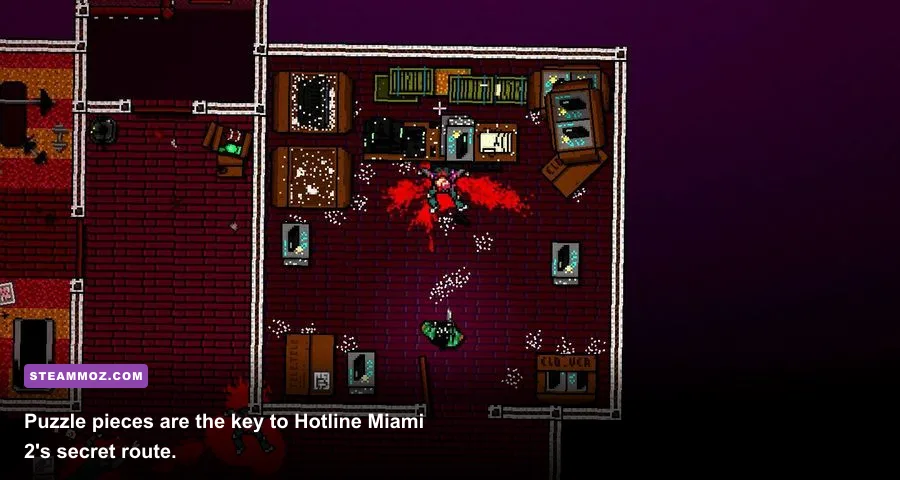
Wrong Number's collectible system is deliberately cryptic. Every puzzle piece looks like a small jigsaw fragment with a pale outline, and collecting it makes a sharp confirmation sound. A piece disappears permanently from that scene once collected, so you don't need to grab it again on replay. You do, however, need to finish or properly exit the level for the game to record your progress reliably.
There are 27 puzzle pieces in total. They form the hidden path to The Abyss, a special chapter associated with the game's most secretive ending material. You can check your overall collectible progress from the chapter-selection and level-completion screens. If the counter isn't moving, replay the scene and confirm that the piece has vanished before abandoning the run.
The game also contains alternate routes, hidden rooms, score masks, and character-specific interactions. Those aren't part of the 27-piece collection. The Fans' animal masks, for example, are unlocked through campaign progression and score requirements rather than placed in secret rooms. That distinction matters: searching every corner for a mask wastes time when the real reward is usually a puzzle fragment.
For the official PC version and its achievement list, check the Hotline Miami 2 Steam page. The Devolver Digital developer page is also useful for confirming the supported release rather than relying on unofficial achievement trackers.

🎮 Hotline Miami 2: Wrong Number
Looking to experience this game? Grab your digital key directly on our store for $3.74.
View on Steammoz Store →All 27 puzzle-piece locations, organized by route
The table below uses the safest way to identify each hiding spot: the scene, the side of the map, and the landmark you should reach before searching. Room layouts can feel visually noisy during a restart, so look for the fragment before opening the next major door or crossing the obvious point of no return.
| Piece | Scene | Where to search | Best collection moment |
|---|---|---|---|
| 1 | Down Under | Outer side room off the opening building | Before clearing the first large interior |
| 2 | Homicide | Far-side room beyond the opening apartment route | Search before moving upstairs |
| 3 | Hard News | Side office away from the newsroom's main lane | Before the next-floor transition |
| 4 | Ambush | Perimeter room outside the central combat area | At the start, before committing to the ambush |
| 5 | Dead Ahead | Dead-end compartment along the train-side route | Search each branch before advancing |
| 6 | No Mercy | Back room on the outer edge of the opening section | Before the first major firefight |
| 7 | Seizure | Peripheral room behind the early corridor | Grab it before the seizure sequence escalates |
| 8 | Fun and Games | Side room away from the amusement-park route | Search before entering the main attraction area |
| 9 | Subway | Far platform-side dead end | Before crossing into the next station section |
| 10 | First Blood | Outer room near the opening compound | Collect before the first forced push forward |
| 11 | Stronghold | Defensive side room outside the fortified lane | Before triggering the stronghold assault |
| 12 | The Nuclear Blast | Back section reached by checking the map perimeter | Search before following the obvious objective path |
| 13 | Release | Side cell or service-room branch | Explore before opening the next locked route |
| 14 | Deathwish | Outer room beside the early combat route | Before starting the central encounter |
| 15 | House Call | Unoccupied room at the edge of the house layout | Check every bedroom before the main attack |
| 16 | Cutting Room | Backstage side room away from the primary set | Before crossing the set-piece trigger |
| 17 | Withdrawal | Peripheral room along the apartment or office branch | Search before following the withdrawal route |
| 18 | Blood Money | Remote room beyond the main money objective | Before collecting the obvious objective |
| 19 | Take Over | Side office or storage room around the first floor | Clear and inspect the perimeter first |
| 20 | Caught | Dead-end branch outside the capture sequence | Collect before entering the central trap |
| 21 | Final Cut | Backstage or side corridor outside the main set | Search before the final scripted advance |
| 22 | Home | Outer room in the residential layout | Inspect the house before starting the confrontation |
| 23 | Moving Up | Side room on the building's outer route | Before changing floors |
| 24 | Downhill | Perimeter room off the downhill combat lane | Search before pushing through the next gate |
| 25 | Crackdown | Back room outside the main crackdown zone | Before activating the large encounter |
| 26 | Subway sections revisited | Secondary platform or service branch | Check the opposite edge before leaving |
| 27 | Final campaign route | Last accessible side-room branch before the ending path | Explore before the final irreversible transition |
Scene names and chapter ordering can appear differently depending on where you are in the campaign and which character sequence is active. The reliable rule is to inspect every room that doesn't serve the immediate objective. Puzzle pieces never sit in the middle of a firefight for no reason; they're usually placed where the game tempts you to hurry past.
For another collectible-focused approach, compare the structure with Steamoz's Gloomy Eyes secret locations guide. The same habit applies here: finish the dangerous section, then sweep the edges while enemies are down.
How to find pieces without missing a one-life run

Use the perimeter-first sweep
At the beginning of a scene, pause for two seconds and identify the map's four edges. Clear the nearest threats, then walk the outside wall in one direction. This catches most puzzle rooms before the level's central objective changes the enemy layout. Don't sprint straight toward the highlighted route. Wrong Number rewards the player who treats every unremarkable office as suspicious.
Exploit the restart loop
Deaths don't erase a collected piece, but restarting immediately after finding one can create confusion if you haven't allowed the pickup to register. Let the sound play, move away from the fragment, and finish the room. If you're using a score-attack replay, collect the piece first and then restart only after the result screen confirms the scene's updated state.
Watch for one-way triggers
Several scenes use doors, elevators, stairwells, or scripted transitions that divide the map. Before entering one, check every open side room on your current floor. This is especially important in levels built around trains, offices, and multi-floor compounds. If the camera scrolls into a new section, assume the previous section is no longer safely accessible until proven otherwise.
| Situation | Risk | Correct response | Why it works |
|---|---|---|---|
| Piece sits beside enemies | Pickup gets missed during a rush | Clear the room, then sweep corners | Removes visual and audio clutter |
| Piece is near a stairwell | Transition can lock the floor | Search before climbing or descending | Prevents one-way-route mistakes |
| Piece is in a dead end | Return trip exposes you | Use a thrown weapon or cleared lane first | Keeps the retreat predictable |
| Piece appears during a scripted scene | Objective movement can trigger events | Collect it before crossing the objective marker | Stops the level from advancing early |
For performance issues, keep the game at a stable frame rate rather than chasing visual tweaks. Hotline Miami 2 is fast, but its input timing is forgiving compared with modern high-refresh shooters. Steamoz's higher-FPS settings guide and PC crash and low-FPS fixes cover the same basics: disable unnecessary overlays, test fullscreen and borderless modes, and prioritize consistent input response.
The Abyss unlock and what counts as a hidden reward

Once all 27 puzzle pieces are collected, The Abyss becomes available through the appropriate campaign progression or chapter-selection route. It isn't a weapon cache, bonus shop, or endless arena. Treat it as a secret narrative chapter and complete it like any other level. If it doesn't appear, replay the scenes that never showed a confirmed pickup; a missing fragment is almost always the problem.
The Abyss is the payoff for exploring, but several other rewards are easy to mistake for collectibles:
- Character masks: The Fans' masks belong to Alex and Ash, Corey, Mark, Tony, and other playable characters. Their abilities are tied to the character selection screen, not a hidden room.
- Score masks and weapons: These unlock through campaign performance and level progression. Higher scores come from fast kills, varied executions, and avoiding deaths—not from finding puzzle pieces.
- Alternate endings: These depend on story choices, character paths, and whether you reach secret content. A completed collectible set opens content; it doesn't magically replace every ending.
- Achievement rewards: Steam achievements track challenges such as finishing chapters, using character abilities, and pursuing secret content. They don't add an inventory item to the game.
That means there isn't a hidden “best mask” waiting behind the 27th piece. The real reward is access to a deliberately obscured chapter and the extra context it provides. If you're chasing a 100% completion file, combine the puzzle-piece sweep with your score-mask unlocks and chapter achievements instead of replaying the same room looking for a nonexistent chest.
Best cleanup order for a complete save file
Finish the story once without obsessing over every fragment. Wrong Number's campaign constantly changes characters, weapons, and enemy density, and forcing a collectible run during a blind first playthrough can turn a tense level into a restart marathon. On the second pass, use chapter select and work from the earliest unconfirmed scene forward.
- Replay one scene at a time. Start with the earliest missing piece rather than jumping between random chapters.
- Clear combat areas safely. Firearms, thrown weapons, and executions are tools for making the map readable, not just for chasing score.
- Sweep every dead end. Check bathrooms, offices, storage rooms, balconies, side platforms, and rooms behind doors that don't advance the objective.
- Confirm the pickup. Listen for the sound and verify that the piece is gone before leaving the area.
- Finish the scene. Let the results screen save the progress, then move to the next unconfirmed entry.
- Launch The Abyss. Once the counter reaches 27, check chapter select and complete the unlocked secret chapter.
Take the same patient approach you would use in a brutal survival game. Steamoz's survival tips for Generation Zero and puzzle-route advice for Human Fall Flat both boil down to the right lesson here: don't confuse speed with progress. In Hotline Miami 2, the fastest route is often the one that leaves no unexplored branch behind.
Collect all 27 puzzle pieces, verify the save after every scene, and don't waste time hunting for fictional mask pickups. That checklist covers every genuine hidden-location reward in Hotline Miami 2: Wrong Number and gets you to The Abyss with the least possible backtracking.
For broader information about the game and its creators, visit the official Devolver Digital website and the official Steam listing.