If you want the highest FPS in Finding the Soul Orb without turning its moody world into a blurry mess, start with 1080p, fullscreen mode, medium textures, low shadows, low effects, and ambient occlusion disabled. That profile is the best baseline for most PCs. Keep textures higher if your graphics card has at least 6GB of VRAM, and use a 60 FPS cap unless your frametime graph is consistently stable above your monitor’s refresh target.
The game’s atmosphere depends heavily on darkness, bloom, fog, and small light sources, so blindly setting every option to Low makes it look worse than it needs to. Shadows, volumetric effects, reflections, and post-processing usually cost more frames than texture quality. In other words, cut the effects that inflate GPU frame time first, not the settings that simply use video memory.
Before changing anything, check the developer’s official Steam listing for the latest patches and system information. Steam games can receive quiet performance fixes, and a setting that behaves badly in one build may be corrected in the next. If you are troubleshooting crashes rather than low FPS, our guide to PC crash and low-FPS fixes covers the same basic diagnostic process.
Best Finding the Soul Orb settings for max FPS
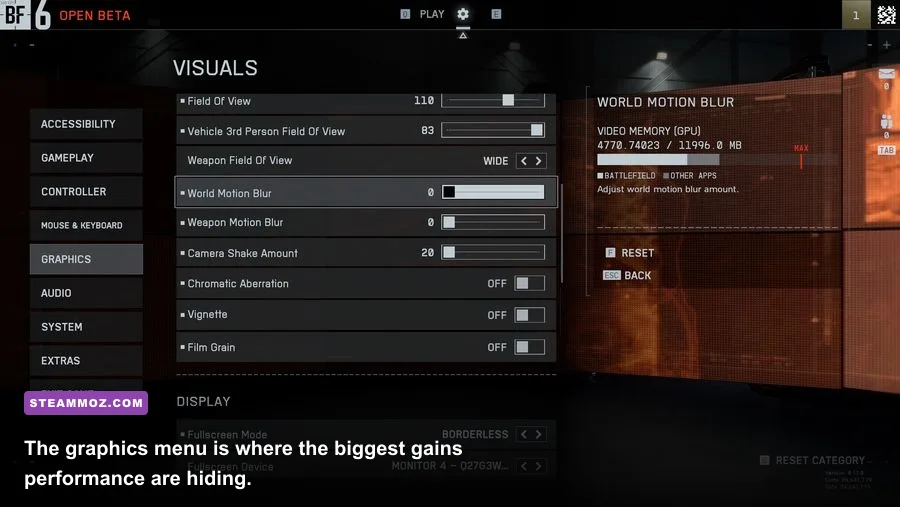
Use the table below as the practical starting point. It is designed around a stable 60 FPS target at 1920x1080, which is a better goal for an exploration-heavy game than chasing a wildly fluctuating 100 FPS. The exact result depends on your GPU, CPU, driver version, and whether the game is running from an SSD.
| Setting | Recommended value | FPS impact | Visual note |
|---|---|---|---|
| Display mode | Exclusive fullscreen | Low | Usually gives the cleanest frame pacing and simplest alt-tab behavior. |
| Resolution | 1920x1080 | Very high | Lower to 1600x900 only when the GPU remains saturated. |
| Resolution scale | 100% | Very high | Try 90% before dropping the full output resolution. |
| Textures | Medium or High | Low to medium | Mostly affects VRAM usage rather than raw GPU speed. |
| Shadows | Low | High | The best first cut for crowded scenes and exterior areas. |
| Effects | Low or Medium | High | Reduces particles, spell flashes, and combat spikes. |
| Post-processing | Low | Medium | Reduces bloom, depth of field, and screen-space processing. |
| Ambient occlusion | Off | Medium | Edges lose some contact shading, but interiors become cheaper to render. |
| Volumetric fog or lighting | Low | High | Important in misty spaces and scenes with several light sources. |
| Motion blur | Off | Small | Improves clarity during camera movement and combat. |
| V-Sync | Off with VRR; On without VRR | Variable | Use a frame cap to control tearing and latency. |
| Frame limit | 60 or monitor refresh minus 3 | None | A cap often produces smoother frame pacing than an uncapped GPU. |
Textures deserve special attention. If you have a 4GB card, Medium is the safer choice because high-resolution assets can push the game into VRAM swapping. That does not always show up as a low average FPS number; it appears as sudden stutters when turning toward a new room or entering a large area. With 6GB or 8GB of VRAM, High textures are usually a sensible visual upgrade, provided you leave shadows and effects reduced.
The 60 FPS competitive-stability profile
For a locked 60 FPS experience, use 1080p, 100% resolution scale, Medium textures, Low shadows, Low effects, Low post-processing, disabled ambient occlusion, Low volumetric lighting, and motion blur off. Cap the game at 60 FPS in its own menu if that option exists. If it does not, use your GPU driver or an external limiter and test a 58 or 59 FPS cap when playing on a 60Hz display.
This profile is less glamorous than Ultra, but it avoids the ugly pattern of 80 FPS in empty corridors followed by 42 FPS when particles and lighting stack up. Stable frame delivery matters more than a high number in quiet areas. You will feel the improvement immediately when rotating the camera or reacting to an enemy attack.

🎮 Finding the Soul Orb
Looking to experience this game? Grab your digital key directly on our store for $2.99.
View on Steammoz Store →Which settings should you lower first?
Not every graphics option costs the same amount. The useful way to tune Finding the Soul Orb is to identify whether you are GPU-limited, CPU-limited, or running out of VRAM. Watch GPU utilization, dedicated memory, CPU thread usage, and frametime while walking through the busiest location you can currently access. A quiet opening area is a poor benchmark because it does not stress lighting, streaming, or enemy effects.
| Symptom | Likely bottleneck | First change | Expected result |
|---|---|---|---|
| GPU usage stays above 95% | Graphics card | Lower resolution scale, shadows, and fog | Higher average FPS and lower GPU frametime. |
| GPU usage sits below 85% while FPS falls | CPU, streaming, or engine overhead | Close background apps and reduce enemy or effects density if available | Fewer dips, though maximum FPS may barely change. |
| FPS is fine but stutters when entering areas | VRAM or asset streaming | Lower textures one step and install the game on an SSD | Shorter hitching and more consistent traversal. |
| Dark scenes look noisy or flicker | Upscaling or temporal reconstruction | Raise resolution scale to 100% and disable aggressive sharpening | Cleaner edges, potentially at a small FPS cost. |
| Combat causes sudden frame drops | Effects, shadows, or volumetrics | Lower effects and volumetric lighting | Better lows during particle-heavy encounters. |
Lower shadows before textures. Shadows require the game to render additional depth information and then filter it across the scene. Their cost climbs in areas containing several lights, which is exactly where atmospheric games tend to look most dramatic. Dropping shadows from High to Low often produces a larger gain than dropping textures from High to Low, while the visual loss is easier to tolerate once you are moving.
Effects are the next major target. Particle systems, glowing attacks, sparks, and screen-space flashes can be cheap individually but brutal when several overlap. If the game has separate settings for effects quality and effects density, reduce quality first. If it only offers one slider, Medium is a good compromise. Low can make important combat feedback harder to read, especially when an attack’s impact is communicated through light and particles.
Why ambient occlusion is optional
Ambient occlusion adds subtle darkness where objects meet floors, walls, and one another. It makes rooms feel grounded, but it is not essential to readability. On a weaker GPU, turning it off is one of the safest ways to gain performance without making textures muddy. If your frame rate is already comfortable, use the lowest AO option rather than the highest setting; the difference is mostly visible in static screenshots, not during play.
Best profiles for low-end, mid-range, and high-end PCs
There is no single perfect preset because the important limitation changes from machine to machine. A low-end laptop may need a lower internal resolution, while a desktop with a strong GPU but only 4GB of VRAM can run effects well and still stutter on high textures. The following profiles prioritize consistent frame time rather than headline FPS.
| Hardware profile | Resolution | Core settings | Target |
|---|---|---|---|
| Integrated graphics or older laptop GPU | 1280x720 or 1600x900 | Low textures, Low shadows, Low effects, AO Off, fog Low, 80-90% scale | 30-45 FPS with fewer severe dips |
| Entry-level dedicated GPU | 1920x1080 | Medium textures, Low shadows, Low effects, AO Off, fog Low, 90-100% scale | Stable 45-60 FPS |
| Mainstream gaming PC | 1920x1080 | High textures, Medium shadows, Medium effects, AO Low, fog Low or Medium | Locked 60 FPS or higher |
| High-end GPU | 2560x1440 | High textures, High shadows, Medium effects, AO Medium, fog Medium | 60-100 FPS depending on scene |
| 4K-capable system | 3840x2160 | High textures, Medium shadows, Medium effects, reduced volumetrics | 60 FPS with resolution scaling as needed |
For a low-end PC, do not immediately choose the lowest possible resolution. Start at 1600x900 if the display is 1080p and reduce resolution scale to 85 or 90 percent. The image will retain the monitor’s output shape while lowering the internal workload. If distant geometry becomes too soft, return scale to 100 percent and use 1280x720 instead. The better-looking option depends on the game’s reconstruction and sharpening behavior.
Mid-range systems benefit most from a mixed preset. High textures preserve environmental detail, while Low shadows and Low volumetrics protect the frame rate in large rooms. This is the profile I would recommend first for a typical gaming PC: it keeps the game’s visual identity intact without wasting performance on effects you notice only during screenshots.
High-end owners should resist maxing everything immediately. The highest volumetric and shadow settings can still create poor 1% lows, especially at 1440p and 4K. Raise one option at a time, replay the same demanding route, and keep the setting only if the visual improvement is obvious while the frametime remains stable.
Resolution, upscaling, and image quality

Resolution is the most powerful FPS lever in the menu, but it is also the easiest way to make Finding the Soul Orb look soft. Use the native display resolution whenever possible, then adjust internal resolution scale in five-percent steps. Going from 100% to 90% renders roughly 19% fewer pixels, which can produce a meaningful GPU gain without the immediate blur associated with dropping from 1440p to 1080p.
If the game offers an upscaler, start with its Quality mode. Balanced mode can be useful at 1440p, but it tends to reveal shimmering around thin geometry and bright objects in dark areas. Those artifacts are particularly distracting when the scene contains glowing soul-orb effects, fog, or fine branches. Performance mode should be reserved for systems that cannot maintain the desired frame rate at native resolution.
| Output target | Suggested internal scale | Use case | Image-quality warning |
|---|---|---|---|
| 1080p | 100% | Best clarity for most players | Do not lower scale unless the GPU is fully loaded. |
| 1080p | 90% | Small GPU gain on entry-level hardware | Fine detail becomes slightly softer. |
| 1440p | 90-100% | Good compromise for mainstream cards | Check foliage and glowing effects for shimmer. |
| 1440p | 75-85% | Performance-focused high-refresh play | Use moderate sharpening, not an extreme filter. |
| 4K | 67-80% | High-end systems targeting 60 FPS | Upscaler quality matters more than shadow quality here. |
Sharpening should be subtle. A strong sharpening filter can make edges look crisp in a still image but exaggerate temporal noise while you move. Set it low, then judge the image during traversal rather than in the settings screen. If the game has film grain, chromatic aberration, or depth of field toggles, disable them while testing. They can obscure whether the upscaler is genuinely producing a clean image.
Players using adaptive sync should enable FreeSync or G-Sync and cap FPS a few frames below the monitor’s maximum refresh rate. For a 144Hz panel, try 141 FPS; for 120Hz, try 117 FPS. If the game cannot hold those numbers, a locked 60 FPS is usually preferable to a fluctuating 70-110 FPS range. You can find more practical frame-pacing advice in Steamoz’s PC specs and best settings guide.
How to test performance without fooling yourself
Average FPS alone is not enough. A game can report 60 FPS while delivering uneven frames that feel like small pauses. Use an overlay with FPS, GPU utilization, VRAM usage, CPU utilization, and frametime. MSI Afterburner with RivaTuner Statistics Server is a common choice, while AMD Adrenalin and NVIDIA’s overlay provide simpler alternatives.
A repeatable five-minute test
- Restart the game. This reduces the chance that a previous area remains cached and makes comparisons more consistent.
- Load the same save. Pick a location with lighting, traversal, and at least one combat encounter rather than an empty menu or safe room.
- Walk the same route for two minutes. Rotate the camera slowly, then quickly, because streaming and foliage can respond differently.
- Trigger one demanding fight. Record the lowest sustained FPS and the frametime spike, not just the peak number.
- Change one setting. If you alter shadows, effects, and resolution together, you will not know which change helped.
Watch the 1% low if your overlay provides it. A result of 60 average FPS with a 1% low of 38 will feel less consistent than 57 average FPS with a 1% low of 52. The latter is the better setting profile for exploration and combat. If your dips happen only during the first visit to an area and disappear after revisiting it, asset streaming or shader compilation may be responsible rather than a permanently excessive graphics preset.
Keep a simple note of each test: resolution, scale, texture level, shadow level, effects level, average FPS, lowest sustained FPS, and whether stutter occurred. This turns tweaking into a short experiment instead of a ritual of changing every slider and hoping for the best. It is the same disciplined approach that helps when tuning other demanding releases, including the workflow in our Borderlands 3 performance and beginner tips.
Windows and driver tweaks that actually help
Graphics settings do most of the work, but a few system changes can remove avoidable stutter. Install the latest stable driver for your GPU, then reboot after installation. Avoid beta drivers unless the release notes specifically mention Finding the Soul Orb. Keep the game on an SSD with free space available, since a nearly full drive can make asset streaming less predictable.
Close browser tabs playing video, RGB control panels you do not need, recording software, and aggressive hardware-monitoring utilities. These rarely double your FPS, but they can steal CPU time or memory during a scene transition. Windows Game Mode can remain enabled. Test Hardware-Accelerated GPU Scheduling rather than assuming it is always beneficial; its impact varies by driver and hardware combination.
Do not use third-party “FPS booster” programs that modify system services or replace game files. They often add overlays, create new background tasks, or damage configuration files. If the game starts behaving strangely after experimentation, use Steam’s file verification option and delete only the game’s documented configuration cache. The official Steam troubleshooting guidance is a safer starting point than registry-cleaning software.
My recommended final preset
For most 1080p players, use exclusive fullscreen, 100% resolution scale, High textures if VRAM allows, Low shadows, Medium effects, Low post-processing, ambient occlusion Off, Low volumetric lighting, motion blur Off, and a 60 FPS cap. If the GPU remains above 95% utilization, lower scale to 90%. If stutters remain while GPU usage is low, reduce textures, move the game to an SSD, and check background CPU usage instead.
That balance keeps the soul orb itself, environmental textures, and the game’s dark lighting readable while cutting the settings most likely to punish frame time. Players with 1440p monitors should begin at 90% scale and Medium shadows, then increase quality only after a repeatable test. Those chasing maximum FPS can use the Low shadows, Low effects, AO Off profile, but do not sacrifice texture quality until VRAM or streaming stutter proves it is necessary.
For more PC optimization reading, compare the approach with Steamoz’s performance-focused gameplay guide and beginner settings advice. The core principle stays the same: measure the demanding moments, protect frame pacing, and spend visual performance only where you can actually see the difference.
Bottom line: lower shadows, volumetrics, effects, and ambient occlusion first; preserve textures when your VRAM permits; use resolution scale in small steps; and judge the result by 1% lows and frametime rather than average FPS. That is the fastest route to a smooth, sharp-looking Finding the Soul Orb experience.
For patch announcements and developer updates, keep an eye on the game’s official Steam hub and any linked developer channels. A future update may add an upscaler, improve shader compilation, or rename individual options, but this tuning order will remain a reliable foundation.