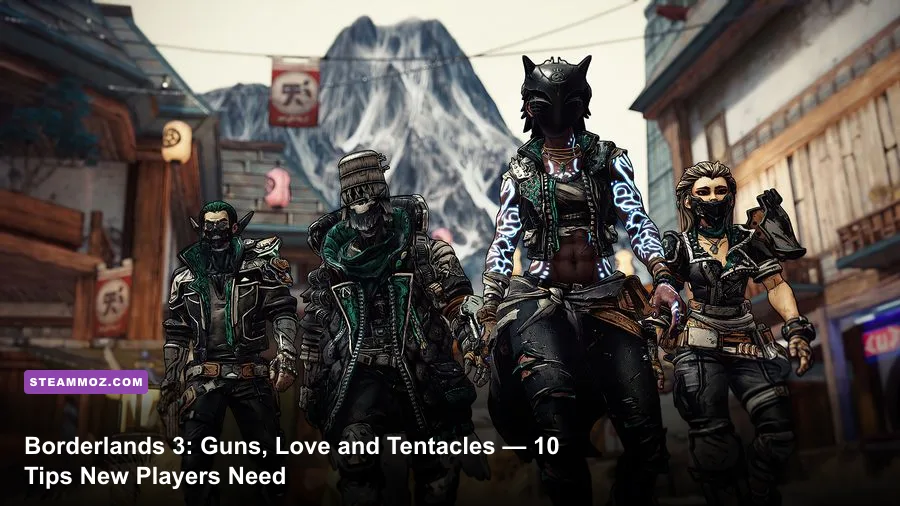
If you're new to Borderlands 3: Guns, Love and Tentacles, start with three rules: enter the DLC close to your current level, carry weapons for different enemy defenses, and spend your Eridium before treating Mayhem as a serious goal. The campaign's icy planet Xylourgos mixes tight arenas, shielded cultists, cursed creatures, and bosses that punish standing still. These 10 tips cover the decisions that make the DLC smoother without spoiling every story beat.
You need either the Guns, Love and Tentacles Steam page or an edition of Borderlands 3 that includes the second campaign add-on. The DLC begins from the main game's Sanctuary III map, and its recommended level varies with your progression. For a first run, normal difficulty and a level-matched character are ideal.

Start the DLC at the right level and difficulty

Tip 1: Don't rush to Xylourgos with an underleveled loadout. Borderlands 3 scales much of its content around your current progression, but your equipment still determines whether fights feel fair. A level 25 Vault Hunter using level 18 guns will struggle even if the enemies technically match the character. Before launching the DLC, visit a vending machine, replace weapons that are more than three or four levels behind, and equip a shield with a useful capacity rather than an attractive but obsolete legendary effect.
Guns, Love and Tentacles is built around the wedding of Sir Alistair Hammerlock and Wainwright Jakobs. You can begin it by accepting the mission from the wedding invitation in Sanctuary III. If this is your first Borderlands 3 campaign, finish enough of the main story to unlock your action skill and a complete class-mod loadout first. The DLC is far more enjoyable when your build has its core action skill, passive bonuses, and at least one reliable second wind weapon.
Tip 2: Use Normal mode for the first clear. True Vault Hunter Mode is for a second playthrough, while Mayhem Mode is an endgame modifier system unlocked after the main story. Mayhem 1 through 10 increases enemy health, damage, and rewards, but it also introduces modifiers that can disrupt a leveling build. Don't turn on Mayhem simply because a guide says every legendary must be farmed there. Learn the maps and boss patterns first.
| Starting Situation | Best Choice | Why It Works | What to Avoid |
|---|---|---|---|
| First Borderlands 3 character | Normal, level-matched gear | Clean enemy health and manageable modifiers | Starting with Mayhem 10 |
| Finished main story | Mayhem 1-3 initially | Introduces scaling without extreme build checks | Jumping straight to Mayhem 10 |
| Playing with a veteran | Co-opetition or level-appropriate loot mode | Prevents loot confusion and overpowered handouts | Using gear six levels above your character |
🎮 Borderlands 3: Guns Love and Tentacles
Looking to experience this game? Grab your digital key directly on our store for $10.04.
View on Steammoz Store →Build around one action skill before chasing loot

Tip 3: Pick a simple skill identity and support it. Borderlands 3 gives every Vault Hunter three major skill trees, but early points are more valuable when they reinforce one combat loop. Moze is the most forgiving beginner choice because Iron Bear can rescue you from a bad room and deal tremendous damage while your shields recharge. Start with Means of Destruction for grenade and ammo sustain, then work toward explosive bonuses and Iron Bear upgrades.
Amara works beautifully when you want to control crowds. Phasegrasp locks down a dangerous target, and Stillness of Mind can spread the control effect when you invest into the Mystical Assault tree. Zane is excellent for players who constantly move: Violent Momentum scales gun damage with movement speed, while Distributed Denial can make the Barrier more useful in defensive encounters. FL4K's Fade Away gives new players a panic button and guaranteed critical hits during its active window.
Tip 4: Read the action-skill element and cooldown text. Cryo is especially useful on Xylourgos because frozen enemies become easier to finish with a critical hit, but elemental bonuses vary by skill and gear. Don't assume every weapon with an ice effect is automatically best. Check the damage-over-time chance, magazine size, reload time, and whether the gun is effective against shields or flesh.
| Vault Hunter | Beginner Skill Anchor | Priority Stat | Simple Combat Loop |
|---|---|---|---|
| Moze | Iron Bear, Means of Destruction | Weapon damage and splash damage | Throw grenades, fire splash weapons, enter Iron Bear when pressured |
| Amara | Phasegrasp | Action-skill damage and elemental bonuses | Lock a priority enemy, clear clustered targets, reposition |
| Zane | Barrier or Digi-Clone | Movement speed and gun damage | Keep moving, deploy equipment, shoot through safe angles |
| FL4K | Fade Away | Critical-hit and gun damage | Activate Fade Away, target weak points, let the pet revive you |
For more detailed PC tuning, our guide to settings that turn stutter into smooth FPS covers the same performance principles that matter in Borderlands 3: stable frame pacing beats a flashy but inconsistent average.
Build a weapon rotation for shields, armor, and flesh

Tip 5: Stop judging guns by rarity alone. A purple Maliwan weapon with the correct element can outperform a badly matched legendary. The basic damage chart is simple: shock is strongest against blue shields, corrosive is strongest against yellow armor, and incendiary is strongest against red flesh. Cryo slows and freezes many fleshy targets, while radiation spreads an explosion effect through groups and is particularly useful when enemies cluster.
Carry at least three functional weapons instead of four guns that all do the same thing. A dependable Jakobs pistol or assault rifle handles critical hits, a Maliwan elemental weapon strips defenses, and a shotgun or launcher gives you emergency burst damage. Dahl weapons are comfortable for controlled bursts, Vladof guns offer high fire rates, and Torgue's explosive projectiles can delete groups when you hit the ground near their feet.
Watch the weapon card's level, damage, accuracy, fire rate, magazine size, and reload time. A massive damage number can be misleading if the gun takes two seconds to reload after every shot. For new players, magazine size and handling often matter more than a small damage advantage because they reduce the time spent exposed in a room full of cultists.
Three gear checks before every major mission
- Compare your current weapon level with the recommended mission level.
- Keep one shock weapon for shield bars and one corrosive or incendiary option for health bars.
- Replace class mods and artifacts when their level falls far behind, even if the passive bonus looks exciting.
Tip 6: Use the Lost Loot machine rather than ignoring bad drops. Sanctuary III's Lost Loot system can recover higher-rarity items you left behind, but its capacity depends on your upgrades and settings. Sell low-level weapons regularly, bank unusual class mods, and use the Marcus Munitions vending machines before boss arenas. You don't need every legendary; you need a coherent set of tools.
For reference, the official Borderlands site lists current game editions and add-on information, while the official Steam listing for Borderlands 3 is useful for checking included content.
Learn Xylourgos enemy telegraphs instead of trading damage

Tip 7: Move before the attack lands. Guns, Love and Tentacles frequently places enemies in compact rooms with ice, hanging platforms, and limited cover. Cultists with shields want to pin you in place, while larger creatures can turn a narrow route into a death trap. Shoot exposed heads and glowing weak points, but keep one eye on the floor. A red damage indicator behind your reticle is often your warning that a melee attacker or projectile is already in motion.
Use the environment as a reset button. If your shield breaks, sprint around a pillar or climb to a different platform rather than standing still and hoping it recharges. Slides and mantles are not cosmetic movement tricks; they break enemy aim and let you reach Second Wind targets. When downed, prioritize the weakest nearby enemy, not the boss. A single accurate pistol shot can restart the fight more reliably than an ambitious rocket launcher blast.
Tip 8: Treat curses and elemental effects as positioning problems. Some encounters fill arenas with hazards or force you to react to unusual enemy behaviors. When your screen becomes visually noisy, stop chasing damage for a second and identify the safest lane. A shield with elemental resistance can help, but movement and line-of-sight remain the real counters. Grenades with area damage are excellent for flushing enemies from cover, not for blindly throwing at every red barrel.
Safe combat rhythm
- Open with the element that matches the enemy's visible health bar.
- Kill ranged attackers and shield carriers before focusing durable melee enemies.
- Save your action skill for a dangerous wave, a revive, or a boss damage window.
- Reload while sliding toward cover, not while standing in the center of the arena.
If Borderlands 3 feels sluggish on your computer, compare your results with Steamoz's high-FPS settings advice. The principle is the same: lower the settings that affect CPU and particle workload first, rather than destroying texture quality immediately.
Beat the Wendigo and other DLC bosses with patience

Tip 9: Bosses are damage-window tests, not target dummies. The Wendigo is the major late-campaign fight and can punish players who unload every cooldown immediately. Keep moving around the arena, watch for its lunge and area attacks, and use pillars or elevation to break line of sight when the ground becomes dangerous. During safer windows, aim at the exposed weak points and switch to the element that matches its current health bar.
Don't panic when a boss temporarily becomes difficult to damage. Borderlands 3 often uses phases that include invulnerability, reinforcements, or a changed arena pattern. Shooting through an immune phase only wastes ammunition and may leave you empty when the real window opens. Use those moments to reload, collect ammunition, activate a class effect, and locate a nearby enemy for a Second Wind opportunity.
Empowered Grawn is another useful lesson. The arena can become crowded, and its heavy attacks are much easier to avoid if you stay mobile instead of hugging the boss. Clear smaller threats when they block your escape route, but don't spend so long farming them that you lose the boss's vulnerable timing. A shotgun at close range is powerful only after the attack animation finishes; before then, distance is more valuable.
| Boss Situation | Main Danger | Counter Strategy | Best Tool |
|---|---|---|---|
| Wendigo melee approach | Large hitbox and sudden arena pressure | Strafe wide, break line of sight, punish after the lunge | High-damage shotgun or critical rifle |
| Wendigo hazard phase | Reduced safe floor space | Prioritize movement and wait for the damage window | Accurate elemental assault rifle |
| Empowered Grawn adds | Blocked escape routes and crossfire | Clear the nearest threat, then return to the boss | Area-damage grenade or splash weapon |
| Any downed state | Wasting time on an unreachable target | Shoot the weakest nearby enemy for Second Wind | Fast pistol or SMG |
Quest rewards and boss drops are level-sensitive, so farming a boss repeatedly before your build is finished rarely pays off. Complete the campaign, unlock Mayhem if you want endgame scaling, and then farm with a specific target in mind. The official Borderlands news page is also worth checking for hotfixes and event changes that can alter loot behavior.
Use co-op, performance settings, and endgame systems wisely

Tip 10: Make the game stable before making it harder. Borderlands 3 can be demanding because of its detailed environments, volumetric effects, and busy elemental combat. On PC, start with the DirectX 11 renderer if DirectX 12 causes shader-compilation stutter on your system. Use a frame-rate cap that your hardware can hold consistently; 60 stable frames per second usually feels better than swinging between 45 and 100.
| Setting | Recommended Starting Value | FPS Impact | Visual Trade-Off |
|---|---|---|---|
| Volumetric Fog | Low or Medium | High in large combat scenes | Less atmospheric fog and light scattering |
| Screen Space Reflections | Low | Medium | Less accurate reflective ice and wet surfaces |
| Foliage | Medium | Medium | Reduced grass and environmental density |
| Texture Quality | High if VRAM allows | Low to Medium | Keep higher texture detail when possible |
| Anti-Aliasing | FXAA or low-cost option | Low | Some additional shimmering at distance |
| Resolution Scale | 100%, lower only if necessary | Very High | Lower image sharpness when reduced |
In co-op, communicate elements rather than simply calling dibs on orange loot. One player running shock and another using corrosive damage gives the group a much better answer to mixed defenses. The game's cooperative loot settings can also reduce arguments: choose the mode that fits your group, and remember that a weapon useful to Moze may be a poor fit for Zane even if it has a higher item score.
After the DLC campaign, use Mayhem to test the build rather than blindly increasing the number. Mayhem 1-3 is enough to reveal whether your weapons and action skill actually work together. At higher levels, anointed gear, class-mod passives, artifact bonuses, and dedicated legendary farms become much more important. The Pearl of Ineffable Knowledge, for example, is a powerful Guns, Love and Tentacles reward, but it matters most when your character already has reliable gun damage and survivability.
Your first-run checklist
- Replace weapons that are several levels below your character.
- Carry shock plus corrosive or incendiary damage.
- Spend skill points around one action-skill loop.
- Use cover, slides, and mantles whenever your shield breaks.
- Save cooldowns for boss damage windows or emergency revives.
- Finish the story before seriously farming Mayhem gear.
That approach keeps the DLC's best qualities intact: fast gunplay, ridiculous loot, strange cosmic horror, and a campaign that constantly rewards curiosity. Explore side paths on Xylourgos, check every vending machine, and don't be afraid to leave a legendary behind when its level or stats no longer serve your build. If you make those ten habits automatic, Guns, Love and Tentacles becomes a confident first step into Borderlands 3's endgame instead of a frustrating gear check.
For another demanding game where preparation matters as much as reflexes, see Steamoz's Kenshi survival RPG coverage and our guide to fixing low FPS on PC.