
Hop Step Sing! kiss×kiss×kiss is less a traditional rhythm game and more an interactive VR idol performance, so the best beginner strategy is simple: calibrate your headset, stay centered, learn where the interaction prompts appear, and treat each replay as a chance to notice something new. There are no conventional weapons, character builds, or RPG statistics to grind. Your real progression comes from comfort, timing, camera awareness, and knowing when to let the scene play instead of constantly reaching for input.
That distinction matters. Players arriving from Beat Saber or a full-length visual novel often expect a score chase, branching combat system, or a large menu-driven campaign. kiss×kiss×kiss is built around presence and performance. The experience is at its best when your room is prepared, your headset is stable, and you understand that the idols’ gestures, camera cuts, and vocal cues are part of the game’s rhythm. These ten tips will help new players avoid the most common mistakes without spoiling the charm of the show.
Before installing, check the current listing on the official Steam search page. The available headset support, input behavior, and store description can change with updates, so use the product page as the final word on compatibility. If your PC struggles with VR generally, Steamoz’s guide to checking PC specifications is a useful starting point, even though this title has a very different performance profile.
1. Set up your room before launching

Give yourself a clear standing or seated play area before putting on the headset. You don’t need a huge room, but you do need enough space to move your head and hands without hitting a desk, monitor, microphone, or wall. The experience puts performers close to your viewpoint, which makes players instinctively lean forward. That small movement is exactly how controllers end up meeting furniture.
Remove reflective objects where possible, especially if your headset uses inside-out tracking. Mirrors, glossy television screens, and bright windows can make tracking less stable in some rooms. Keep the headset cable behind your shoulder rather than across your feet, and place the controllers where you can grab them without looking. If you’re playing seated, choose a chair without tall arms; they can interfere with natural controller movement during interactive moments.
Run the platform’s room-scale or seated-boundary setup every time you move to a different play space. It takes less than a minute and is far cheaper than replacing a controller.
2. Calibrate your headset height and view

Camera placement is a major part of kiss×kiss×kiss. If the horizon feels too high, the idols may appear to sit below your natural eyeline; if it feels too low, close-up framing becomes uncomfortable. Recenter the headset while looking directly toward the main stage position, not at the floor or a side character.
Start seated if you’re unsure. Seated play gives you a fixed reference point and reduces unnecessary swaying during close-up scenes. Standing play can feel more immersive, but it also encourages you to rotate away from the intended viewpoint. A good rule is to keep your shoulders aimed toward the center of the performance and turn your head rather than your whole body when the camera shifts.
Don’t chase perfect symmetry. The show uses directed framing, so the “correct” view is usually the one that lets you see the performers’ faces, upper bodies, and any nearby prompt without straining your neck. Recenter whenever the scene begins to feel subtly crooked.
3. Learn the interaction language before rushing
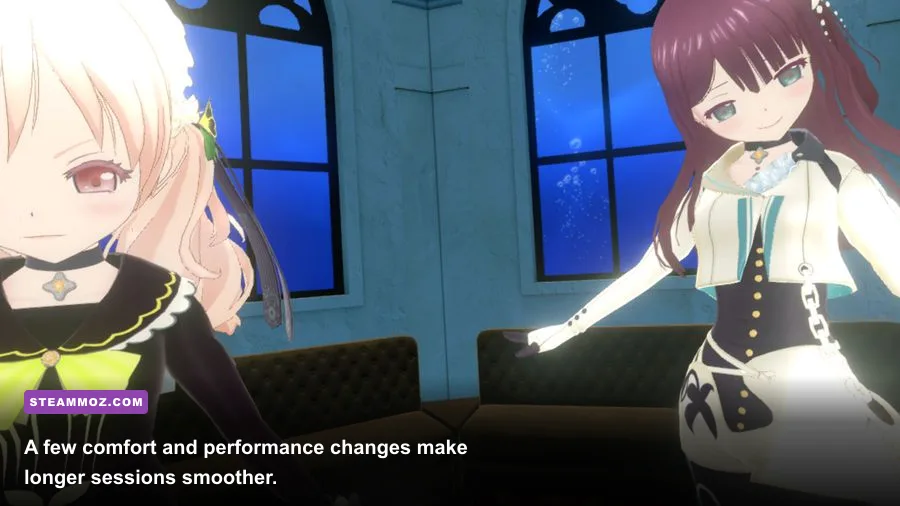
New players often assume every hand movement is a scoring prompt. That’s not how this experience reads. Some gestures are part of the performance, while others invite direct interaction. Watch the controller icons, hand cues, and on-screen prompts for a full scene before trying to react quickly.
Keep both controllers visible and charged, even if the opening sequence appears passive. Interactive moments can arrive after a period of watching, and fumbling for a controller breaks the illusion more than missing a cue. If your platform offers controller visualization or input testing, use it before starting the episode so you know which button confirms, exits, or recenters the view.
There’s also no advantage to waving constantly. Unnecessary input can trigger an interaction early, obscure the performers, or leave your hand in an awkward position when the next cue appears. Hold the controllers loosely, keep your elbows relaxed, and respond only when the game clearly asks you to.
4. Treat the first run as a rehearsal
Your first playthrough should be about orientation, not perfection. Let the scenes breathe and identify the sequence of camera positions, character entrances, and interactive prompts. Trying to inspect every detail while also reacting to unfamiliar controls is the fastest route to motion fatigue.
On the second run, focus on one thing at a time. First, track the stage composition: where each idol enters and which side of the frame receives attention. Next, watch for repeated visual signals. Finally, experiment with optional interactions. This layered approach works better than restarting every time you miss a moment.
Unlike a competitive rhythm title, kiss×kiss×kiss doesn’t need to be played with an “all notes perfect” mindset. The reward is often a more comfortable and complete viewing experience on subsequent runs. If you want a high-speed score attack, this may feel limited; if you enjoy replaying animated performances for staging details, that structure is the point.
| Run | Primary goal | What to ignore | Useful result |
|---|---|---|---|
| First | Learn camera flow and controls | Perfect reactions | Comfortable baseline |
| Second | Identify prompts and character cues | Minor visual details | Better interaction timing |
| Third | Explore optional moments | Rushing the scene | More complete replay |
| Later runs | Enjoy framing and animation details | Forced optimization | Relaxed viewing |
5. Keep your gaze on faces and hands
The most useful visual habit is alternating between faces and hands. Faces tell you where the scene wants your attention; hands often telegraph the next interactive beat. If you stare only at the center of the screen, you can miss a gesture arriving from the edge. If you track only the controllers, you’ll miss the performance’s strongest expressions.
Use soft focus rather than snapping your head between targets. Let your eyes move first, then turn your head only when the subject is outside your comfortable field of view. This reduces neck movement and helps prevent the visual mismatch that causes nausea in sensitive players.
When the camera cuts to a close-up, stop searching the wider stage. Close-ups are designed to be read at a short visual distance. Trying to find the other performer at that moment creates unnecessary movement and makes the shot feel less natural.
6. Use short sessions to beat VR fatigue
VR fatigue can appear even in a stationary experience. The combination of animated camera movement, close perspective, and sustained visual focus can produce eye strain before you realize what’s happening. Start with a 15- to 20-minute session, then take the headset off for a genuine break rather than immediately switching to another VR title.
Stop at the first sign of sweating, headache, nausea, or unusual eye pressure. Don’t try to “push through” motion sickness; that teaches your body to associate the headset with discomfort. A fan aimed gently toward your face can provide airflow and a useful directional reference, while cool room temperature helps during longer performances.
Keep water nearby, but don’t play immediately after a heavy meal. If seated play feels better, use it. There’s no immersion bonus for standing if standing makes you shift around and lose the intended viewpoint.
7. Tune performance before chasing image quality

For this type of title, stable frame delivery matters more than maximum resolution. A brief hitch during a close-up is more distracting than slightly softer textures. Start with the headset’s recommended refresh rate and the default render resolution. Only increase supersampling after you’ve confirmed that tracking and frame pacing remain consistent.
Close browser tabs, launchers, recording software, and hardware-monitoring overlays that hook into VR. If you see judder, lower render resolution first; it usually delivers a bigger improvement than reducing every visual option at once. Keep texture quality higher when possible because anime character surfaces benefit from clean edges, while effects and shadows are safer places to make compromises.
| Setting or adjustment | Starting recommendation | Performance impact | Visual trade-off |
|---|---|---|---|
| Headset refresh rate | Use the platform default | High if increased | Smoother motion versus higher GPU demand |
| Render resolution | Default, then reduce one step if needed | Very high | Softer image at lower values |
| Texture quality | Keep medium or high | Low to medium | Character detail is preserved |
| Shadows and effects | Reduce before textures | Medium | Less depth and sparkle |
| Overlays and capture tools | Disable while testing | Variable | Fewer interruptions and frame spikes |
For broader PC troubleshooting, Steamoz’s guides covering crashes and low FPS and practical PC fixes offer useful general habits. The key VR-specific rule remains unchanged: prioritize consistent frame timing over a prettier screenshot.
8. Don’t confuse watching with missing content
kiss×kiss×kiss can feel sparse if you approach it like a conventional game with a quest log and a progression tree. That isn’t a hidden failure state. The core content is the staged performance, character presentation, and interactive viewing. Not every quiet sequence is waiting for a button press.
Let the camera finish its work. Looking around aggressively can pull you away from the intended composition and make a carefully timed reaction feel accidental. On repeat runs, explore the edges of the scene deliberately, but don’t assume that every off-center detail is an unlockable secret.
This is also why you shouldn’t compare it directly with a full visual novel. If you want deeper choice-driven storytelling, Steamoz’s coverage of choice-heavy narrative games points toward a very different kind of experience. Hop Step Sing! is closer to an interactive anime performance than a branching drama.
9. Solve tracking problems systematically
When a controller disappears or your view drifts, resist the urge to restart immediately. First, check whether the headset can see the controller’s tracking lights or markers. Move away from direct sunlight, uncover the headset’s cameras, and avoid placing your hands directly against a dark shirt or reflective surface if your tracking system struggles with contrast.
Next, set the controller down and pick it up naturally rather than waving it at the headset. If only one controller is affected, replace its battery or recharge it before changing software settings. If both are drifting, the room lighting, boundary setup, or headset position is more likely to be responsible.
Restart the VR runtime only after checking the physical causes. This order saves time and helps you identify whether the problem belongs to the game, the headset, or the room. Also confirm that your play space has not been accidentally shifted since the last session.
10. Replay for performance details, not just prompts
Once the controls feel natural, stop treating every replay as a test. Watch the performers’ eye lines, small hand motions, changes in distance, and the way the camera frames the pair. These details are easy to miss while you’re worried about input, but they’re what give the title its anime-performance appeal.
Try one replay with your hands resting naturally and another with your attention on the character who is not speaking. You’ll often notice staging choices that vanish when you only follow dialogue or the nearest face. If the experience includes a replay or scene-selection option on your version, use it to revisit shorter sections instead of repeating the entire presentation every time.
For the best final pass, dim the room without making it completely dark, clean the headset lenses with a proper microfiber cloth, and use headphones at a moderate volume. Crisp audio makes vocal cues easier to follow, but excessive volume becomes tiring quickly in a headset.
The best beginner setup in one glance
There’s no secret character build or overpowered interaction route in Hop Step Sing! kiss×kiss×kiss. The strongest setup is a stable one: a clear room, a correctly centered headset, charged controllers, default performance settings, and a willingness to replay without rushing. That sounds modest, but it turns a potentially awkward first VR session into a much more polished idol-show experience.
Use the first run to learn, the second to interact, and later runs to appreciate the animation and staging. If tracking or frame pacing fails, fix those problems before changing your play style. And if you want to compare the title with other focused, replayable games, Steamoz’s Katana Zero review and Lethal League Blaze guide show how different genres can reward repeat play for very different reasons.
That’s the real trick with Hop Step Sing!: don’t play it like a game it isn’t. Give the performance room to work, respond when the experience asks you to, and let the second viewing reveal what the first one was too busy to show.