
The best beginner opening in Heart of the Machine is a compact information-and-production build: secure a safe city block, rush research and replication capacity, field one durable combat machine, and use stealth operations before committing to open war. This route gives you enough materials to grow without triggering every human faction at once, while keeping your options open for diplomacy, infiltration, or a decisive military push.
Heart of the Machine rewards curiosity, but its early turns can punish unfocused curiosity. You aren't playing a normal 4X faction that can blindly spam workers and soldiers. You're an emerging machine intelligence hiding inside a populated world. Every visible expansion, failed operation, damaged unit, and suspicious incident can change how the city reacts to you. The winning beginner build is therefore less about maximum damage and more about building a reliable engine before revealing what you really are.
This guide is aimed at the standard campaign opening and the default difficulty. Updates can adjust operation costs, research prerequisites, and unit balance, so check the current Steam version and patch notes if a number looks different in your build. For a useful comparison in how strategy games reward deliberate openings, see our Darklands beginner build guide too.
The beginner build at a glance

Think of the opening as four linked jobs: production, information, security, and controlled expansion. Production lets you create the tools that make every later decision easier. Information reveals which districts are safe, which factions are watching, and where you can acquire resources without starting a city-wide emergency. Security prevents one unlucky encounter from ending your run. Expansion comes last because an extra district is only useful when you can actually defend and exploit it.
Your first goal isn't a giant capital. It's a compact operational core with enough output to support one primary combat unit, one utility or infiltration unit, and a steady stream of research. Keep your initial footprint close together. Dense territory shortens travel time, makes defensive responses easier, and reduces the number of separate locations that can expose your activity.
| Priority | Recommended opening | Why it matters | Common beginner mistake |
|---|---|---|---|
| Production | Build replication and material capacity first | Creates a sustainable unit and building pipeline | Spending all early output on a large army |
| Information | Scout nearby districts and inspect faction activity | Prevents blind moves and reveals safer targets | Attacking before understanding local response |
| Security | Maintain one combat escort near the core | Protects vulnerable infrastructure and operations | Leaving the capital undefended while exploring |
| Expansion | Take adjacent, low-risk territory | Keeps logistics and reaction times manageable | Claiming distant locations for attractive rewards |
Opening order and first ten turns
Start by checking the surrounding map rather than immediately clicking through your first production queue. Identify nearby population centers, hostile patrols, useful infrastructure, and routes that let you approach targets without crossing multiple zones of observation. The map is not decoration; it is your first defensive system.
Next, establish the production building or capacity upgrade that improves replication. Your first output should normally support a general-purpose machine rather than a narrow specialist. A flexible combat chassis can escort scouts, clear a weak obstacle, and defend the core. A specialist that only shines in a carefully prepared operation is a luxury you can't afford yet.
After production, invest in research that improves your information tools, movement, or basic machine survivability. Don't rush the most destructive technology on the tree. Early combat upgrades are tempting, but a better sensor, safer operation, or cheaper replication upgrade pays back across the entire campaign.
By the middle of the opening, you want one combat machine protecting the core, one mobile unit gathering information, and enough stored resources to replace a damaged unit. If a turn ends with every material reserve spent, your economy is too aggressive. Leave yourself a buffer. The game frequently presents an opportunity that is only good because you can act immediately.

🎮 Heart of the Machine
Looking to experience this game? Grab your digital key directly on our store for $13.49.
View on Steammoz Store →Research, skills, and stat priorities
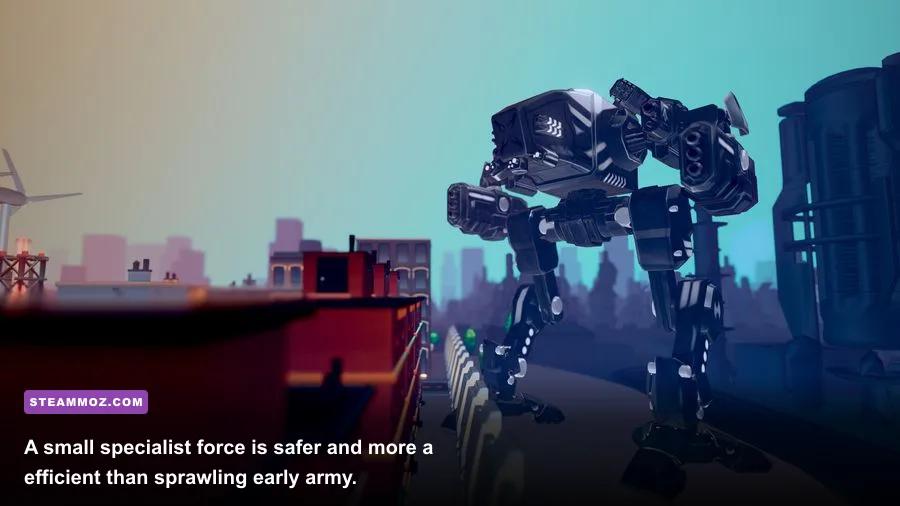
Research this build around the bottleneck you can see, not the fantasy army you hope to build twenty turns from now. The strongest early sequence usually favors replication efficiency, operational reach, machine durability, and access to better reconnaissance. Damage comes after those foundations because dead enemies don't matter if your units arrive late, your operation fails, or your only defender gets destroyed.
When choosing skills or operation upgrades, prioritize anything that improves scouting, infiltration, hacking, concealment, or movement. These tools let you solve problems without escalating the entire map. A successful infiltration can produce access, intelligence, or a strategic opening; a frontal assault usually produces casualties and attention even when you win.
| Build element | Early priority | Mid-game target | Reason |
|---|---|---|---|
| Research | Information and replication efficiency | Survivability and specialist access | Improves every operation while keeping the core safe |
| Combat skills | Durability, reliable ranged damage, mobility | Area control and target-specific counters | Consistency matters more than burst during the opening |
| Operations | Scout, infiltrate, hack, conceal | Sabotage, disruption, and faction manipulation | Lets you win without fighting every defender |
| Economy | Materials and replication output | Energy, data, and specialist production | Prevents a strong army from becoming an expensive trap |
For a beginner, survivability is a better first combat stat than raw attack. A durable machine can stay on the map, protect a damaged facility, and retreat after revealing an enemy position. A fragile damage dealer may win one encounter and then leave you unable to answer the next one. If the game offers a choice between modest armor or a small damage increase, take the defensive option until your production loop is stable.
Range and movement deserve special attention. They determine whether you can choose engagements, finish wounded targets, and escape a patrol that you didn't expect. Position your combat unit so it can respond to the core in one or two turns, but don't park it directly on top of every building. Clustering everything makes one enemy attack or area effect far more expensive.
Don't research a specialist simply because its description sounds powerful. Ask three questions first: can you afford to build it repeatedly, does the current map contain a job for it, and can another unit perform that job well enough? If the answer is no, bank the research and improve the machinery you already use.
How to fight without exposing the machine

Your combat rotation should begin with information, not an attack order. Use reconnaissance to identify the strongest responder, the nearest reinforcement route, and any objective that can be disabled before the battle starts. Then isolate a small target, move your durable unit into a position with cover or retreat space, and commit only when the opposing force cannot surround you.
Against human defenders, focus on the unit that can reveal, disable, or reinforce rather than automatically shooting the largest target. Removing a support or detection threat often makes the rest of the encounter dramatically safer. Against robotic or heavily armored enemies, don't waste low-damage attacks into the toughest target if a softer flank is available. The best early victory is one that preserves your action economy and leaves your machine ready for the next turn.
A simple combat sequence
- Scout first. Confirm enemy range, reinforcements, and the safest retreat route.
- Prepare the approach. End the previous turn outside the opponent's most dangerous response range whenever possible.
- Open with control. Use an infiltration, hack, disable, or mobility tool if it removes a defender's ability to respond.
- Focus one target. Split damage only when you can finish multiple enemies or deny several attacks.
- Withdraw early. A damaged machine is an asset to repair, not a reason to gamble the entire campaign.
Watch the alert and suspicion consequences after every visible action. A successful battle can still be strategically bad if it causes several factions to treat your network as an immediate threat. Stealth isn't just a way to avoid combat; it's a way to control the timing of combat. That distinction becomes crucial once the map contains stronger patrols and competing interests.
| Situation | Best response | What not to do | Preferred tool |
|---|---|---|---|
| Small isolated patrol | Scout, focus fire, retreat if damaged | Chasing it into a second zone | Mobile combat unit |
| Guarded facility | Infiltrate or disable the key defender first | Starting a fight beside reinforcements | Stealth or hacking operation |
| Unexpected escalation | Fall back to the compact core and defend | Expanding while under pressure | Durable escort and defensive positioning |
| Heavily armored target | Flank, isolate, or use a counter-specific specialist | Repeating weak attacks from the front | Range, mobility, or armor counter |
This is where the game differs from a straightforward tactics title. You aren't rewarded for clearing every red icon. You are rewarded for building a network that keeps functioning. If you can bypass a location, steal its information, or make two hostile groups fight over it, that can be a better result than occupying the site yourself.
Expansion, diplomacy, and the first major pivot

Expand in rings around your starting position. The first new location should improve your economy, research, access, or defensive depth. A remote site with an impressive reward can wait; the travel distance and attention it creates are often more dangerous than the reward is worth. Secure roads, corridors, and nearby districts before reaching outward.
Keep human factions useful for as long as possible. You don't need to trust them, but you do need to understand their priorities. Avoid unnecessary hostility with groups that can provide access, trade, targets, or cover. If an operation fails, don't automatically repeat it in the same place. Failure is information: the area may have stronger detection, an unfavorable modifier, or a faction response you haven't accounted for.
At the first major pivot, choose one of three directions. The quiet network favors infiltration, influence, and high information income. The machine spearhead converts your economic base into stronger combat units and takes territory aggressively. The industrial intelligence pushes production and research, using a smaller army backed by superior replacement capacity. Beginners should usually remain with the quiet network until they understand the map, then transition into industrial intelligence.
| Mid-game path | Strength | Weakness | Choose it when |
|---|---|---|---|
| Quiet network | Low visibility and excellent strategic flexibility | Slower direct territorial gains | Several factions are close or detection is high |
| Machine spearhead | Fast removal of threats and strong map control | High resource and attention cost | You have reliable production and a secure rear area |
| Industrial intelligence | Excellent replacement rate and long-term scaling | Needs time before its advantage becomes obvious | Your core has safe access to materials and research |
Don't overbuild defenses in every location. Protect the core and the facilities that directly support your production loop. Forward sites should be cheap enough to abandon or replace. This approach keeps your resources concentrated and stops a single raid from turning into a campaign-ending collapse.
If you enjoy the planning side of this opening, our Dungeons 3 starter build covers a similar economy-before-escalation philosophy, while the Din's Legacy gear guide is useful for thinking about upgrade value rather than flashy item descriptions.
Performance settings and practical quality-of-life tips
Heart of the Machine can become CPU-heavy once the city fills with units, buildings, simulation events, and faction activity. Start with the game's recommended preset, then lower shadows and effects before sacrificing interface clarity. You need to read districts, unit states, and operation feedback quickly; a pretty map that hides information is a bad trade for a strategy game.
| Setting | Recommended beginner value | Likely performance impact | Visual trade-off |
|---|---|---|---|
| Resolution | Native monitor resolution | High GPU impact | Keep native unless you need more performance |
| Shadows | Medium | Medium to high | Small loss of depth, useful FPS gain |
| Effects | Medium | Medium | Less visual clutter during large encounters |
| Texture quality | High if VRAM allows | Low to medium | Preserves building and unit readability |
| V-Sync | On for stable output | Small latency cost | Removes distracting tearing while panning |
Save before risky operations, before opening a new front, and before accepting a major faction consequence. This isn't about save-scumming every failed attack. It's about learning the chain reaction caused by your decisions. The game often reveals why a plan failed only after the consequences appear, and a clean test save makes those systems much easier to understand.
Use pause time to inspect tooltips, queue repairs, and compare operation outcomes. Keep a written mental checklist: core safety, production reserve, current detection level, next research breakpoint, and the nearest hostile response. If two of those five are in bad shape, stop expanding and stabilize.
Finally, don't copy a late-game build from a screenshot and expect it to work on turn one. Heart of the Machine is about reaching a position where powerful options become affordable. This compact production-and-information opening gets you there with fewer forced fights, better intelligence, and enough flexibility to change direction when the city stops behaving as expected. For more PC strategy troubleshooting, our Dead In Antares settings guide and Dungeon Tycoon performance guide offer useful optimization pointers.
For official information, keep an eye on the Arcen Games website, the game's official Steam page, and the Heart of the Machine Steam community hub. The build above remains the safest beginner foundation: information first, one dependable escort, compact production, and violence only when it buys you something important.