To fix Free Fire stuttering, low FPS, and crashing on Windows, start with a clean emulator profile, enable hardware virtualization, cap the game at a stable 60 FPS, and lower shadows, resolution, and anti-aliasing before touching advanced Windows tweaks. BlueStacks 5 and LDPlayer 9 are usually the easiest choices, but neither can rescue an overheating CPU, an outdated GPU driver, or a system starved of RAM.
Free Fire and Free Fire MAX are Android games running through a compatibility layer on PC, so performance isn't governed by the game's graphics menu alone. The emulator, Windows' hypervisor settings, GPU driver, background applications, and even your monitor's refresh rate all affect frame pacing. A counter showing 60 FPS can still feel awful if frames arrive unevenly every few milliseconds.
This guide focuses on repeatable fixes rather than random “booster” apps. Before changing anything, check Garena's official Free Fire website and use the current game build from a reputable emulator or the official Google Play listing for Free Fire MAX. Modified APKs and unofficial injectors can cause both crashes and account trouble.
First, Find Out What Is Actually Stuttering
Don't begin by turning every setting to Low. First reproduce the problem in a controlled way. Play one full match in Battle Royale on Bermuda, then spend two minutes in the Training Grounds. Bermuda's larger sightlines, vehicles, smoke, and clustered squads make it a better stress test than the quieter lobby. If the game is smooth in Training Grounds but collapses when several players, effects, and buildings appear, you're dealing with a GPU or emulator load problem. If both scenes hitch, suspect CPU scheduling, RAM pressure, virtualization, or a bad installation.
Watch three things at the same time: FPS, frame-time consistency, and temperatures. A locked 60 FPS equals roughly 16.7 milliseconds per frame. A sudden 100-millisecond spike feels like a freeze even if the counter immediately returns to 60. Use the emulator's built-in FPS display, Windows Task Manager, or a trusted overlay. Avoid running several overlays together; Discord, Xbox Game Bar, MSI Afterburner, and emulator counters can compete for hooks.
| Symptom | Most Likely Cause | Best First Test | Typical Fix |
|---|---|---|---|
| Constant 20–35 FPS | Too much resolution or weak integrated graphics | Set 1280×720 and render at 720p | Lower resolution, use discrete GPU, close background apps |
| 60 FPS with sudden freezes | CPU spikes, shader compilation, or RAM paging | Check CPU, memory, and disk graphs during a hitch | Enable virtualization, reduce CPU load, leave free RAM |
| Mouse movement feels uneven | Unstable frame pacing or excessive sensitivity polling | Cap FPS instead of using an unlimited mode | Use a fixed 60 FPS cap and lower emulator load |
| Crashes on launch | Damaged instance, renderer conflict, or hypervisor issue | Create a fresh 64-bit instance | Update emulator, switch renderer, reinstall game |
| Crashes after several matches | Heat, memory leak, or aggressive RAM allocation | Check temperatures and memory usage over time | Improve cooling and use moderate memory allocation |
Also check whether the stutter happens only after tabbing out. Alt-tabbing can force an emulator to redraw its surface and trigger a short burst of shader or texture loading. Borderless windowed mode generally recovers more gracefully than exclusive full screen. If you need more general Windows troubleshooting, our ELEX PC crash and FPS guide covers the same driver, overlay, and file-integrity principles.
Use a Stable Free Fire Emulator Profile
For most Windows PCs, start with BlueStacks 5 or LDPlayer 9 rather than stacking multiple experimental emulator builds. Install only one at first. Multiple emulators can enable competing virtualization services, occupy large disk caches, and make it harder to identify which renderer is failing. If Free Fire is already installed in a heavily modified instance, create a fresh instance before assuming the game itself is broken.
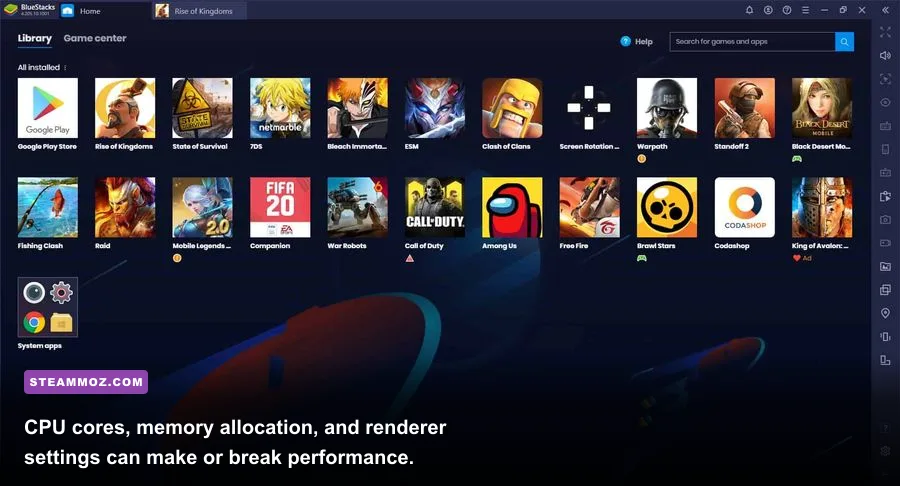
On a modern four-core or six-core processor, assign four CPU cores to the emulator, not every core available. Leaving Windows a couple of cores keeps audio, input, networking, and the desktop responsive. Allocate 4 GB of RAM for Free Fire MAX on a machine with 8 GB total; use 4–6 GB on a 16 GB system. Giving an emulator 8 GB on an 8 GB computer does not create performance. It forces Windows to page data to the drive, which produces the exact hitching you're trying to remove.
Enable CPU virtualization in your motherboard firmware. It may be called Intel VT-x, Intel Virtualization Technology, AMD-V, or SVM Mode. In Windows, open Task Manager, choose the Performance tab, select CPU, and confirm that Virtualization says Enabled. If it says Disabled, enter UEFI during startup and switch it on. This is one of the few settings that can transform an emulator from sluggish to responsive.
Hyper-V deserves a careful, not superstitious, approach. Current BlueStacks versions can work with Windows Hypervisor Platform, while some older emulator builds perform better when Hyper-V-related features are disabled. Don't randomly turn services off. Check your emulator's current compatibility mode, then use Windows Features to test one configuration at a time. Disable Hyper-V, Virtual Machine Platform, and Windows Hypervisor Platform only if your emulator specifically recommends it and you don't rely on WSL2, Docker, Windows Sandbox, or other virtual machines.
| Profile | Resolution | CPU / RAM | Renderer and FPS |
|---|---|---|---|
| Low-end laptop | 1280×720 | 2–4 cores / 3–4 GB | Compatibility or OpenGL; stable 30–45 FPS |
| Balanced 8 GB PC | 1280×720 | 4 cores / 4 GB | OpenGL or DirectX; capped 60 FPS |
| Mid-range gaming PC | 1600×900 or 1920×1080 | 4–6 cores / 4–6 GB | Vulkan, DirectX, or OpenGL test; capped 60 FPS |
| High-refresh enthusiast | 1920×1080 | 6 cores / 6 GB | 120 FPS only if the build supports it consistently |
Start with OpenGL if DirectX produces black textures, flickering, or launch crashes. Try DirectX if OpenGL causes graphical corruption or poor performance on your driver. Vulkan can be excellent on a recent GPU, but compatibility varies more between emulator versions. Restart the emulator after every renderer change; applying a setting without a full restart often leaves old cached shaders active.
Inside Free Fire, begin with Graphics on Smooth or Standard, High FPS on Normal or High, and Shadows off. Use the game's High FPS option only after the 60 FPS profile is stable. MAX's higher-quality assets cost more than the standard client, especially at 1080p. For competitive play, consistent frame delivery is more valuable than distant foliage or soft shadow detail.
Best Graphics Settings for Smooth 30, 60, or 90 FPS
There is no prize for an unstable 120 FPS counter. Free Fire's gunplay benefits from low input latency, but a consistent 60 FPS is a better target than oscillating between 45 and 90. Match the cap to what your PC can hold in a busy Bermuda fight, not what it reaches while staring at an empty wall.
| Setting | Recommended Value | FPS Impact | Visual Trade-Off |
|---|---|---|---|
| Game graphics | Smooth or Standard | High impact | Less foliage, lighting, and texture detail |
| High FPS | High after testing | Medium to high | Lower latency, but more CPU/GPU load |
| Shadows | Off | Medium | Characters and buildings lose soft shadowing |
| Anti-aliasing | Off or Low | Low to medium | More jagged edges at low resolution |
| Resolution | 1280×720 first | Very high | Less sharp image, often the biggest FPS gain |
| Display DPI | 160–240 | Low to medium | Lower UI sharpness, lighter emulator workload |
| FPS limiter | 60 FPS | Reduces spikes | Caps peak performance for smoother pacing |
Use a simple tuning order: resolution first, shadows second, anti-aliasing third, then High FPS. Change only one option at a time and replay the same route. If reducing resolution does almost nothing while CPU usage is pinned near 100 percent, the processor or emulator configuration is the bottleneck. If GPU usage falls sharply and FPS rises after lowering resolution, keep that change and test a slightly higher image quality later.
Don't confuse sensitivity with performance. Free Fire's General, Red Dot, 2x Scope, 4x Scope, Sniper Scope, and Free Look sensitivity values change aim response, not frame rate. Keep your preferred sensitivity intact while testing graphics so you don't mistake altered mouse behavior for stuttering. Likewise, changing key mappings won't cure a renderer crash, though removing unnecessary macro scripts can improve stability and protect your account.
For a high-refresh monitor, set the emulator and game to a frame rate your system can sustain. A 90 or 120 FPS mode can feel excellent on a strong desktop, but it roughly doubles the rendering workload compared with 60 FPS. If fights dip below the target, return to 60. Competitive consistency wins here: a clean 60 FPS lets you track movement more reliably than a flashy profile with repeated drops.
Fix Windows Drivers, Power, and Background Conflicts
Install the latest stable graphics driver directly from NVIDIA, AMD, or Intel. Windows Update drivers can work, but laptop owners should check the laptop manufacturer's support page if a new generic driver causes black screens or broken switching between integrated and discrete graphics. Use a clean installation option when available, especially after updating from an old NVIDIA or AMD package.
Force the emulator onto the high-performance GPU. In Windows 11, go to Settings, System, Display, Graphics, browse to the emulator executable, choose Options, and select High performance. The executable may be named HD-Player.exe for BlueStacks or dnplayer.exe for LDPlayer. Add the correct process rather than only the desktop shortcut. On laptops, test while plugged in; battery modes commonly reduce CPU clocks and make frame pacing appear inconsistent.
Choose Windows' Best performance power mode while playing, but don't disable every thermal safeguard. A laptop that runs at 95°C may boost briefly and then throttle hard, creating repeated stutters. Clean blocked vents, raise the rear of the machine, and check temperatures after 15–20 minutes. If the CPU or GPU clock repeatedly falls as temperature rises, cooling—not another graphics slider—is the real fix.
Close heavyweight background tasks before launching the emulator. Browser tabs with video, cloud-sync clients, RGB control software, virtual machines, and game recording can all steal CPU time or disk bandwidth. Disable Xbox Game Bar capture and background recording if you don't use them. Keep Discord's overlay off for testing. Add the emulator and game folders to your antivirus exclusions only if you understand the security trade-off; never exclude an unknown APK or crack.
Storage matters during loading and shader work. Keep at least 15–20 percent free space on the drive holding the emulator. An SSD won't magically increase the game's maximum FPS, but it reduces launch delays, texture-streaming pauses, and Windows paging penalties. If Task Manager shows Disk at 100 percent during every hitch, move the instance to an SSD and investigate what else is reading the drive.
These same principles apply to other emulator-heavy PC games. Our EscapeVR crashing and low-FPS troubleshooting guide explains why overlays, thermal throttling, and renderer mismatches often look like game bugs, while the Filament performance settings guide offers another useful example of tuning for frame-time stability.
Stop Free Fire Crashes Without Losing Your Account
Crashes need a different workflow from low FPS. Start by recording when the crash occurs: before the lobby, while loading a match, after changing graphics, or after several rounds. A crash before the login screen points toward the emulator, renderer, virtualization, or damaged files. A crash only when entering a match points more toward graphics memory, a bad cache, or a specific asset-loading problem.
1. Update, then create a clean instance
Update the emulator from its official channel and restart Windows. In the emulator's multi-instance manager, create a fresh 64-bit Android instance using the default device profile. Install Free Fire from the official store, sign in through your normal account method, and test before restoring custom scripts or third-party tools. A clean instance separates account data from a corrupted virtual disk.
2. Clear cache before clearing data
Android Settings inside the emulator can clear Free Fire's cache without removing the account. Use Clear Cache first, restart the emulator, and test. Clear Data only after confirming your account is linked to a supported login method. Never uninstall a working instance while relying on an unlinked guest account; local guest progress may not be recoverable.
3. Change the renderer and disable extras
Switch from DirectX to OpenGL, or from OpenGL to DirectX, then reboot the instance. Disable ASTC texture decoding, high-quality textures, post-processing, and experimental graphics options while diagnosing. If the game stops crashing, re-enable one feature at a time. This is much faster than changing five settings and forgetting which one fixed the problem.
4. Repair the emulator installation
Use the emulator's repair tool if it provides one. If not, back up only the data you need, uninstall the emulator, restart Windows, and install a current version to an SSD with plenty of free space. Don't restore every old configuration file immediately. Old virtual-machine settings can preserve the same corruption or incompatible renderer option that caused the original crash.
5. Remove account-risky software
Uninstall FPS unlockers, DLL injectors, auto-aim tools, macro packages, and modified clients. Besides violating game rules, they can hook input or graphics calls and trigger instability. Use Garena's official support portal if the account is locked or the client reports an integrity problem. Don't attempt to bypass an anti-cheat warning with random registry edits.
If a crash began immediately after a Windows or driver update, use System Restore or roll back the driver only when the previous version was known to work. Check Event Viewer under Windows Logs and Application for the failing module, but treat the name as a clue, not proof. A crash mentioning a graphics DLL can still be caused by an emulator setting or a damaged asset file.
Use This Five-Minute Stability Test
After making changes, don't judge the result from the lobby. Restart Windows, launch only the emulator, and run the same test every time: five minutes in Training Grounds, one Bermuda Battle Royale match, and a second match after returning to the lobby. Watch for frame-time spikes, audio crackle, input delay, and temperature growth. A fix that looks brilliant for 30 seconds but degrades after 15 minutes isn't a fix.
- Confirm Virtualization is Enabled in Task Manager.
- Set the emulator to four cores and 4 GB RAM on a typical 8–16 GB PC.
- Use 1280×720, Smooth or Standard graphics, shadows off, and a 60 FPS cap.
- Force the emulator to the high-performance GPU and play while plugged in.
- Close overlays, browsers, recorders, and cloud-sync tools.
- Test OpenGL and DirectX separately if crashes or texture bugs remain.
- Only raise resolution, High FPS, or visual effects after stability is proven.
For a low-end system, the winning profile is usually 720p, Smooth graphics, 30 or 45 FPS, four or fewer emulator cores, and moderate RAM allocation. For a mid-range gaming PC, 720p or 900p at a locked 60 FPS is the sweet spot. A high-end desktop can try 1080p and 90/120 FPS, but only if the emulator build, monitor, and Free Fire client all expose and sustain that mode.
Finally, keep expectations realistic. Free Fire is lightweight compared with demanding PC shooters, but emulation adds overhead and latency that native Windows games don't have. If your system is old, stable 30–45 FPS with no hitching will feel better than chasing a fluctuating 60. If the game still stutters after a clean instance, enabled virtualization, current drivers, low settings, and controlled temperatures, the remaining limit is probably the hardware or the emulator—not a hidden Windows switch.
For broader PC troubleshooting, Steamoz's Far Cry 6 max-FPS settings guide and PC requirements breakdown explain how to separate a settings bottleneck from a genuine hardware limit. Apply the same discipline here: measure first, change one variable, and prioritize consistent frame times over impressive numbers.