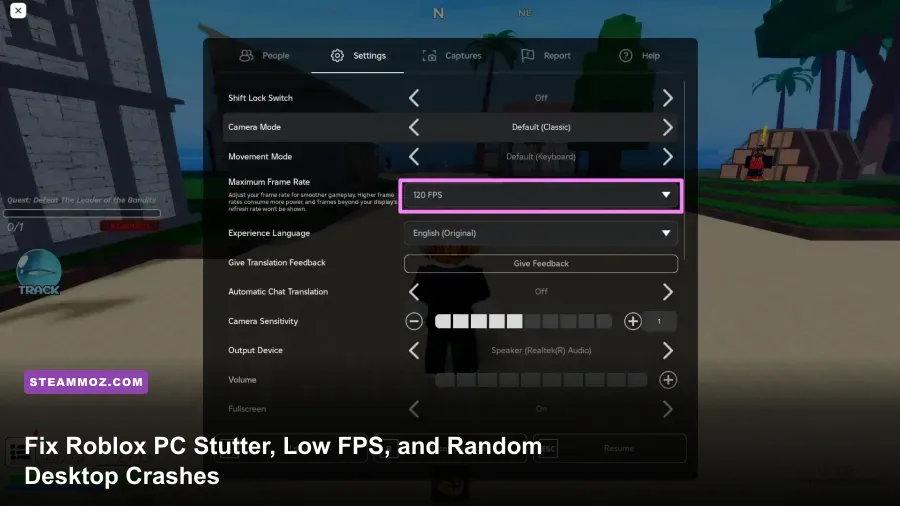
If Roblox is hitching, locking to an agonizing 60 FPS, or straight-up crashing to your desktop during intense combat encounters in fast-paced experiences like Frontlines, Deepwoken, or Blox Fruits, you are fighting the platform's default engine constraints rather than your PC's hardware. The Roblox desktop client relies on an ancient 60 FPS cap, aggressively caches bloated telemetry and texture files, and frequently routes through integrated laptop GPUs instead of dedicated graphics cards. Fixing these bottlenecks requires overriding Roblox's internal engine FastFlags, purging corrupted cache directories that trip Byfron anti-cheat, and forcing Windows to grant the client raw hardware priority.
1. Unlock the 60 FPS Cap and Tweak Engine FastFlags
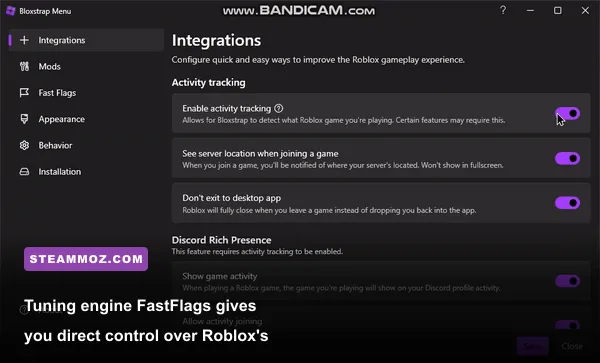
Roblox still enforces a hardcoded 60 FPS limit on the vanilla client, introducing severe input latency and jarring frame pacing on modern high-refresh monitors (144Hz, 240Hz, or 360Hz). While third-party DLL injectors used to be common for uncapping framerates, the rollout of Roblox's Hyperion (Byfron) 64-bit anti-cheat now flags or crashes unverified code injection. The safest and most robust method to uncap your frames and kill render-thread stutter is by configuring native engine FastFlags using an open-source bootstrapper like Bloxstrap or by manually writing a ClientAppSettings.json file.
FastFlags are internal configuration switches deployed by Roblox engineers to test engine performance. You can leverage them locally without triggering anti-cheat kicks. To manually deploy your custom flag profile without third-party software, follow these exact steps:
- Press Win + R, type
%localappdata%\Roblox\Versions, and press Enter. - Open the folder corresponding to the most recent client version (look for the subfolder containing
RobloxPlayerBeta.exe). - Inside that version folder, create a new directory named
ClientSettings. - Inside
ClientSettings, create a plain text file namedClientAppSettings.json. - Open the file in Notepad or VS Code and paste the following JSON payload:
{
  "DFIntTaskSchedulerTargetFps": 240,
  "FFlagDebugGraphicsDisableDirect3D11": "False",
  "FFlagDebugGraphicsPreferD3D11FL11": "True",
  "FFlagFixGraphicsQuality": "True",
  "DFFlagDisableDPIScale": "True"
}
Setting DFIntTaskSchedulerTargetFps to your monitor's native refresh rate (e.g., 144, 165, or 240) immediately decouples the Luau engine's task scheduler from the 60 Hz frame lock. Meanwhile, disabling DPI scaling prevents Windows desktop display scaling from forcing bilinear blur and rendering overhead onto the client. If you enjoy diving into aggressive game tweaks like our Far Cry 6 GOTY settings for max FPS, mastering FastFlags is the PC enthusiast's gateway to tailoring Roblox to run identically to an esport-tier shooter.
2. Fix Hardware Allocation and GPU Disconnects
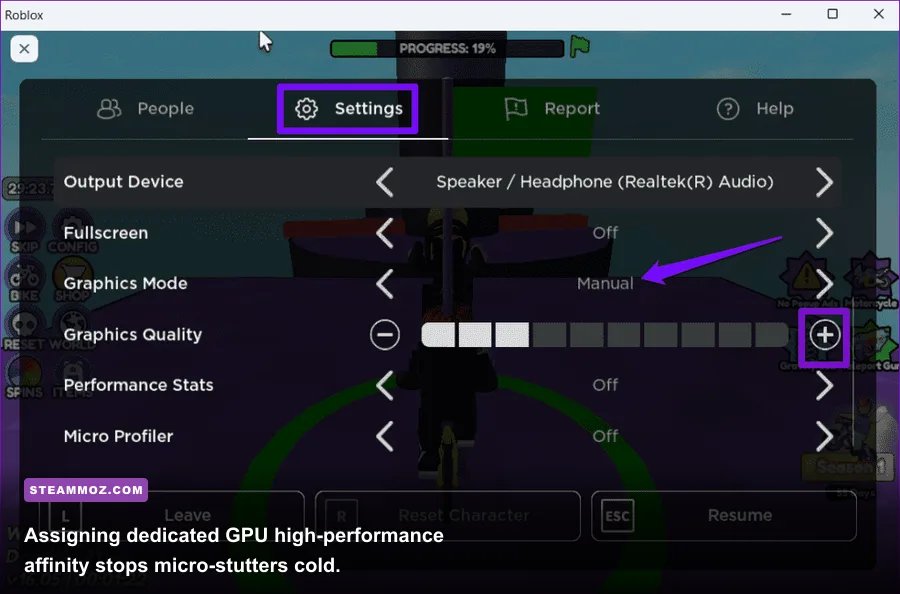
One of the most insidious sources of 15–30 FPS drops and micro-stuttering on dual-GPU setups (gaming laptops or desktop processors with integrated graphics) is Windows assigning RobloxPlayerBeta.exe to your low-power iGPU. Because Roblox is distributed as a lightweight web-launched executable, Windows Power Plan profiles frequently misidentify it as an office productivity task rather than a 3D application.
To eliminate this, you must explicitly enforce high-performance GPU allocation through Windows and your dedicated graphics driver control panel. Just as we outlined in our troubleshooting breakdown for ELEX PC fixes that stop crashes and rescue FPS, bypassing Windows' automated power management prevents sudden downclocking during gameplay.
| Driver / System Setting | Recommended Parameter | FPS & Latency Impact | Technical Mechanism |
|---|---|---|---|
| Windows Graphics Preference | High Performance (Dedicated GPU) | +40–120% FPS on laptops | Bypasses hybrid Optimus switching; binds frame buffers to discrete silicon. |
| NVIDIA / AMD Low Latency Mode | On (or Ultra / Radeon Anti-Lag) | Reduces input lag by 8–15ms | Limits the render queue to 1 pre-rendered frame; reduces input lag spikes. |
| NVIDIA Shader Cache Size | 10 GB | Eliminates asset-load hitches | Prevents driver from purging compiled Direct3D shaders on large maps. |
| Power Management Mode | Prefer Maximum Performance | Stabilizes 1% low frame times | Forces GPU core clocks to remain at target P-State without aggressive downthrottling. |
| Threaded Optimization | On | +10–18% CPU throughput | Enables multi-threaded rendering dispatch across physical CPU cores. |
To configure these settings in Windows 10 or 11:
- Press the Windows Key, search for Graphics Settings, and open it.
- Under "Custom options for apps", choose Desktop app and click Browse.
- Navigate to
%localappdata%\Roblox\Versions\version-[current]\, selectRobloxPlayerBeta.exe, and click Add. - Click Options under the newly added entry, select High performance (which explicitly displays your dedicated NVIDIA RTX or AMD Radeon card), and click Save.
Next, open the NVIDIA Control Panel or AMD Software: Adrenalin Edition. Add the Roblox executable to your 3D Program Settings, flip Power Management Mode to Prefer Maximum Performance, and increase your Shader Cache Size to 10 GB. Roblox frequently streams user-generated assets, sounds, and mesh variations into memory on the fly; an expanded shader cache prevents the driver from dumping and recompiling asset shaders in real time.
3. Diagnosing Spikes with the Built-In Microprofiler
Roblox packs an enterprise-grade diagnostic engine under the hood: the Microprofiler. When experiencing random stuttering, most players blame their internet connection or their graphics card blindly. The Microprofiler tells you mathematically what is causing the hitch.
Inside any Roblox experience, press Ctrl + F7 (or Cmd + F7 on macOS). A detailed timeline bar will appear at the top of your screen. Pressing Ctrl + P enables the paused frame-dump mode, allowing you to scrub backwards through frame timing history.
Understanding frame budgets is essential for reading this data:
- A solid 60 FPS allows 16.6 milliseconds (ms) per frame.
- A buttery 144 FPS gives you only 6.94 ms per frame.
- A competitive 240 FPS requires every frame to finish rendering within 4.16 ms.
When the bar graphs spike with deep orange or red bars, look at the label beneath the spike:
- Render / renderJob: If this label spikes, the bottleneck is visual. Shadows, draw distance, voxel lighting passes, or high-polygon meshes are choking your GPU render pipeline. Lower your in-game graphic levels.
- Heartbeat / Physics: This indicates an unoptimized experience physics simulation. If a game utilizes hundreds of unanchored physics objects or heavy collision math, the Luau thread stalls regardless of how powerful your graphics card is.
- Scripts / Luau Garbage Collection (GC): If you see periodic 50–100ms spikes every 5 to 10 seconds, the game's developer wrote inefficient Luau scripts with severe memory leaks. As the engine triggers garbage collection to clear discarded tables from RAM, the entire main thread freezes momentarily. Similar script-loop bottlenecks plague other unoptimized titles, as we explored when tackling EscapeVR The Basement crashing and low FPS fixes.
- Receive / Network: If this spikes while your frame rate tanks, your network stack is bottlenecking client-side replication. Incoming packet fragmentation forces the engine to halt visual rendering while waiting to synchronize network IDs.
4. Eradicate Memory Leaks, Cache Bloat, and Sudden Crash Errors
Random crashes to desktop—often accompanied by the generic "An unexpected error occurred" pop-up, Error Code 277, or Error Code 268 ("You have been kicked due to unexpected client behavior")—almost always trace back to cache corruption, third-party software hooks, or corrupted Direct3D runtime files. Roblox's Byfron anti-cheat runs at ring 3 with deep heuristic integrity checks; if an external application hooks into the Roblox process memory, Byfron immediately terminates the client without producing a crash dump.
To eliminate random client closures, follow this deep cleanup protocol:
Disable Incompatible In-Game Overlays
Byfron treats any DLL injection as an exploit vector. Disable the following utilities before launching Roblox:
- RivaTuner Statistics Server (RTSS): If you run RTSS with MSI Afterburner, change the Application Detection Level for
RobloxPlayerBeta.exeto None, or close RTSS entirely. - Discord In-Game Overlay: Open Discord Settings > Game Overlay > toggle off "Enable in-game overlay".
- GeForce Experience / AMD In-Game Overlay: Turn off the shadowplay or instant replay overlays if your client crashes within 60 seconds of joining a server.
Purge the Corrupted Local Storage and Cache
Over months of playing hundreds of different community places, Roblox amasses gigabytes of outdated sound files, geometry caches, and HTTP temporary cookies. If a cached asset becomes malformed, the client crashes the moment that asset attempts to stream into view.
- Close all Roblox windows and terminate background processes in Task Manager.
- Press Win + R, type
%temp%\Roblox, hit Enter, and delete everything inside that folder. - Press Win + R again, type
%localappdata%\Roblox\Downloads, hit Enter, and delete the downloaded cache files. - Open your browser of choice (Chrome, Edge, or Firefox) and clear cookies specifically for
roblox.comto resolve persistent web-launch authentication handshake failures.
If crashing persists, verify that your core Windows DirectX runtimes are intact by downloading the official DirectX End-User Runtimes installer. Corrupted legacy D3D libraries cause silent CTDs (Crash to Desktop) whenever Roblox encounters dynamic lighting effects, similar to the render-layer crashes we diagnosed in our guide for Everspace 2 Wrath of the Ancients crashing fixes.
5. In-Game Graphic Sliders vs. Custom Rendering API Selection
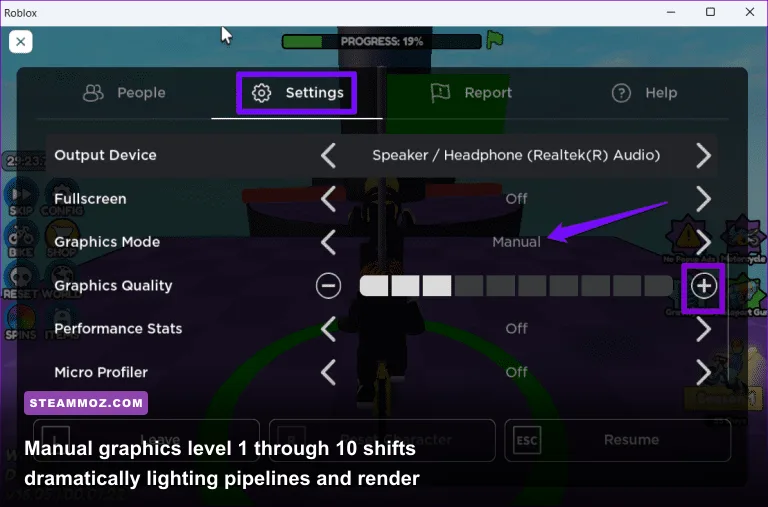
Roblox's in-game Escape menu features a deceptively simple "Graphics Quality" slider ranging from 1 to 10. Many players assume this slider operates like a linear resolution scale, but under the hood, each tick activates entirely different visual systems—switching between primitive shadow mapping, dynamic shadow cascades, voxel illumination, and complex Future is Bright (Phase 3) screen-space reflections.
Understanding which specific graphics level balances visibility and performance can double your framerate without sacrificing critical line-of-sight in competitive shooters.
| Graphics Quality Level | Render Distance (Studs) | Lighting Technology & Shadows | Performance Overhead | Recommended Use Case |
|---|---|---|---|---|
| Level 1–3 | Minimal (250–500 studs) | No shadows; Legacy Voxel lighting; flat particle emitters. | Extremely Low (Ideal for iGPUs) | Low-end hardware or competitive PvP where visual clutter must be zero. |
| Level 4–7 | Medium (1,000–1,800 studs) | Basic local shadows enabled; ShadowMap technology; simple reflections. | Moderate (Balanced) | The Sweet Spot: Full draw distance for targets without high GPU cost. |
| Level 8–10 | Maximum (2,500+ studs) | Full Future (Phase 3) lighting; point light soft shadows; post-processing bloom. | Very High (GPU heavy) | Cinematic showcases, showcase roleplay worlds, and modern high-end PCs. |
Levels 1 through 3 strip out nearly all lighting calculations, which is great for framerate but reduces your draw distance so drastically that enemy players or terrain disappear into fog beyond 300 studs. Level 5 is the optimal competitive breakpoint: it provides near-maximum view distance while cutting out heavy screen-space specular reflections and soft-edge dynamic shadows that bog down mid-tier systems. Tuning your rendering settings with precision like this delivers the same performance gains seen in our walkthrough on Filament Marmalade Edition settings for higher FPS.
Selecting the Right Rendering Backend (DirectX vs. Vulkan)
By default, Roblox runs on Direct3D 11 on Windows machines. While D3D11 is reliable for older GPUs, modern AMD Radeon architectures (RDNA 2 and RDNA 3) and Intel Arc GPUs often suffer from frame-time jitter under D3D11 because of legacy driver dispatch overhead.
If you use Bloxstrap or customize your ClientAppSettings.json, you can force Roblox to render via Vulkan. This bypasses older driver layers, drastically flattening frametime spikes and reducing input lag across multi-core systems:
{
  "FFlagDebugGraphicsDisableDirect3D11": "True",
  "FFlagDebugGraphicsPreferVulkan": "True"
}
Warning: If you run older NVIDIA cards (GTX 900 series or older), stick to DirectX 11. Vulkan implementations on older Kepler and Maxwell hardware can cause client crashes upon switching full-screen applications. Always verify that your display drivers are cleanly updated before switching graphics backends.
Final Diagnostic Checklist for Bulletproof Performance
Before jumping back into your favorite experience, run through this quick hardware checklist to ensure you have tackled every possible background bottleneck:
- Disable Fullscreen Optimizations: Right-click
RobloxPlayerBeta.exe, select Properties > Compatibility, check Disable fullscreen optimizations, and click Apply. This hands exclusive presentation mode directly to your GPU, eliminating desktop window manager (DWM) composition latency. - Kill High-Overhead Background Apps: Chrome hardware acceleration, active video streams, and wallpaper engines consume critical VRAM. Ensure your available system memory stays well above 4 GB before launching high-asset experiences.
- Switch from Wi-Fi to Ethernet: Roblox's Luau network synchronization halts local frame rendering whenever ping jitter exceeds 200ms. An uninterrupted wired connection stops synchronization freezes entirely.
By pairing uncapped FastFlag framerates with dedicated GPU routing, clean shader caches, and a calibrated graphics slider level, you effectively turn Roblox from a stuttering web app into an ultra-responsive, highly optimized PC gaming engine.