The real villain behind the stuttering and sudden frame dips in Final Fantasy VII Remake Intergrade on PC isn't your graphics card—it is Unreal Engine 4's hyper-aggressive Dynamic Resolution Scaling (DRS) colliding head-on with broken DirectX 12 shader compilation. Even if you're running a powerhouse rig with an RTX 4080 or RX 7900 XTX, stepping into the Sector 7 Slums or sprinting through Wall Market can trigger jarring frametime spikes jumping from 16.6ms straight to 85ms. Forcing the game to run in DirectX 11 mode, disabling DRS via simple config modifications, and applying driver-level framerate locks will immediately stabilize your framerate at a razor-sharp, butter-smooth 60 or 120 FPS while stopping desktop crashes in their tracks.
Forcing DirectX 11: The Quickest Fix for Micro-Stutters
When Square Enix shipped the PC port on both the Epic Games Store and Steam, they defaulted the executable to run strictly on DirectX 12. In theory, DX12 provides better multi-threaded CPU utilization. In practice, the game's DirectX 12 implementation suffers from catastrophic pipeline state object (PSO) compilation hitches. Every time Cloud swings his Buster Sword at a new enemy type, triggers an Operator Mode counter, or enters a fresh zone, the game compiles shaders in real-time, producing brutal visual hiccups.
Switching the renderer to DirectX 11 offloads shader caching to your graphics driver much more predictably, eliminating virtually all traversal and combat stutter. If you've tinkered with troubleshooting other notoriously rough PC releases, such as applying Elex crashes and FPS drops fixes, you know that changing API wrappers is often the golden ticket.
Here is how you force DX11 depending on which storefront launcher you use:
For Steam Users
- Right-click FINAL FANTASY VII REMAKE INTERGRADE in your Steam Library and select Properties.
- Stay on the General tab and locate the Launch Options input field at the bottom.
- Type
-dx11(or alternatively-d3d11) directly into the box. - Close the properties window and boot the game.
For Epic Games Store Users
- Open the Epic Games Launcher, click your profile icon in the top right corner, and click Settings.
- Scroll down to the bottom and expand the drawer for Final Fantasy VII Remake.
- Check the box for Additional Command Line Arguments.
- Type
-dx11into the text prompt.
Once DX11 is active, verify the change using an overlay like MSI Afterburner with RivaTuner Statistics Server (RTSS). You should see the D3D11 API tag instead of D3D12, and your frametime graph should immediately transition from an erratic seismograph into a flat, consistent line.
Killing Dynamic Resolution Scaling (DRS) with FFVIIHook
The second major culprit sabotaging your visual clarity and framerate stability is Dynamic Resolution Scaling. Square Enix hard-coded DRS into the engine without giving players an in-game toggle. The moment your PC drops even a single frame below your selected target framerate (such as 60 or 120 FPS), the game instantly slashes internal rendering resolution down to as low as 50%. The result is a muddy, blurry picture that constantly shifts between 4K and 1080p, generating noticeable frame pacing issues while Cloud runs through bustling Midgar districts.
To kill DRS for good and force the game to render at your monitor's native resolution 100% of the time, you need a lightweight utility called FFVIIHook, created by modder emoose and hosted on FFVIIHook on Nexus Mods. This tool opens up the internal Unreal Engine documentation console commands and enables customized Engine.ini file tweaks.
Step-by-Step FFVIIHook Setup
- Download the FFVIIHook zip archive from Nexus Mods.
- Extract the contents (
xinput1_3.dlland theffvii_hookfolder) directly into your game's root binary directory:...\FINAL FANTASY VII REMAKE INTERGRADE\End\Binaries\Win64\ - Navigate to your local AppData folder on Windows:
%USERPROFILE%\Documents\My Games\FINAL FANTASY VII REMAKE\Saved\Config\WindowsNoEditor\ - Open
Engine.iniwith Notepad or any text editor. If the file doesn't exist, create it. - Paste the following commands at the very bottom of the document:
[SystemSettings]
r.DynamicRes.OperationMode=0
r.DynamicRes.MinScreenPercentage=100
r.DynamicRes.MaxScreenPercentage=100
r.Tonemapper.Sharpen=1
r.DefaultFeature.MotionBlur=0
r.DepthOfFieldQuality=0
Setting OperationMode=0 disables the dynamic scaler completely, while setting min and max screen percentages to 100 forces pure native resolution. As a bonus, adding the sharpening toggle cleans up temporal anti-aliasing ghosting, while disabling motion blur and depth-of-field removes artificial visual smearing during high-velocity Braver and Focused Thrust combos.
Optimal In-Game Graphics Settings and Performance Impact
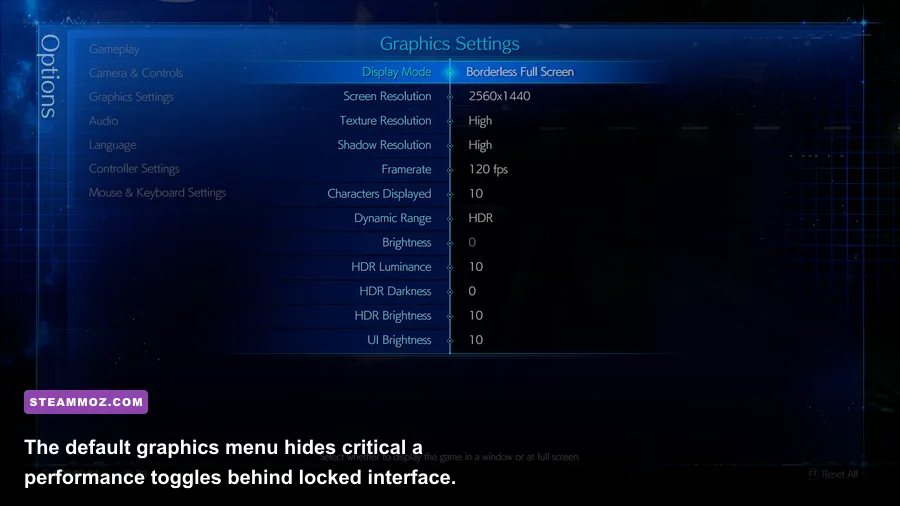
The in-game options menu in Final Fantasy VII Remake is notoriously barren compared to modern PC titles. Instead of dozens of granular toggles, you're given broad sliders for Texture Resolution, Shadow Resolution, and Characters Display. Dialing these in carefully lets you salvage tremendous GPU headroom without compromising visual presentation, similar to how we tune settings in our Far Cry 6 GOTY settings for maximum FPS guide.
Here is an exhaustive breakdown of what each setting actually impacts under the hood, along with the precise performance penalty you can expect:
| In-Game Setting | Optimal Value | FPS Cost | Visual Impact & Optimization Note |
|---|---|---|---|
| Texture Resolution | High (8GB+ VRAM) / Low (6GB VRAM) | 0–3% | Determines VRAM allocation. High causes massive stutter on 6GB cards due to VRAM overflow. Low prevents memory swapping. |
| Shadow Resolution | Low | 8–14% | High calculates heavy cascaded shadow maps for environmental geometry with minimal visual payoff in dark industrial sectors. |
| Characters Display | 6 to 8 | 5–12% | Controls NPC density in Sector 7 and Wall Market. Dropping from 10 to 7 eliminates severe draw-call CPU bottlenecks. |
| Framerate Limit | 120 FPS | Baseline | Never set to 30 or 60 in-game. Setting this to 120 minimizes internal frame-pacing bugs; cap externally instead. |
| Screen Mode | Borderless Fullscreen | 1–2% | Exclusive Fullscreen is absent. Borderless ensures seamless Windows DWM synchronization and prevents alt-tab crashes. |
Pay close attention to Characters Display. This setting sounds like an aesthetic choice, but it is actually the most CPU-intensive toggle in the engine. When set to maximum (10), your processor has to track pathfinding routines and collision meshes for dozens of background NPCs in Sector 5 and Sector 7 markets. Lowering this value to 7 or 8 saves vital CPU cycles, ensuring that your processor feeds frames cleanly to your GPU without stuttering.
Driver-Level Tweaks: NVIDIA Control Panel and AMD Adrenalin Profiles
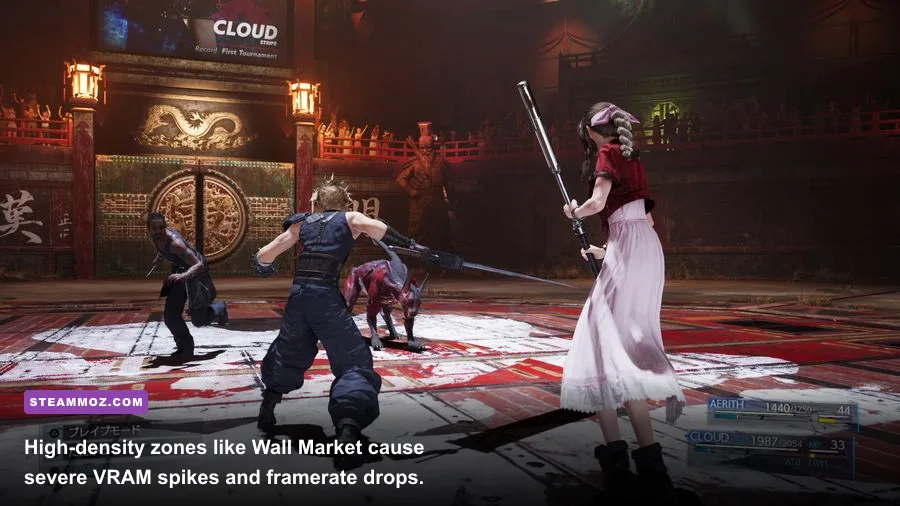
Because the in-game display settings are so restrictive, taking control at the driver level is non-negotiable. Modern display drivers from NVIDIA and AMD can enforce shader cache reservations, override broken V-Sync implementations, and smooth out frame pacing better than the game engine itself. Much like refining post-processing in Filament Marmalade Edition settings for higher FPS, configuring driver settings bridges the gap between hardware and software.
NVIDIA Control Panel Configuration
- Shader Cache Size: Change from "Driver Default" to 10 GB (or Unlimited). Unreal Engine 4 needs generous disk cache space so it doesn't constantly dump and rebuild compiled shaders between game restarts.
- Max Frame Rate: Set this to 3 FPS below your monitor's native refresh rate (e.g., 141 FPS for 144Hz, or 117 FPS for 120Hz). If targeting 60Hz, lock it to 60 FPS directly here rather than using the in-game limiter.
- Low Latency Mode: Set to On. Avoid "Ultra" if you're CPU-bound in crowded town hubs, as Ultra can cause minor hitching when draw calls spike.
- Vertical Sync: Set to On in the NVIDIA panel, while keeping V-Sync disabled inside the game. This activates standard G-Sync/FreeSync tear-free frame delivery.
- Power Management Mode: Set to Prefer Maximum Performance to stop GPU clock frequencies from fluctuating during cutscene-to-gameplay transitions.
AMD Radeon Adrenalin Tweaks
- Radeon Enhanced Sync: Toggle Enabled to reduce tearing without the traditional input lag penalty of standard double-buffer V-Sync.
- Radeon Chill: Configure Min FPS and Max FPS to identical numbers (e.g., 60 and 60, or 120 and 120) to enforce clean framerate caps with rock-solid frame times.
- Surface Format Optimization: Set to Disabled to prevent texture aliasing artifacts on Cloud's hair and Shinra armor plating.
- Reset Shader Cache: If you previously ran the game in DX12 mode, hit "Reset Shader Cache" under the Gaming tab to clear out corrupted pipeline states.
Before launching your newly tuned profile, verify that your baseline hardware meets the standard requirements. Just as we analyzed system capabilities in our breakdown of Fatal Fury City of the Wolves PC specs, ensuring your hardware has enough VRAM bandwidth and storage throughput is vital for handling modern high-fidelity assets.
Stopping Random Crashes and Memory Leaks in Midgar
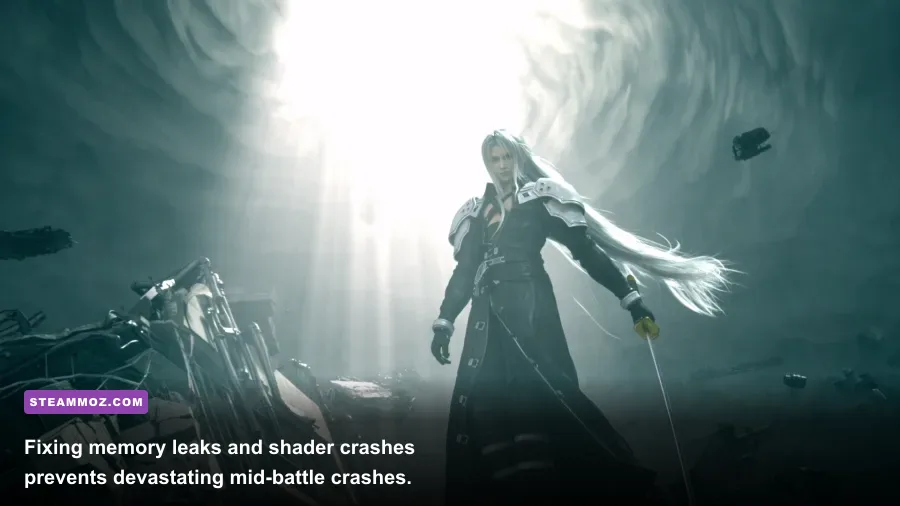
Nothing breaks immersion faster than Cloud executing an Infinity's End attack on the Airbuster boss, only for the game to freeze and silently crash back to the desktop. Crashes in Final Fantasy VII Remake PC generally stem from three distinct triggers: audio driver sample mismatches, virtual memory exhaustion on Windows, or direct DirectX 12 driver timeout crashes (TDRs). For stubborn crash scenarios across complex game engines, looking at crash resolutions like those found in our EscapeVR crashing and low FPS fixes reveals identical core engine pitfalls.
Use the troubleshooting matrix below to pinpoint your exact crash symptom and implement the verified resolution:
| Crash Symptom | Root Cause | Technical Diagnostic | Definitive Fix |
|---|---|---|---|
| Crash during Cutscenes | Audio Buffer Desync | Windows audio format sample rate mismatch with UE4 sound engine. | Set Windows Sound Control Panel output to 24-bit, 48000 Hz (Studio Quality). Disable 7.1 spatial sound. |
| Crash to Desktop at Wall Market | VRAM / Pagefile Out-of-Memory | Game exhausts video memory, fails to allocate swap file space on SSD. | Manually expand Windows Virtual Memory (Pagefile) to a minimum of 16384 MB (16 GB) on your fastest NVMe drive. |
| Freeze on Boss Phase Transition | DX12 Timeout Detection (TDR) | GPU takes longer than 2 seconds to compile volumetric smoke and particle effects. | Force DX11 mode via launch arguments, or increase TdrDelay to 8 in the Windows Registry under GraphicsDrivers. |
| Infinite Black Loading Screen | Corrupted UE4 Shader Cache | Invalid shader binaries stored in the AppData local cache folder. | Delete files in %LOCALAPPDATA%\FFVIIREMAKE\Saved\ and rebuild clean cache on fresh boot. |
Expanding Windows Pagefile Allocation
Final Fantasy VII Remake features aggressive asset streaming. Even if your PC packs 16GB or 32GB of physical system RAM, Windows will actively dump background assets into your pagefile during heavy transitions—such as walking from the train graveyard directly into the Shinra Sector 7 collapse sequence. If your virtual memory is set to a restricted size or disabled entirely, the game will instantly crash with an "Out of Memory" error code.
- Press the Windows Key, type Adjust the appearance and performance of Windows, and press Enter.
- Click over to the Advanced tab and click the Change... button located under the Virtual Memory section.
- Uncheck "Automatically manage paging file size for all drives".
- Select your fastest solid-state drive (NVMe preferred), choose Custom size, and set both Initial size (MB) and Maximum size (MB) to
16384(16 GB). - Click Set, confirm with OK, and reboot your PC.
Configuring Windows Audio Format to Prevent Engine Freezes
An overlooked issue causing sudden lockups during pre-rendered cinematics or heavy battle sequences involves the Windows audio sample rate. Unreal Engine 4 expects a standard 48,000 Hz or 44,100 Hz output. Audiophile DACs or wireless gaming headsets running at 96,000 Hz, 192,000 Hz, or operating with active Dolby Atmos / Windows Sonic spatial audio can overwhelm the internal audio thread, locking up the CPU loop and terminating the process.
To fix this, open your Windows Sound Settings, click into your active playback device properties, locate the Default Format dropdown, and lock it to 24-bit, 48000 Hz (Studio Quality). Additionally, turn off any virtual surround virtualization. The game features its own internal stereo and 5.1 positional audio mixing that functions far more reliably without third-party spatial processing interfering.
If you implement these targeted adjustments—forcing DirectX 11, killing dynamic resolution scaling via FFVIIHook, dialing back Character Display to 7, expanding your pagefile, and capping framerates at the driver level—you will permanently transform Final Fantasy VII Remake on PC. Midgar will finally run the way it was always meant to: crisp, responsive, visually stunning, and locked at maximum performance from the opening bombing mission all the way through the climactic highway chase.