
The fastest way to level Ciel in Ciel Fledge: A Daughter Raising Simulator is to specialize each week, keep fatigue and stress under control, and treat paid work as a targeted cash tool rather than a default activity. The game does not really use a traditional RPG gold loop: your practical “gold” is the household money shown in the management screens. Earn it with jobs, preserve it by buying only schedule-improving items, and spend your best action slots on training that directly supports the next class, exam, or event.
How Ciel Fledge’s progression actually works
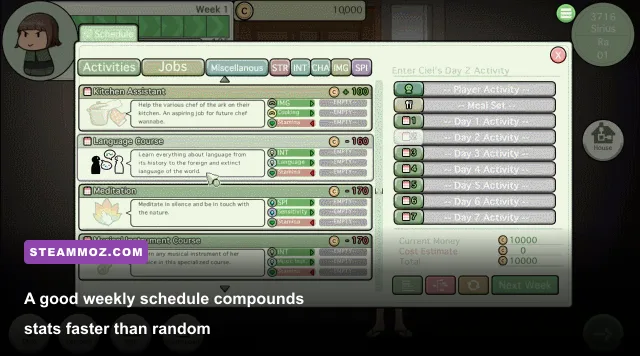
Ciel Fledge is closer to a calendar-based stat simulator than a conventional leveling game. Ciel’s level is only one piece of the puzzle. Training raises her attributes, lessons improve her academic direction, work produces money, and rest protects the condition that lets every later action pay off. If you chase the level number while ignoring fatigue or stress, the schedule starts eating itself: weaker results lead to more remedial activity, which leaves less time for income and recovery.
The important distinction is between growth actions and maintenance actions. Classes and training are growth actions. Rest, recreation, and some home activities are maintenance. Jobs are hybrid actions because they generate money but consume a slot that could have created permanent stat progress. That trade is fine early on, when you need funds for essentials, but poor later when a major lesson or event is close.
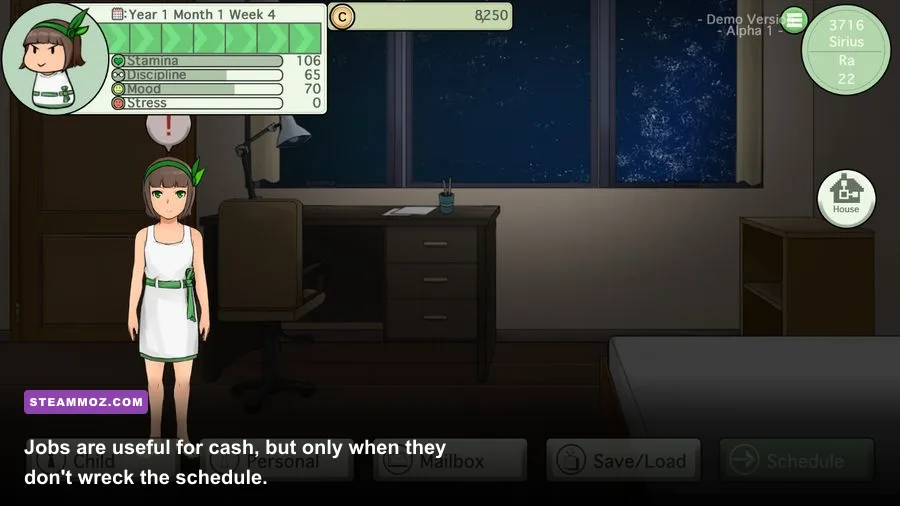
Before changing Ciel’s routine, open every available status and schedule screen. Note her current level, the attributes being requested by the next unlocked activity, her fatigue or condition indicator, and any stress penalty. The game’s most expensive mistake is repeating a favorite activity without checking what it is actually improving.
For a useful second opinion on planning around lighter management systems, see Steamoz’s beginner-planning tips. The games are wildly different, but the same principle applies: spend limited actions on the bottleneck, not on the stat you already have covered.
| Activity type | Primary payoff | Hidden cost | Best use |
|---|---|---|---|
| Lessons and classes | Reliable attribute and level progress | Time, fatigue, possible stress | Core of every focused week |
| Training | Targeted stat growth | Can over-specialize Ciel | Fix the next requirement |
| Paid work | Household money | No direct level growth | Short early-game cash bursts |
| Rest and recreation | Condition and stress recovery | Little or no progression | After hard lessons or work |
| Social and event actions | Relationship and event progress | Opportunity cost | When an event or ending needs it |

🎮 Ciel Fledge: A Daughter Raising Simulator
Looking to experience this game? Grab your digital key directly on our store for $0.99.
View on Steammoz Store →The fastest leveling schedule for a new save
The strongest early routine is a two-to-one growth pattern: spend two action blocks on the attribute required by your immediate goal, then use one block for recovery or a complementary lesson. Don’t split every day between five attributes. That feels balanced, but it produces a Ciel who is mediocre everywhere and under-qualified for the next important activity.
At the start of a cycle, check the lesson list and identify the nearest requirement. If the next useful class favors Intelligence, make Intelligence the focus for the week. If a job or event favors Strength, switch only when the reward justifies losing academic momentum. A focused block is valuable because repeated actions often build a meaningful threshold faster than alternating between unrelated training types.
Day-by-day template
- First block: choose the lesson or training activity that advances the current bottleneck.
- Second block: repeat that focus if Ciel’s condition remains safe. This is where most fast-leveling schedules pull ahead.
- Third block: use a lower-pressure lesson, social activity, or rest option. Pick recovery if fatigue or stress has visibly climbed.
- End of cycle: review the status screen and change direction only after confirming the next requirement.
This isn’t a rigid “always train three times” rule. If two demanding lessons push Ciel into a poor condition state, the third action should be rest. A failed high-value action is worse than a low-value recovery action because it can cost both time and the money spent setting it up.
Use paid work in the first part of a cycle only when you have a specific purchase in mind. One or two work actions can fund an essential lesson, item, or appointment. Running work continuously is the classic trap: your wallet improves while Ciel’s development stalls. Once you can afford the next meaningful purchase, return to training immediately.
| Schedule profile | Growth speed | Money gain | Risk | Recommendation |
|---|---|---|---|---|
| Focused training | Highest | None | Fatigue and stress | Use before exams and unlocks |
| Training, training, rest | High | None | Low | Best default leveling cycle |
| Work, training, rest | Medium | Medium | Low to medium | Best early cash compromise |
| Full-time work | Low | Highest short-term | Long-term progression loss | Only for a planned purchase |
| Random activities | Unpredictable | Unpredictable | High | Avoid unless chasing an event |
Gold farming without sabotaging Ciel’s stats

For search purposes, “gold farming” is the right phrase, but Ciel Fledge presents the resource as money rather than combat loot. There’s no monster route to repeat and no secret enemy that drops a jackpot. Your reliable income source is the job system, so the best farm is a schedule that converts spare action slots into money while protecting the next progression checkpoint.
Start with a cash target. Write down the price of the item, lesson, or service you need, then work only until you reach that amount plus a small buffer. That buffer matters because an unexpected event or condition penalty can force a recovery action. Farming far beyond the target gives you a comfortable wallet but delays the stat thresholds that unlock better options.
The most efficient pattern is usually work, work, recover, train when the household is nearly broke, followed by train, train, recover, work once the immediate expense is covered. The second pattern is better for the majority of the game. It keeps money moving without allowing jobs to become the entire identity of the save.
Don’t buy every new option the moment it appears. Prioritize purchases that do one of three things: improve the quality of a repeated action, reduce the need for recovery, or unlock a route that gives both money and progression. Cosmetic spending and low-impact convenience purchases can wait until your schedule is stable.
There’s also a timing trick: work during a low-pressure period, not immediately before a major class or event. If the schedule shows a demanding objective ahead, bank enough money beforehand and reserve the final action slots for the required stat. A job that leaves Ciel exhausted can turn a guaranteed advancement into a wasted attempt.
Steam’s official Ciel Fledge store page is the safest place to verify the current version, features, and platform details. Patch differences can affect activity balance, so be wary of old farming claims that promise a specific payout without identifying the game version.
Stat priorities, classes, and the anti-grind rule

There isn’t one universally best Ciel build because the game’s events and endings reward different directions. The practical leveling rule is simpler: raise the stat that unlocks your next useful option, then keep the others from falling dangerously behind. Specialization is faster than balance, but total neglect can close off activities and make later requirements expensive.
Use classes for dependable general growth and training for precision. If a class already advances the attribute you need, take it over a weaker custom activity. If the class points toward the wrong direction, use targeted training to close the gap. This is where experienced players save weeks: they stop paying for broad growth after the relevant threshold is nearly reached.
Keep an eye on social and affection-related progress as well. A pure academic route may level quickly but miss event conditions that depend on Ciel’s relationship or behavior. The answer isn’t to abandon specialization; reserve one lighter action in each cycle for the route you’re deliberately maintaining.
When to stop grinding
Stop repeating an activity when it no longer helps the next unlock, when the gain is being erased by poor condition, or when the schedule is approaching an event with different requirements. More levels are not automatically better if they cost the relationship, money, or stress management needed for the ending you’re pursuing.
| Goal | Priority | Secondary focus | What to avoid |
|---|---|---|---|
| Fast general leveling | Current class requirement | Recovery | Unplanned jobs |
| Cash recovery | Short job burst | One training action per cycle | Permanent full-time work |
| Event or ending route | Required event stats | Affection and social progress | Overtraining an irrelevant stat |
| Stable long save | Lessons and targeted training | Condition maintenance | Ignoring stress indicators |
For comparison, Steamoz’s Breathedge systems guide makes a similar point about optimization: the best setup isn’t the most extreme one, but the one that preserves performance over the whole session. In Ciel Fledge, “performance” means a schedule that keeps producing instead of collapsing under fatigue.
Fatigue, stress, and the recovery math

Condition is the invisible tax on greedy schedules. The game doesn’t reward you for filling every available slot if the final action produces a weak result or triggers a recovery spiral. Treat fatigue and stress as a combined budget. After a demanding lesson or work sequence, spend the next slot on recovery before returning to high-value training.
Watch for warning changes in the status screen rather than waiting for a dramatic failure. A tired Ciel can still appear productive, which makes overtraining feel efficient until several actions underperform. Rest is especially valuable after a two-action focused push. It preserves the value of the actions you already paid for with time.
Recreation and social actions can be better than pure rest when they recover the relevant condition while also supporting an event path. But don’t choose them blindly. Compare the immediate recovery benefit with the next requirement, and use the option that solves two problems at once.
Never reload repeatedly hoping for a lucky result from a bad schedule. Save before committing to a major cycle, inspect the outcome, and adjust the plan rather than gambling on variance. This is a management game; the best “exploit” is catching a bad week before it becomes a bad month.
A practical fast-leveling route from broke to stable
- Audit the first schedule. Identify the next class, event, or unlock and write down its relevant requirement.
- Earn only starter money. Use a short job burst for the first essential purchase or lesson. Stop when the target is covered.
- Run two focused growth actions. Use the same attribute or class direction rather than spreading progress thinly.
- Recover immediately. Take rest, recreation, or a low-pressure social action if the status screen shows rising fatigue or stress.
- Repeat with a cash check. If funds are adequate, replace work with training. If not, insert one planned job action, not an entire work cycle.
- Reassess after every unlock. New classes and events change the best use of time. The routine that was optimal at the beginning can become wasteful later.
The route is deliberately conservative because it wins over a full playthrough. A flashy money rush can look impressive for a few cycles, but it leaves Ciel under-trained. A relentless training rush can unlock content while leaving you unable to pay for the next step. The sweet spot is simple: fund the next decision, focus the next block, and recover before the game charges interest on your fatigue.
If you’re troubleshooting the PC side while managing the schedule, Steamoz’s PC fixes guide and smooth-performance settings guide cover the same practical priority: stability first, optimization second. For Ciel Fledge, that translates to a stable condition bar and a schedule optimized around real thresholds.
Common mistakes that make the grind slower
Working every cycle is the biggest one. Money feels tangible, while stat progress is delayed, so jobs create a false sense of momentum. Training every cycle is the opposite mistake. It ignores recovery and can force you to spend the money you just earned on fixing the consequences. Changing focus daily produces the weakest version of both strategies because no attribute gets enough concentrated attention.
Another mistake is buying for comfort instead of for a measurable schedule advantage. Before spending, ask whether the purchase improves an activity you’ll repeat, opens a required route, or prevents a predictable condition problem. If the answer is no, keep the money.
Finally, don’t follow a guide built around a single ending unless that is your goal. Ciel’s development is flexible by design. The fastest level is not always the best daughter, best event outcome, or best story route. Use the bottleneck method, keep a cash buffer, and let your chosen objective decide which stats deserve the next week.
Bottom line: fast leveling comes from focused classes and training; reliable gold farming comes from short, deliberate job bursts. Combine the two with recovery days, and Ciel Fledge stops feeling like a slow grind and starts feeling like the sharp little scheduling puzzle it was meant to be.