
Dragon’s Dogma: Dark Arisen becomes dramatically easier when you understand three systems the game barely explains: pawn knowledge, vocation progression, and stamina-heavy combat. Hire a balanced party, carry curatives and throwables, upgrade equipment instead of hoarding money, and treat every large monster as a puzzle rather than a damage sponge. These ten tips will keep a new Arisen alive through Gransys, the Everfall, and the opening hours of Bitterblack Isle.
Dark Arisen is an unusual action RPG. Your character can climb a Cyclops, throw a Goblin into a fire, command AI companions, change vocations freely, and stumble into enemies that can erase an underprepared party in seconds. That freedom is brilliant, but the game’s tutorials leave out crucial details. The advice below focuses on the decisions that actually change your first playthrough.

🎮 Get Dragon's Dogma: Dark Arisen
Ready to dive in? Grab your copy today for just $4.79.
Check Offer1. Build a pawn party with jobs, not duplicates

Your main pawn is permanent, while two hired pawns can be replaced whenever you find better options. The safest early party has one frontline character, one dedicated healer, and at least one ranged or magical damage dealer. A Fighter or Warrior can draw attention; a Mage with Anodyne keeps everyone alive; a Strider, Ranger, Sorcerer, or support-heavy Mage handles targets that are awkward to reach.
Don't choose pawns only by level. A level 18 Mage with Anodyne, Halidom, and useful elemental boons is often more valuable than a level 23 Mage carrying random offensive spells. Check each pawn’s vocation, inclination, equipped skills, weapon quality, and “knowledge” stars. A pawn with three-star knowledge of a monster has learned useful tactics, such as climbing a Griffin or attacking a Cyclops’s eye.
Inclinations shape AI behavior. Scather pushes a pawn toward large enemies and melee engagement, while Utilitarian encourages exploiting weaknesses and using party knowledge. Challenger prioritizes ranged enemies; Medicant makes a pawn more likely to heal. These tendencies are not cosmetic. A Scather Mage may run into danger, while a Medicant Fighter may waste time using curatives instead of attacking.
| Party Role | Strong Early Choice | What to Look For | Main Weakness |
|---|---|---|---|
| Frontline | Fighter | Shield Drum, Shield Summons, high defense | Limited reach against flying enemies |
| Healer | Mage | Anodyne, Halidom, elemental boons | Low physical durability |
| Ranged damage | Strider or Ranger | Fivefold Flurry, Mighty Bend, special arrows | Needs stamina and ammunition |
| Magic damage | Sorcerer | High-tier spells and enemy knowledge | Long casting times |
Use the official Steam community hub to find current pawn-sharing communities, but don't blindly hire overpowered pawns. A level 200 companion can flatten early quests and make your own progression feel strangely empty. Hiring pawns within roughly five levels of your Arisen usually produces a more satisfying first run.

🎮 DARK
Looking to experience this game? Grab your digital key directly on our store for $2.99.
View on Steammoz Store →2. Learn the difference between damage and defense
Dragon’s Dogma uses a damage threshold system that makes weapon upgrades incredibly important. Your Strength or Magick stat matters, but an attack that fails to clear an enemy’s defense can deal pathetic damage. This is why an upgraded weapon from the next story tier can outperform an older weapon with a higher character level behind it.
For physical attacks, compare your Strength plus weapon power against the target’s defense. For spells, compare Magick plus staff or archistaff power against magic defense. The exact result is modified by skills, hit zones, resistances, and difficulty, but the practical lesson is simple: if your strikes are producing tiny white damage numbers, stop attacking and find better gear, a weakness, or a resistance bypass.
Upgrade weapons and armor at a blacksmith whenever you can. The Black Cat in Gran Soren offers forged equipment, while Caxton’s shop stocks useful early upgrades if you support him during the “Mythril” and “A Fortress Besieged” progression. Keep old weapons for alternate vocations, but don't carry every low-level item. Storage at an inn is shared between your Arisen and main pawn, and weight affects stamina regeneration and movement speed.
Elemental damage is a multiplier on the right target, not a universal solution. Fire works well against many undead and ice-based enemies; ice is useful against fire-aligned creatures; lightning can punish wet targets and certain flying enemies. Ask your Mage pawn for a boon, but don't wait through a long cast while a Chimera is charging. A physical attack on a weak point is often better than a badly timed spell.
3. Choose a vocation for skills, not just its label

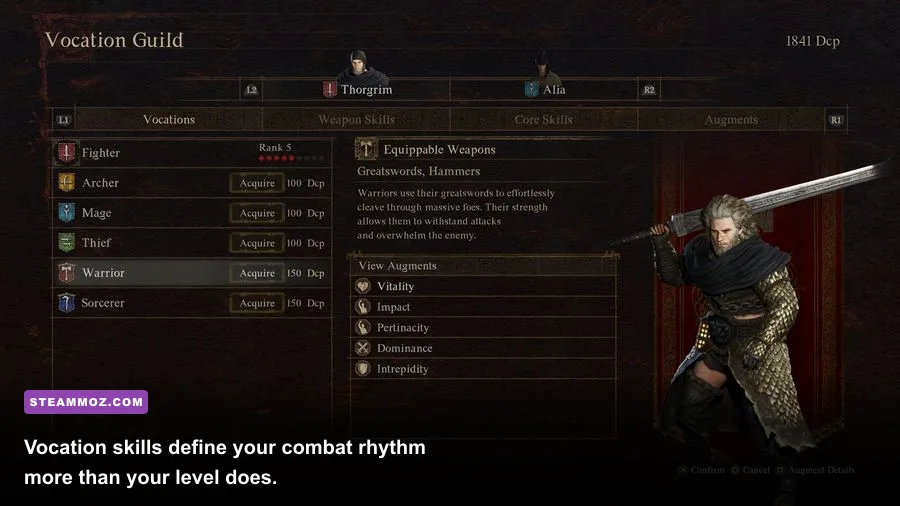
There are nine vocations: Fighter, Strider, Mage, Warrior, Ranger, Sorcerer, Mystic Knight, Assassin, and Magick Archer. You can change vocation at the inn in Gran Soren by speaking to Asalam, and doing so doesn't erase your progress. The real strategy is to unlock useful augments and core skills, even if you don't plan to stay in that vocation.
Strider is a superb first vocation because it combines fast daggers, a shortbow, and mobility. Hundred Kisses shreds a clinging monster’s weak point, while Fivefold Flurry gives you reliable ranged pressure. Fighter teaches blocking, perfect timing, and positioning, while Mage teaches healing and elemental support. Sorcerer brings spectacular spells such as High Maelstrom and High Gicel, but casting safely requires party control and good terrain.
Warrior hits harder than Fighter but loses the shield and much of the defensive flexibility. Mystic Knight is powerful once you understand perfect blocks and weapon enchantments, but it is a poor recommendation for a player still learning enemy tells. Magick Archer is exceptionally comfortable in Dark Arisen because Ricochet Hunter dominates enclosed corridors, while Sixfold Bolt handles exposed weak points. Assassin has an enormous toolkit but demands more deliberate loadout planning.
| Vocation | Best Beginner Skill | Core Advantage | Learning Curve |
|---|---|---|---|
| Fighter | Dragon’s Maw | Shield defense and reliable stagger | Low |
| Strider | Hundred Kisses | Excellent climbing and ranged damage | Low to medium |
| Mage | Anodyne | Healing and elemental support | Low |
| Ranger | Tenfold Flurry | High single-target bow damage | Medium |
| Sorcerer | High Miasma | Huge area damage and spell variety | High |
| Magick Archer | Ricochet Hunter | Exceptional indoor combat | Medium |
Augments remain available after you unlock them, so vocation experimentation pays off. Fighter’s Sinew increases carrying capacity, while Strider’s Leg-Strength improves climbing speed and mobility. Sorcerer’s articulacy reduces spell-casting time. Don't obsess over perfect stat growth on a first playthrough; equipment and ability selection have a far larger immediate impact than small level-up differences.
4. Fight big monsters by reading their telegraphs

Large monsters aren't meant to be attacked from the ground until they die. Watch the animation, identify the vulnerable body part, then commit to a short burst of damage. A Cyclops’s eye is the obvious target, but its club swings, stomp, and shield position determine whether you can safely reach it. Climb from the legs or torso, listen for the creature’s roar, and release your grip before stamina empties.
Chimeras are a priority puzzle. The snake head spits poison and can be severed; the goat head casts spells; the lion head pressures you at close range. Kill or disable the goat first if your party lacks magical resistance, then remove the snake to reduce status effects. Against a Griffin, fire damage and oil can create a knockdown opportunity, but chasing it in open terrain is dangerous. Let it land, attack the wings, and exploit the moment it prepares a long roar.
Golems require patience because their glowing magickal seals are the real health bars. Physical attacks barely matter against some seals, and a destroyed seal changes the monster’s attack pattern. Keep your camera moving, use ranged attacks when a seal is high on the body, and don't climb blindly while the Golem is charging its beam.
| Monster | Dangerous Telegraph | Counter | Useful Tool |
|---|---|---|---|
| Cyclops | Raises club or stamps repeatedly | Stay behind legs; attack eye after stagger | Lightning boon, shield timing |
| Chimera | Goat begins casting; snake coils | Interrupt goat and cut snake head | Silence, fire, ranged attacks |
| Griffin | Wingbeats and extended roar | Ground it, then attack wings | Fire, oil, blast arrows |
| Golem | Body glows before beam attack | Break magickal seals and retreat | Ranged damage, lightning |
| Drake | Chest glows before fire breath | Attack heart; dodge breath sideways | Ice damage, silence |
Grabbed enemies can be dangerous, but being grabbed isn't always a disaster. Pawns often attack the monster’s hand or head to free you. Mashing movement and attack inputs can escape some holds, while a curative removes disabling conditions afterward. Carry Panacea, Large Mushrooms, Spring Water, and Greenwarish rather than expecting Anodyne to solve every problem.
5. Treat stamina, weight, and travel as combat systems
Stamina is the hidden currency of Dragon’s Dogma. Sprinting, climbing, heavy skills, and some defensive actions all consume it. Entering a monster fight with a heavy inventory and half a stamina bar is like starting a boss battle with your controller unplugged. Keep your load below Very Heavy whenever possible, and use Large Mushrooms or Liquid Vim before a long climb.
Ferrystones are precious early and convenient later. Buy them when merchants stock them, but don't burn one for every short trip. Place Portcrystals in useful locations such as Bitterblack Isle’s entrance, the Greatwall, or the Bluemoon Tower, then use a Ferrystone to return to Gran Soren. The permanent Portcrystal from the main story is especially valuable because it can be relocated.
Lantern oil matters more than new players expect. Dark corridors hide ledges, ambushes, and environmental hazards, and some enemies are much harder to read without light. Carry spare oil in storage and refill before entering the Watergod’s Altar, the Soulflayer Canyon, or Bitterblack Isle. A wet lantern is useless, so avoid deep water or replace it immediately.
For broader PC performance advice, Steamoz’s graphics settings guide explains the same practical principle: prioritize the settings that affect frame pacing, not the ones with the flashiest menu descriptions. Dark Arisen is generally light on modern hardware, but a stable frame rate makes climbing, blocking, and camera control noticeably easier.
6. Save deliberately and understand quest timing
Dragon’s Dogma uses autosaves, manual saves, and checkpoint saves, but the system can trap an unprepared player if used carelessly. Save at an inn before major quests, keep a manual save before entering unfamiliar caves, and avoid relying on a single autosave slot. The game has a few point-of-no-return moments, especially around the main story’s final sequence.
Quest availability can change as the story advances. Some notice-board tasks and escort quests disappear after major events, while others become available only after you speak to a particular NPC. The “Lost and Found” quest in Cassardis, for example, is easy to miss if you rush ahead. Check notice boards in Cassardis, Gran Soren, and the Encampment before starting a major story mission.
Don't accept every escort quest just because it appears. Escorts can send you across the map with a fragile NPC and no convenient Portcrystal. If you do accept one, place a Portcrystal near the destination first, or bring a Ferrystone so a death spiral doesn't turn a ten-minute errand into an hour-long detour.
7. Use throwables and status effects instead of hoarding them
New players often finish Dark Arisen with a bag full of unused explosives, arrows, and curatives. That is a mistake. Oil Arrows make targets vulnerable to fire, Blast Arrows deliver enormous stagger and damage when used by Rangers, and Throwblasts can help clear tough enemies before your gear catches up. Consumables are there to solve bad matchups, not decorate storage.
Debilitations can completely change an encounter. Silence limits spellcasting, Torched enemies panic and take fire damage, and Blindness can disrupt physical attackers. Carry at least one item that cures poison, torpor, blindness, skill silence, and petrification when exploring Bitterblack Isle. Petrification is particularly brutal because the entire party can be lost if you don't carry Secret Softener or a Panacea.
8. Approach the Everfall and Bitterblack Isle as new difficulty tiers
The Everfall marks a major shift in the game’s rhythm. The enemies hit harder, vertical spaces punish careless movement, and loot becomes more important than ordinary quest rewards. Don't rush downward just because the story points you there. Upgrade your main weapon, fill empty skill slots, and bring a Mage with healing and a ranged option.
Bitterblack Isle is not simply extra content for a fresh character. Its first rooms can overwhelm a level 50 party, and cursed equipment creates a separate identification loop. Explore in stages, retreat when enemies take absurdly little damage, and learn the location of Riftstones and healing opportunities. Daimon is a serious endgame encounter, not a boss you should expect to defeat because you completed the main story.
Once you are comfortable, Bitterblack Isle rewards repeat runs with some of the best equipment in the game. Purification results depend on the Arisen and main pawn’s vocations, so changing vocation before purifying cursed weapons or armor can influence what you receive. That system is worth using later; it is not worth delaying your first clear while chasing perfect drops.
9. Dragonforge equipment before chasing perfect loot
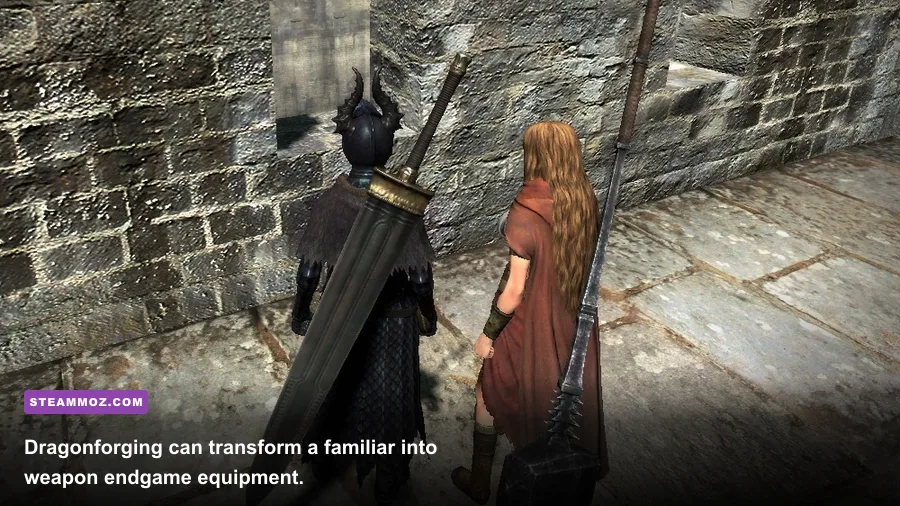
When a weapon or armor piece is Dragonforged, its upgrade level increases dramatically after being used against a dragon-class enemy, including the Grigori battle near the end of the story. The chance depends on the item’s upgrade level, with fully upgraded gear offering the best odds. Dragonforging can turn a familiar weapon into a viable endgame option, so don't automatically discard everything that isn't Bitterblack gear.
Prioritize Dragonforging your main weapon, then armor pieces that cover common weaknesses. Resistances matter: torpor, curse, possession, and petrification can end a fight faster than raw damage ever will. Fashion matters too, but a stylish low-defense coat won't save you from Daimon’s spells. Keep a practical combat set and a cosmetic set in storage if you care about appearance.
10. Follow a simple first-playthrough progression plan
For a clean first run, begin as Strider or Fighter, hire a Mage and a ranged pawn, and complete early Cassardis and Encampment quests before pushing toward Gran Soren. Upgrade your primary weapon at every sensible opportunity, unlock core skills at the inn, and switch vocations after you understand the basics. After reaching Gran Soren, explore rather than sprinting through the main quest; many of the game’s best lessons happen in caves and roadside encounters.
| Stage | Priority | Recommended Preparation | Common Mistake |
|---|---|---|---|
| Cassardis and Encampment | Learn combat and pawns | Balanced party, basic curatives | Rushing the first major quest |
| Gran Soren | Upgrade vocation and gear | New skills, storage cleanup, lantern oil | Keeping weak weapons too long |
| Main story | Explore and complete side quests | Ferrystones, Portcrystal planning | Accepting every escort blindly |
| Everfall | Prepare for endgame damage checks | Dragonforging target, status cures | Ignoring enemy resistances |
| Bitterblack Isle | Learn patterns and farm carefully | High resistances, upgraded weapons | Treating it like a normal dungeon |
For reference, the Dragon’s Dogma: Dark Arisen Steam page lists the PC edition and its included expansion, while Capcom’s official Dragon’s Dogma site provides franchise information. If you enjoy demanding games that reward careful preparation, Steamoz’s Inquisitor-Martyr starting build and Against the Storm secrets guide offer similarly practical advice.
The best Dragon’s Dogma habit is staying curious. Ask why a pawn keeps dying, why a weapon suddenly stopped dealing damage, or why a monster refuses to stagger. Usually, the answer is visible in its behavior, resistance, positioning, or equipment threshold. Once you start reading those clues instead of charging forward, Gransys stops feeling unfair and starts feeling like one of the smartest action-RPG playgrounds on PC.