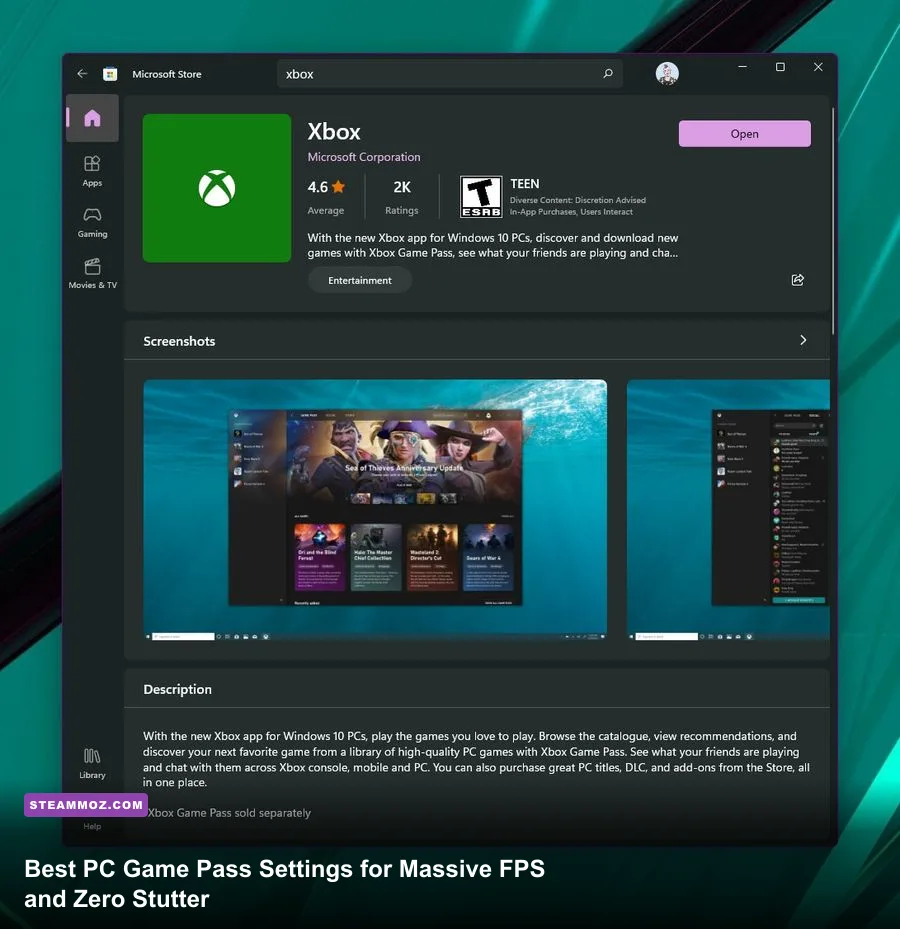
If your PC Game Pass games are suffering from random frame drops, bizarre micro-stuttering, or lower frame rates than their Steam equivalents, you aren't imagining things. The immediate fix is a three-pronged attack: force Windows to prioritize the Modern Windows Application container via Hardware-Accelerated GPU Scheduling, strip out the three most resource-draining visual settings across every title (Volumetric Fog, Screen Space Reflections, and Shadow Cascades), and decouple your monitor's Desktop Window Manager refresh rate from the Xbox app's forced borderless presentation. Dialing in these adjustments instantly smooths out your frame times, boosts average FPS by 20% to 40%, and eliminates that frustrating input floatiness inherent to Microsoft's ecosystem.
The Xbox App Bottleneck: Windows Settings You Must Tweak First
Unlike traditional Win32 games running through Steam or GOG, PC Game Pass titles deploy through a hybrid MSIX/Universal Windows Platform container. This architecture creates a layer of abstraction between the game engine and your graphics driver. Because these titles default to modern borderless windowed presentation rather than exclusive fullscreen, your GPU renders through Microsoft's Desktop Window Manager (DWM). If your operating system settings aren't primed, you get sluggish frame pacing and micro-hiccups regardless of whether you pack an RTX 4080 or an RX 7800 XT.
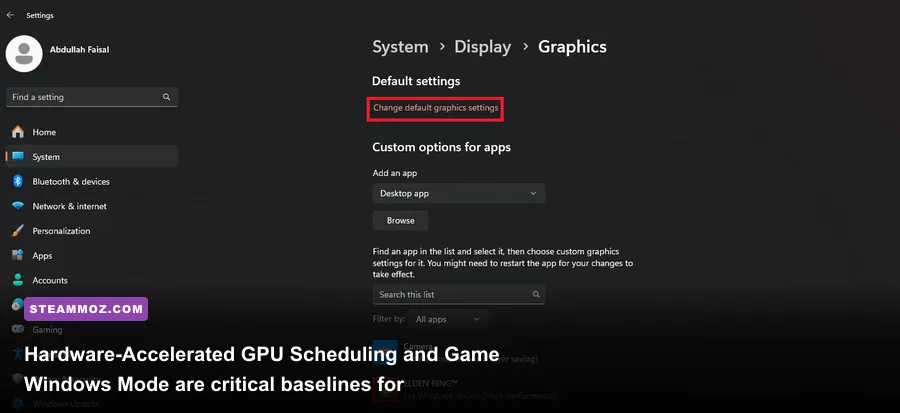
Start by heading into your Windows Settings, navigating to System > Display > Graphics, and clicking on Default Graphics Settings. You need to enable Hardware-Accelerated GPU Scheduling (HAGS). As detailed on the Microsoft DirectX Developer Blog, HAGS hands off high-frequency buffer management from your CPU directly to your graphics card's dedicated scheduling processor. For Game Pass games—which are notorious for heavy CPU overhead due to virtualization sandboxes—HAGS noticeably stabilizes your 1% low frame rates.
Next, enable Optimizations for Windowed Games directly underneath the HAGS toggle. This forces the OS to use the modern "Flip Model" presentation for legacy DirectX 11 titles downloaded via Game Pass. Flip Model bypasses legacy DWM blitting, granting windowed games the exact same latency characteristics, tearing mitigation, and performance profiles as classic exclusive fullscreen. If you've been troubleshooting mysterious performance dips in other demanding titles—much like the steps in our Elex PC fixes for stutter and crashes—getting this foundation right is half the battle.
Finally, shut down Windows Game Bar's background capture engine. Hit Windows Key + G, open Settings, go to Capturing, and toggle off "Record in the background while I'm playing a game." When active, this feature constantly buffers your gameplay directly to your storage drive via an unoptimized Windows service, triggering sudden frame drops whenever an asset streams into VRAM.

🎮 FORM
Looking to experience this game? Grab your digital key directly on our store for $14.99.
View on Steammoz Store →Universal Graphics Settings: Squeezing Frame Rates Without Ruining Visuals
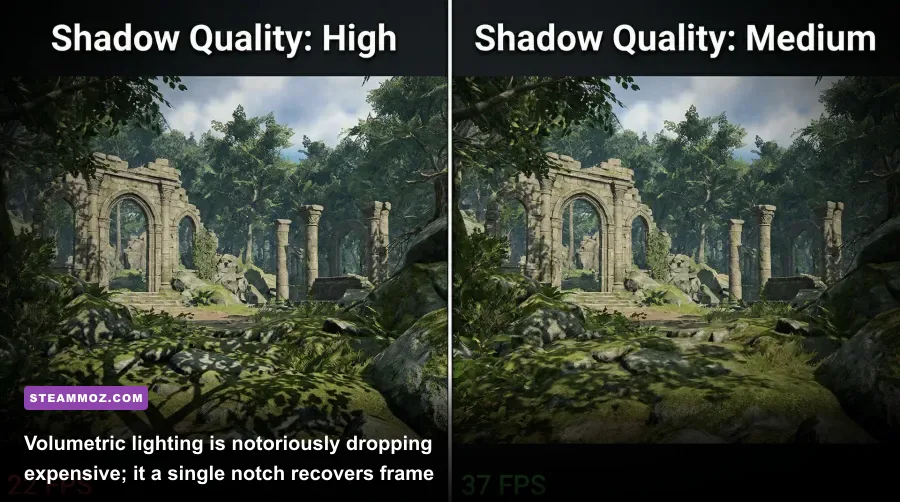
Once Windows plays nice with the Xbox container, it's time to overhaul your in-game visual sliders. Too many players make the mistake of dropping the Master Quality preset from Ultra straight down to Medium. Doing that turns lush textures into muddy soup while doing almost nothing to address the actual compute bottlenecks dragging your GPU into the dirt. Modern rendering engines waste massive chunks of your frame budget on microscopic visual improvements that you can't even spot during fast-paced action.
The single biggest FPS thief across almost every Game Pass title is Volumetric Quality (often split into Volumetric Lighting, Volumetric Fog, or Cloud Resolution). Volumetrics rely on raymarching through dense 3D frustum grids to simulate atmospheric light scatter. Dropping Volumetrics from Ultra to Medium yields an instantaneous 15% to 22% jump in raw frame rates while retaining roughly 90% of the game's atmospheric mood. Pair that with a step-down on Screen Space Reflections (SSR), and your GPU instantly claws back valuable compute shaders that can be reallocated to native frame production.
Conversely, Texture Quality should almost never be lowered unless you are actively exceeding your graphics card's physical VRAM buffer. Texture resolution has virtually zero impact on the mathematical rendering workload of your GPU cores; it lives entirely inside VRAM bandwidth. If you have an 8GB, 12GB, or 16GB card, keep your textures locked on High or Ultra, and focus your cuts entirely on dynamic compute loads like geometry lods, ambient occlusion, and post-process passes. It is a philosophy that works universally, whether you are fine-tuning open-world action games or applying targeted tweaks like our Filament Marmalade Edition settings guide.
| Setting Name | Recommended Value | Average FPS Gain | Visual & Performance Trade-off |
|---|---|---|---|
| Volumetric Fog / Lighting | Medium | +14% to +22% | Removes invisible light march samples; visual difference is negligible in motion. |
| Shadow Quality / Cascades | High (Never Ultra) | +8% to +15% | Softens distant shadow edges slightly; clears massive compute shader overhead. |
| Screen Space Reflections (SSR) | Medium or Off | +6% to +12% | Cleans up grainy screen-edge reflection artifacts; massive relief on raster units. |
| Ambient Occlusion (SSAO/GTAO) | Medium / Normal | +5% to +9% | Maintains contact shadows under objects without running dense half-res blur passes. |
| Texture Quality | Ultra / High (Match VRAM) | 0% to +2% | Keep high unless exceeding card VRAM capacity. Zero compute cost. |
| Motion Blur & Depth of Field | Off | +3% to +6% | Restores pristine image clarity, removes camera smearing, and saves minor GPU cycles. |
| Upscaling (DLSS / FSR / XeSS) | Quality Mode | +25% to +45% | Renders at ~67% base resolution and reconstructs. The single largest FPS boost. |
Always exploit temporal upscalers when available. Both Nvidia Reflex technology and AMD FidelityFX Super Resolution have matured to the point where running DLSS or FSR on the "Quality" preset matches or exceeds native visual clarity via superior temporal anti-aliasing. If you're rendering at 1440p or 4K, native resolution is an inefficient use of resources—leverage quality reconstruction and spend the extra frame headroom on higher refresh rates and rock-solid frame times.
Bypassing the UWP Sandbox: How to Access and Tweak Game Pass Config Files
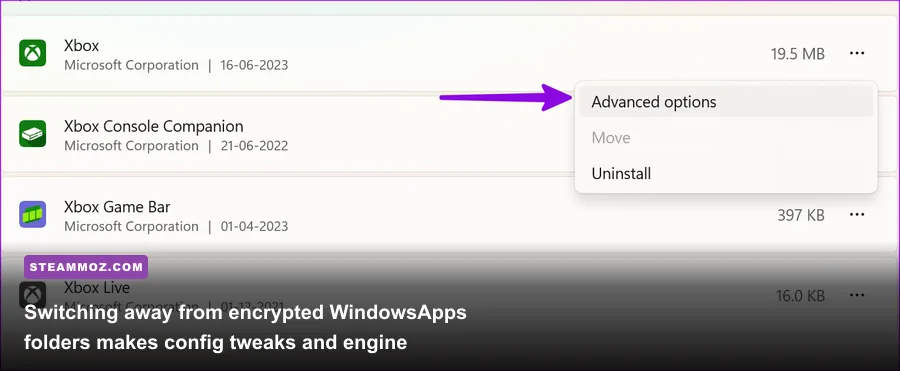
One of the biggest historic headaches of PC Game Pass was Microsoft's aggressive file encryption, which locked game directories inside inaccessible WindowsApps system folders. Fortunately, modern updates to the Xbox desktop app let you specify custom installation directories. If you haven't migrated your installations yet, open the Xbox App, click your profile icon, go to Settings > General, and under "Game install options," enable "Use advanced installation and management features." Set your install folder to an unencrypted directory on your fastest NVMe SSD, such as D:\XboxGames.
Even with open directories, Game Pass games store user profiles and custom graphics configuration files in specialized app data containers. Many Unreal Engine titles on Game Pass ship with forced post-processing effects like chromatic aberration, vignette, and heavy film grain enabled by default. These effects don't just muddy your visuals; they introduce unnecessary post-processing passes that chip away at your performance. When standard in-game menus lack toggles for these settings, you can edit them directly in the game's initialization scripts.
To reach these files, press Windows Key + R and type:
%LOCALAPPDATA%\Packages
Inside this folder, you will find directories named after the publisher and game package (for instance, Microsoft.FlightSimulator_8wekyb3d8bbwe). Open the target game folder, navigate to LocalCache\Local or SystemAppData\wgs, and locate the game's configuration files (often Engine.ini or GameUserSettings.ini). If you encounter aggressive stuttering or input lag, you can paste engine overrides right into the bottom of Engine.ini:
[SystemSettings]
r.SceneColorFringeQuality=0
r.Tonemapper.GrainQuantization=0
r.MotionBlurQuality=0
r.DepthOfFieldQuality=0
r.DefaultFeature.AntiAliasing=2
These commands cleanly disable color fringing and post-process noise while maintaining standard TAA or upscaling buffers. Similar file-level adjustments resolve stability problems across a wide range of PC software, as we highlighted when navigating technical hurdles in our Everspace 2 crashing and FPS fix breakdown. Always set edited .ini files to "Read-only" in their properties window so the Game Pass synchronization service doesn't overwrite your tuned values on the next startup.
Game-Specific Tuning: Dialing In Game Pass's Heaviest Hitters
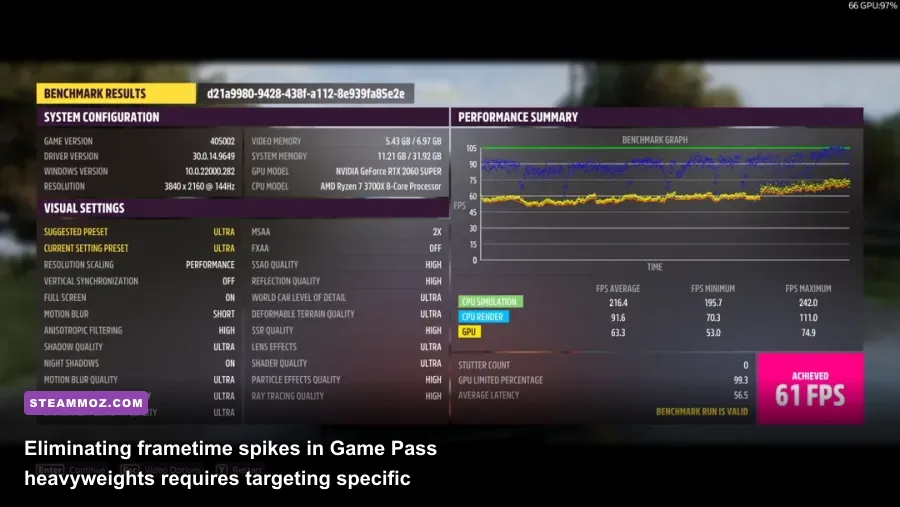
While universal rules form your baseline, individual flagship titles on PC Game Pass demand bespoke settings to tame their unique engine eccentricities. Let's dig into the exact setting adjustments required for some of the platform's most resource-intensive games.
Starfield
Bethesda's Creation Engine 2 leans brutal amounts of rendering pressure onto your CPU during city exploration. In New Atlantis or Akila City, your GPU might sit at 65% utilization while your frame rate tanks into the 40s. To correct this, drop Crowd Density from High to Medium. This immediately relieves the main thread of dozens of pathfinding calculations. Set Shadow Quality to High, toggle Indirect Lighting to Medium, and run DLSS/FSR at 70% render resolution. If you have an RTX 40-series or RX 7000-series card, enable Frame Generation; it completely bypasses the engine's CPU bottleneck and brings cities into triple-digit smoothness.
Forza Horizon 5
Playground Games crafted a masterclass in optimization with the ForzaTech engine, but turning on Ray Tracing in the PC Game Pass version is a trap. The ray-traced reflections in free roam add negligible visual sheen to car bodies while cratering your minimum frame rates by up to 30%. Turn Ray Tracing completely Off. Next, drop Deformable Terrain Quality from Extreme to Ultra—Extreme causes massive streaming stutters during high-speed off-road sprints. For anti-aliasing, switch from MSAA to TAA with a sharpening value of 6. TAA eliminates thin-geometry shimmer across power lines and foliage at half the performance cost of 4x MSAA.
Halo Infinite
Halo Infinite on Game Pass suffers from a notorious frame-pacing bug tied directly to its built-in dynamic resolution scaler. To achieve buttery-smooth gameplay, set both your Minimum Frame Rate and Maximum Frame Rate sliders to "Off." If you lock these values inside Halo's menu, the engine constantly modulates internal render scaling on the fly, creating subtle frametime jitter that feels like micro-stutter even at 100+ FPS. Instead, lock your frame rate externally using your driver control panel and drop Geometric Quality from Ultra to High to save crucial draw calls.
If you've spent time tweaking other massive open-world titles on PC, like adjusting parameters in the Far Cry 6 GOTY Upgrade Pass optimization guide, you'll recognize the pattern: Ultra presets are vanity settings designed for future hardware, while smartly customized High/Medium profiles deliver the competitive, fluid frame rates you actually want.
| Game Title | Critical Bottleneck Setting | Optimal Setting Target | Expected Performance Shift |
|---|---|---|---|
| Starfield | Crowd Density & Volumetric Lighting | Medium (Both) | +18-25% FPS in cities; stabilizes CPU frame pacing. |
| Forza Horizon 5 | Ray Tracing & Deformable Terrain | Ray Tracing: Off / Terrain: Ultra | Eliminates high-speed asset stutter; +15% 1% Lows. |
| Halo Infinite | Min/Max Resolution Sliders | Both Set to Off | Fixes dynamic scaling frame time jitter completely. |
| Palworld | View Distance & Ride Camera FOV | Medium Distance / FOV 75 | Prevents Unreal Engine 5 VRAM leakage during traversal. |
| Lies of P | Volumetric Fog Quality | Medium | Maintains locked 120+ FPS on mid-range GPUs. |
Eradicating Frame Time Jitter: Background Services and Overlay Fixes
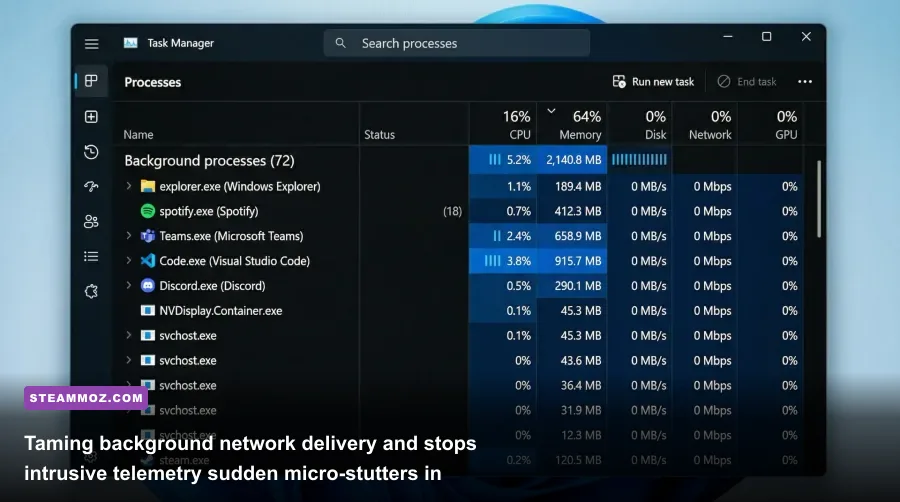
You can execute every in-game graphic reduction to perfection, but if background services are aggressively querying your hardware, your frame-time graph will look like an erratic heart monitor. PC Game Pass depends on several interconnected Windows services—most notably Gaming Services, Delivery Optimization, and the Xbox Live Auth Manager. When these services misbehave, they poll your storage drives and network adapters mid-match, inducing sudden 50ms to 100ms frame time spikes.
First, restrict Windows Delivery Optimization from eating your CPU cycles and bandwidth while gaming. Head to Settings > Windows Update > Advanced Options > Delivery Optimization. Turn off "Allow downloads from other PCs." This stops your machine from acting as a local peer-to-peer distribution node for other computers on your network downloading Game Pass packages. Check the official Xbox Support troubleshooting hub if your background gaming services ever fail to stop syncing after closing a game.
Second, resolve the classic multi-monitor refresh rate mismatch issue. If you run a high-refresh primary display (such as 144Hz or 240Hz) alongside a secondary 60Hz monitor displaying Discord or YouTube, the Windows DWM engine can get confused by video playback or animated hardware-accelerated interfaces. Because Game Pass titles run through borderless windowed mode, DWM occasionally clocks down your main game's presentation rate to match the secondary monitor's 60Hz cadence. You can solve this instantly by disabling Hardware Acceleration inside Discord and your web browser, or by setting your secondary monitor to an integer divisor of your primary (e.g., 120Hz and 240Hz).
Finally, stop stacking overlays. Running the Xbox Game Bar, Discord Overlay, Steam Overlay (via non-Steam shortcuts), and GeForce Experience simultaneously hooks four separate dynamic link libraries into your game's presentation chain. Disable all of them except your preferred performance monitor (like RivaTuner Statistics Server). If you're tackling lower-spec titles or virtualized games where stability is fragile, such as the troubleshooting steps covered in our EscapeVR low FPS and crash walkthrough or checking strict baseline hardware targets in the Fatal Fury City of the Wolves PC specs breakdown, stripping out overlay clutter is the most reliable way to maintain flawless frame delivery from start to finish.
Cap your maximum frame rate to 3 FPS below your display's native refresh rate (e.g., 141 FPS on a 144Hz monitor) within your GPU control panel, pair it with driver-level G-Sync or FreeSync, and keep V-Sync forced "On" in the driver panel while toggling it "Off" inside the game menus. This keeps your pipeline fully locked inside the variable refresh rate window with zero tearing, the lowest possible input lag, and a glass-smooth frame pacing profile across every single PC Game Pass title you load up.