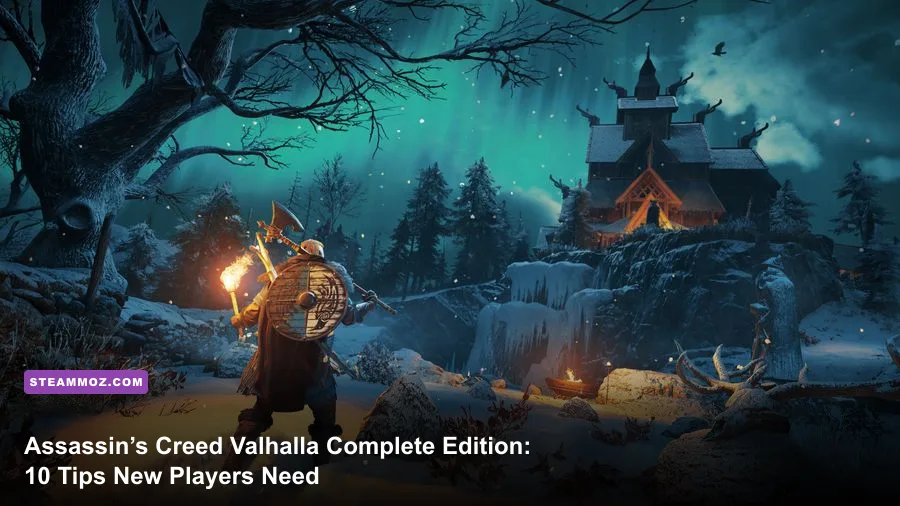
Start by upgrading Ravensthorpe, learning parry timing, and spending skill points along one coherent path instead of chasing every shiny icon. Assassin’s Creed Valhalla Complete Edition gives you the base campaign, Wrath of the Druids, The Siege of Paris, Dawn of Ragnarök, and the Ultimate cosmetics, so there’s a huge amount to absorb. These 10 tips will help new players build a strong Eivor, avoid wasted resources, handle England’s toughest fights, and approach the expansions in the right order.
The Complete Edition is still a sprawling action RPG rather than a traditional stealth-only Assassin’s Creed game. You’ll raid monasteries, solve environmental puzzles, manage a settlement, hunt legendary animals, and occasionally delete a boss with a perfectly timed stun attack. The trick is understanding which systems matter immediately and which can wait.
1. Build Ravensthorpe Before Chasing Every Quest
Ravensthorpe is more than a cosmetic home base. Settlement buildings unlock services, quest lines, upgrades, and useful conveniences, so your first major priority after arriving in England should be gathering raw materials and supplies for construction. The Blacksmith, Hidden Ones’ Bureau, Stable and Aviary, Barracks, and Fishing Hut all provide meaningful benefits.
Which settlement buildings matter first?
Upgrade the Blacksmith early because Gunnar can improve your gear quality and raise weapon and armor ranks. The Hidden Ones’ Bureau unlocks assassination-related content and gives you access to the Leap of Faith after completing its early requirements. The Stable and Aviary improves horse training, while the Barracks lets you customize your Jomsviking and recruit stronger raiders.
Don’t spend every supply on buildings just because the resources are available. Some structures, including the Cartographer and Museum, are useful later but won’t transform early combat. Raids in England are the fastest way to collect supplies, while larger monastery raids usually provide enough raw materials for several settlement upgrades at once.
| Building | Early benefit | Priority |
|---|---|---|
| Blacksmith | Improves gear quality and upgrades | Very high |
| Hidden Ones’ Bureau | Unlocks assassination content and bureau quests | High |
| Stable and Aviary | Horse training and mount improvements | High |
| Barracks | Jomsviking customization and recruitment | Medium |
| Fishing Hut | Fishing deliveries and rewards | Medium |
For a useful comparison, Valhalla’s base-building rhythm is more hands-on than the simpler town systems in Dungeons 3. Think of each Ravensthorpe building as a permanent quality-of-life investment, not a side activity you can safely ignore.
🎮 Assassin's Creed Valhalla Complete Edition
Looking to experience this game? Grab your digital key directly on our store for $34.99.
View on Steammoz Store →2. Follow One Skill-Tree Direction at First
Valhalla’s three skill branches are Bear for heavy melee, Raven for stealth and assassination, and Wolf for ranged combat and light gear. You can eventually unlock a huge portion of the tree, but early points are much more valuable when they create a working combat loop instead of scattering across distant nodes.
A reliable beginner path
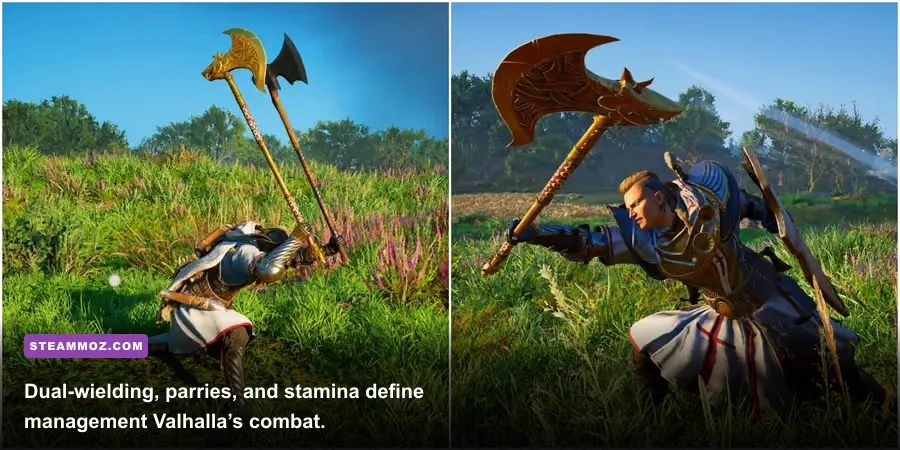
For a forgiving first run, lean into the Bear tree and take Stomp, Heavy Dual Wield, and Adrenaline Fiend when available. Stomp deals enormous damage to downed enemies, Heavy Dual Wield lets you carry two heavy weapons, and Adrenaline Fiend rewards aggressive play with increased attack and speed while you have at least one adrenaline-filled slot.
In the Raven branch, Advanced Assassination is excellent once you’re comfortable with stealth. It gives you a timing-based chance to assassinate high-power targets rather than simply bouncing off them. In the Wolf branch, Bow to Melee Link is an efficient early pickup because landing a ranged hit boosts your next melee attack.
Skill nodes display hidden connections as you reveal them, so don’t panic if the map looks confusing. You can reset individual skills at any time without permanently ruining Eivor. That flexibility means you should respec before a difficult region or boss instead of stubbornly carrying a setup that isn’t working.
| Skill | Branch | Why it matters | Best use |
|---|---|---|---|
| Stomp | Bear | Huge damage against downed enemies | Finish stunned elites |
| Advanced Assassination | Raven | Can kill higher-power targets with timing | Stealth openings |
| Bow to Melee Link | Wolf | Ranged hits empower the next melee strike | Hybrid combat |
| Adrenaline Fiend | Bear | Improves offense while adrenaline is available | Raids and elite fights |
3. Learn Stamina, Parrying, and Stun Damage
Valhalla’s combat becomes dramatically easier once you stop treating the dodge button as your only defense. Dodging consumes stamina, while parrying with a light shield or appropriately timed weapon attack can interrupt enemies, expose weak points, and create a counterattack window. Heavy shields can parry too, but their timing feels less forgiving and their weight changes the rhythm of a fight.
Read the attack colors
Yellow attacks can usually be parried. Red attacks cannot be blocked or parried, so dodge them or move out of range. Blue attacks are special unblockable strikes that still require a dodge. Enemy animations matter more than the icon: wolves lunge low, standard soldiers telegraph overhead swings, and zealots often chain a second hit after the first whiff.
Every enemy has a stun gauge beneath its health bar. Hitting weak points with a bow, landing parries, and using heavy attacks drains that gauge. When it empties, the enemy staggers. That is when Stomp, a heavy finisher, or a dual-wield combo earns its best damage.
Try this beginner rotation: tap a weak point with the Hunter Bow, parry the next yellow attack, use a light combo while the enemy is open, then finish the stun with Stomp. Don’t mash heavy attacks constantly. Heavy swings are slower, consume stamina, and can leave Eivor exposed to red attacks.
Use adrenaline abilities instead of hoarding them
Adrenaline abilities are designed to be spent. Rage of Helheim is superb against isolated elites, while Harpoon Impalement can pull or slam enemies into walls and other targets. Mark of Death turns a charged bow into an excellent opener against groups. Your adrenaline refills through combat, stealth kills, and certain skill bonuses, so saving every bar for an imaginary emergency wastes damage.
4. Don’t Upgrade Every Weapon You Find
Gear in Valhalla is deliberately less disposable than loot in a typical level-based RPG. Weapons and armor have quality tiers, rune slots, and upgrade paths, but you don’t need to replace everything every few minutes. Find a moveset you enjoy, then invest in it. A well-upgraded Varin’s Axe can carry you much farther than a random weapon with a slightly higher power rating.
Strong early combinations
Varin’s Axe paired with a light shield is a balanced opening setup: quick attacks, dependable parries, and good stamina control. If you prefer reach and crowd control, use a Dane Axe such as the Sepulcher Axe. Two flails hit hard but have awkward recovery animations, making them better for experienced players who understand spacing.
Dual-wielding changes the moveset of both weapons. A main-hand weapon determines the regular attack pattern, while the off-hand weapon controls the special attack. Try a fast axe in the main hand and a hammer in the off hand if you want quick pressure followed by a heavy stun-focused ability.
Runes are worth examining instead of automatically equipping the largest number. Weapon runes can improve attack, stun, speed, or critical chance, while armor runes often boost health, melee resistance, or specific damage types. Don’t sink rare resources into gear you dislike. Materials such as tungsten ingots become much more important when pushing gear to mythical quality later.
| Setup | Strength | Weakness | Best for |
|---|---|---|---|
| Axe and light shield | Fast attacks and safe parries | Limited reach | First-time players |
| Two axes | Excellent pressure and mobility | Consumes stamina quickly | Aggressive melee |
| Dane Axe | High damage and wide swings | Slow recovery | Groups and stunned elites |
| Bow and hidden blade | Strong stealth openings | Less forgiving when surrounded | Raven-focused builds |
For PC players, the same principle applies to performance tuning: don’t chase every maximum setting if it makes combat feel uneven. Our PC troubleshooting guide covers the broader performance mindset, but Valhalla-specific choices matter most here.
5. Explore Wealth, Mysteries, and Artifacts Differently
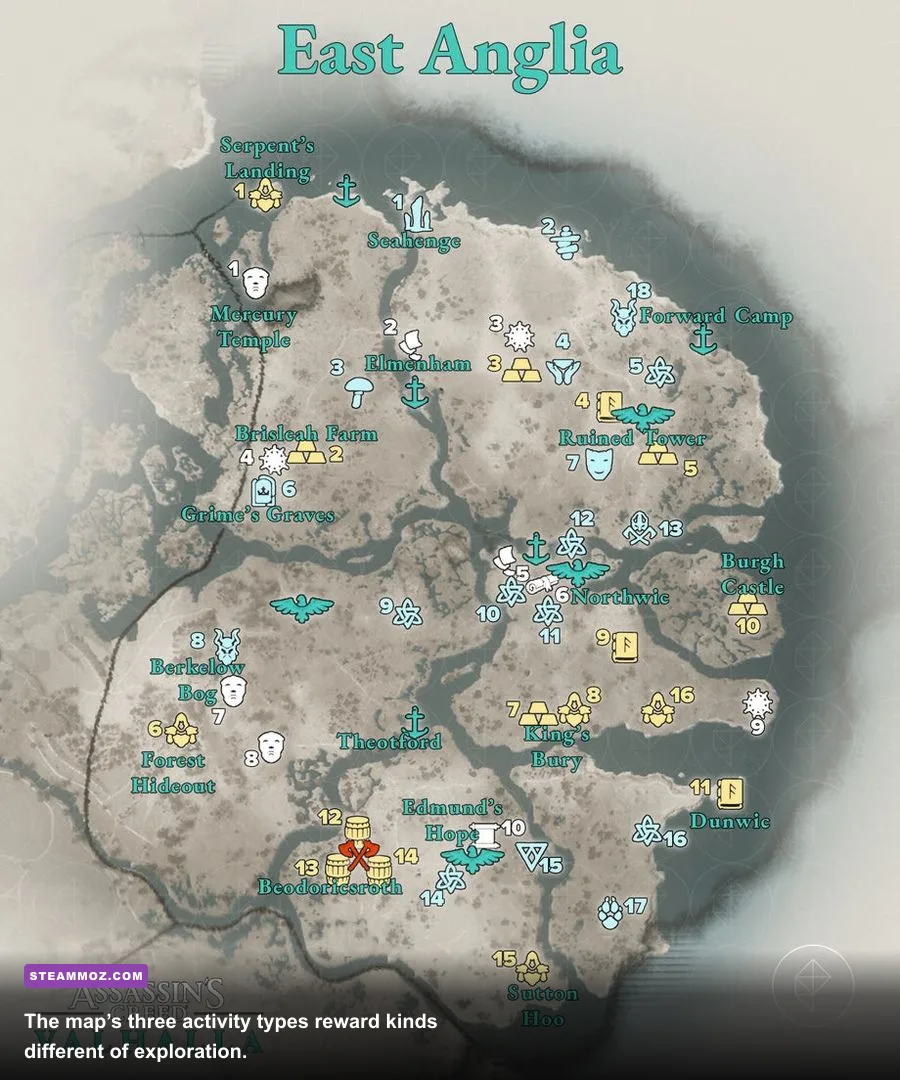
England’s map divides exploration into Wealth, Mysteries, and Artifacts. Wealth usually provides gear, abilities, ingots, or upgrade materials. Mysteries are handcrafted encounters ranging from flyting and puzzles to boss fights. Artifacts include Roman relics, cursed symbols, treasure hoard maps, and cosmetic designs. Clearing every icon in a region is tempting, but you’ll progress faster by prioritizing the rewards that match your build.
Prioritize ability books
Gold ability markers often lead to Books of Knowledge. Finding the same ability twice upgrades it, so keep an eye out for both melee and ranged versions. Incendiary Powder Trap is useful for destructible walls and groups, Ranged Fire Strike adds fire damage to bow attacks, and Focus of the Nornir slows time while you aim. These active abilities have a bigger effect on combat than a small armor-stat increase.
Use Odin’s Sight near Wealth markers, then look vertically. Many chests are not locked by a simple key; they may sit behind a breakable wall, beneath a floor, above a barred door, or inside a nearby building. Explosive oil jars, incendiary traps, and movable shelves solve more puzzles than brute force.
Flyting is worth doing because charisma levels unlock extra dialogue options. Match the opponent’s rhyme, rhythm, and meaning rather than choosing the longest-sounding insult. Drinking contests, meanwhile, are mainly a timing test: tap the button as the reticle passes the target and correct Eivor’s balance when prompted.
6. Manage Raids, River Raids, and Supplies
Story raids and River Raids are not interchangeable. Standard raids help expand Ravensthorpe with supplies and raw materials, while River Raids use the Jomsviking Hall and reward special gear, foreign supplies, and quest progress. If your crew is dying repeatedly, you’re probably treating a River Raid like a solo dungeon rather than a sequence of short strikes.
How to raid without losing your crew
Scout the settlement before sounding the horn. Use Raven’s Sight to identify chests and guards, then assassinate isolated enemies or open gates from inside. Call your crew only when you’re ready to break open a large chest. This reduces the time your Jomsvikings spend absorbing damage and lets you clear dangerous champions before the messy group fight begins.
During a raid, revive fallen crew members when it’s safe, but don’t sprint into a crowd just to save one warrior. Crew health is a resource, and a dead Jomsviking may be unavailable until you return to the settlement. Upgrade the Jomsviking Hall if you’re investing seriously in River Raids, since higher-rank companions survive longer and deal more damage.
Upgrade rations early. Eivor can carry more healing meals by improving the rations pouch, and that is often more valuable than a tiny increase to armor. Fish, berries, mushrooms, and cooked meals refill health, so don’t ignore them while traveling.
7. Treat Zealots and Legendary Animals as Optional Bosses
Zealots are roaming Order of the Ancients enforcers, and some arrive far above your current power. The game allows you to encounter them early, but that doesn’t mean you should fight immediately. If a zealot’s level is dramatically higher than Eivor’s, mark the location and return later rather than burning through every ration in a battle you can’t reliably win.
Practical boss tactics
Against a zealot, lock on and watch the weapon, not the health bar. Their unblockable red attacks often have a clear wind-up, while their yellow strikes are opportunities to parry. Target exposed weak points with a Hunter Bow to drain the stun gauge, then use a heavy ability during the stagger. Keep enough stamina for two consecutive dodges because many zealots follow a missed red attack with a fast second swing.
Legendary animals work similarly, but arena geometry becomes part of the fight. The legendary elk’s charge can be sidestepped, while large predators punish panic rolling with wide follow-up swipes. Stay near the edge of the arena only if you have a clear escape route; getting pinned against a rock removes the space you need to read telegraphs.
8. Use Stealth Even When You Prefer Melee
Valhalla supports loud Viking combat, but stealth remains one of the best ways to reduce the difficulty of fortified locations. Eivor can use the hood disguise, crouch in long grass, whistle to isolate targets, and chain assassinations from cover. You don’t need a pure Raven build to benefit from this approach.
Before attacking a fortress, climb high and use Odin’s Sight to mark guards, keys, chests, and explosive hazards. Remove lookouts first. If a restricted area has a commander or banner carrier, assassinate that target before starting the main fight. Fewer reinforcements means less pressure on your stamina and healing supplies.
Stealth also makes resource collection faster. You can enter a monastery, grab an ability book, sabotage a gate, and leave without wiping every soldier. That’s particularly useful when you’re under the recommended power for a region.
9. Tune PC Settings Around Stability, Not Screenshots
Assassin’s Creed Valhalla can look excellent while still producing distracting traversal stutter or inconsistent frame pacing. On PC, start with the built-in benchmark, then lower the settings that affect dense environments rather than blindly dropping resolution. Volumetric Clouds, World Details, and Shadows are common performance levers; texture quality mostly depends on available VRAM.
| Setting | Recommended value | FPS impact | Visual trade-off |
|---|---|---|---|
| Resolution scale | 100%; use 90% for a demanding GPU | Very high | Lower values soften distant detail |
| World details | High | High | Lower draw distance and environmental density |
| Volumetric clouds | Medium | High | Less dramatic fog and sky lighting |
| Shadows | Medium or High | Medium | Reduced shadow definition |
| Textures | High if VRAM allows | Low to medium | Minimal loss when reduced one step |
| Anti-aliasing | High | Medium | Lower settings create shimmer |
Cap the frame rate to a number your system can hold during raids and crowded settlements, not just in empty wilderness. A stable 60 frames per second feels better than a fluctuating 45–75 FPS range. The official Steam page for Assassin’s Creed Valhalla lists the current PC requirements, while Ubisoft’s official Valhalla site covers the game and its major content.
10. Play the Complete Edition Expansions in the Right Order
Don’t rush into Dawn of Ragnarök just because it looks like the biggest expansion. Finish enough of the England campaign to understand Eivor, Sigurd, Basim, and the settlement first. A good route is the base game’s major arcs, then Wrath of the Druids, The Siege of Paris, and finally Dawn of Ragnarök as a late-game mythic adventure.
What each expansion changes
Wrath of the Druids sends Eivor to Ireland, where trading posts, royal influence, and new enemy types shape the progression loop. It’s a natural mid-campaign detour and adds useful weapons, armor, and abilities without requiring you to abandon the main save.
The Siege of Paris focuses more heavily on infiltration and political tension in Francia. Its rebel missions reward careful planning, and the expansion introduces additional one-handed sword options. Approach it after you’re comfortable with stealth and assassination routes.
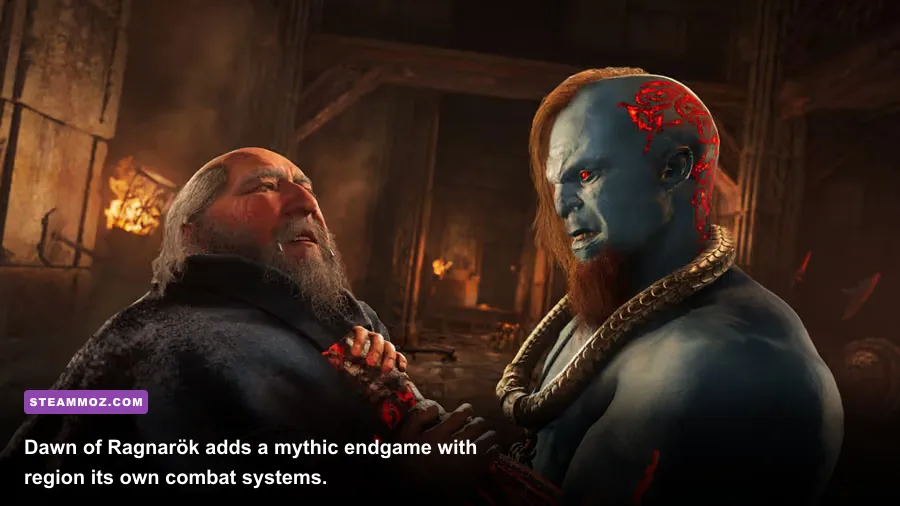
Dawn of Ragnarök moves Eivor into Svartalfheim and introduces the Hugr-Rip, a powerful device that lets Eivor borrow abilities from defeated enemies. You’ll use powers such as Muspelheim’s fiery immunity and the Raven transformation to navigate lava, vertical spaces, and mythic combat encounters. It’s more enjoyable once Eivor has a mature skill setup and upgraded gear.
| Content | Best time to play | New system | Why wait or start |
|---|---|---|---|
| Wrath of the Druids | Mid-campaign | Trading posts and Irish royal influence | Natural first expansion detour |
| The Siege of Paris | Mid-to-late campaign | Rebel missions and Francia | Best after learning stealth routes |
| Dawn of Ragnarök | Late game | Hugr-Rip powers | Designed around a developed Eivor |
The Complete Edition also includes cosmetic packs such as the Berserker Gear Pack, settlement items, and longship cosmetics. They’re fun, but don’t let appearance bonuses dictate your build. The gear you enjoy using, upgraded consistently and paired with sensible runes, will outperform a flashy set you never tailor to your combat style.
Your First 10 Hours, Mapped Out
During the opening hours in Norway, complete the main quests that unlock the settlement transition and collect nearby Wealth without trying to clear the entire region. Once England opens, build the Blacksmith and Hidden Ones’ Bureau, complete a couple of raids, and spend skill points toward Stomp or Advanced Assassination. Upgrade your rations pouch and settle on one primary weapon combination.
After that, follow the alliance map rather than wandering randomly across the whole country. Do a few Mysteries when they’re nearby, prioritize Books of Knowledge, and return to Ravensthorpe whenever you have enough supplies for a useful building. Keep the map’s power recommendation in mind, but don’t treat it as an absolute wall; smart parries, stealth, and weak-point shots can carry you through slightly stronger areas.
Finally, embrace the game’s flexibility. You can respec skills, change weapons, alter cloak visibility, switch between stealth and open combat, and return to earlier regions whenever you want. If you want another sprawling RPG with a different progression philosophy, our Dungeon Siege retrospective makes for a worthwhile contrast. Valhalla is at its best when you stop trying to clear everything immediately and let its raids, alliances, mysteries, and settlement upgrades pull you forward naturally.
Follow these 10 rules and Eivor will enter England with a functional build, a productive settlement, reliable combat fundamentals, and enough patience to enjoy the Complete Edition’s enormous campaign instead of turning it into an exhausting checklist.