You can turn an aging Alienware Alpha into a snappy, silent 1080p living room powerhouse by swapping its sluggish mechanical hard drive for a SATA SSD, replacing dry factory thermal paste, disabling Dell's obsolete HiveMind interface, and pushing a stable +135 MHz core overclock on its custom Maxwell GPU. Dell designed this compact PC to fight the PS4 and Xbox One during the ill-fated Steam Machine era, but factory hardware bottlenecks crippled its real-world speed right out of the gate. With purposeful calibration, clean firmware settings, and tailored graphics profiles, this micro-machine still chews through competitive esports, indie hits, and classic PC blockbusters at a locked 60 frames per second.
Hardware Reality Check: R1 vs R2 Upgrade Path
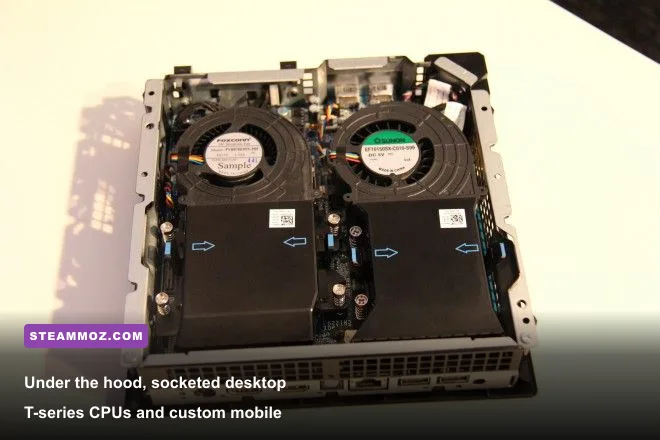
Before you turn a single screw or tweak a driver slider, you have to know which revision sits on your desk. Dell released two distinct iterations of this machine: the Alienware Alpha R1 (late 2014) and the Alpha R2 (mid-2016). They look identical from the outside, featuring the signature triangular cut corner and illuminated Alienware logo, but their internal architectures represent entirely different hardware generations.
The Alpha R1 runs on Intel's 4th Generation Haswell platform paired with a proprietary, soldered Nvidia GeForce GPU based on the Maxwell GM107 architecture. This chip is essentially an overclocked mobile GTX 860M fitted with 2GB of GDDR5 VRAM on a 128-bit bus, performing remarkably close to a desktop GTX 750 Ti. The base model shipped with a dual-core Intel Core i3-4130T, 4GB of single-channel DDR3L SODIMM RAM, and a disastrously slow 5400 RPM mechanical laptop drive. If your machine feels unusable today, that spinning hard drive is the culprit. Swapping it for a standard 2.5-inch SATA SSD immediately eliminates the notorious 100% disk usage bug in modern Windows environments.
The CPU in the R1 is not soldered. It sits in a standard LGA1150 desktop socket, meaning you can swap the sluggish i3 for a quad-core Haswell chip. However, you must respect the motherboard's strict 35W thermal envelope. Upgrading to a Core i5-4590T or an Intel Core i7-4765T/i7-4790T provides four physical cores and eight threads, eliminating the severe CPU frame drops that plague the base dual-core configuration in modern operating systems. Memory is equally crucial: drop two matching 8GB DDR3L-1600 SODIMM sticks into the board to enable dual-channel bandwidth, which smooths out background asset streaming.
The Alpha R2 shifted to Intel's 6th Generation Skylake platform (LGA1151 socket, running 35W T-series CPUs like the i5-6400T and i7-6700T) and upgraded the GPU to either an AMD Radeon R9 M470X or an onboard desktop-class Nvidia GeForce GTX 960 with 4GB of GDDR5. The R2 also introduced an NVMe M.2 SSD slot alongside its 2.5-inch bay and featured Dell's proprietary Alienware Graphics Amplifier port, allowing you to hook up a full-sized external desktop graphics card. If you are comparing hardware targets or checking whether an older rig matches modern expectations, cross-referencing classic specs like the system requirements of classic open-world games like Far Cry 2 gives you a solid baseline for how Haswell and Maxwell architecture stack up.
| Hardware Element | Alpha R1 (Factory Base) | Alpha R1 (Optimal Tuned) | Alpha R2 (Factory Base) | Alpha R2 (Optimal Tuned) |
|---|---|---|---|---|
| Processor | Intel Core i3-4130T (2C/4T, 2.9GHz) | Intel Core i7-4790T (4C/8T, 2.7-3.9GHz) | Intel Core i5-6400T (4C/4T, 2.2-2.8GHz) | Intel Core i7-6700T (4C/8T, 2.8-3.6GHz) |
| Graphics Processor | Custom GTX 860M (2GB GDDR5 GM107) | Custom GM107 (+135 Core / +400 Mem) | GeForce GTX 960 (4GB GDDR5 GM206) | GTX 960 (+120 Core / +450 Mem) |
| System Memory | 4GB DDR3L 1600MHz (Single-Channel) | 16GB DDR3L 1600MHz (Dual-Channel) | 8GB DDR4 2133MHz (Single Slot) | 16GB/32GB DDR4 2400MHz SODIMM |
| Primary Storage | 500GB 5400 RPM 2.5" SATA HDD | 1TB/2TB 2.5" SATA III SSD | 1TB 7200 RPM SATA HDD | 1TB NVMe M.2 SSD + SATA Storage |
| Power Delivery | 130W External DC Power Brick | 130W OEM Power Brick | 130W or 180W External Brick | 180W OEM Power Brick |
Thermals, Teardown, and Taming the Yellow Light of Death
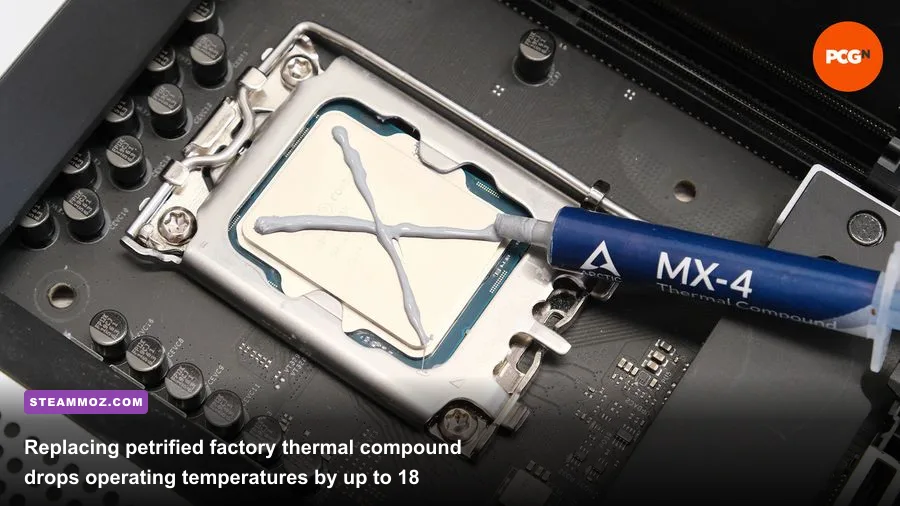
Because the Alienware Alpha packs desktop-class components into a chassis the size of a Nintendo Wii, cooling degradation is your greatest operational enemy. Decades-old thermal compound turns into brittle cement, causing the CPU and GPU blower fans to ramp up to jet-engine levels before thermal throttling cuts your clock speeds in half. When hunting down system instability or troubleshooting sudden frame drops and crash loops under heavy GPU loads, high temperatures are almost always the primary catalyst.
Opening the Alpha requires removing four deep-set Phillips #1 screws recessed under the rubber feet on the bottom casing. Once inside, you'll find two independent cooling assemblies: one squirrel-cage blower for the socketed CPU and one for the dedicated GPU. Unscrew both heatsinks in a cross pattern to prevent unbalancing pressure across the bare silicon dies. Scrape off the dried gray compound thoroughly using 99% isopropyl alcohol and lint-free microfiber wipes.
Apply a thick, non-conductive thermal paste with high resistance to pump-out. Noctua NT-H2, Arctic MX-6, or phase-change thermal pads like Honeywell PTM7950 work miracles here. Because small-form-factor heatsinks suffer from uneven mounting pressure compared to large desktop coolers, standard low-viscosity paste pumps out within weeks, causing hot-spot spikes above 90°C. While inside, inspect the tiny fin stacks directly adjacent to the blower exhaust vents. Dust carpets collect in these gaps, completely choking airflow regardless of fan speed.
Before closing the chassis, address the most common hardware fault: the "Yellow Light of Death" (YLoD). If your Alpha powers on, flashes its front-panel Alien head amber five times in a repeating cycle, and refuses to send a display signal, do not throw the board away. This five-flash sequence indicates a dead CMOS coin-cell battery. Unlike typical motherboards featuring an open coin slot, the Alpha utilizes a shrink-wrapped CR2032 battery connected via a proprietary two-pin wire lead that plugs directly into the underside of the mainboard. Order a replacement 2-pin CR2032 pre-wired battery harness, plug it in, and perform a full power cycle by holding down the power button for 30 seconds while the AC cable is disconnected. The yellow light will vanish, and the system will boot cleanly into BIOS.
OS Calibration: Purging HiveMind for a Lean Modern Interface
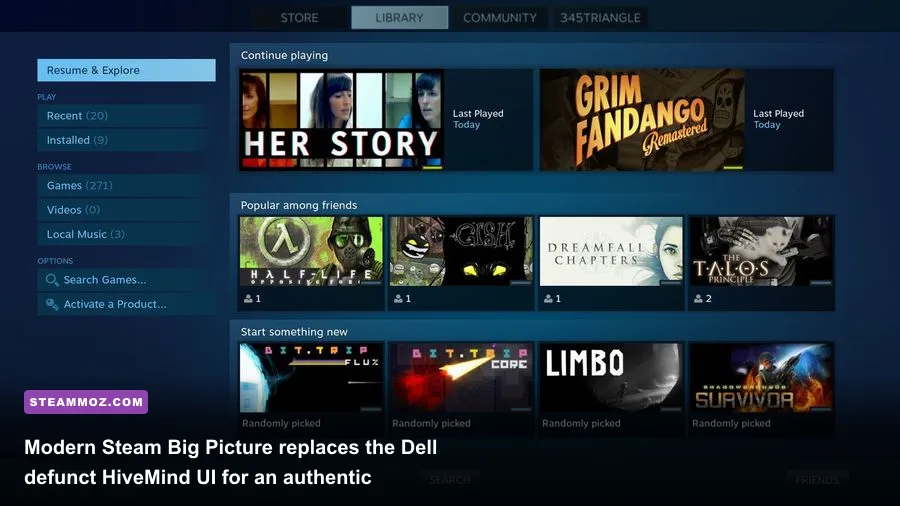
When Dell originally marketed the Alpha, it shipped with "AlphaUI"—a customized fork of Kodi branded as Alienware HiveMind. It was designed to boot straight into a custom Windows 8.1 account controlled entirely by an Xbox 360 gamepad. Today, HiveMind is abandonware riddled with broken Python scripts, out-of-date runtime environments, and compatibility walls that disrupt modern digital distribution platforms. Your first software directive is simple: purge it completely.
Perform a clean installation of Windows 10 64-bit (preferably version 22H2 or an optimized LTSC build). Avoid Windows 11 on the R1 hardware; Haswell lacks official TPM 2.0 and Secure Boot compatibility, and Microsoft's background security layers impose an unnecessary performance tax on older 4-thread architectures. Make sure you install chipset, audio, and management engine drivers from the official Dell Support portal before moving forward.
To replicate the seamless console experience HiveMind attempted to provide without the associated system overhead, leverage the modernized Steam Big Picture Client. Open Steam settings, navigate to the "General" and "Interface" tabs, and toggle "Start Steam when computer starts" alongside "Start Steam in Big Picture Mode." Combine this with Windows auto-login: run netplwiz from the Windows Run prompt, uncheck "Users must enter a user name and password to use this computer," and provide your account credentials. The machine will now boot straight from power-on directly into a responsive, controller-navigable interface.
Next, tackle the CPU throttling bug. On Haswell T-series processors, aggressive Dell BIOS power limits can trigger an issue where the CPU locks its clock multiplier at its lowest stepping (often sticking stubbornly at 798 MHz). To fix this, download TechPowerUp ThrottleStop. Inside ThrottleStop, disable "BD PROCHOT" (Bi-directional Processor Hot). This setting prevents bad temperature sensors on aging motherboards from sending false throttling flags to the CPU core. Set your Windows Power Plan to "High Performance" to prevent aggressive C-state down-clocking during game asset decompilation.
Overclocking Maxwell: Tuning Profiles via MSI Afterburner
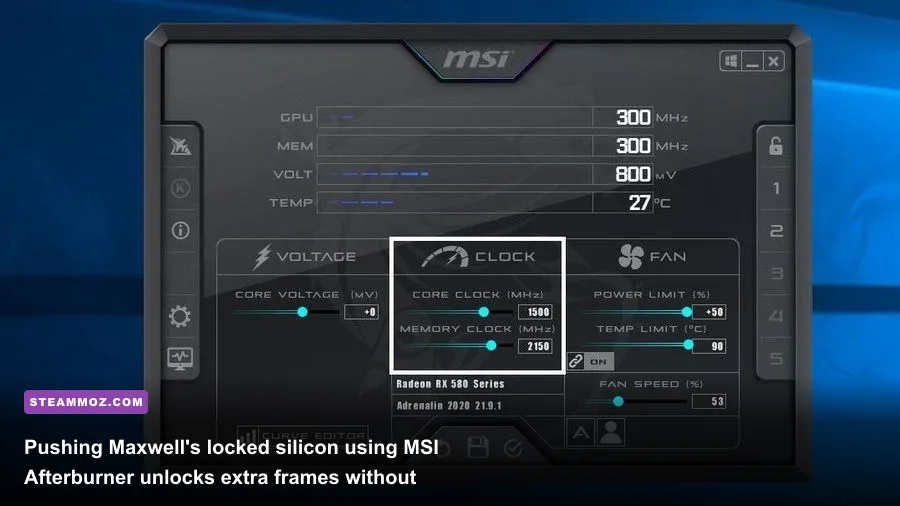
The customized Maxwell GPU inside the Alienware Alpha R1 was engineered with substantial architectural headroom. Nvidia and Dell locked down the vBIOS on the R1's custom GM107 chip, capping the maximum allowable core clock offset via software at +135 MHz. Fortunately, this GPU handles that full +135 MHz offset with absolute stability, extracting free performance without exceeding the system's 130W power brick capacity.
Install MSI Afterburner alongside RivaTuner Statistics Server (RTSS). Open Afterburner's settings and verify that "Start with Windows" and "Start Minimized" are checked. On the main interface, pull the Core Clock slider to exactly +135 MHz. This lifts the GPU core frequency under load from its stock base of ~1020 MHz up to a sustained boost exceeding 1180 MHz.
Memory clock tuning yields even greater rewards. The 2GB of onboard GDDR5 memory operates at a relatively conservative clock speed from the factory. Maxwell’s memory architecture scales exceptionally well with bandwidth increases: pull the Memory Clock offset to +350 MHz. If your specific board features Samsung GDDR5 memory chips (verifiable via GPU-Z), you can push this offset comfortably to +450 MHz or even +500 MHz without artifacts or thermal memory faults. This extra memory bandwidth prevents micro-stuttering in titles that rapidly cycle textures into VRAM.
| Tuning Parameter | Alpha R1 (Stock) | Alpha R1 (Calibrated) | Alpha R2 (Stock) | Alpha R2 (Calibrated) |
|---|---|---|---|---|
| Core Clock Offset | +0 MHz | +135 MHz (Hard Cap) | +0 MHz | +110 to +140 MHz |
| Memory Clock Offset | +0 MHz | +350 to +450 MHz | +0 MHz | +400 to +550 MHz |
| Power Limit Slider | 100% (Locked) | 100% (Locked) | 100% | 105% (Model Dependent) |
| Target Peak Temp | 82°C - 88°C | 71°C - 76°C (Post-Repaste) | 84°C - 90°C | 74°C - 78°C |
| Target Fan RPM | Dynamic Auto | Stepped Curve (45% at 65°C) | Dynamic Auto | Stepped Curve (50% at 70°C) |
For drivers, download clean releases from the official Nvidia Driver Hub. For the Alpha R1, the custom GPU is recognized under standard mobile GeForce 800M/desktop 700 series branches. Nvidia's 472.12 WHQL driver stands out as the most stable, resource-efficient release for this specific architecture, skipping telemetry bloat while delivering flawless compatibility with DirectX 11 and Vulkan renderers.
In-Game Calibration: Frame Pacing and Graphics Optimization
With hardware refreshed and clocks pushed, configuring the software rendering pipeline prevents frame pacing anomalies. The custom 2GB Maxwell GPU cannot handle uncompressed high-resolution textures or brute-force modern ray tracing, but it remains remarkably adept when configured for its native resolution target: 1080p (1920x1080) or dynamic 900p (1600x900).
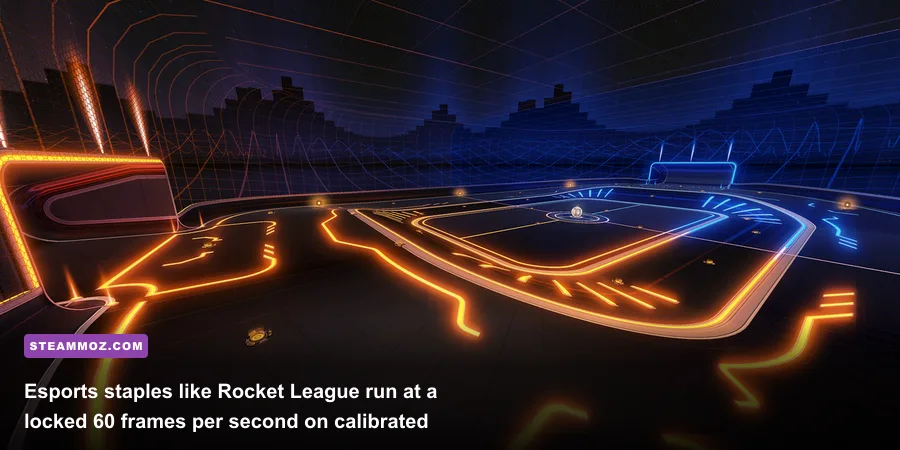
In competitive multiplayer games like Rocket League, set the display mode to Exclusive Fullscreen, match the resolution to 1080p, drop Texture Quality to "Performance," and set World Detail to "Quality." The Alpha holds a locked, flat 60 FPS without breaking a sweat. For lightweight indie masterpieces where tight input timing matters, learning to tweak settings for higher FPS in indie titles allows the Alpha's modest silicon to deliver competitive, latency-free gaming that mirrors desktop responsiveness.
Modern gaming engines require a slightly smarter approach. Games relying on aggressive post-processing or high geometry loads can cause 2GB framebuffers to choke, leading to harsh stuttering. When configuring more demanding engines, implementing techniques like optimizing graphics settings for max framerates through render scaling or spatial upscalers is essential. If a game features AMD FidelityFX Super Resolution (FSR 1.0 or FSR 2.1), set your output resolution to 1080p and enable FSR on the "Quality" or "Balanced" preset. The game renders internally at 720p or 770p, drastically reducing memory usage while the upscaler reconstructs clean edge detail on your television display.
| Game Title | Target Resolution | Recommended Graphics Profile | Expected Framerate | Tuning Advice |
|---|---|---|---|---|
| Rocket League | 1080p (Native) | High Details / FXAA Low | 60 FPS Locked | Disable Motion Blur and Ambient Occlusion. |
| Grand Theft Auto V | 1080p (Native) | Normal-High Textures / Shader High / FXAA | 50 - 60 FPS | Keep Grass Quality at Normal to prevent CPU spikes. |
| Hollow Knight | 1080p (Native) | Maximum Settings / V-Sync Off | 60 FPS Locked | Cap framerate via RTSS to maintain flat frametimes. |
| Valorant | 1080p (Native) | Low Details / 4x Anisotropic / UI Low | 75 - 90 FPS | Requires quad-core CPU upgrade (i5/i7) for stability. |
| Fallout: New Vegas | 1080p (Native) | Ultra Details / 4x MSAA / Full LOD | 60 FPS Locked | Install New Vegas Anti-Crash (NVAC) and 4GB Patcher. |
Whenever you hit persistent hitching or unexpected stutters in heavily populated zones, consult proven strategies to rescue your FPS and stabilize performance. Limiting background tasks, setting your RivaTuner framerate cap to 60 FPS, and enforcing "Prefer Maximum Performance" in the Nvidia Control Panel's Power Management Mode guarantees the custom Maxwell chip delivers consistent frame pacing, transforming Dell's forgotten living room experiment into an ultra-reliable, compact gaming machine.