The best essential mods for The Last of Us Part I on Steam are a carefully chosen mod loader, a performance-friendly ReShade preset, a field-of-view or camera tweak, a safe save-backup tool, and a few restrained quality-of-life fixes. The goal isn’t to turn Naughty Dog’s survival drama into a sandbox; it’s to smooth the PC version’s rough edges, improve readability, and preserve its film-like lighting, stealth balance, and brutal combat.
That distinction matters. The Last of Us Part I is not officially built around Steam Workshop support, and its PC mod scene changes whenever Naughty Dog or Iron Galaxy ships a patch. Most useful downloads come from community repositories such as Nexus Mods for The Last of Us Part I, while installation tools and compatibility notes can vary from one upload to the next. Always read the current description, check the supported game build, and keep an untouched backup of your saves before experimenting.
Start With a Mod Loader and Clean Backups

A mod loader is the foundation, not the exciting part. It gives texture swaps, script-adjacent utilities, and some camera tweaks a predictable place to load from instead of asking you to overwrite original files. Search the current Nexus catalog for a maintained The Last of Us Part I Mod Loader and confirm whether its author supports the latest Steam executable. A loader made for an older build may launch perfectly and still break pre-rendered cinematics, photo mode, or menu assets.
Install the loader after verifying the game directory through Steam. The usual path is SteamLibrary/steamapps/common/The Last of Us Part I, but your library may be on another drive. Do not blindly drag every downloaded file into that folder. Some mods use a dedicated mods directory, some rely on a loader profile, and some are simply loose replacement archives. The installation instructions are part of the mod.
Before changing anything, copy your save folder somewhere outside Steam Cloud’s control. A broken visual mod generally won’t damage progression, but a crash during autosave can. Disable Steam Cloud temporarily if you’re testing several packages, then restore it once the game has launched, loaded a chapter, and saved cleanly.
| Mod Layer | What It Changes | Risk Level | Best Practice |
|---|---|---|---|
| Mod loader | Loads supported community files | Low to medium | Use a build-matched release and keep the original files |
| Texture replacement | Characters, clothing, weapons, or environments | Medium | Check VRAM use and remove one pack at a time |
| ReShade | Color, contrast, sharpening, and effects | Low | Install for the correct executable and keep a toggle key |
| Gameplay trainer | Ammo, health, crafting, or encounter rules | High | Use only in offline personal play and never near cloud saves |
For a first run, skip trainers, invincibility mods, and radical enemy edits. They undermine the scarcity loop built around Parts, Supplements, shivs, arrows, and workbench upgrades. If you want experimentation, make a separate manual save and treat it like a test profile.

🎮 FORM
Looking to experience this game? Grab your digital key directly on our store for $14.99.
View on Steammoz Store →The Best Visual Mods Are the Subtle Ones

The Last of Us Part I already has excellent physically based materials, volumetric fog, wet-surface reflections, and facial animation. That makes aggressive visual mods surprisingly easy to get wrong. A heavy teal-orange preset can flatten the gray-green Boston quarantine zone, crush the shadow detail in Bill’s Town, and make a dark Clicker silhouette disappear against a wall.
That’s why a restrained ReShade preset is the most broadly useful visual upgrade. Look for presets built around mild sharpening, local contrast, film grain control, and color correction rather than fake HDR or extreme bloom. A good preset should make Joel’s jacket texture clearer in daylight while leaving the hotel basement genuinely frightening. Install ReShade against the game executable, select the DirectX 12 option when prompted, and enable only the effects the preset actually needs.
Use the in-game Photo Mode to judge a preset before committing to it. Check the opening highway sequence, the museum in Boston, the flooded hotel, and the snowy Jackson sections. These locations expose different problems: bright outdoor scenes reveal oversaturation, indoor corridors reveal crushed blacks, and snow reveals blown highlights. If a preset looks impressive only in a paused screenshot, it’s not ready for a 20-hour campaign.
Texture packs are more situational. A high-resolution clothing or weapon replacement can be lovely on a desktop with 12GB or more of VRAM, but The Last of Us Part I streams large assets aggressively. On a 6GB graphics card, adding 4K replacement textures on top of Very High textures can trigger stutter when entering the Capitol Building, Pittsburgh, or the University. A 2K pack is usually the smarter compromise.
| Visual Mod Type | Recommended Hardware | Typical Cost | Why It’s Worth Using |
|---|---|---|---|
| Light ReShade | Any GPU that meets the game’s requirements | 1–3 FPS | Improves clarity and tone with minimal streaming impact |
| Sharpening-only preset | GTX 1660, RX 5600 XT, or better | Usually under 1 FPS | Restores crispness after temporal anti-aliasing |
| 2K texture pack | 8GB VRAM recommended | Variable; may increase stutter | Adds detail without the worst memory pressure |
| 4K texture pack | 12GB–16GB VRAM and fast SSD | Higher streaming pressure | Best for screenshots and high-resolution displays |
| Heavy cinematic effects | RTX 3070, RX 6800, or better | 5–15 FPS | More dramatic presentation, but often hurts gameplay readability |
Disable depth of field and chromatic aberration in ReShade if you want a cleaner image. The game’s native cinematic effects are already strong, and stacking post-processing can produce halos around foliage and muddy weapon sights. Keep the preset toggle bound to a key so you can compare it during a combat encounter rather than trusting a static menu screen.
Camera and Input Tweaks That Improve Play
A wider field of view is the most meaningful gameplay-oriented adjustment, particularly on ultrawide monitors. The default camera can feel tight when Joel squeezes through a ruined apartment or when a Runner rushes from the edge of the screen. A modest FOV increase—roughly 5 to 10 degrees beyond default—is usually enough to improve peripheral awareness without exposing animation seams or making melee distance feel strange.
Don’t immediately select the widest value available. The Last of Us relies on controlled framing: the camera pushes close during stealth, climbing, and scripted exploration beats. Excessive FOV can make Joel look small, stretch the edges of the image, and reduce the cinematic pressure of narrow spaces. Test the change in the hotel basement and the Pittsburgh bookstore, where enemies often attack from outside the center of the screen.
Ultrawide users should also look for a maintained aspect-ratio or HUD fix rather than a simple horizontal stretch. The important checks are subtitles, Listen Mode indicators, weapon-wheel placement, and Photo Mode framing. A fix that gives you a perfect 21:9 image but cuts off tutorial prompts isn’t an upgrade.
Input mods are less glamorous but often more valuable. If your mouse feels floaty, first disable Windows pointer acceleration and use the game’s own mouse sensitivity controls. A community mouse-acceleration fix can help only if it is explicitly compatible with the current PC build. For controllers, the official Steam page for The Last of Us Part I lists PC features including DualSense support, but wired connection is generally the safest route for adaptive triggers and haptic effects.
Quality-of-life save managers deserve a place here too. The campaign’s autosaves are reliable, but a manual backup before the Pittsburgh sniper encounter, the Winter chapter, and the hospital finale can save hours if you’re testing mods. Avoid save editors that advertise unlocked weapons or altered progression unless you understand exactly which flags they change. Chapter progression, collectibles, and New Game Plus data can share profile information in ways a generic editor doesn’t explain.
Performance Mods Cannot Replace the Right Settings
The PC version’s biggest enemy is often shader compilation and asset streaming, not a missing mod. Let the game finish its shader-building process after installing a driver update or changing major graphics settings. Rebuilding shaders can take a long time, but interrupting it creates a far worse first-play experience: traversal stutter, sudden hitching during camera pans, and uneven frame pacing whenever new materials appear.
Use an SSD. The official PlayStation PC information page lists a 100GB SSD requirement for the game, and that storage choice genuinely matters. A SATA SSD is workable; an NVMe drive gives asset streaming more headroom. Keep at least 120GB free on the install drive so Windows, shader caches, and updates aren’t fighting for space.
Performance-oriented mods are best used after you establish a clean baseline. Capture a short run through the same area, record average FPS and one-percent lows, then test one change at a time. A frame-rate cap through RTSS or your GPU driver can feel smoother than an unstable unlocked frame rate. At 60Hz, cap around 58–60 FPS; at 120Hz, aim for a stable 60 or 90 rather than bouncing between 70 and 115.
| Setting or Component | Minimum Target | Recommended Target | Pro-Tuned Profile |
|---|---|---|---|
| CPU | Core i7-4770K or Ryzen 5 1500X | Core i7-8700 or Ryzen 5 3600X | Modern six-core CPU with strong single-thread performance |
| GPU | GTX 1050 Ti 4GB or RX 470 4GB | RTX 3060 or RX 6600 XT | RTX 4070 / RX 7800 XT for high-resolution texture mods |
| System memory | 16GB | 16GB dual-channel | 32GB for multitasking and heavy texture experimentation |
| Texture quality | Low or Medium on 4GB VRAM | High with 8GB VRAM | Very High only when VRAM headroom remains |
| Frame-rate target | 30 FPS capped | 60 FPS capped | 90–120 FPS if the GPU can sustain it |
| Storage | 100GB SSD | Fast SATA SSD | NVMe SSD with 120GB or more free space |
Start by lowering Texture Quality if you see texture pop-in paired with hitching, not just if average FPS is low. Lowering Shadows can improve frame time in foliage-heavy areas, while Ambient Occlusion has a smaller but noticeable cost in dense interiors. Reflections and Volumetric Effects can be reduced before you sacrifice character texture detail. If you use a ReShade sharpening pass, you can also lower the game’s internal sharpening slightly to avoid crunchy edges.
For more general PC troubleshooting, Steamoz’s ELEX crash and FPS fixes and EscapeVR low-FPS guide cover the same useful fundamentals: clean driver installs, overlays, shader caches, and frame-time testing.
Mods Worth Avoiding on a First Playthrough
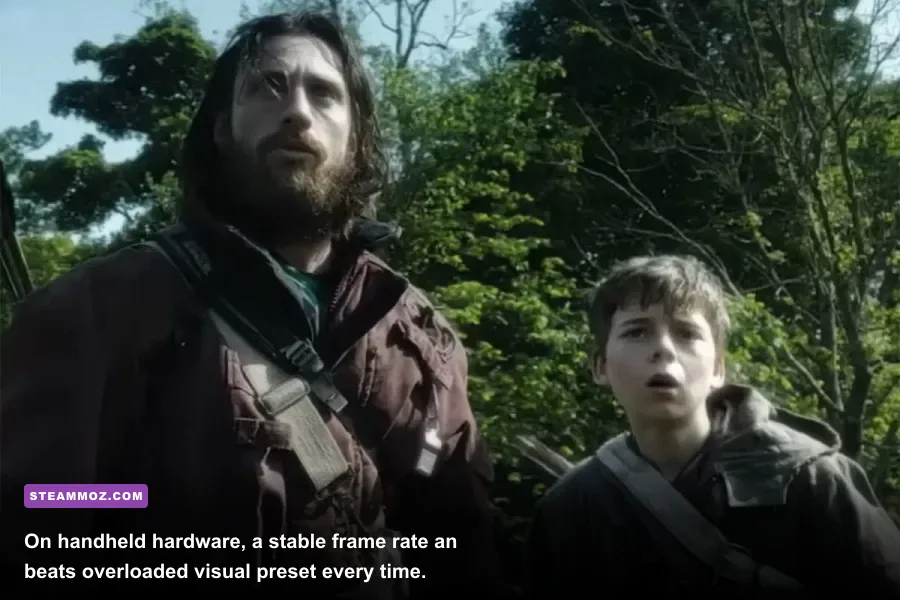
The Last of Us is unusually vulnerable to mods that sound fun in a download title but damage the experience in practice. Unlimited ammo removes the pressure behind every workbench decision. One-hit-kill weapons make the game’s encounter design irrelevant. Enemy-randomizer tools can also break stealth spaces built around a specific Clicker, Runner, or human patrol position. They’re fine for a throwaway experiment after finishing the story, but they aren’t essential.
Be cautious with character swaps, especially those that replace Joel or Ellie globally. A replacement model may look excellent in gameplay and fail during a cutscene because Naughty Dog’s scenes use different skeletons, facial rigs, clothing meshes, and animation assumptions. The result can be stretched hands, missing hair, broken facial expressions, or a crash when a cinematic loads. Read the comments and look for screenshots from both gameplay and cutscenes.
Skip any download that asks you to disable antivirus protection, run an unknown executable, or share Steam credentials. A texture archive should not need your account password. Trainers are particularly risky because they often use memory injection and can trigger false positives or become incompatible after a patch. Never use them in multiplayer—The Last of Us Part I’s Steam release is a single-player experience, but good mod hygiene still matters.
Finally, don’t stack multiple versions of the same fix. Two FOV tools, two HUD replacements, or several shader injectors can fight over the same files. If the game stops launching, remove the newest mod first, verify files in Steam, and restore your clean backup. Steam’s official file-verification support page is the right place to start when a modified install refuses to boot.
My Recommended Mod Stack for The Last of Us Steam
For most players, the best setup is deliberately small: a maintained mod loader, a light ReShade preset, a moderate FOV adjustment if you use an ultrawide monitor, and a manual save-backup routine. That stack improves presentation and comfort without rewriting the campaign’s economy or combat. Install the loader first, launch the game, and confirm that an unmodded save loads. Add ReShade next, then test the same chapter before adding any texture or camera package.
On a mid-range PC with 16GB of RAM and 8GB of VRAM, use High textures, Medium shadows, High ambient occlusion, and a 60 FPS cap as your starting point. On a 4GB card, use Medium textures, reduce volumetric effects, and cap at 30 FPS if 60 produces constant traversal hitching. On a modern high-end system, Very High textures and a 2K texture pack make more sense than blindly installing 4K replacements. The aim is stable frame pacing through the University and hospital, not a spectacular benchmark in an empty hallway.
| Player Profile | Essential Mods | Graphics Target | What to Skip |
|---|---|---|---|
| First-time story player | Light ReShade and save backups | Stable 60 FPS where possible | Trainers and gameplay overhauls |
| Ultrawide monitor owner | Aspect-ratio fix, moderate FOV tweak | Native 21:9 image and readable HUD | Extreme FOV values |
| Screenshot enthusiast | 2K texture packs and cinematic ReShade | High or Very High at native resolution | Stacked bloom and chromatic aberration |
| Older gaming PC | Performance profile and sharpening-only ReShade | 30 FPS cap with consistent frame times | 4K textures and heavy volumetrics |
| Replay or sandbox player | Character swaps and selective trainers | Separate experimental installation | Using altered saves as your main profile |
Keep a simple text file listing every installed mod, its download page, and the game version it supports. That tiny habit makes troubleshooting much faster after a patch. Before launching an updated build, disable all third-party files, test the vanilla game, then re-enable mods one by one. The Far Cry 6 settings guide and Steamoz’s Filament performance tips are also useful references for the same disciplined FPS-first approach.
The best mods for The Last of Us Steam don’t drown out the performances, environmental storytelling, or survival tension that make the remake work. They sharpen the image, widen the view when your display demands it, stabilize the frame rate, and protect your saves. Start conservatively, test every change, and you’ll get a PC version that feels less like a troublesome port and more like the definitive way to revisit Joel and Ellie’s journey.