For the smoothest PC Building Simulator experience, start with a stable 1080p setup, disable unnecessary visual effects, and treat every Career Mode job like a checklist: inspect the brief, install only compatible parts, run the required software, and verify the final result before returning the machine. The biggest time-savers are learning the component filters, using the tablet efficiently, and separating repair work from performance-tuning work.
This guide focuses on the original PC Building Simulator on Steam, not a real-world PC-building tutorial. Its virtual hardware catalogue, prices, and available components can differ between updates, DLC, and platform versions. The underlying workflow, however, remains remarkably consistent.
Build Your Workshop Around Fast Verification
The best PC Building Simulator setup is not the prettiest one; it is the one that lets you read objectives, find hardware, and verify results without wasting movement or menu time. Career Mode gives you a workshop computer, a tablet, a workbench, and a growing collection of tools. Use each for a specific purpose rather than constantly jumping between screens.
Keep the tablet open whenever a job has several objectives. The customer brief may ask for a particular graphics card, a virus scan, a 3DMark score, a new operating system, or the removal of dust. Those are separate checks. Installing the requested GPU does not complete a benchmark requirement, and a successful boot does not prove the virus scan has finished.
Before opening a case, read the job description twice. Look for three kinds of language:
- Replace or remove: These jobs usually require a specific component action, not simply a functioning PC.
- Install software: The relevant program must be installed through the in-game operating system and actually run.
- Achieve a score or temperature: This turns the job into a performance test and may require upgrades or overclocking.
For a reliable desktop experience, target 60 frames per second at 1920x1080. PC Building Simulator is mostly a first-person workshop game, so ultra-high refresh rates matter less than clear text and responsive menus. If your system struggles, reduce shadows and screen-space effects before lowering resolution. Blurry tablet text slows down every job.
| Target | Recommended Value | Why It Helps | Trade-Off |
|---|---|---|---|
| Resolution | 1920x1080 | Sharp menus and easy component identification | Higher resolutions cost GPU performance |
| Frame rate | 60 FPS locked | Consistent movement around the workshop | Does not exploit a 120Hz monitor |
| VSync | On if tearing appears | Stops distracting horizontal tearing | Can add a small amount of input latency |
| Window mode | Fullscreen or borderless | Reduces accidental desktop focus changes | Borderless can use slightly more memory |
If the game crashes or stutters, use the practical troubleshooting approach from Steamoz’s PC crash and FPS fixes guide. The same basics apply here: update the graphics driver, verify game files, close overlays, and avoid stacking recording software on top of an already busy system.

🎮 PC Building Simulator
Looking to experience this game? Grab your digital key directly on our store for $19.99.
View on Steammoz Store →Follow a Zero-Backtracking Installation Order
PC Building Simulator is generous about interaction, but the fastest builders still follow a fixed installation order. Start by inspecting the case and motherboard. If the customer wants a case replacement, do that before installing hardware. If the motherboard is being replaced, remove every connected component first rather than trying to work around the board.
The clean sequence
- Remove the side panel and inspect dust, missing parts, and the existing cable state.
- Install the CPU into the motherboard socket, then apply thermal paste if the selected cooler requires it.
- Attach the CPU cooler and connect its fan cable.
- Install RAM into the available motherboard slots.
- Install the motherboard into the case and connect the motherboard power cable.
- Install the power supply, storage drive, graphics card, and any expansion cards.
- Connect front-panel, storage, GPU, and power cables.
- Install the operating system and required programs only after the machine boots.
The CPU, cooler, and memory belong on the motherboard before the board goes into the case because they are much easier to place while the board is flat. The graphics card should come late: removing it repeatedly to reach power connectors is one of the most common sources of wasted time.
Compatibility is the hidden gatekeeper. A CPU must fit the motherboard socket, RAM must match the board’s supported memory type, the power supply must provide enough wattage, and the case must physically accept the motherboard form factor and graphics card length. The game makes this easier with its filters, but do not rely on a single stat. A high-end graphics card can still fail a job if the customer explicitly requested another model.
| Job Stage | What to Check | Common Mistake | Best Practice |
|---|---|---|---|
| Pre-build inspection | Dust, missing hardware, requested parts | Installing upgrades before reading the brief | Mark every objective mentally |
| Core assembly | Socket, RAM type, cooler compatibility | Mounting the board before CPU and RAM | Prepare the board outside the case |
| Power and storage | PSU wattage, drive type, cable connections | Forgetting motherboard or GPU power | Connect power before closing the case |
| Final verification | Boot, software, score, temperature | Returning a working but incomplete PC | Run each requested test manually |
For real-world hardware context, the official PC Building Simulator website is useful for identifying the game’s licensed component partners. Inside the game, though, the customer’s written requirement always beats your personal preference.
Calibrate Every Job With the Right Software
Software is not decoration in PC Building Simulator. It is the game’s verification layer. A PC can power on and still fail because it has not been tested, cleaned, scanned, or tuned. Install software through the in-game operating system, then run the specific application named in the job.
3DMark is the key graphics and overall performance test. It gives you a score that can be pushed through component upgrades or overclocking. If the brief says to reach a target, do not stop when the PC boots. Run the benchmark and wait for the final score screen. A score below target means you need a stronger part, a compatible overclock, or both.
Cinebench is primarily a processor test. It is especially useful when a customer asks for a CPU performance goal. A faster graphics card will not solve a Cinebench requirement, so identify which component the benchmark actually stresses before spending money.
OCCT is the stability check. It becomes important after overclocking because a system can post successfully and still fail under load. If the customer asks for a stable overclock, run OCCT after changing BIOS values. Crashes or failed tests mean the frequency or voltage needs to come down.
The Virus Scanner and 3DMark Advanced Edition are separate job actions when listed separately. Likewise, installing the operating system does not automatically install every requested program. Read the objective list after each task and watch for completed checkmarks.
| Software | Primary Test | Use It When | What Success Looks Like |
|---|---|---|---|
| 3DMark | GPU and system score | The job specifies a 3DMark target | Final score meets or exceeds the brief |
| Cinebench | CPU rendering performance | The customer requests CPU performance | Required score appears after the run |
| OCCT | Load stability and temperatures | You changed clock speed or voltage | Test completes without failure |
| Virus Scanner | Malware removal | The brief asks to remove viruses | Scan completes and objective updates |
Save before a risky benchmark or overclock. The game’s autosave behavior is helpful, but it is not a substitute for controlling your own checkpoints. Steamoz’s settings guide for Filament also explains why stable frame pacing and readable interfaces matter in software-heavy games; PC Building Simulator benefits from the same mindset.
Overclock Without Throwing Away the Job
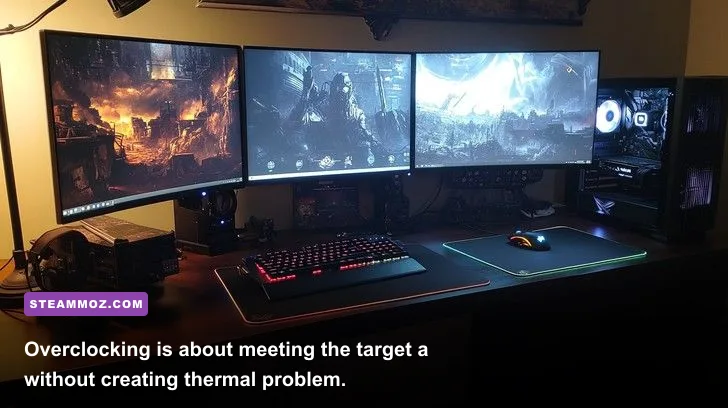
Overclocking is where PC Building Simulator stops being a simple assembly puzzle. In Career Mode, the goal is rarely to create the fastest theoretical machine. It is to reach a customer’s target score while keeping the system stable and cool enough to pass the requested test.
Enter the BIOS and adjust the CPU multiplier in small steps. A multiplier increase raises the processor’s operating frequency, while voltage can help stability at higher speeds. Voltage also raises heat, so pushing it immediately is a poor strategy. Start with frequency, boot the system, and run the requested benchmark or OCCT. If it fails, add a modest voltage increase or reduce the multiplier.
Do not overclock a weak power supply into a larger problem. If the build has a low-wattage PSU and an already demanding graphics card, a GPU upgrade may require a PSU upgrade first. The same logic applies to cooling: a stock cooler can be enough for a mild CPU adjustment, but it is a bad foundation for an aggressive target.
| Tuning Profile | Multiplier Approach | Voltage Approach | Best Use |
|---|---|---|---|
| Safe first pass | Increase one step | Leave unchanged | Checking whether the chip has easy headroom |
| Moderate target | Increase in small increments | Add the smallest stable increase | Most Career Mode performance jobs |
| High target | Push only after cooling is upgraded | Raise carefully and test every change | Late-game benchmark contracts |
| Recovery profile | Return to the last stable value | Reduce voltage if temperatures spike | Failed OCCT or benchmark runs |
The critical loop is simple: change one variable, boot, benchmark, inspect the result, and only then make another adjustment. Changing multiplier, voltage, cooler, and GPU at once makes it impossible to know which decision solved or caused the failure. Keep a mental note of the last stable setting so you can recover quickly.
There is also a financial angle. A cheap cooler and a low-end CPU may be enough for an early 3DMark contract, while a more ambitious score can cost more than the job pays. Before buying parts, compare the reward with the upgrade price. Career Mode is a business simulation as much as it is a hardware sandbox.
Optimize Career Mode Progression and Cash Flow
Career Mode becomes much easier once you stop treating every job as a fresh puzzle. Early contracts teach the basic loop: remove viruses, clean dust, install parts, and run software. Later jobs combine those tasks with exact hardware requests, score targets, and overclocking. The progression curve rewards efficiency more than flashy builds.
Accept jobs that use tools and inventory you already understand. A repair involving dust removal and a virus scan is usually less risky than a demanding overclocking contract with a narrow score target. Complete several predictable jobs, buy only equipment that unlocks profitable work, and keep cash available for power supplies, coolers, and storage upgrades.
Store spare components with a purpose. A modest graphics card can be useful for diagnosing a dead system, while an extra compatible power supply can save a replacement job. Do not fill the workshop with random parts simply because they are discounted. Inventory clutter makes it harder to identify the hardware that actually solves the current brief.
| Career Phase | Priority | Useful Hardware | Risk to Avoid |
|---|---|---|---|
| Early contracts | Learn repairs and software | Basic screwdriver, spare storage, entry GPU | Overspending on performance parts |
| Mid-career | Meet score targets efficiently | Better cooler, balanced PSU, faster CPU or GPU | Buying parts that do not match the brief |
| Late career | Handle tuning and premium builds | High-end cooling, strong PSU, benchmark-ready parts | Running unstable overclocks without testing |
Pay attention to deadlines and customer satisfaction. A technically correct job can still become a poor business decision if you spend too much or leave it until the last moment. If a task feels underfunded, choose a cheaper compatible part that meets the stated requirement rather than building the machine you would personally want.
For players who enjoy the hidden-reward side of progression, Steamoz’s secret locations guide shows the same useful habit: inspect spaces carefully instead of rushing from objective to objective. In PC Building Simulator, that means checking every workbench, shelf, and storage option before buying new equipment.
Use Graphics Settings That Keep the Workshop Sharp
PC Building Simulator does not need extreme graphics hardware, but its first-person camera makes stutter more noticeable than the modest visual style suggests. The game is built around close-up cases, component labels, cables, and menus. A stable image and readable text are more valuable than maximum shadow quality.
Start with the native resolution of your monitor and use a 60 FPS cap. If performance falls during larger workshop scenes, reduce shadows first. Shadows add atmosphere but do not help you identify a motherboard socket or power connector. Lower reflections and post-processing next, then adjust texture quality only if your GPU memory is limited.
VSync is a personal choice. Turn it on if camera movement shows obvious tearing. Turn it off if you prefer the lowest possible latency and your monitor supports adaptive sync. A frame limiter can be a good middle ground because it keeps the GPU from rendering far beyond what the display can show.
| Graphics Setting | Recommended Value | FPS Impact | Visual Note |
|---|---|---|---|
| Texture quality | High on 4GB-plus GPUs | Low to medium | Keeps component surfaces and labels clearer |
| Shadows | Medium | Medium to high | Lower first when workshop scenes hitch |
| Reflections | Low or medium | Medium | Minor effect on practical readability |
| Post-processing | Low to medium | Low to medium | Reduces blur and unnecessary effects |
| Anti-aliasing | Medium | Low to medium | Smooths case edges without major cost |
| VSync | On for tearing, off for latency | Variable | Match the setting to your monitor |
Close browser overlays and GPU recording tools if the game behaves badly. If you are playing on an older machine, the advice in Steamoz’s FPS optimization guide applies here too: cap the frame rate, reduce the settings with the largest performance cost, and change one setting at a time so you can identify the real culprit.
Finish With a Professional Final Checklist
The last five minutes of a job decide whether your build earns its reward. Before returning the PC, confirm that every requested component is installed, every unwanted component has been removed, and every software objective has visibly completed. A clean boot is only the beginning of the inspection.
- Check that the requested CPU, GPU, RAM, storage, case, and power supply are present.
- Confirm the operating system boots and the machine reaches the desktop.
- Run 3DMark, Cinebench, or OCCT if the brief names it.
- Complete virus scans and dust-cleaning actions separately.
- Verify the score, stability result, or temperature requirement on the final screen.
- Return removed components to the correct storage location if the job expects them back.
- Save before submitting a complicated or overclocked build.
Cable management is mostly functional in the original game, but tidy wiring still improves your workflow. It makes connectors easier to spot, reduces the chance of missing motherboard or GPU power, and gives the finished build a satisfying professional look. More importantly, do not close the case until you have tested the machine. Reopening a completed PC because one cable was missed is the kind of mistake that turns a profitable contract into a frustrating one.
Use the official Steam page for current patches and community information, and check Irregular Corporation’s official site for publisher details. For hardware-focused players, the official PC Building Simulator resource hub is also worth bookmarking.
Master the loop of inspect, assemble, boot, test, and verify, and PC Building Simulator becomes far less about clicking every highlighted part and far more about making disciplined engineering decisions. Keep the frame rate stable, spend Career Mode money with a plan, and never submit a machine until the customer’s exact checklist is complete. That approach is faster, more profitable, and much more satisfying than chasing the biggest possible benchmark number.