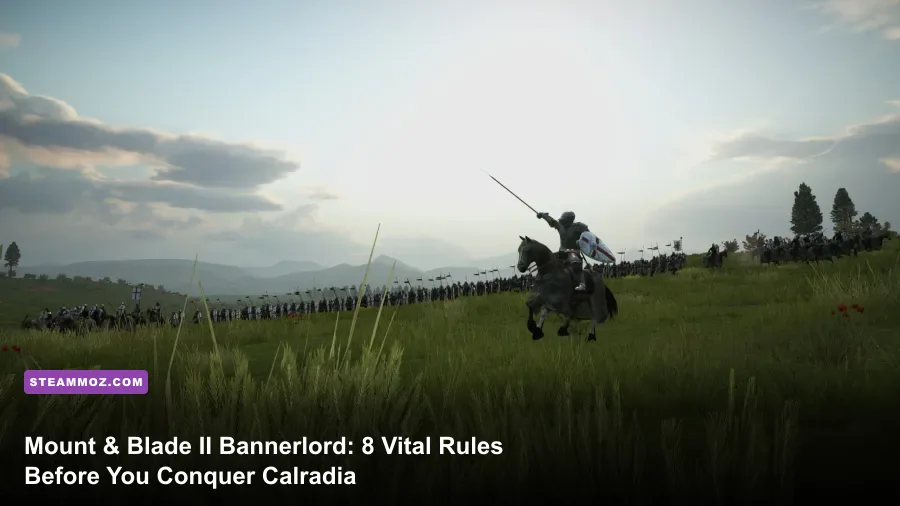
Mount & Blade II: Bannerlord fools you into thinking it is a third-person action RPG where martial skill alone turns you into an emperor. It is not. TaleWorlds’ massive medieval sandbox is fundamentally an unforgiving feudal economy simulator layered beneath grand-tactical warfare. The primary trap that crushes 90% of new warlords within their first ten hours is expanding army headcounts prematurely, accumulating ruinous daily troop wages, and bankrupting their clan before ever winning a fief. If you attempt to conquer Calradia like a roaming lone wolf, the game’s sandbox systems will grind your clan into dust.
Surviving your opening campaign requires deliberate financial planning, calculated stat allocation, and an acute understanding of campaign map logistics. Calradia does not hand out mercy, and it certainly does not care about your personal swordsmanship when your starving recruits desert you on the road to Seonon. Before you draw your sword and swear an ill-advised oath of fealty to an AI king, internalize these non-negotiable fundamentals to ensure your dynasty rises rather than perishes in poverty.
1. Culture Selection Dictates Your Entire Campaign

When you start character creation, your culture selection is a permanent structural modifier that impacts your campaign long after you forget what your character looks like. Do not pick a culture purely for roleplay aesthetic unless you are fully prepared to deal with severe mechanical bottlenecks. Every culture grants specific buffs and penalties that drastically shape trade velocity, movement speed, and settlement stability.
The current meta overwhelmingly favors Battania for beginners and min-maxers alike. The Battanian culture perk cuts movement speed penalties in forests by 50%, while granting +1 militia production to Battanian-held towns. Movement speed on the overland map is the single most important survival stat in Bannerlord; it determines whether you catch retreating bandits or escape an 800-man doomstack sent by an enemy monarch. Being able to dash through heavy woods at full gallop turns the vast forested spine of Calradia into your private escape highway.
Conversely, Vlandia offers an exceptional +5% renown from battles, +15% troop XP while serving as an army mercenary, and a 20% production boost to village projects. If you plan to play heavily as a mercenary cavalry captain, Vlandia accelerates your clan tier progression faster than any other faction. Khuzait remains a terrifying offensive pick due to a 10% speed boost for mounted formations on the campaign map and cheaper cavalry recruitment, while Aserai provides cheaper caravans and halves trade penalties at the cost of higher daily troop wages in desert environments.
| Culture | Primary Campaign Advantage | Hidden Tactical Downside | Ideal Playstyle Strategy |
|---|---|---|---|
| Battania | -50% speed penalty through forests; +1 militia in towns | Lacks heavily armored native shock cavalry | Guerilla warfare, skirmishing, archer-heavy deathstacks |
| Vlandia | +5% battle renown; +15% mercenary troop XP | Higher recruit maintenance costs early on | Mercenary knight corps, early freelance warfare |
| Khuzait | +10% campaign speed for horsemen; cheap cavalry | Vulnerable in infantry grind sieges without elite troops | Nomad horse archer swarms, hyper-mobile raiding |
| Empire | +20% village hearth growth; -20% garrison wages | Generic roster lacking singular specialized dominance | Territorial expansion, defensive settlement holding |
| Aserai | -10% caravan cost; -10% trade penalty | +5% daily troop wages across your entire army | Merchant warlord, workshop stacking, trade runs |
| Sturgia | -50% speed penalty on snow; +20% shield-wall defense | Disjointed geographical layout, terrible starting economy | Hardcore infantry grinding, Viking-style coastal raiding |
Avoid Sturgia on your maiden campaign. While Sturgian Heavy Axemen and Druzhinnik Champions look majestic, their snow-speed bonus is geographically restricted to the frozen northern rim, their starting towns suffer from catastrophic food shortages, and their kingdom is consistently carved up by Battania and Khuzait within the first 200 in-game days.

🎮 Mount & Blade
Looking to experience this game? Grab your digital key directly on our store for $9.99.
View on Steammoz Store →2. Economy First, War Later: Escaping the Daily Wage Trap
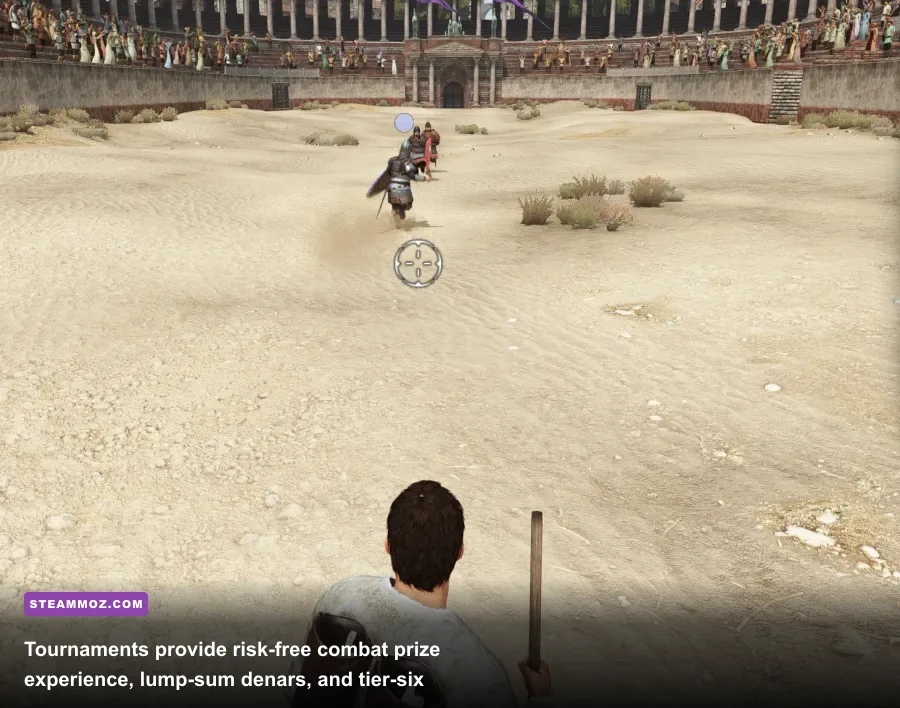
The fastest way to ruin a campaign is upgrading all your tier-one Imperial Recruits into high-tier legionaries before you establish passive cashflow. A tier-five infantryman costs upwards of 12 to 15 denars per day to maintain. If you field fifty of them without a workshop or caravan running, your war chest will bleed hundreds of denars every single morning at dawn. When you hit zero gold, troop morale collapses, high-tier veterans desert your ranks, and wounded soldiers refuse to heal.
For your first 50 days, stay small. Maintain a lean squad of 15 to 20 low-tier skirmishers simply to deter mountain and forest bandits, and focus all your energy on accumulating liquid capital. Much like managing your cashflow in Empires of the Undergrowth's resource-heavy economy, early-game Bannerlord demands strict fiscal conservatism before you attempt aggressive expansion.
The Holy Trinity of Early Cash Generation
- Arena Tournaments: Visit major imperial towns (Zeonica, Poros, Jalmarys) hosting tournaments. Bet the maximum 150 denars on yourself in every round. Winning nets you roughly 1,400 to 1,800 denars in betting winnings, plus a prize weapon, armor set, or high-tier noble horse (such as an Asaligat or Wousha) that can be sold to local merchants for 5,000 to 18,000 denars outright.
- Trade Arbitrage: You do not need to be a spreadsheet accountant to make bank trading. Buy mules, sumpter horses, and pack camels in Aserai lands (Askar and Sanala) where they spawn cheap for 40 to 60 denars. Ride north to Vlandia or Battania and flip them for 120 to 180 denars each. Along the way, buy cheap Hardwood in Seonon for 10-15 denars and sell it in iron-rich Empire cities for 35-50 denars.
- High-Value Hostages: When fighting looters and brigands, always take prisoners. Invest in blunt weapons (maces, clubs, or sledgehammers) for your own loadout so you knock enemies unconscious rather than killing them. Sell them at local taverns via the Ransom Broker. A handful of captured Sea Raiders nets several hundred denars in blood money.
Once you reach 15,000 liquid denars, immediately purchase your first productive workshop. Look at the primary trade goods produced by the villages bound to the target city. If a town has three bound villages supplying grain (like Sanala), construct a Brewery. If a town is supplied by multiple clay villages (like Pen Cannoc), build a Pottery Shop. A well-placed workshop yields 150 to 300 denars in daily passive profit, effectively offsetting the baseline wage of your core security detail permanently.
3. Character Stats: Combat Wins Duels, But Social Wins Wars
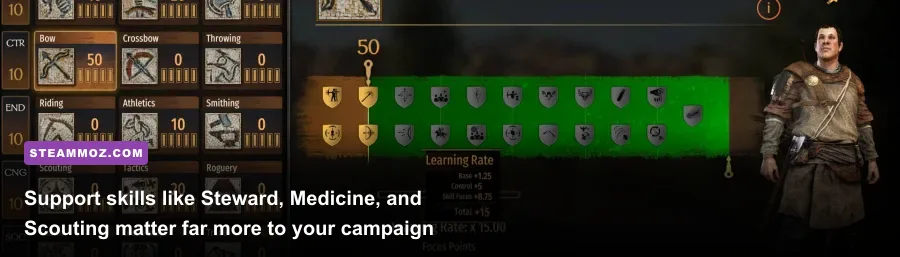
Beginners inevitably treat the character sheet like an action RPG, sinking five attribute points and maximum focus into One-Handed, Two-Handed, or Bow. This is an enormous mistake. While personal combat competence helps you survive the tournament ring, Calradia is governed by logistics, medical care, and political influence. If you want a smooth starter build progression, you must invest heavily in party-wide utility trees.
Your character's Attribute Points (Vigor, Control, Endurance, Cunning, Social, Intelligence) are scarce, hard-capped by your character level. You earn one attribute point every four levels. Waste them on combat skills you can easily delegate to combat-heavy companions, and you will lock yourself out of late-game army caps and diplomatic survival.
| Skill Category | Governing Stat | Priority Rating | Crucial Early Perk to Rush | Mechanical Impact |
|---|---|---|---|---|
| Steward | Intelligence | Essential (S-Tier) | Paid in Promise (Level 125) | Party size scales directly with Steward; converts discarded armor into troop XP. |
| Medicine | Intelligence | Essential (S-Tier) | Preventive Medicine (Level 50) | Keeps lethal casualties unconscious instead of dead; saves elite troops. |
| Scouting | Cunning | High (A-Tier) | Day Travel / Night Runner | Boosts map speed and spotting range; prevents surprise encirclements. |
| Leadership | Social | Late Game (S-Tier) | Famous Commander (Level 75) | Drastically boosts party morale, garrison size, and clan influence generation. |
| Charm | Social | High (A-Tier) | Inspirational / Virile | Makes lord persuasion trivial; slashes bartered peace and marriage costs. |
| Smithing | Endurance | High Utility (A-Tier) | Steel Maker / Curator | Prints infinite wealth and gives +2 free Attribute Points via late perks. |
You must prioritize Steward above all else. Assign yourself as your clan's Quartermaster in the Clan (L) menu immediately. Steward passively levels up simply by keeping high variety in your food inventory. Carry grain, meat, cheese, butter, fish, grapes, dates, and beer simultaneously. High food variety grants +6 to +8 daily morale and skyrockets your Steward progression, widening your personal party size limit from 25 to over 150 men without needing a single fief.
Second only to Steward is Medicine. Designate yourself as the party Surgeon until you find an exceptional scholar companion. At higher levels, Medicine ensures that when your tier-six troops take a lance couched at full speed, they are merely knocked unconscious rather than deleted from your army roster. Training a top-tier knight takes hours of battle XP; losing them to random looter rocks because your Medicine stat is zero is soul-crushing.
4. Tactical Command & The Elite Unit Meta
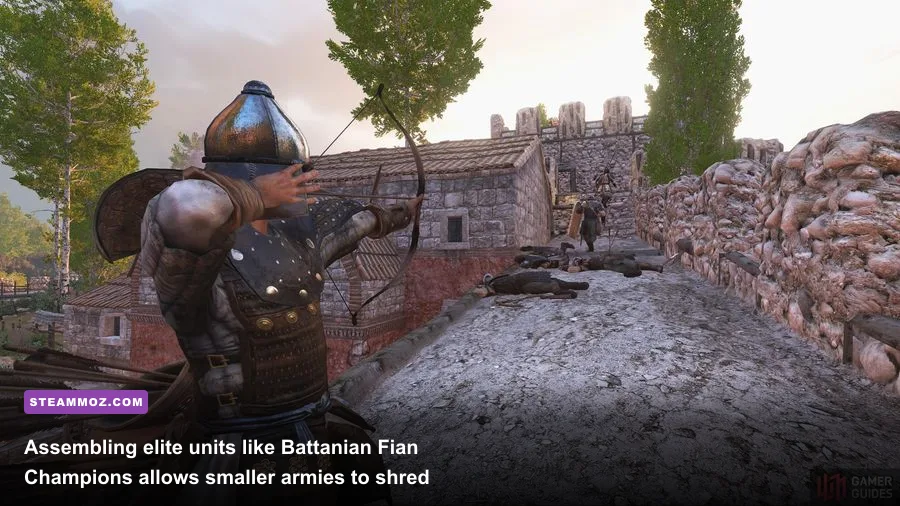
When the battle horn sounds, the instinctive reaction for new players is pressing F1 then F3 to order an all-out charge. In the original Mount & Blade, an all-out cavalry charge solved every problem. In Bannerlord, pressing F1+F3 against an organized enemy battle line on higher difficulties will send your cavalry sprinting straight into spear walls, your archers running into enemy skirmish ranges, and your army getting slaughtered in detail.
Troop tiers in Bannerlord do not scale linearly; they scale exponentially. A tier-five Imperial Legionary has double the effective armor and weapon speed of a tier-three recruit, while possessing superior AI blocking routines. Furthermore, Calradia features a "Noble Troop Line" for every culture—recruits found exclusively in specific rural villages governed by powerful village notables. Understanding which elite units form the backbone of a winning army is as critical as mastering a tier list ranking of weapons before jumping into competitive combat.
The Dominant Meta Units You Must Recruit
- Battanian Fian Champions (Noble Archer Line): Recruited from Battanian villages as Battanian Highborn Youth. These are undisputedly the most lethal ranged units in the game. Armed with custom noble longbows, two quivers of heavy bodkin arrows, and massive two-handed greatswords, they massacre enemy lines at 250 meters and shred light cavalry in melee combat if flanked.
- Imperial Elite Cataphracts (Noble Cavalry Line): Recruited as Imperial Vigla Recruits. They wear the heaviest cataphract barding in the game. Unlike fragile light cavalry, Cataphracts survive prolonged moshpits, absorb crossbow volleys effortlessly, and break braced spear formations through raw mass.
- Khuzait Khan’s Guard (Noble Horse Archer Line): Recruited as Khuzait Nomads through the noble path. Wielding recurve bows and devastating glaives, a cluster of 40 Khan's Guards can circle-strafe an enemy force of 150 footmen, exhaust their quivers, and then charge with polearms to wipe the survivors without taking a single casualty.
| Elite Unit | Role | Primary Loadout | Battlefield Command Strategy |
|---|---|---|---|
| Battanian Fian Champion | Sniper / Shock Hybrid | Noble Longbow, 2H Veteran Falx/Sword | Place on elevated ridge; set formation to Loose (F3 -> F3) for clear firing lines. |
| Imperial Elite Cataphract | Heavy Shock Breaker | Heavy Lance, Imperial Heavy Mail, Warhorse | Hold on flank; order Follow Me (F1 -> F2) then punch through archer clusters. |
| Imperial Legionary | Anvil Frontline Infantry | Heavy Kite Shield, Menavlion, Pila Javelins | Form a Shield Wall (F3 -> F2); advance slowly to exhaust enemy thrown weapons. |
| Sturgian Heavy Spearman | Anti-Cavalry Wall | Oversized Round Shield, Heavy Thrusting Spear | Pack tight into Square (F3 -> F4) formation to de-horse charging enemy cavalry. |
| Khuzait Khan's Guard | Mobile Skirmish Executioner | Steppe Recurve Bow, Long Glaive | Engage Fire at Will and Skirmish/Follow; charge with Glaives once quivers run dry. |
When positioning your forces, establish a standard combined-arms doctrine. Form your infantry into a Shield Wall (F3 then F2) at the foot of a hill. Deploy your archers in a Loose formation (F3 then F3) thirty yards directly behind them on the elevated slope so their firing arcs are unobstructed. Keep your cavalry on your extreme flanks under your direct command. Let the enemy charge into your archer killzone; once their frontline engages your infantry's shields, sweep your heavy cavalry directly into their rear flank to trigger an immediate rout.
5. The Fealty Ladder: Mercenary Work vs. The Dragon Banner Trap
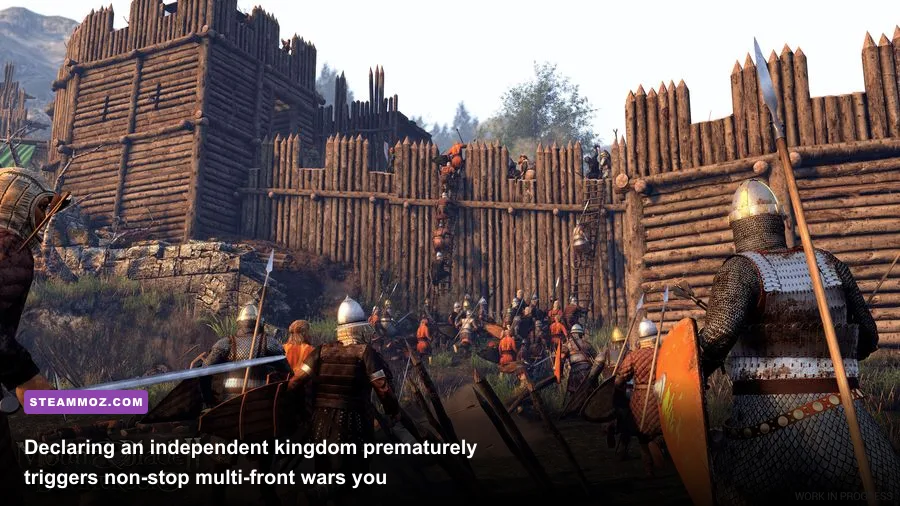
Once your clan reaches Clan Tier 2, kings and faction leaders across Calradia will begin inviting you to join their ranks. Do not become a vassal immediately. Vassalage is a binding political contract that drags you into every territorial war your monarch starts, leaving your newly acquired holdings vulnerable to massive counter-sieges while you scramble across the map.
Instead, spend your early mid-game operating strictly as a Mercenary. Talk to any ruling lord and offer your sword for pay. As a mercenary, your contract pays you a negotiated denar sum for every single point of Influence you generate through combat. You have no territory to defend, you pay zero garrison maintenance costs, and best of all, you can cancel your mercenary contract at any second via the Kingdom menu with zero diplomatic or relation penalties. If the kingdom you work for starts losing an unwinnable war on three fronts, simply resign, pack your bags, and sell your services to the faction that is currently winning.
Use this mercenary phase to grind your clan tier to Tier 4, hoard at least 600,000 to 1,000,000 denars, and recruit high-tier companions with specialized roles (Scouts, Engineers, and Governors). If you suffer from sudden framerate stuttering during massive 1000-man field battles while grinding these mid-game mercenary engagements, reviewing troubleshooting performance hiccups and frame drops can help isolate whether your CPU bottleneck is being driven by ragdoll calculations or battlefield sound channels.
Beware the Main Questline Dragon Banner
If you are playing the standard Campaign mode rather than pure Sandbox, the main storyline tasks you with assembling the ancient Dragon Banner of Calradia and either creating an independent kingdom or presenting it to an existing ruler. Do not rush this quest. As soon as you declare your allegiance or forge your own sovereign kingdom with that banner, an invisible timer activates: the "Conspiracy" meter.
Once that meter fills, the game forces three major global superpowers into a permanent, non-negotiable death-war against you. You cannot sue for peace through bartering; they will endlessly send 1,000-man doomstacks to siege your castles until you eradicate their factions completely. If you do not possess an elite army of 300+ veterans, millions of denars to bribe enemy lords to defect to your banner, and high Charm to govern conquered fiefs, this quest trigger will completely destroy your campaign save. Keep the banner pieces locked safely in your quest log until you have mastered Calradia's economic and military mechanics.
6. Companion Roles and Clan Management
Never treat companions as generic combat grunts. Every companion you hire occupies a finite Clan Member slot that must be optimized for specific operational utilities. Calradia's tavern pool generates procedurally titled wanderers whose surnames indicate their precise stat spreads:
- "The Scholar" or "The Surgeon": Extremely high Medicine. Assign them as your party Surgeon if you did not invest in Intelligence yourself.
- "The Engineer" or "Of the Walls": High Engineering stats. Drastically speeds up siege camp construction, allowing you to build onagers and trebuchets before your army runs out of rations outside enemy walls.
- "The Spicevendor" or "The Swift": High Trade and Steward attributes. These are your premier caravan leaders. A caravan led by a Spicevendor companion generates double the trade revenue of an unskilled follower.
- "The Golden" or "The Shieldmaiden": Combat-heavy powerhouses designed to lead specific army wings (such as cavalry or shock infantry) or act as your designated captain on the field.
When sending companions out to establish caravans, always pay the extra 5,000 denars (totaling 20,000) for the "Better Troops" option. Unprotected caravans are immediately chased down and captured by Steppe Bandits or rival lords the moment war breaks out. Additionally, designate loyal family members or culture-matching companions as Governors for newly conquered settlements. Installing a Vlandian governor in a conquered Battanian town causes rapid loyalty collapse, sparking outright peasant rebellions that take the town out of your control.
7. Essential Combat Settings and Quality of Life Tuning
Before stepping foot onto the battlefield, verify your game settings in the Gameplay and Video options. Bannerlord defaults to dynamic, directional blocking based on your mouse trajectory. If you are struggling with combat responsiveness, TaleWorlds includes several toggles to smooth the learning curve:
- Directional Blocking by Movement: Switch blocking direction from mouse look to character movement direction, or activate the auto-block visual directional arrows to learn attack telegraphs cleanly.
- Damage Taken Options: If you are completely new to melee slash mechanics, set player damage taken to "Reduced (2/3)" while keeping troop damage on "Realistic." This prevents you from being sniped instantly by a random peasant throwing a javelin across the map, allowing you to actually participate in frontline combat without spending half the battle watching your troops fight from the spectator camera.
- Battle Size Configuration: If your machine chugs when reinforcements spawn, drop the Battle Size slider from 1000 to 600 or 800. Bannerlord's reinforcement waves dynamically balance themselves according to your active army size ratio, so scaling this down will not mechanically disadvantage you—it simply spares your CPU's physics execution threads.
8. Summary Strategy: The 100-Day Survival Checklist
To guarantee your warlord establishes a permanent foothold across the continent, structure your campaign around a disciplined, step-by-step roadmap rather than wandering aimlessly:
- Days 1–20: Pick Battania or Vlandia. Maintain a squad of under 20 low-tier troops. Tour the imperial arenas, win 5 tournaments, sell expensive horse prizes, and accumulate 25,000 liquid denars. Dedicate focus points to Steward and Medicine.
- Days 21–50: Buy two high-output workshops in secure economic hubs (Sanala, Ortysia, or Marunath). Launch one caravan led by a high-Trade companion. Assemble 40–50 tier-three skirmishers and footmen.
- Days 51–100: Attain Clan Tier 2. Sign on as a mercenary for a faction engaged in offensive wars. Farm battle renown, capture enemy lords, ransom prisoners, and bank 200,000 denars while leveling your companion captains.
- Post-Day 100: Transition to full vassalage only when offered a wealthy, defended town of your matching culture. Stock its garrisons, optimize its village loyalty, and assemble your core stack of Battanian Fians and Imperial Cataphracts before ever thinking about forging an empire of your own.
Calradia has broken dozens of arrogant warlords who assumed personal glory could substitute for logistical discipline. Master your party's food rations, respect your army's daily balance sheet, command your battle formations with patience, and the Iron Throne of Calradia will eventually be yours to claim. For more detailed system guides, weapon mechanics, and technical walkthroughs, consult the official resources at TaleWorlds Entertainment, the community databases on the Mount & Blade Wiki, and verify game updates on the Bannerlord Steam Community Hub.