
The best Far Cry 6 beginner build is a quiet-to-loud setup built around the MS16 S, MP40, Volta Supremo, armor-piercing rounds, and movement-focused gear. It lets you remove alarms and officers silently, then switch to an assault rifle or Supremo EMP blast when a base erupts into chaos. The Game of the Year Upgrade Pass doesn’t change the core campaign’s skill system—Far Cry 6 has no traditional skill tree—but it gives you three major villain expansions and bonus gear, so a versatile loadout pays off across both Yara and the DLC.
This setup is designed for new players on Action or Story difficulty. It avoids the common early mistake of building around one flashy weapon while ignoring alarms, ammunition types, and gear perks. You’ll have a dependable answer for soldiers, helmets, cameras, helicopters, checkpoints, and armored targets without needing perfect aim.
The Starter Build at a Glance

Your first serious goal is not collecting every chest in Isla Santuario. It’s assembling four dependable tools: a precision rifle for officers and alarms, a suppressed sidearm or SMG for close stealth, a Supremo that solves emergencies, and gear that helps you move between cover. Juan or Juan’s Arms Dealers introduce the weapon and Supremo systems early, so you can begin shaping this build almost immediately after the tutorial.
| Build Slot | Recommended Choice | Why It Works | Early Alternative |
|---|---|---|---|
| Primary weapon | MS16 S with a scope and armor-piercing rounds | Accurate single shots handle officers, alarms, and exposed weak points | SVD if you find one before upgrading |
| Secondary weapon | MP40 with a suppressor | Stable, quiet close-range damage and generous magazine capacity | 1911 with suppressor |
| Resolver weapon | La Varita later; any early Resolver rifle beforehand | Resolver weapons provide specialized answers to difficult encounters | Standard assault rifle |
| Supremo | Volta | EMP disables electronics and helps hijack vehicles | Exterminador for emergency rocket damage |
| Gear priority | Movement, stealth, healing, then defense | Positioning keeps beginners alive longer than raw armor | Whatever complete gear pieces you currently own |
The MS16 S is the important piece. It rewards deliberate headshots and doesn’t force you to burn through rifle ammunition. Fit it with a medium optic if available, then use armor-piercing rounds once you can buy or loot them. Standard rounds are more forgiving against unarmored soldiers, but armor-piercing ammunition is the better long-term choice because helmets and tougher enemies become increasingly common as you move into higher-rank regions.
Keep a normal assault rifle in the third slot once you find one with useful attachments. The MS16 S handles reconnaissance; the assault rifle handles a fight that has already gone loud. That division is far more practical than carrying two rifles with nearly identical ranges.
🎮 Far Cry 6 - Game of the Year Upgrade Pass
Looking to experience this game? Grab your digital key directly on our store for $14.99.
View on Steammoz Store →Why Volta Beats Exterminador for New Players
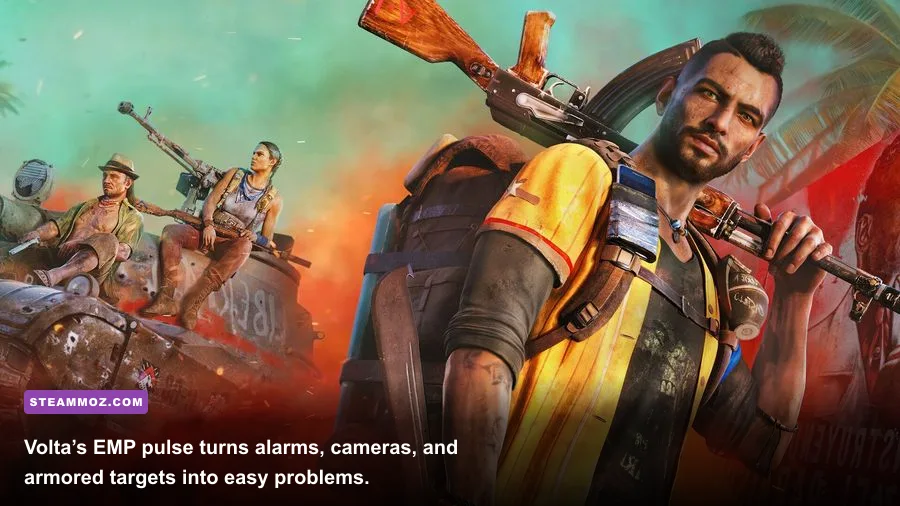
Exterminador is Juan’s first big spectacle: activate it and Dani unleashes a guided barrage of rockets. It can erase a group, but it also creates noise, fire, and confusion. That’s excellent when you’re already surrounded, yet it does little to prevent the problem that caused the firefight—an alarm operator calling reinforcements or a turret locking down your escape route.
Volta’s EMP blast is less cinematic and considerably more useful for beginners. It disables cameras, alarms, turrets, and vehicles, while also creating an opening to hijack a vehicle. Against a checkpoint, you can use it to shut down electronics, sprint to the alarm box, and regain control before the base fills with reinforcements. Against a tank, Volta gives you the chance to approach and hijack it, or disable the vehicle long enough to reposition.
| Supremo | Best Use | Main Weakness | Beginner Verdict |
|---|---|---|---|
| Volta | Alarms, cameras, turrets, vehicles, tank hijacks | Low direct damage | S-Tier utility for learning bases |
| Exterminador | Large groups and emergency damage | Loud, imprecise, and easy to waste | A-Tier panic button |
| Furioso | Close-range crowd control and mobility | Requires aggressive positioning | B-Tier until you understand movement |
| Gladiador | Speed-focused melee attacks | Very risky against firearms | Fun, but poor first choice |
Supremo charge comes from combat actions, kills, and general activity, so don’t hoard Volta forever. Use it when an alarm begins or when a tank blocks your route. The ideal rhythm is simple: scout, disable, eliminate the alarm operator, and save the Supremo for the first sign that the plan is collapsing.
For a useful comparison with other gear-focused games, Steamoz’s Dark weapon tier list also demonstrates why utility can outperform flashy damage in difficult encounters.
Gear Perks and the Correct Stat Priority
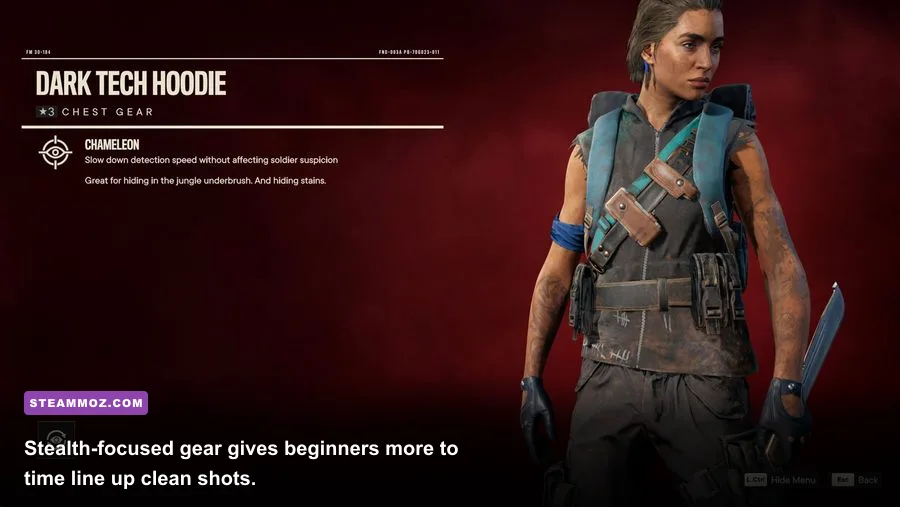
Far Cry 6’s gear system is easy to misunderstand. You aren’t chasing a conventional armor score or stacking a skill tree. Each clothing piece carries a perk, and the strongest setup is usually a collection of complementary bonuses rather than a matching five-piece costume.
Start with movement and stealth. Faster movement helps you cross sightlines, reach alarm panels, and escape vehicles. Stealth-oriented pieces buy you extra seconds before detection, which is often enough to land a headshot or relocate. Add healing or general survivability after those priorities. Explosive resistance and fire resistance are valuable when a region throws grenades or flamethrowers at you, but they shouldn’t replace better positioning.
| Priority | Gear Effect | What It Changes | When to Replace It |
|---|---|---|---|
| 1 | Movement speed or stamina | Faster flanks, escapes, and alarm-panel rotations | Only when a mission demands stealth or elemental resistance |
| 2 | Stealth or reduced detection | More time to mark enemies and land silent shots | Swap for defense during repeated open combat |
| 3 | Healing or survivability | Improves recovery after grenades and stray bullets | Keep one defensive piece for late-game regions |
| 4 | Fire, poison, blast, or impact resistance | Counters specific enemy weapons and environmental hazards | Equip only when the region’s enemies justify it |
The Parkour gear set is a natural beginner target because movement and stamina make every mission more forgiving. Dark Tech pieces are worth grabbing when you prefer quiet infiltrations. Don’t feel obligated to wear an entire set, though. A strong perk on one helmet can be more valuable than completing a visually matching outfit.
Use the workbench to install suppressors, optics, and ammunition modifications whenever you have depleted uranium and the necessary materials. Juan’s Arms Dealers trade depleted uranium for Resolver equipment, while regular materials come from chests, supply drops, animals, and dismantled gear. Sell or dismantle duplicate weapons instead of dragging a bloated arsenal through every region.
Combat Rotation for Checkpoints and Bases

Every attack should follow the same five-step loop: observe, mark, remove the alarm, isolate the target, and only then commit to the fight. Use your phone camera to tag soldiers, officers, cameras, and heavy weapons. Marking matters because Far Cry 6’s bases become dangerous when an enemy you never saw reaches an alarm box.
Step 1: Find the alarm operator
Before firing, identify the yellow alarm icon and the soldier closest to it. The MS16 S can remove that operator with one accurate headshot. If the shot isn’t clean, use Volta rather than gambling on a second attempt while the warning meter climbs.
Step 2: Start with the perimeter
Pick off isolated guards on the outside edge, then move bodies away from patrol routes. Avoid shooting the central courtyard first. A quiet perimeter gives you multiple exits and prevents a single missed shot from becoming a crossfire.
Step 3: Use the correct ammunition
Armor-piercing rounds are your default against helmets and armored soldiers. Soft-target rounds are better against unarmored enemies, especially when you’re using an automatic weapon and need quick body-shot damage. Don’t waste armor-piercing ammunition on every basic soldier if your aim is still developing.
Step 4: Break contact instead of forcing a duel
If detection rises, crouch-slide behind cover, change elevation, and let the alert settle. Far Cry 6 rewards relocation more than stubbornly holding one piece of cover. When a tank arrives, use Volta for a hijack opportunity, EMP grenades, or an explosive attack on its weak rear vents. Shooting the tank’s armor with ordinary bullets is mostly wasted effort.
Step 5: Use the Supremo only when it changes the fight
Volta should disable the base’s electronic backbone. Exterminador should erase a dangerous cluster after enemies have grouped. Don’t fire either into a single guard. The charge is too valuable, and ordinary weapons are more than capable of handling one target.
| Threat | Telegraph | Counter | Best Tool |
|---|---|---|---|
| Alarm operator | Yellow alarm icon and warning meter | Headshot or rush the alarm panel | MS16 S or Volta |
| Armored soldier | Heavy body armor and helmet | Use armor-piercing rounds and aim high | MS16 S |
| Flamethrower | Fuel tank and visible flame burst | Keep distance and target the tank | Precision rifle |
| Tank | Vehicle icon and heavy cannon report | EMP, hijack, or attack rear weak points | Volta |
| Helicopter | Searchlight and rotor noise | Break line of sight or use an EMP | Volta or launcher |
How the GOTY Upgrade Pass Fits the Build

The Upgrade Pass includes Vaas: Insanity, Pagan: Control, and Joseph: Collapse, plus the Blood Dragon set and other bonus content depending on the edition and platform. These villain episodes are structured differently from the main campaign, so don’t expect your Yara loadout to transfer as a normal permanent progression path. They use roguelite-style runs and bespoke progression systems built around each villain.
That’s why the starter build should be established in the base game first. Learn silent takedowns, weapon-wheel swapping, alarm control, and Supremo timing in Yara before entering the DLC. Vaas: Insanity in particular punishes reckless pushes because a failed run can cost temporary progress. The calm, information-first habits from this guide carry over much better than a pure damage setup.
For official details, check Ubisoft’s Far Cry 6 game page and the official support hub before buying or launching the Upgrade Pass. Ubisoft’s Far Cry 6 news archive is also the best place to verify edition-specific content.
Once you leave Isla Santuario, push toward whichever region has the weapons or materials you want rather than trying to clear every icon. Build your arsenal around the MS16 S, MP40, Volta, and movement gear first. Later, replace the MP40 with a stronger suppressed SMG or shotgun and add a launcher for aircraft, but keep the same combat logic.
For more practical starter advice, Steamoz’s Daymare 1998 beginner build and Death Howl weapon tier list are useful reminders that early flexibility beats chasing the highest theoretical damage.
The finished Far Cry 6 beginner build is deliberately unglamorous: scout with your phone, use the MS16 S to remove priority targets, keep the MP40 suppressed for close work, wear movement-focused gear, and trigger Volta before an alarm turns into a war. It’s forgiving, inexpensive to maintain, and strong enough to carry a new player through Yara and into the GOTY Upgrade Pass’s strangest, most demanding side adventures.