
The fastest way to level The Phantom in Hunt: Showdown 1896 is to treat him like any other Hunter: chain clues, kill efficient AI, secure a bounty when the lobby allows it, and extract before greed turns a profitable run into a free Hunter loss. The Phantom has no secret XP multiplier, exclusive gold bonus, or special combat stat. He is a Legendary Hunter skin, so your results come from route discipline, loadout value, Dark Tribute, cash registers, and surviving with your Hunter.
That distinction matters. A lot of players search for a Phantom-specific exploit, but Hunt does not reward a cosmetic with hidden progression advantages. The winning plan is a repeatable low-risk loop that builds Hunter XP, Bloodline XP, and Hunt Dollars at the same time. This guide focuses on that loop, including when to abandon the bounty, where money actually comes from, and how to avoid spending more than you earn.

What The Phantom Actually Changes
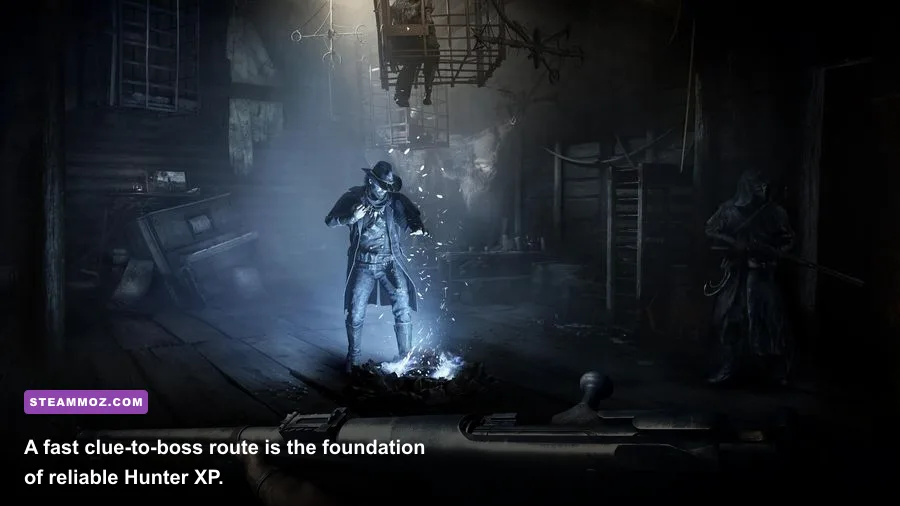
The Phantom is a Legendary Hunter appearance associated with Hunt’s western gunslinger fantasy. His gameplay is governed by the same health bars, stamina, weapon handling, trait pool, and recruitment economy as every other Hunter. That means you should not force aggressive plays just because the character looks premium. Protecting a recruited Phantom is financially sensible only if you have already paid for a strong loadout; emotionally treating him as irreplaceable is how players make bad pushes.
Hunter progression stops at level 50. Experience earned by the Hunter can unlock traits and improve the value of a successful run, while Bloodline XP advances your account progression and unlocks equipment. A dead Hunter loses his current level and carried gear, although some account-level rewards and currency earned before death remain yours. The practical goal, therefore, is not maximum kills. It is maximum experience per minute that reaches extraction.
| Progression Target | How You Earn It | Best Phantom Strategy | Main Risk |
|---|---|---|---|
| Hunter XP | AI kills, clues, boss work, enemy Hunters, bounty actions | Clear useful AI while following a compact clue route | Taking unnecessary fights for marginal XP |
| Bloodline XP | Match actions, extraction, kills, bounty and general progression | Finish short matches consistently instead of gambling every run | Long failed raids with no extraction |
| Hunt Dollars | Extraction rewards, cash registers, contracts, Dark Tribute and pickups | Search compounds on your route and extract with a profit margin | Buying expensive gear after every death |
| Traits | Hunter leveling and trait points | Prioritize movement, stamina and information traits | Spending points on niche traits before core utility |
Before queuing, check the official Steam page for Hunt: Showdown 1896 and current patch notes. Economy values, event bonuses, map conditions, and reward tuning can change. If a seasonal event is active, its challenges may be worth more than ordinary farming, but never assume an event bonus applies to every source of XP or currency.
🎮 Hunt: Showdown 1896 - The Phantom
Looking to experience this game? Grab your digital key directly on our store for $2.49.
View on Steammoz Store →The Fastest Safe Leveling Route
Use a three-stage route: clues first, useful AI second, bounty or extraction third. At spawn, identify the nearest clue and move with purpose. You do not need to kill every grunt, armored, hive, or water devil you see. Kill AI that blocks your route, protects a clue, or can be dispatched silently. A Hunter that spends five minutes sweeping an empty compound is wasting time and creating sound for nearby teams.
Stage one: build a clean route
Take the first clue quickly, then decide whether the next clue pulls you toward the active bounty or into a dangerous dead end. Clues reveal the map by removing compounds from the search area; they also award Hunter experience. The value is not only the XP. A fast clue route tells you where teams are likely to converge and lets you choose between contesting the boss, rotating around it, or extracting with a smaller but safer profit.
Stage two: farm only efficient AI
Silenced weapons, throwing knives, knuckle knife attacks, and careful melee preserve ammunition and reduce noise. Grunts are simple experience opportunities, but armored enemies consume time unless you have a knife, poison, or a reliable heavy melee option. Hives should be handled from range or with a clean headshot; swarms can force healing and expose your position. Burning an immolator with fire is a bad habit if you are trying to farm quietly because the panic and sound can attract players.
Stage three: make the extraction decision early
Once you have two or three clues, listen before committing to the boss compound. If you hear banishing, gunfire, or multiple teams, decide whether your loadout supports a contest. If not, sweep nearby compounds for money and leave. A level 20 Phantom that extracts with modest gains is more useful than a level 35 Phantom that dies while chasing a team through a boss lair.
| Situation | Recommended Action | Why It Works | Abort Trigger |
|---|---|---|---|
| Quiet spawn, nearby clues | Take clues and clear route AI silently | Fast Hunter XP with low ammunition cost | Repeated shots or hostile sound traps |
| Boss compound is active | Scout entrances and rotate before pushing | Information is worth more than a blind breach | Multiple teams, depleted heals, or bad zone |
| Cash register found early | Loot it, then reassess extraction | Immediate Hunt Dollars can make a short run profitable | Nearby footsteps or active compound pressure |
| Teammate down and bounty secured | Revive only after controlling the area | Preserves both the reward and the roster | Enemy sightline on the body |
For broader performance preparation, Steamoz’s settings guide for reducing stutters in Ghost Recon Breakpoint covers the same kind of frame-time thinking that matters in Hunt. Stable frame pacing helps more than a flashy preset when you are holding a dark doorway at thirty metres.
Best Loadouts for XP and Profit
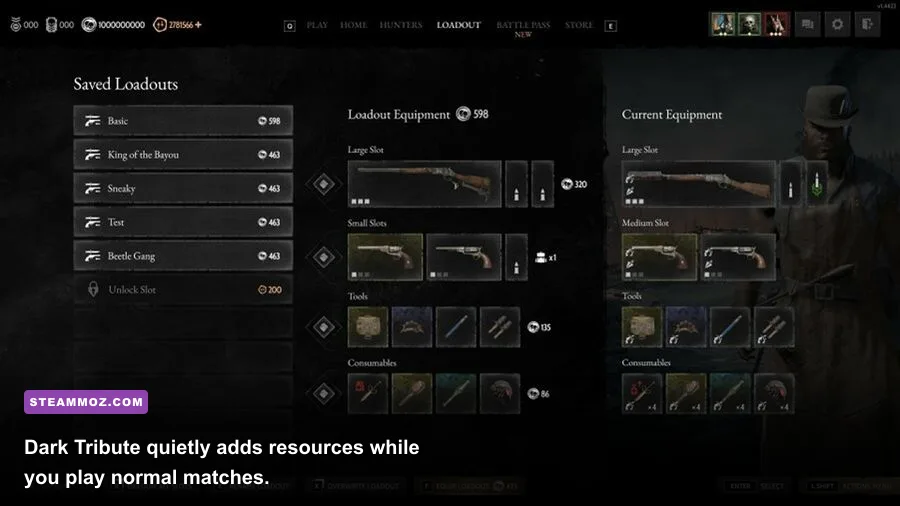
The ideal farming loadout is cheap, quiet, and capable of defending an extraction. Do not bring a six-slot dream kit if the entire purpose of the run is to rebuild your economy. A Winfield M1873 or Winfield M1873C gives you forgiving ammunition capacity and respectable close-to-midrange pressure. The Romero 77 is inexpensive and deadly in a committed fight, but its single-shot rhythm demands better positioning. The Vetterli 71 Karabiner offers a stronger midrange option without the cost of a Mosin-Nagant M1891.
For tools, a knife or knuckle knife handles ordinary AI, while a first-aid kit and vitality shot keep a run from ending to a random grunt. Choke bombs are valuable in teams because they extinguish burning teammates and deny fire-based area control. Decoys or blank fire decoys can manipulate sound, but they are optional in a pure low-cost route. Bring a throwable only if you understand the noise and timing it creates.
| Loadout | Approximate Role | Strength | Weakness |
|---|---|---|---|
| Winfield M1873C + melee sidearm | Budget all-rounder | Fast follow-up shots and cheap ammunition | Less decisive at long range |
| Romero 77 + compact pistol | Close-range boss contest | Excellent single-shot damage for the price | Misses are heavily punished |
| Vetterli 71 + Nagant M1895 Officer | Flexible solo route | Strong midrange rifle with emergency close pressure | More expensive than a basic Winfield setup |
| Crossbow + budget sidearm | Quiet AI and ambush play | Low sound profile and useful bolt options | Slow projectile speed and demanding aim |
Traits should support survival rather than create a fantasy build. Greyhound extends sprint duration, Determination improves stamina recovery, Doctor and Physician make healing more efficient, and Frontiersman expands tool capacity. Resilience is valuable in a team because a revived Hunter returns with a full health bar, while Necromancer can create comeback opportunities when used from cover. Trait availability and cost can vary with patches, so read the in-game descriptions before spending points.
Pair the Phantom with a cheap first run after recruitment. If he extracts, upgrade naturally from recovered equipment and earned currency. This avoids the classic economy trap: spending more on a replacement loadout than the previous match paid out. Our weapon tier breakdown is useful for thinking about value, but Hunt’s one-shot lethality means positioning often matters more than a weapon’s theoretical tier.
How to Farm Hunt Dollars Without Throwing Runs

Hunt Dollars come from several small streams rather than one guaranteed jackpot. Cash registers are the most obvious direct source and can appear inside compounds, but they are also danger magnets because experienced players know common building layouts. Search them when they are on your route, not when crossing the entire map for a rumoured register while the banish timer is running.
Looting defeated Hunters can return useful ammunition, tools, and weapons, although the financial value is situational. Pick up equipment that improves your next extraction or replaces a costly purchase. Do not waste time stripping every body if the bounty team is rotating toward you. The strongest economy play is often leaving with a serviceable weapon and a live Hunter rather than maximizing every possible pickup.
Dark Tribute provides passive progression rewards as you play. Visit the Dark Tribute screen between matches and claim available rewards rather than letting the system sit untouched. Mr. Chary’s tribute system and any active event track can provide Hunt Dollars, consumables, equipment, or other resources depending on current tuning. Check the official Hunt: Showdown website for event details instead of relying on old farming videos.
| Money Source | Best Use | Risk Level | Profit Rule |
|---|---|---|---|
| Cash registers | Loot during a normal compound rotation | Medium | Leave if the sound attracts a nearby team |
| Dark Tribute and Mr. Chary | Claim between matches | Low | Never ignore free progression rewards |
| Successful bounty extraction | High-value committed run | High | Contest only with heals, ammo, and information |
| Recovered weapons and consumables | Reduce future loadout spending | Medium | Value survival equipment over novelty weapons |
| Event challenges | Targeted seasonal progression | Variable | Stack objectives with ordinary clue routes |
Keep a simple profit check in your head: if the Phantom entered with a cheap loadout, one cash register or a few recovered supplies may already make the match worthwhile. If you entered with a premium rifle, expensive tools, and multiple consumables, a non-bounty extraction may still be a net loss. Farming is about repeatable margin, not the biggest single payout.
Bosses, Bounties, and the Safe Extraction Call
Bosses are excellent experience and reward objectives, but they are also sound alarms. Scrapbeak can consume equipment from the arena, Butcher punishes careless close-range movement with fire and heavy swings, Assassin uses clones and bleed pressure, and Spider attacks from awkward angles while applying poison. The exact boss roster and map rotation can change, but the principle stays constant: enter with stamina, a healing plan, and an exit route.
Fight the boss efficiently
Clear nearby AI before starting if time allows, then keep an escape lane open. Use heavy melee attacks when safe, back away during the boss’s enraged state, and avoid standing in fire or poison just to finish a damage cycle. A sticky bomb or other specialist tool can speed certain encounters, but spending a premium consumable is not automatically profitable if your real goal is budget leveling.
During banishment, trap likely entrances and watch the map rather than staring at the progress bar. If you hear a team approaching, you have three choices: hold the lair, rotate outside and ambush, or abandon the bounty and extract. The best decision depends on health bars, weapon ranges, teammate positions, and whether the approaching players have the advantage of surprise.
| Boss Situation | Primary Danger | Counterplay | Extraction Decision |
|---|---|---|---|
| Butcher in a tight room | Fire, heavy swings, blocked exits | Use cover, bait attacks, and preserve stamina | Leave if a team arrives before banish control |
| Assassin in dark corridors | Bleed, clones, visual confusion | Keep moving, identify the real body, heal bleed safely | Rotate outside if visibility collapses |
| Spider near water or clutter | Poison and unpredictable movement | Use antidote planning and avoid cornering yourself | Extract if supplies are already low |
| Scrapbeak after a long fight | Lost tools and loud third-party pressure | Use spare melee options and check exits early | Prioritize surviving with the token |
Once you have a bounty token, do not confuse confidence with safety. Dark Sight Boost helps locate bounty carriers, but it is limited and should be spent to cross exposed ground, check a suspicious compound, or coordinate a final push. On the way out, avoid predictable straight-line travel when the extraction point is contested. A short rotation through cover is worth more than saving a few seconds.
The Phantom Profit Loop That Actually Works
Here is the repeatable loop: recruit The Phantom, equip a budget rifle or shotgun, bring a melee tool, healing, and one defensive utility item, then take the nearest clue. Continue through two or three compounds while killing only route-blocking AI. Search cash registers and loot intelligently. If the boss is quiet and your resources are healthy, contest it. If the lobby is loud or the route turns hostile, extract early. Claim Dark Tribute and use recovered gear in the next match.
- Recruit and inspect: Check the Phantom’s starting traits and health bars. Keep useful traits; dismiss only when the roster or cost makes the recruit genuinely poor.
- Build for value: Choose Winfield M1873C, Romero 77, or Vetterli 71 depending on range and budget. Avoid premium ammunition until the run’s objective justifies it.
- Take clues quickly: Move between compounds with a planned exit. Silent AI kills add XP without advertising your exact location.
- Search opportunistically: Loot cash registers, toolboxes, event objects, and bodies only when the soundscape is safe.
- Read the lobby: Gunshots, crows, dogs, banishing, and dark sight information tell you whether the bounty is contestable.
- Extract with discipline: A successful short run preserves Hunter XP, gear, and future earning power. Do not donate a leveled Phantom for one more register.
There is no legitimate Phantom-only gold glitch worth risking an account or a Hunter roster. Avoid cheats, exploit tutorials, and suspicious third-party tools; they can compromise your account and destroy the fair-play economy that makes Hunt’s extraction tension work. For technical issues that interrupt farming, compare your setup against Steamoz’s PC crash and FPS troubleshooting guide and its frame-rate settings advice. Stable performance is a real advantage when a single stutter can lose a level-40 Hunter.
The short version is simple: The Phantom does not level faster because he is The Phantom. He levels faster when you stop treating every match like a tournament final. Run cheap gear, follow clues, farm efficient AI, take money that is already on your route, contest bounties only with a real advantage, and extract before the profit turns into a corpse. That rhythm builds Hunter levels and Hunt Dollars far more reliably than any flashy high-risk streak.
For official systems, patch information, and current events, use the official Hunt: Showdown news page and the official Steam news feed. The numbers and rewards can shift, but the core economy lesson does not: survival is your best multiplier.