Squeezing maximum frames per second out of your gaming rig without turning your screen into a muddy soup comes down to a fundamental realization: modern graphics presets are thoroughly broken. You don't need to slap your settings down to "Low" across the board, nor should you blindly leave everything parked on "Ultra" just because your graphics card cost as much as a used car. The real secret to buttery smooth frame delivery is isolating the four universal GPU resource hogs—volumetric fog, cascaded shadow map resolution, dynamic screen-space reflections, and unoptimized ray tracing passes—while keeping high-impact visual anchors like textures, geometry LOD, and anisotropic filtering completely pinned. By targeting the exact rendering features that disproportionately tax compute pipelines and leveraging modern temporal upscalers properly, you can instantly reclaim 30% to 50% of your frame rate while maintaining razor-sharp visual fidelity.
The "Ultra" Trap: Why Game Presets Lie to You
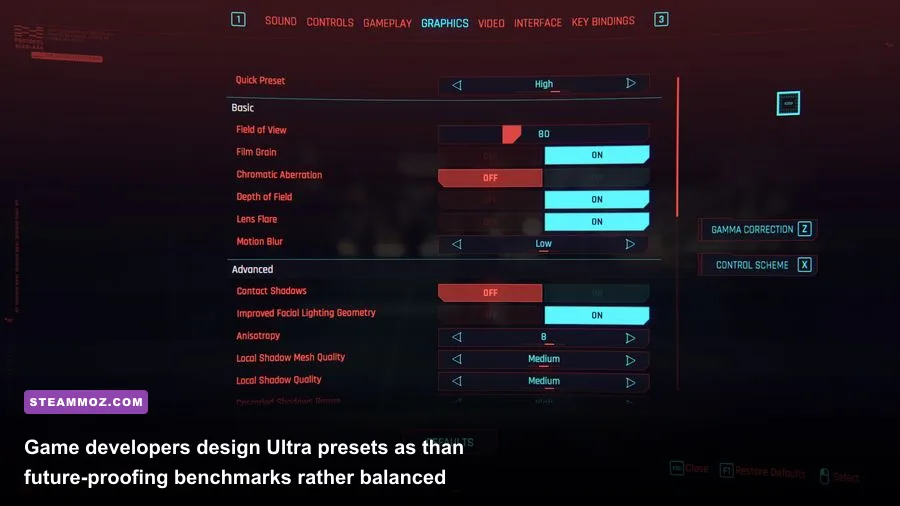
For over a decade, game developers have treated the "Ultra" preset as a forward-looking stress test rather than a practical setting for gameplay. When you switch an option from High to Ultra, you are rarely getting a tangible leap in fidelity. Instead, you are generally instructing the game engine to increase sampling steps, widen calculation radii, or render invisible geometry at distances your display cannot physically resolve. According to engineering insights from Microsoft DirectX 12 architecture, these exponentially increasing draw calls and shader instructions frequently deliver diminishing visual returns while sending your GPU's rasterization units into overdrive.
Consider how frame timing works in the real world. To achieve a perfectly fluid 60 FPS presentation, your GPU has an absolute maximum render budget of 16.6 milliseconds per frame. Push your target to 144 FPS on an esports-grade high refresh panel, and that budget contracts to a razor-thin 6.9 milliseconds. When an unoptimized Ultra setting adds just 3 milliseconds of compute time to resolve soft shadow contact points in foliage you won't even glance at while running, your frame pacing collapses. The result isn't just a lower average counter; you trigger violent 1% low frametime spikes that cause noticeable visual hitching. We have explored similar engine-level bottlenecks when helping players tune their configs in our Far Cry 6 GOTY settings guide, showing that automated developer presets rarely respect your hardware's actual performance envelopes.
The goal of our tuning philosophy is ruthless efficiency. We want to identify the graphical calculations that chew through precious render milliseconds with zero perceptible difference during motion, drop them to their visual sweet spot, and let your GPU pump out lightning-fast, evenly paced frames.

🎮 FORM
Looking to experience this game? Grab your digital key directly on our store for $14.99.
View on Steammoz Store →The Big Four Performance Killers to Dial Down
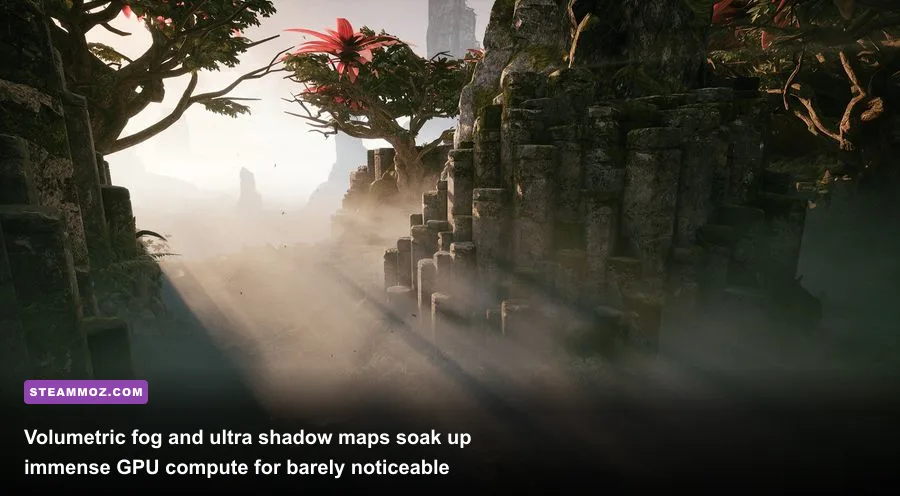
If your game is chugging, stuttering, or failing to hit your monitor's native refresh rate, the culprit almost always traces back to four specific options tucked inside the video menu. Understanding what these settings actually do behind the scenes allows you to adjust them with surgical precision rather than blind guesswork.
1. Volumetric Fog, Clouds, and Mist
Volumetrics look undeniably stunning when sunlight pierces through a misty forest canopy, but their computational cost is catastrophic. Modern engines generate these effects using ray-marching algorithms. The GPU must cast virtual rays through a 3D grid of voxels, calculating light absorption, scatter, and density at dozen of individual sample points along each ray. On "Ultra," the engine might evaluate 64 to 128 samples per ray per pixel. Dropping volumetric effects down to "Medium" or "High" typically halves the ray-marching sample rate and uses temporal reconstruction to blend the results across frames. You preserve 90% of the moody atmospheric lighting while instantly saving up to 15% to 20% on overall GPU render time.
2. Shadow Resolution and Cascaded Shadow Maps
Dynamic shadows are rendered by calculating depth maps from the perspective of every light source in the scene. Ultra shadow settings push shadow map buffers to astronomical resolutions (often 4096x4096 pixels) across multiple cascaded distance tiers. This crushes both GPU compute cores and VRAM memory bandwidth. Dialing shadows back to "Medium" or "High" softens the hardest edges of distant shadows—which looks far more natural in outdoor environments anyway—and yields an immediate 10% to 15% boost in average frame rates without turning the game world flat.
3. Screen-Space Reflections (SSR)
Before hardware ray tracing took over, SSR was the industry's go-to method for rendering wet surfaces, puddles, and polished floors. SSR operates by casting rays across the existing depth buffer of your rendered screen to find reflected color values. On top-tier presets, games use full-resolution ray casting with extensive denoising passes. This can cause brutal GPU stalls when wet asphalt or vast oceans fill the screen. Switching SSR to "Medium" or "Half-Resolution" uses an interleaved checkerboard pattern that drops the calculation burden by nearly 50%, while ambient surface roughness naturally masks the lower sample density.
4. Ray Traced Reflections and Ambient Occlusion
Hardware ray tracing represents the cutting edge of rendering, but it remains a generational performance tax. Traditional rasterization simply projects 3D polygons onto a 2D plane, whereas ray tracing builds and traverses complex Bounding Volume Hierarchy (BVH) structures in memory. If you aren't running an ultra-enthusiast tier GPU, running full ray-traced reflections will often wipe out 40% to 60% of your baseline frame rate. Unless your baseline frame rate comfortably exceeds 90 FPS before toggling RT on, leave screen-space ambient occlusion (SSAO) handle contact shadowing and reserve native ray tracing strictly for slower-paced, cinematic titles.
| Graphics Setting | Recommended Value | Estimated FPS Uplift | Visual Impact & Technical Note |
|---|---|---|---|
| Volumetric Fog / Clouds | Medium to High | +12% to +22% | Halves ray-marching steps; virtually indistinguishable during gameplay camera motion. |
| Shadow Quality / Maps | Medium or High | +8% to +16% | Reduces shadow atlas resolution; softens overly sharp, unrealistic contact edges. |
| Screen-Space Reflections (SSR) | Medium / Low Noise | +7% to +14% | Renders specular reflections at half internal resolution; blends cleanly via temporal AA. |
| Ray Tracing (Reflections / GI) | Off (or Low with DLSS) | +25% to +50% | Massive compute pipeline overhead; disable unless targeting 60 FPS on high-end silicon. |
| Post-Processing (Motion Blur, DoF) | Off / Low | +3% to +6% | Removes camera smear, cleans up pixel clarity, and eliminates post-shader latency. |
| Ambient Occlusion | High / SSAO | +4% to +8% | Stick to standard SSAO or HBAO+ instead of compute-heavy voxel or ray-traced ambient occlusion. |
If you've tackled finicky lighting performance in other complex engines, such as those we addressed when resolving performance bottlenecks in our Filament Marmalade Edition optimization breakdown, you know that keeping post-processing passes lean is fundamental to sustaining peak engine responsiveness.
Free Visual Candy: Settings You Should Never Lower
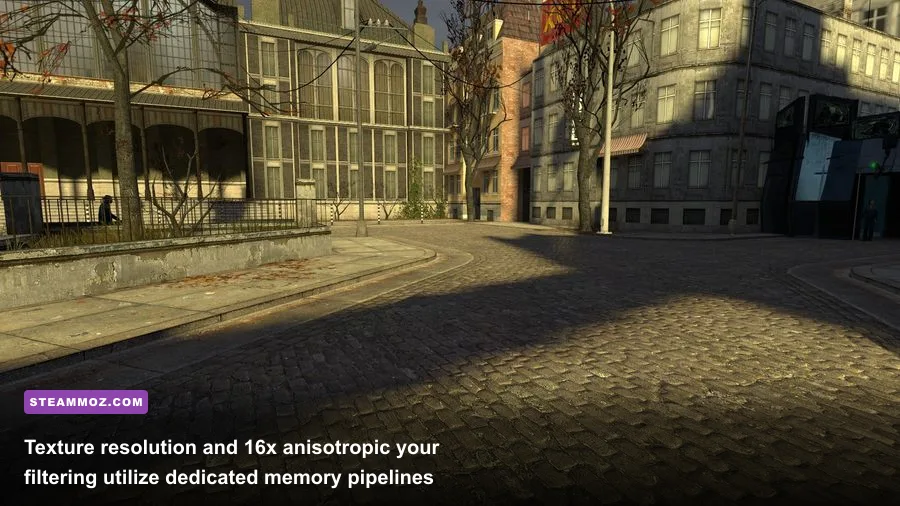
While cutting volumetric density and shadow cascades reclaims massive chunks of render time, other settings have an immense impact on image clarity while costing virtually nothing in raw computational power. Lowering these settings is a tragic mistake that ruins the artistic presentation of modern games for zero practical gain.
Texture Quality (Match to Your VRAM)
Texture quality is not processed by your GPU's shader execution cores; it is stored inside your card's dedicated Video RAM (VRAM) and sampled via dedicated texture mapping units. As long as the textures fit comfortably within your GPU's memory buffer, setting textures to "Ultra" costs practically zero frame rate performance. An RTX 4070 or Radeon RX 7800 XT with 12GB to 16GB of VRAM can effortlessly handle maximum texture resolutions without dropping a single frame.
The only danger arises when your texture allocation exceeds your physical VRAM capacity. When an 8GB card attempts to load a 10GB Ultra texture pack, the graphics driver is forced to stream assets across the PCIe bus from system RAM. This causes catastrophic stuttering and single-digit frame drops. If you want to dive deeper into how memory constraints trigger real-world engine failures, check our deep dives on ELEX crash prevention and FPS stability along with troubleshooting system limits in EscapeVR low framerate fixes. Keep textures at the maximum setting your VRAM pool can natively hold.
Anisotropic Filtering (Lock to 16x)
Anisotropic filtering sharpens textures rendered at extreme or oblique viewing angles—such as looking down a long cobblestone street or across a wide wooden floorboard plane. Modern GPUs feature dedicated hardware samplers that perform this math almost instantaneously. The performance delta between 2x and 16x anisotropic filtering on any GPU built in the last decade is less than 1 FPS. Leaving this setting below 16x makes your game look blurry and muddy just a few virtual yards in front of your character. Turn it to 16x in the game menu, or force it globally in your graphics driver software, and leave it there permanently.
Mesh and Geometry Detail (LOD)
Mesh quality governs how many polygons make up 3D character models, vehicles, and environmental architecture, as well as the distance at which low-detail models swap in (Level of Detail or LOD). On modern multi-core processors, geometry throughput is heavily optimized. Dropping mesh quality down to Low causes jarring object "pop-in" right in front of your eyes while you explore. Leaving geometry at High ensures clean silhouettes and consistent sightlines without significantly penalizing your GPU's rasterization engine.
Upscaling and Frame Generation: DLSS, FSR, and XeSS Done Right
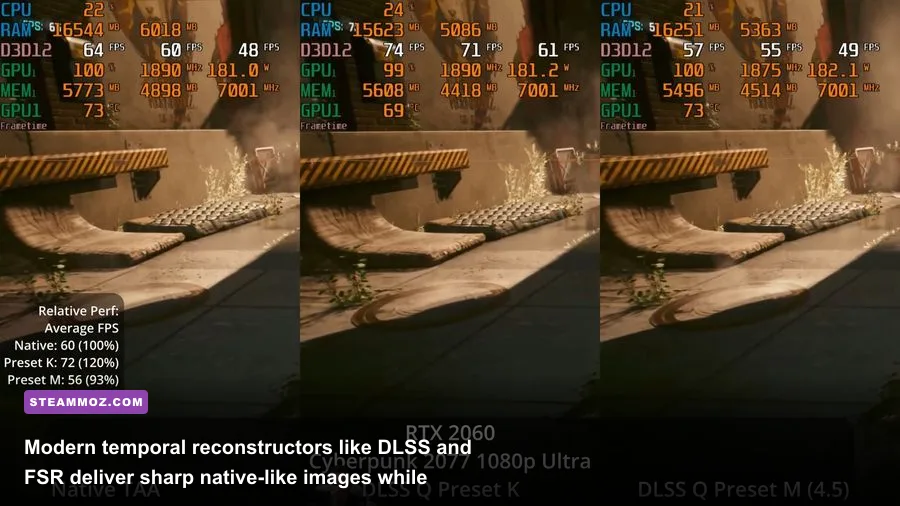
The days of playing games strictly at native output resolution are rapidly ending. Modern temporal reconstructors have transformed from controversial visual crutches into state-of-the-art rendering foundations. If your game supports Nvidia Deep Learning Super Sampling (DLSS), AMD FidelityFX Super Resolution (FSR), or Intel XeSS, you are leaving massive performance on the table by ignoring them.
Here is how upscalers change the performance equation: instead of forcing your graphics card to shade every individual pixel on a 1440p (3.7 million pixels) or 4K (8.3 million pixels) monitor, the engine renders the scene at a lower internal resolution. An AI-trained neural network (DLSS) or advanced spatial-temporal algorithm (FSR/XeSS) then analyzes motion vectors, depth buffers, and previous frame data to reconstruct an output image that frequently looks sharper and exhibits less temporal shimmer than native resolution running standard TAA.
| Upscaler Mode | Internal Render Scale | Input Resolution (1440p Output) | Input Resolution (4K Output) | Recommended Use Case |
|---|---|---|---|---|
| DLSS / FSR Quality | 66.7% per axis | 1706 x 960 | 2560 x 1440 | Default sweet spot. Visually matches or beats native TAA with a 30-40% FPS leap. |
| DLSS / FSR Balanced | 58.0% per axis | 1485 x 835 | 2227 x 1252 | Ideal for 1440p ultrawide or pushing 4K monitors on mid-range GPUs. |
| DLSS / FSR Performance | 50.0% per axis | 1280 x 720 | 1920 x 1080 | Superb at 4K output. Avoid at 1080p, as 540p input lacks detail for reconstruction. |
| Ultra Performance | 33.3% per axis | 853 x 480 | 1280 x 720 | Emergency reserve mode designed specifically for 8K gaming or extreme handhelds. |
A vital warning regarding Optical Multi-Frame Generation (DLSS 3 / FSR 3): frame generation does not improve your controller or mouse responsiveness. It inserts synthetic, AI-interpolated frames between traditionally rendered frames to smooth out visual motion on high refresh rate displays. However, your actual input latency is governed strictly by your base frame rate. If your game is struggling along at 35 FPS, turning on Frame Generation might display 60 FPS on your monitoring software, but the mouse will still feel sluggish and unresponsive. Always tune your baseline settings to hit a rock-solid, responsive 60 FPS before activating Frame Generation to boost the visual delivery up to 100+ FPS.
Before locking into aggressive rendering profiles, make sure your baseline hardware is properly calibrated by reviewing technical requirements in guides like our Fatal Fury City of the Wolves PC specs breakdown.
Windows and Driver Level Tweaks for True Frame Pacing
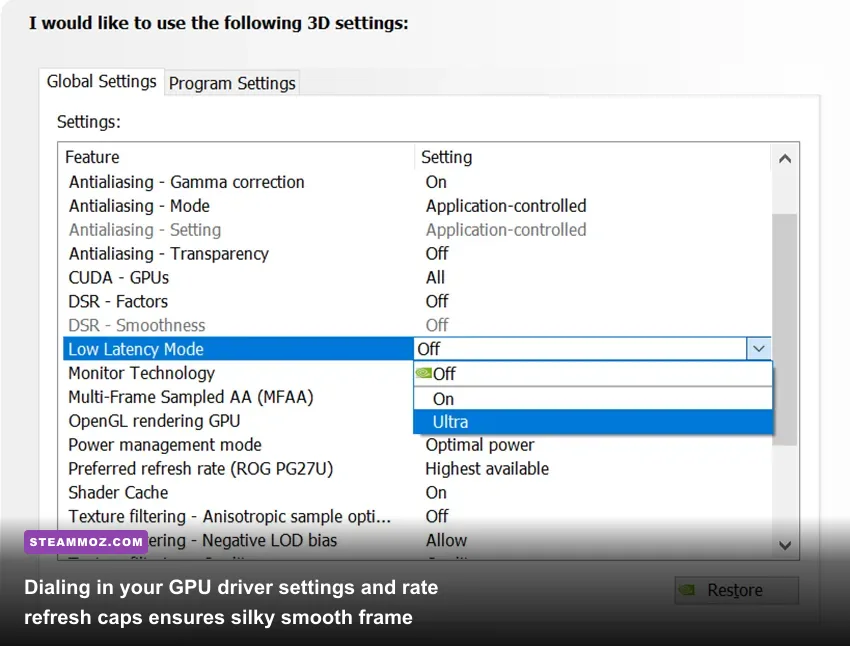
Even if your in-game visual settings are tuned to mathematical perfection, background operating system bottlenecks and poorly configured display drivers can sabotage your frame delivery. Smoothness isn't simply high average FPS; it is the uniform arrival of every frame to your eyeballs at identical intervals.
1. Hardware-Accelerated GPU Scheduling (HAGS)
Windows includes a native scheduling engine designed to pass memory management directly to a dedicated scheduling processor on modern graphics cards. To turn this on, open your Windows Settings, head to System > Display > Graphics, click "Change default graphics settings," and toggle Hardware-Accelerated GPU Scheduling to "On." This reduces CPU communication overhead, trims input latency, and is a strict mandatory prerequisite if you plan on using Nvidia or AMD Frame Generation technologies.
2. The Golden Rule of Variable Refresh Rate (G-Sync and FreeSync)
Gamers frequently set up their high-refresh adaptive monitors incorrectly, leading to jarring visual tear lines when frame rates spike past display thresholds. Follow this proven low-latency rule:
- Enable G-Sync or FreeSync in your graphics card control panel for both Fullscreen and Windowed modes.
- Inside the Nvidia Control Panel or AMD Software, set global Vertical Sync to ON. (Do not enable V-Sync inside the game menu itself; let the driver handle the buffer management).
- Cap your maximum frame rate 3 to 4 FPS below your monitor's maximum refresh rate using the driver-level limiter or RTSS (RivaTuner Statistics Server). If you run a 144Hz panel, lock your cap at 141 FPS; if you run a 240Hz panel, set it to 237 FPS.
This ensures your graphics card never outpaces the variable refresh rate window. It prevents screen tearing entirely while avoiding the harsh input latency penalty historically associated with standard double or triple-buffered V-Sync.
3. Driver Shader Cache Allocation
Shader compilation hitching has become the bane of modern PC gaming on both Unreal Engine and custom DirectX 12 titles. By default, the Nvidia driver sets your shader cache limit to a modest size. In the Nvidia Control Panel under "Manage 3D Settings," find Shader Cache Size and increase it from the default driver value to 10 GB or even "Unlimited" if you have ample SSD space. This ensures compiled pipeline states remain stored locally on your ultra-fast NVMe drive instead of being purged and recompiled on the fly, eliminating those random, immersion-breaking pauses during combat.
Banishing Micro-Stutter and Rescuing 1% Lows
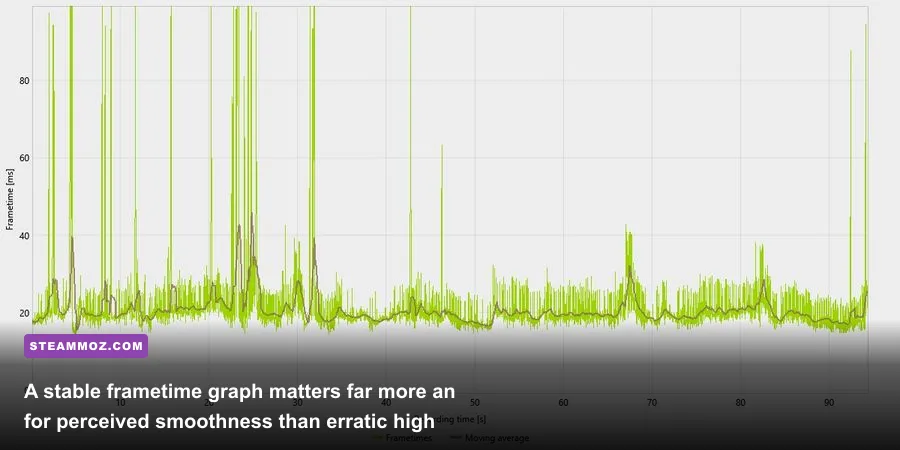
Nothing shatters an immersive gaming session faster than micro-stutter. You might look up at your monitoring overlay, see a comfortable "120 FPS" read-out, yet the actual gameplay feels jittery and inconsistent. This disconnect occurs because traditional performance overlays measure average frame rates across a rolling 1000-millisecond window. If 119 frames render in 5 milliseconds each, but one single frame stalls for 150 milliseconds due to an asset loading spike or shader compilation hitch, your average still reads high while your eye registers a jarring freeze.
To eliminate these micro-stutters, audit your background ecosystem. Disable hardware acceleration inside background messaging platforms, web browsers, and music streaming clients running on secondary monitors. These apps routinely compete with your game for access to the GPU's desktop window manager (DWM), prompting random frame drops during intense combat rotations.
Furthermore, keep background recording software configured intelligently. Tools like Windows Game Bar capture or third-party clipping utilities that constantly write raw gameplay buffers directly to the same drive hosting your game files can overwhelm drive queue depths. Route temporary recording files to a secondary high-speed drive, keep your operating system updated, and inspect game patch release notes regularly on official platforms like the Steam client to ensure dynamic shader pipelines are fully stabilized.
By taking ownership of your graphics settings rather than surrendering to default manufacturer presets, you gain total control over your PC gaming experience. Strip out the invisible compute bloat of volumetric fog and runaway shadow buffers, max out your texture filtering and geometry detail, pair temporal reconstruction with variable refresh pacing, and enjoy the flawless balance of high-framerate responsiveness and stunning visual clarity your gaming PC was built to deliver.