If your crosshair feels like it's dragging through wet cement, your frame rates swing wildly during firefights, or your high-end rig hitches on every camera swipe, you aren't alone. You don't need to drop two grand on a new graphics card to fix this. More often than not, sluggish response times and micro-stutters stem from misconfigured Windows services, botched GPU driver queues, hidden DPC latency spikes, and mismatched monitor sync settings. By tackling your operating system's background thread management, dialing in your driver-level frame buffers, calibrating variable refresh rates properly, and isolating hardware polling bottlenecks, you can turn a floaty, jittery mess into a razor-sharp, instantaneous gaming machine.
1. Purging Windows Overhead: Taming DPC Latency and Background Hogging
Before you touch an in-game graphics slider, you have to clean house inside Windows. An operating system doing background telemetry and disk indexing while you play creates Deferred Procedure Call (DPC) latency. When a system driver hogs CPU cores with high DPC execution times, your game engine gets forced to wait for render cycles. The result? Instant micro-stutters, even if your overlay insists you're running at 140 FPS.
Grab a free diagnostic tool like Resplendence LatencyMon. Boot it up, click the green play button, and play your favorite shooter for ten minutes. If the main screen flashes red warning text pointing to drivers like nvlddmkm.sys (NVIDIA kernel), wdf01000.sys (Windows Driver Framework), or ndis.sys (network driver), you have found your problem. A healthy competitive setup maintains routine DPC execution times well below 500 microseconds; bad configurations frequently breach 2,000 microseconds, causing noticeable mouse float and stutter.
To eliminate these spikes, make targeted adjustments inside Windows 11:
- Game Mode: Turn this ON. In the early days of Windows 10, Game Mode was notorious for crashing games. Today, Microsoft uses it to prioritize GPU and CPU resources for your active game window while suspending background Windows Update tasks. Check out Microsoft Windows Gaming Optimization guidelines to see how thread scheduling shifts priorities.
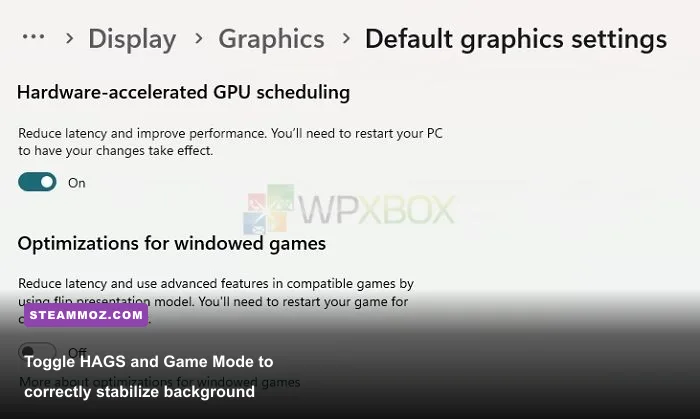
- Hardware-Accelerated GPU Scheduling (HAGS): Found under System > Display > Graphics > Default Graphics Settings. Toggle HAGS ON if you plan to use modern frame generation tools (like DLSS 3 or FSR 3), or if you run a modern RTX or Radeon 6000/7000 card. HAGS offloads VRAM scheduling from the CPU directly to a dedicated processor on the GPU, lowering input lag in CPU-bound scenarios. However, if you are stuck on an older GTX 10-series or RX 500-series card, test toggling it off—older architectures can experience stability hitches with HAGS engaged. Similar system-level quirks often plague older engines, much like the steps we outline in our EscapeVR The Basement crashing and low FPS fixes.
- Core Isolation (Memory Integrity / VBS): Search for Core Isolation in your Windows start menu. If your PC is dedicated purely to gaming and low latency, consider switching Memory Integrity OFF. Virtualization-Based Security (VBS) introduces virtualization overhead that penalizes CPU-heavy titles by anywhere from 3% to 8% of baseline frame pacing consistency.
- Power Plan Configuration: Don't bother with extreme, registry-bloating custom power plans. Simply set Windows to Balanced or High Performance. On modern multi-cache CPUs (like AMD Ryzen X3D chips with asymmetric 3D V-Cache), the default Balanced plan is actually mandatory. It works in tandem with the AMD Chipset Driver to ensure gaming workloads stick to the V-Cache CCD rather than spilling onto the higher-frequency standard cores.
2. Display & Refresh Rate Calibration: Escaping the 60Hz Trap
You would be amazed by how many players drop serious cash on a 165Hz, 240Hz, or 360Hz gaming monitor only to run it at 60Hz for months because Windows defaulted to standard desktop timings. If your mouse feels sluggish right on your desktop wallpaper, your panel isn't communicating its actual refresh capability.
Right-click your desktop, select Display Settings > Advanced Display, and inspect your Choose a refresh rate dropdown. If your 144Hz monitor is reading 59.94Hz or 60.00Hz, lock it to its true maximum right here. If the higher refresh rate option doesn't appear, inspect your cable. Ditch standard HDMI cables in favor of certified DisplayPort 1.4/2.1 or certified Ultra High Speed HDMI 2.1 cables. Older HDMI ports frequently choke bandwidth, capping resolution or locking refresh rates down.
Next up is the Holy Trinity of tear-free, low-lag display technology: G-SYNC/FreeSync, V-Sync, and Frame Rate Caps. For years, the conventional wisdom was "never turn V-Sync on if you care about latency." That rule only applied to legacy fixed-refresh monitors. On modern Variable Refresh Rate (VRR) panels, the setup rules are completely inverted, backed up by exhaustive research from the specialists at the Blur Busters G-SYNC 101 Guide.
Here is the exact formula for pristine frame delivery with zero tearing and virtually nonexistent input lag:
- Enable G-SYNC / FreeSync in your GPU control panel for both fullscreen and windowed modes.
- Enable V-Sync in your GPU Driver Control Panel (not inside the game settings). Driver-level V-Sync on a VRR monitor does not operate like old-school double-buffered V-Sync. Instead, it prevents bottom-of-the-screen frame tearing when frame times rapidly shift.
- Disable V-Sync inside your game's video menu to avoid conflicting buffer queues.
- Cap your frame rate 3 to 4 FPS below your monitor's maximum refresh rate. If you are on a 144Hz panel, cap at 141 FPS; on a 240Hz panel, cap at 237 FPS; on a 360Hz panel, cap at 355 FPS.
Why cap your frame rate below maximum? Because if your frame rate reaches or exceeds your monitor's refresh ceiling (say, 145 FPS on a 144Hz panel), G-Sync turns off. The moment it turns off, traditional V-Sync engages, forcing frames into a buffer queue and instantly spiking your input lag by 15 to 40 milliseconds. The slight cap guarantees your monitor never leaves its active VRR operating window.
| Monitor Refresh Rate | Optimal FPS Cap | Sync Tech Active | Input Latency Profile | Screen Tearing Risk |
|---|---|---|---|---|
| 60 Hz | 57 FPS | G-Sync / FreeSync + Driver V-Sync | Medium (Hardware Bound) | Zero |
| 144 Hz | 141 FPS | G-Sync / FreeSync + Driver V-Sync | Ultra-Low (~4.2ms frame delivery) | Zero |
| 165 Hz | 161 FPS | G-Sync / FreeSync + Driver V-Sync | Ultra-Low (~3.8ms frame delivery) | Zero |
| 240 Hz | 237 FPS | G-Sync / FreeSync + Driver V-Sync | Near-Instant (~2.6ms frame delivery) | Zero |
| 360 Hz | 355 FPS | G-Sync / FreeSync + Driver V-Sync | Competitive Tier (<2.0ms frame delivery) | Zero |
3. Driver Settings Deep Dive: NVIDIA, AMD, and Low-Latency Modes
Default GPU driver installations cater to media stability and energy savings rather than responsiveness. When you install a fresh driver package, your graphics card wants to sleep whenever it can and buffer frames to ensure cinematic smoothness. For competitive gaming, buffer queues are the enemy.
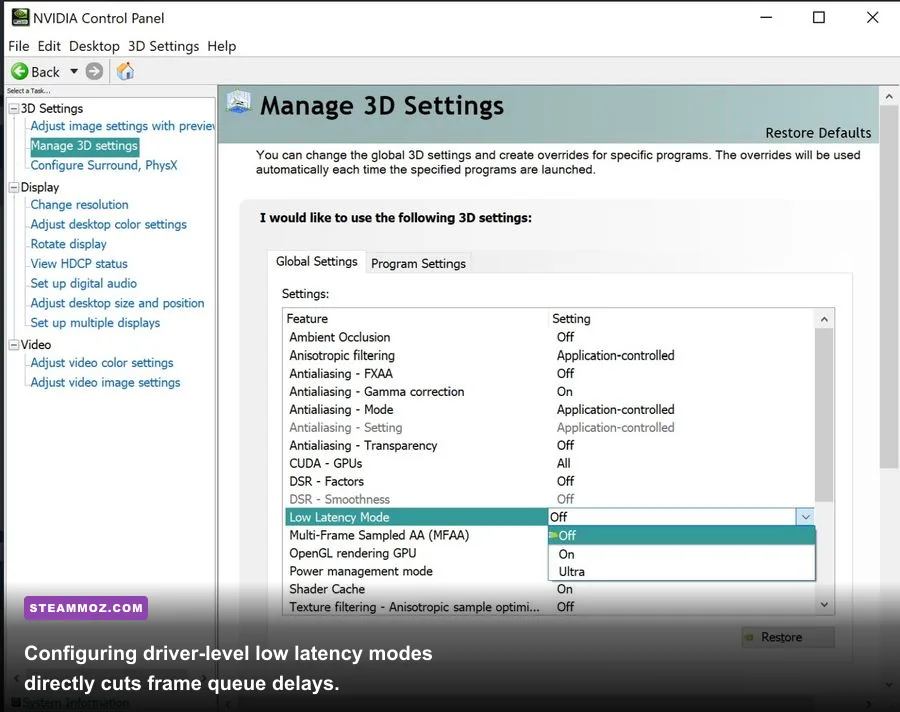
Open the NVIDIA Control Panel or AMD Software: Adrenalin Edition and manually adjust your global 3D parameters. If you're hunting down sudden framerate collapses in demanding open-world games, tweaking these parameters works wonders—just like the stability optimizations we recommend in our guide for Elex PC fixes that stop crashes and rescue your FPS.
NVIDIA Control Panel: The Competitive Preset
- Low Latency Mode: Set to On or Ultra. "On" limits pre-rendered frames queued by the CPU to just 1. "Ultra" dynamically holds the CPU from processing draw calls until the very moment the GPU is ready to render the frame. If the game natively supports NVIDIA Reflex, Reflex overrides this setting automatically and manages the pipeline inside the engine.
- Power Management Mode: Set to Prefer Maximum Performance (or Optimal Power if you dislike high idle clocks when on the desktop). Prefer Maximum Performance prevents the GPU from downclocking during brief quiet moments in-game, avoiding the millisecond clock-ramp stutter that happens when an explosion suddenly rocks your screen.
- Shader Cache Size: Set this to 10 GB or higher. The default driver setting lets Windows purge shader caches whenever disk space gets tight. Every time a game compiles shaders on the fly, you experience an agonizing micro-freeze. Giving your shader cache 10 GB of leeway ensures compiled shaders stay on your fast NVMe drive permanently.
- Max Frame Rate: Set your frame cap here if your game lacks a robust internal frame limiter. Driver-level capping via the control panel introduces less input delay than third-party injection hooks.
AMD Software: Adrenalin Edition Settings
If you're rocking Team Red, head into Gaming > Graphics:
- Radeon Anti-Lag: Toggle Enabled. Anti-Lag dynamically paces CPU work to ensure it doesn't get too far ahead of the GPU, dramatically reducing input delay in GPU-bound titles.
- Radeon Chill: If you prefer an intuitive frame limiter that saves power while maintaining responsiveness, set your Min and Max Chill targets to identical numbers (e.g., 141 and 141 for a 144Hz panel).
- Radeon Enhanced Sync: Turn this OFF if you already use FreeSync with an FPS cap, as it can occasionally trigger erratic frametime pacing when frame rates bounce near the refresh boundary.
| Driver Setting | Recommended Value | Latency & FPS Impact | Why It Matters |
|---|---|---|---|
| NVIDIA Low Latency Mode | On / Ultra | Reduces input latency by up to 35% | Shrinks pre-rendered frame queue depth on CPU threads. |
| Shader Cache Size | 10 GB | Eliminates traversal & asset hitches | Stops constant shader recompilation on your primary drive. |
| Power Management Mode | Prefer Max Performance | Stabilizes frametime floor | Keeps core/memory clocks pegged during sudden in-game action. |
| Anisotropic Filtering | 16x (Driver Level) | Negligible (<1% FPS) | Sharpened floor/wall textures at extreme angles with near-zero tax. |
| AMD Radeon Anti-Lag | Enabled | Cuts input lag in GPU-bound states | Synchronizes CPU draw instructions with GPU availability. |
4. Frame Pacing and Reflex: Why Raw FPS Isn't Telling You the Whole Truth
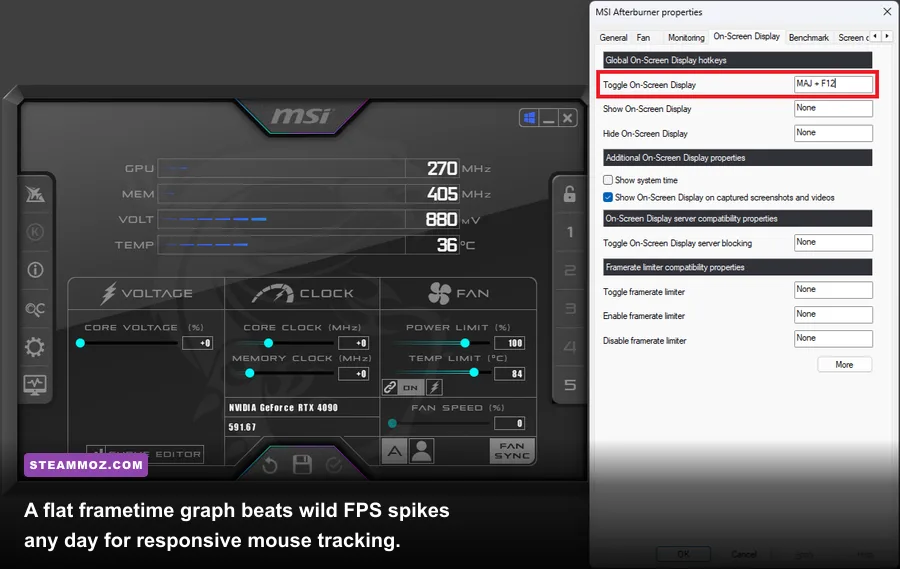
A staggering average FPS figure is one of the biggest marketing traps in PC gaming. An erratic 200 FPS setup where frame times swing violently between 4ms and 25ms will feel noticeably worse, less predictable, and more sluggish than a rock-solid, locked 120 FPS setup running at a flat 8.3ms frametime line.
When your graphics card runs pegged at 99% or 100% capacity, render queues back up. Your CPU pumps out frames as fast as possible, queuing them up while waiting for the saturated GPU to chew through the workload. This back-pressure introduces severe, noticeable input latency—often adding 30 to 50 milliseconds of pure mouse float. This is the exact scenario you see addressed in heavy tactical games, and it's why balancing visual sliders is critical, as highlighted in our guide to Far Cry 6 GOTY settings for max FPS.
To break this bottleneck, implement NVIDIA Reflex Low Latency or AMD Anti-Lag+ whenever games offer the option natively. NVIDIA Reflex integrates directly into the game engine's render loop. The moment it detects the GPU approaching full saturation, it automatically instructs the CPU to briefly hold back draw calls, clearing the render queue entirely. By keeping the pipeline empty, the frame displayed on your screen represents the absolute latest input you gave your mouse milliseconds ago.
When selecting Reflex options, you will typically see On and On + Boost:
- Reflex On: Actively clears the render queue and caps frame rates below your monitor's VRR threshold automatically.
- Reflex On + Boost: Does everything standard Reflex does, but also forces your GPU clock speeds to remain at their absolute peak state, even when your CPU temporarily bottlenecks the action. Use "On + Boost" if you are playing high-intensity shooters where micro-second frame delivery means winning or losing a duel.
If your game doesn't support Reflex or Anti-Lag, use an in-engine frame rate cap to limit performance just below your GPU's breaking point. If you notice your GPU hits 99% load at 180 FPS, try capping your frame rate at 160 FPS. Your GPU usage will sit comfortably around 90-93%, your internal render queue will stay completely clear, and your mouse movements will immediately feel snappy and direct. For deep-dive performance tweaks that resolve sudden resource freezes in specialized titles, take a look at our breakdown for Everspace 2 crashing and low FPS fixes.
5. Peripheral Polling and Audio Drivers: The Micro-Stutter Culprits Nobody Checks
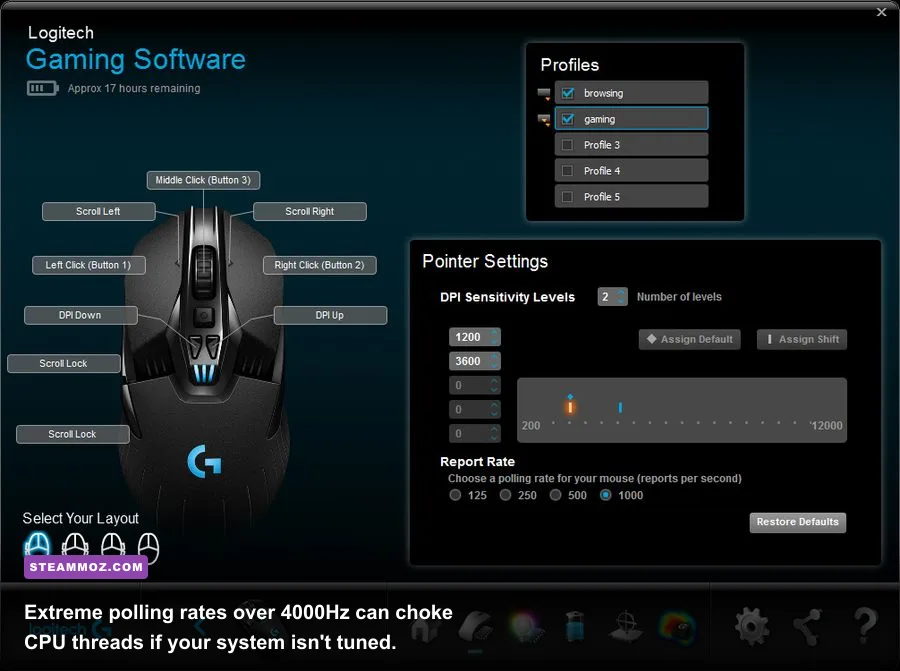
You have optimized Windows, fine-tuned your display, and set up your GPU drivers, yet you still get a baffling micro-stutter every single time you flick your mouse across a mousepad. What gives? The culprit is almost certainly your peripheral polling rate or an unshielded onboard audio driver.
High-polling-rate mice boasting 4,000Hz or 8,000Hz reporting intervals have flooded the market. While sending an input report every 0.125 milliseconds sounds incredible on paper, the computational cost on your CPU is massive. Standard Windows thread architecture struggles when an external device fires 8,000 hardware interrupts per second into a single CPU core. If you run an older or mid-range processor without massive single-core headroom, moving an 8K mouse sweeps CPU usage up by 15% to 25%, causing sudden frametime drops in titles that demand heavy CPU draw calls. For similar frame-smoothing advice on geometry-heavy games, consult our review of Filament Marmalade Edition settings for higher FPS.
Unless you run a top-of-the-line processor (like an Intel Core i9-14900K or AMD Ryzen 7 7800X3D/9800X3D) alongside a 360Hz+ monitor, set your mouse polling rate to 1,000Hz or 2,000Hz max. At 1,000Hz, your reporting delay is a tiny 1 millisecond, consuming negligible CPU overhead while offering rock-solid stability across every gaming engine.
Finally, inspect your audio setup. Many motherboards ship with generic Realtek onboard audio chips that rely on bloated background software suites (such as Sonic Studio, Nahimic, or DTS Sound Unbound). These audio suites inject background hooks into every running process on your machine, wreaking havoc on memory latency.
Follow these quick peripheral cleanup steps:
- Uninstall Third-Party Audio Bloat: Strip out Nahimic and Sonic Studio. Run standard Microsoft high-definition audio drivers or use an external USB DAC/Amp that operates on clean, class-compliant drivers.
- Spread USB Controller Bandwidth: Do not plug your high-bandwidth USB devices (webcams, audio interfaces, external SSDs, and high-polling mice) into the same cluster of USB ports. Check your motherboard manual to find which USB ports connect directly to the CPU lanes versus the motherboard chipset. Plug your mouse and keyboard directly into the dedicated CPU-linked ports to shave off chipset controller routing latency.
- Disable Unused Sound Devices: In Windows Sound Control Panel, right-click and disable every output and input you do not actively use, especially monitor audio pass-throughs over DisplayPort/HDMI. This stops Windows from constantly querying inactive audio pipelines during gameplay.
| Component / Subsystem | Common Mistake | Optimal Competitive Setting | Latency & Stability Gain |
|---|---|---|---|
| Mouse Polling Rate | Leaving at 8000Hz on mid-tier CPU | 1000 Hz or 2000 Hz | Eliminates CPU interrupt hitching entirely |
| USB Port Routing | Plugging mouse into front chassis hub | Direct rear I/O (CPU-routed port) | Removes ~1-2ms hub controller transit time |
| Audio Device Drivers | Running bundled OEM audio bloatware | Clean Class-Compliant / External DAC | Purges DPC audio-buffer spikes in LatencyMon |
| Monitor Color Space | Default YCbCr422 8-bit limited | RGB 10-bit / 8-bit Full Dynamic Range | Crisp pixel edges and zero banding artifact latency |
| In-Game Rendering Mode | Exclusive Fullscreen vs Borderless | Borderless (Win 11) or Exclusive (Win 10) | Win 11 Flip Model delivers lowest input lag |
Tuning your gaming PC isn't about applying mysterious registry scripts or chasing snake-oil "FPS booster" software that ends up breaking system files. It's about aligning the entire hardware and software pipeline: giving Windows clear scheduling lanes, ensuring your graphics card renders frames without queuing back-pressure, keeping your monitor locked within its active variable refresh window, and keeping your USB bus clean. Run through these tweaks methodically, verify your improvements with LatencyMon, and enjoy crisp, instantaneous response every single time your mouse moves.