
To eliminate stuttering, micro-freezes, and high input latency on a Razer PC or Razer Blade laptop, you need to strip down background polling overhead, disable aggressive software RAM management, force your hardware MUX switch to direct GPU mode, and resolve DPC latency conflicts introduced by THX Audio and Chroma modules. While Razer manufactures some of the sleekest, highest-spec portable gaming machines on the market, their default software suite and thermal power caps introduce hidden latency traps that cripple real-time gaming response. Tweaking these settings transforms a sluggish, thermal-throttled rig into a razor-sharp esports contender.
Kill the Bloat: Taming Razer Synapse and Cortex Background Leaks
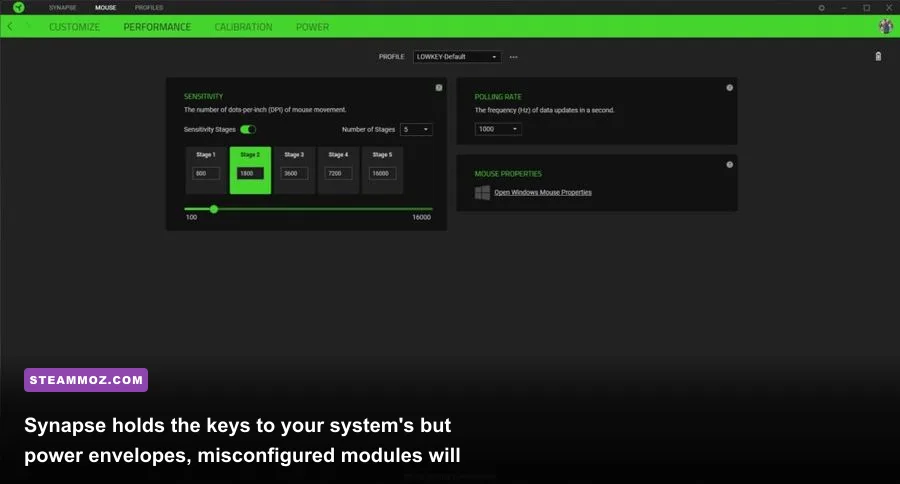
The primary culprit behind erratic frametime spikes on Razer systems is the proprietary software ecosystem running in the background. Razer Synapse is responsible for managing lighting, macro bindings, and hardware profiles, but its companion software—Razer Cortex—is often packaged alongside it as an alleged "system booster." In reality, Cortex behaves like an aggressive memory cleaner. When Cortex purges memory working sets while you play modern titles, it forces the Windows memory manager to constantly retrieve purged data from your SSD, producing massive hitching and hard page faults. If you want seamless frame delivery similar to our setup in fixing frametime pacing and crashes, you should uninstall Razer Cortex immediately through Windows Add or Remove Programs.
Synapse itself isn't innocent either. The software launches half a dozen sub-services upon system startup, including Razer Chroma SDK Core Services, Razer Central Service, Game Manager Service, and the Synapse Service Host. The Chroma lighting engine hooks directly into Windows graphical application programming interfaces (APIs) and DirectInput to sync in-game health and cooldown effects with your keyboard illumination. This continuous polling hook introduces measurable system overhead.
To curb this drain without losing your baseline hardware configurations, open Synapse, navigate to the Modules tab, and uninstall everything you don't actively rely on—specifically Razer Chroma Studio, Chroma Visualizer, and Alexa Integration. Next, head over to the Synapse Settings menu (the cog icon in the top right), toggle off Automatic Updates during gameplay sessions, and disable Razer Central System Tray Notifications. If your peripherals feature onboard memory profiles, save your primary DPI, keybindings, and static lighting profiles directly to the hardware firmware. Once flashed, you can set the Razer Synapse service to "Manual" in Windows Services (services.msc) and prevent it from starting automatically at boot. Your hardware retains its custom mapping without a single background cycle lost to software bloat.

🎮 FORM
Looking to experience this game? Grab your digital key directly on our store for $14.99.
View on Steammoz Store →Eliminating High Polling Rate Stutter and Input Lag Traps
Razer pioneered the push toward ultra-high polling rates with HyperPolling technology, marketing mice and keyboards operating at 4,000Hz and 8,000Hz. While querying input every 0.125 milliseconds sounds incredible on paper, real-world execution frequently shatters performance on even top-tier Intel Core i9 and AMD Ryzen 9 machines. When you sweep an 8K polling mouse across your mousepad, it floods the Windows operating system with up to 8,000 Hardware Interrupt Requests (IRQs) per second. Windows directs these interrupts to CPU Core 0 by default, instantly saturating a single processing thread and starving the game engine's render loop.
If you're playing competitive shooters like Valorant, Apex Legends, or Counter-Strike 2, moving your cursor at 8,000Hz will manifest as sudden, jarring frame drops whenever you flick toward an enemy. To verify and resolve this issue, launch Razer Synapse, select your mouse under the devices bar, open the Performance sub-menu, and check your current Polling Rate. Unless you are running an unconstrained desktop processor with raw input processing explicitly supported by the game engine, drop your polling rate down to 1,000Hz or 2,000Hz.
Running at 1,000Hz delivers a responsive 1.0ms reporting interval with virtually zero interrupt overhead on modern multi-core processors. If your game engine supports "Raw Input Buffer" settings in its control menu, turn it on; this bypasses the Windows desktop window manager input stack entirely. For players fighting similar hardware-level stutter in other heavy engines, addressing these baseline input bottlenecks is just as vital as resolving performance hits outlined in our driver conflict and stutter guide.
Display Latency and MUX Switch Calibration: Unlocking True dGPU Performance
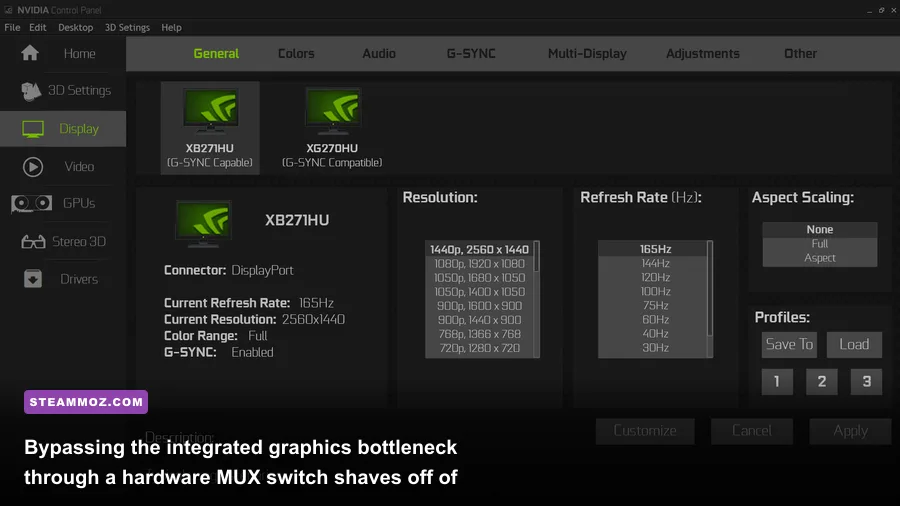
If you're gaming on a Razer Blade 14, 15, 16, or 18, you are operating on mobile hardware that juggles an integrated GPU (iGPU) inside your processor and a discrete Nvidia GeForce RTX graphics chip (dGPU). By default, many Razer laptops ship configured in Nvidia Advanced Optimus or dynamic display switching mode. In this state, the discrete GPU renders the game frame, but it must pass that finished frame across the PCIe bus to the integrated Radeon or Intel UHD graphics processor, which physically connects to the internal display panel.
This passthrough injects an unavoidable 8ms to 15ms display latency penalty into your pipeline, while simultaneously stripping away roughly 5% to 15% of your maximum potential framerate due to PCIe bandwidth contention. To eliminate this visual latency, you must bypass the integrated graphics completely using the laptop's internal MUX switch. Open Razer Synapse, click on your Razer Blade laptop dashboard, head to the Performance tab, look for the GPU Working Mode or Display Mode toggle, and switch it from "Optimus" (or "Automatic Select") directly to "Dedicated GPU Only". This setting requires a full system restart. When the machine boots back up, your display communicates directly with the Nvidia silicon, unlocking hardware-level G-Sync, lower render latency, and higher 1% low frametimes.
| Display / GPU Mode | Routing Mechanism | Input Latency Impact | Recommended Use Case |
|---|---|---|---|
| Nvidia Optimus (Hybrid) | dGPU renders -> routes through iGPU to screen | +10ms to 18ms Latency | Pure battery conservation away from wall outlets |
| Advanced Optimus (Auto) | Dynamic hardware switch based on application state | +3ms to 6ms Latency (Occasional switching hitch) | Casual mixed productivity and intermittent light gaming |
| Dedicated GPU (dGPU MUX) | Direct physical link between Nvidia chip and display | Lowest Latency (Near-Zero Added Routing Lag) | Competitive esports, high refresh gaming, maximum FPS |
| External Monitor (via dGPU DP/Type-C) | Direct display protocol from rear dedicated ports | Lowest Latency (Identical to Desktop dGPU) | Desktop replacement setups at high resolutions (1440p/4K) |
After forcing the dedicated GPU, open the official Nvidia Control Panel to make sure your refresh rate hasn't reverted to a battery-saving 60Hz. Under Change Resolution, confirm the native refresh rate (e.g., 240Hz, 300Hz, or 360Hz) is actively highlighted. Then, enter the Manage 3D Settings menu, locate "Low Latency Mode", and switch it to On (or Ultra if you are GPU-bound and not using in-game Nvidia Reflex). Reflex overrides this setting inside supported titles, keeping your render queue empty to ensure instantaneous mouse-click-to-muzzle-flash response times, a setup we frequently emphasize in deep technical optimizations like our graphics settings guide.
Diagnosing DPC Latency Spikes: Fixing THX Audio and Driver Interrupts
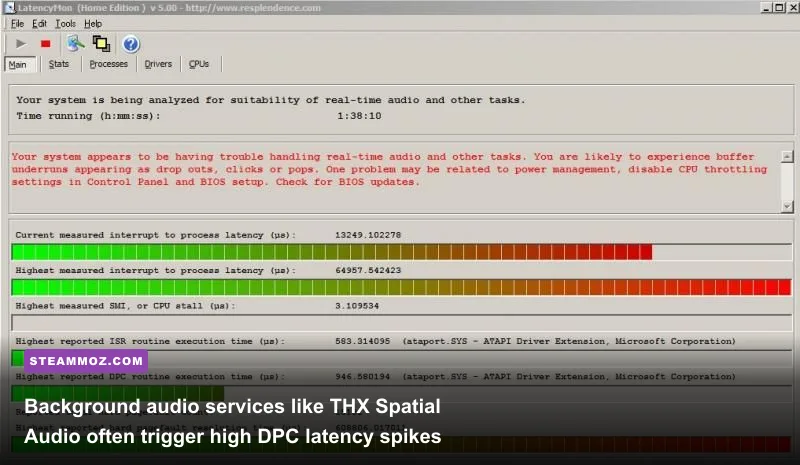
Deferred Procedure Call (DPC) latency measures how effectively your operating system processes background driver routines. If a single audio, network, or graphics driver takes too long to execute its tasks, the Windows kernel delays everything else—including input polling and frame dispatching. On Razer hardware, extreme DPC latency spikes manifest as audible sound popping, brief freezes during intense firefights, and inexplicable cursor drag. Two recurring drivers cause over 80% of these spikes on Razer machines: the THX Spatial Audio driver suite and outdated wireless network interface controllers (NICs).
THX Spatial Audio runs as a virtual multi-channel audio interface sandwiched between your operating system and your real sound hardware (Realtek High Definition Audio or USB DACs). Often, Windows updates disrupt this pipeline, forcing sample rate mismatches. When Windows defaults to 44,100Hz while the THX service attempts to output at 48,000Hz, the system resamples audio streams on the fly, flooding the kernel with wdf01000.sys driver calls. To check this on your machine, download Windows Hardware diagnostic tools or LatencyMon to run an audio latency benchmark while your favorite game is running.
To resolve audio-related DPC latency, press Win + R, enter mmsys.cpl to open the legacy Sound Control Panel, select your active playback device, and click Properties. Head to the Advanced tab and change the Default Format to 24-bit, 48000 Hz (Studio Quality). Next, navigate to the Spatial Sound tab and turn it to Off unless you are specifically competing in an environment that requires simulated surround. If you use a physical headset plugged into a 3.5mm headphone jack, uninstall THX Spatial Audio completely through the Windows device manager and let the native Realtek driver manage output with standard stereo panning. Stereo imaging provides crisper acoustic separation and completely cures audio-induced driver hitching.
For network-related latency spikes, update your Wi-Fi drivers straight from the chip vendor (Intel or Qualcomm) rather than waiting for Windows Update. In Device Manager, locate your wireless adapter, select Properties, navigate to Advanced, and disable Roaming Aggressiveness (set it to "Lowest"). This stops your laptop from constantly polling nearby network beacons mid-game, stabilizing wireless ping times and preventing sudden hardware interrupt halts, a practice that works wonders when resolving engine-level hitches like those covered in our engine-level optimization analysis.
Tuning Razer Synapse Custom Power Limits and Thermal Throttle Thresholds

Razer Blade chassis are engineered from compact CNC aluminum enclosures. Because aluminum conducts heat rapidly, Razer applies conservative power limits to prevent the machine from becoming uncomfortable to the touch. By default, Synapse runs in the "Balanced" power profile. Under this profile, the system places strict thermal throttle limits on both the CPU and GPU. The moment your graphics card hits 75°C or your CPU touches 85°C, the internal embedded controller (EC) severely cuts clock speeds, creating an infuriating performance cliff where your GPU clock drops from 2,300MHz down to 1,200MHz for several seconds until temperatures normalize.
To eliminate this thermal rollercoaster, you need to open Synapse, navigate to the Performance tab for your laptop, select Custom mode, and manually adjust the power sliders. Set the CPU to "Boost" (or "High") and the GPU to "High". This reallocates the Dynamic Boost wattage overhead, allowing your Nvidia GPU to pull its maximum specified Total Graphics Power (TGP)—frequently unlocking an extra 15W to 25W of clean headroom that stabilizes 1% low frametimes. If you run into stubborn thermal thresholds on demanding releases, check out how hardware limits influence performance over on our frametime stability breakdown.
| Hardware Area | Factory Default Setting | Optimized Pro Setting | Measurable Performance Gain |
|---|---|---|---|
| Synapse Power Profile | Balanced (Dynamic Throttle) | Custom (CPU Boost / GPU High) | Eliminates 1,000MHz thermal clock drops; +12% stable FPS |
| Laptop Fan Curve | Auto (Acoustic Prioritized) | Manual (4,800 - 5,200 RPM Static) | Drops peak core temps by 6°C-9°C; halts thermal throttling |
| Mouse Polling Rate | 4,000Hz - 8,000Hz (HyperPolling) | 1,000Hz (or 2,000Hz on fast CPUs) | Fixes core 0 interrupt bottlenecks; stops mouse flick stutters |
| Display Passthrough | Hybrid / Optimus Mode | Dedicated GPU Only (MUX) | Cuts 8ms to 15ms display latency; increases baseline FPS by ~10% |
| Audio Format Buffer | 16-bit, 44,100 Hz (Resampled) | 24-bit, 48,000 Hz (Spatial Off) | Reduces DPC latency spikes below 500 µs; prevents audio popping |
| Razer Cortex Utility | Installed & Running Boost | Completely Uninstalled | Eliminates hard page faults and sudden memory-clearing hitches |
Adjusting power limits alone is half the battle; you must back it up with a proactive fan curve. The default fan behavior ramps up slowly to keep acoustic noise pleasant, but by the time the fans spin at maximum velocity, the vapor chamber is already heat-soaked. In Synapse's Custom Performance profile, set your Fan Speed from "Auto" to Manual when entering a serious gaming session. Setting your fans to run at a consistent 4,800 to 5,200 RPM prevents the initial heat spike from triggering the EC throttle limit in the first place.
Finally, pair your software optimization with physical airflow maintenance. Razer systems pull cold air through microscopic bottom grilles and exhaust through the rear hinge. Elevating the rear of your Razer laptop by just half an inch using a laptop stand or rubber feet improves incoming air volume by up to 25%, dropping internal core temperatures by roughly 4°C. Clean out dust buildup from the cooling fins every four to six months using a can of compressed air, holding the fan blades steady with a plastic toothpick to prevent back-voltage generation. If your machine is older or showing hardware errors after a fresh setup, consult the official Razer Support Knowledge Base to verify that your system is running the latest BIOS and EC firmware revisions. Keeping firmware updated ensures accurate thermal sensor reporting, letting your finely-tuned settings run uninhibited.