
The fastest way to level in Dead in Antares is not to chase the toughest enemy on the map. Run short expeditions, clear only profitable encounters, extract before your supplies collapse, and reinvest the proceeds into damage and carry capacity. For gold, sell low-value duplicates after every run, keep rare upgrade materials, and repeat the safest high-density route you can clear without using emergency items. The Supporter Edition does not turn a weak early build into a powerhouse, so efficient routing still matters more than bonus cosmetics or convenience extras.
This guide is built around the game’s expedition loop: prepare at a settlement, enter a hostile area, collect experience and loot, then return alive to convert that haul into upgrades. Patch balance can change enemy rewards and vendor prices, so treat the percentages below as route targets rather than immutable laws. The important principle never changes: experience is earned during danger, but gold is only useful after you successfully bring the reward home.
Start With a Repeatable 12-Minute Route
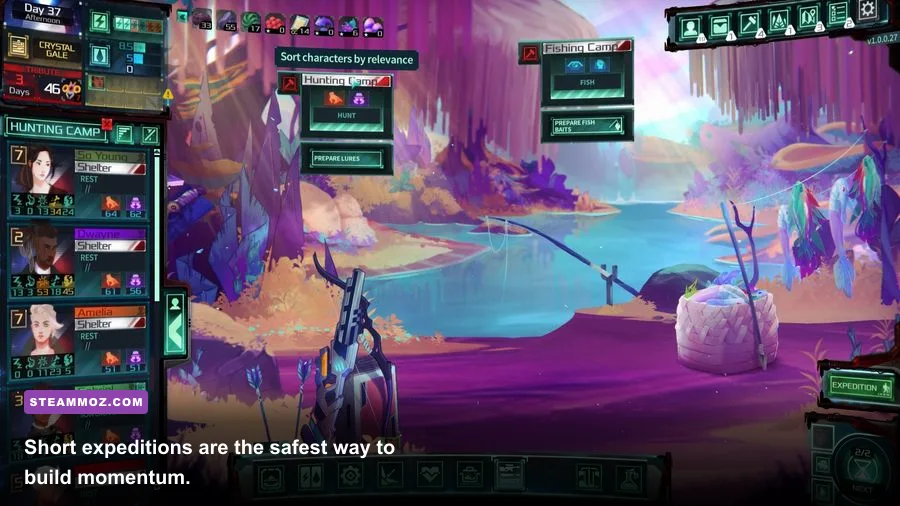
Your first objective should be a route you can finish in roughly 10 to 12 minutes. Longer runs look attractive because they contain more enemies, but they also multiply the chances of taking a bad hit, burning healing items, or returning with an overloaded inventory. A compact loop near the first reliable settlement gives you three benefits at once: predictable experience, fast vendor access, and a short reset time when the run goes wrong.
Move through the nearest cluster of weak enemies, collect only marked valuables and upgrade components, then circle back through any respawned group. Do not fight every patrol. If an encounter takes more than 30 seconds or forces you to use a healing charge, its experience value is probably being cancelled by the time and resource cost. The best early route has a clear escape lane and at least two pieces of cover. If you cannot disengage, it is a poor farming route even when the reward number looks high.
Run this loop until your primary damage option reaches its next meaningful breakpoint. A breakpoint means fewer attacks are needed to defeat the route’s common enemies. One fewer attack per target is often worth more than a small defensive upgrade because it reduces incoming damage across the entire expedition.
| Route Target | What to Clear | What to Skip | Success Benchmark |
|---|---|---|---|
| Early game | Weak groups, marked containers, guaranteed resource nodes | Elite patrols and long detours | 10–12 minutes, no emergency healing |
| Mid game | Dense enemy packs and named loot rooms | Low-value single enemies | 15–18 minutes, extraction above half supplies |
| Late game | High-value targets near an extraction point | Unplanned backtracking | 20 minutes or less, full valuable inventory |
🎮 Dead in Antares Supporter Edition
Looking to experience this game? Grab your digital key directly on our store for $17.49.
View on Steammoz Store →Build for Damage, Mobility, and Carry Space

Fast leveling in Dead in Antares is a damage-per-minute problem. Defensive stats matter, but a build that kills slowly gives enemies more opportunities to interrupt, surround, or drain your inventory of consumables. Put your first upgrade points into the stat or skill that improves your main damage source, then add mobility or stamina, and only afterward invest heavily in pure survivability.
A practical early priority is damage to 40 percent of your available upgrade budget, mobility or stamina to 30 percent, carry capacity to 20 percent, and defense to the remaining 10 percent. That is not a permanent character plan; it is a farming plan. Once you can clear your chosen route without taking repeated hits, move the next points into health or damage reduction so harder zones do not erase your profit.
Carry capacity is quietly one of the best gold upgrades. An extra inventory slot has value only if you fill it with profitable items, so do not buy capacity before your route regularly ends with a full pack. When it does, capacity becomes better than a minor damage upgrade because it increases the value of every successful extraction.
| Upgrade Priority | Recommended Share | Why It Matters | When to Change Course |
|---|---|---|---|
| Main damage | 40% | Hits experience breakpoints sooner | Common enemies already fall quickly |
| Mobility or stamina | 30% | Improves dodging, travel, and disengagement | You rarely need to reposition |
| Carry capacity | 20% | Raises gold per successful run | Inventory no longer fills before extraction |
| Defense and health | 10% | Protects your profit from mistakes | Healing costs or deaths become common |
Use a two-button combat rhythm
Do not mash your strongest attack whenever it comes off cooldown. Open with the ability that controls space, follow with your highest-damage option, then reposition before the enemy recovers. This rhythm prevents the classic farming mistake: winning the fight but losing half your health because you stood still for one extra animation.
Against groups, hit the closest target first if doing so creates an escape gap. Against a single durable enemy, keep your stamina available for the enemy’s telegraphed attack rather than spending everything on offense. A dead farmer earns no experience and drops no gold, while a slightly slower survivor can repeat the route five times.
Gold Farming Means Selling Intelligently

Gold farming is mostly inventory discipline. At the settlement, separate every item into three piles: permanent upgrades, crafting materials, and vendor trash. Never sell an item simply because its immediate price is attractive. If it is required for a weapon improvement, healing recipe, or capacity upgrade, the cost of replacing it later can exceed the sale value by a wide margin.
Sell duplicate low-tier equipment first. Keep one usable spare weapon and one backup defensive item if the game allows durability or equipment damage. Everything beyond that is dead weight during the early loop. Collect currency directly whenever possible, but treat high-value compact loot as your priority when inventory space is limited. A single valuable component is usually preferable to several common materials that can be gathered on the next run.
Use the vendor after every two or three expeditions rather than returning after every small fight. This preserves momentum without allowing a failed run to erase a large unsold haul. Before entering a more dangerous zone, sell enough to leave at least 25 percent of your inventory free. That buffer lets you pick up rare drops instead of abandoning them because your bag is full.
| Loot Type | Early Action | Mid-Game Action | Reason |
|---|---|---|---|
| Common duplicate gear | Sell immediately | Sell immediately | Low value and poor space efficiency |
| Rare upgrade components | Keep one full upgrade batch | Keep two batches | Harder to replace than gold |
| Consumables | Carry only route requirements | Carry one emergency reserve | Unused supplies reduce loot capacity |
| High-value compact loot | Prioritize over common materials | Prioritize near full inventory | Best gold per inventory slot |
How to Turn Experience Into Faster Levels

Do not measure a farm by experience gained in one fight. Measure experience per minute after travel, healing, selling, and loading are included. A difficult encounter that gives 100 experience but takes two minutes is worse than four easy encounters that give 35 experience each in the same time. The same math applies to gold: a 500-gold haul is poor if it requires 20 minutes and a costly recovery, while a 300-gold loop repeated four times is excellent.
Fight enemies in compact groups so your area damage or crowd-control effects hit multiple targets. Pulling one enemy away from a pack is safer, but it lowers experience per minute. Use solo pulls only when the group contains a ranged attacker, an elite, or an enemy with a dangerous stagger effect. Your goal is controlled density, not maximum density.
When a route begins feeling effortless, do not immediately jump to the hardest available zone. First test the next area with a single expedition and record four things: clear time, healing used, inventory value, and extraction reliability. Stay if the new area improves at least two of those numbers. If it only increases enemy health and danger, your actual leveling speed has gone down.
Supporter Edition Preparation and Performance

The Supporter Edition is best treated as a complete package, not a shortcut. Use any included starting bonuses carefully. If a bonus grants a cosmetic or permanent convenience item, equip it early; if it provides a powerful consumable or temporary resource, save it for the first difficult route where it prevents a failed extraction. Burning premium-looking supplies on the tutorial area is one of the easiest ways to flatten your progression curve.
On PC, stable frame pacing is more important than maximum visual quality during farming. A consistent 60 frames per second makes enemy telegraphs easier to read and reduces missed inputs during evasive movement. Lower shadows and effects first if performance is unstable. Keep textures higher when video memory allows, because texture quality usually costs less combat clarity than heavy effects or distant-detail settings.
| Setting | Farming Recommendation | Performance Impact | Visual Trade-Off |
|---|---|---|---|
| Frame limit | Lock to stable 60 FPS | Reduces frame-time spikes | Less peak smoothness on high-end PCs |
| Shadows | Medium | Medium to high gain | Less depth in large areas |
| Effects | Medium | High during combat | Cleaner attack readability |
| Textures | High if VRAM permits | Usually low | Preserves environment detail |
| Motion blur | Off | Small gain | Sharper dodges and camera movement |
The Mid-Game Profit Loop
Once your damage build clears early enemies comfortably, switch from pure experience farming to a hybrid profit loop. Start with the nearest dense combat area, take the route that passes the highest-value containers, and finish at an extraction point rather than wandering for one more fight. The final fight is rarely worth risking a full inventory.
Use a three-run cycle. Run one tests enemy spawns and gathers materials. Run two repeats the route with a full inventory plan. Run three is the profit run, where you bring the minimum supplies needed and leave as soon as the valuable slots are filled. After that, return to the settlement, sell duplicates, upgrade damage or capacity, and begin again.
For broader combat and performance ideas, compare this approach with Steamoz’s fast-leveling farming guide for Bittersweet Birthday and the Borderlands 3 gold-farming breakdown. The games differ, but the core lesson is identical: repetition beats risky improvisation.
Common Farming Mistakes That Kill Your Run
Greed is the obvious one, but it is not the only trap. Many players spend gold on several minor upgrades instead of saving for the next major breakpoint. Others carry every consumable they own, leaving no room for profitable loot. Some repeatedly fight an elite because it feels efficient, even though the encounter takes longer than the rest of the route combined.
Do not farm while overburdened if the game slows movement or stamina recovery. Do not enter a new area with a damaged primary weapon unless you already know the repair cost. Do not sell rare materials simply to fund a temporary weapon that will be replaced after one more level. Most importantly, record your results. After three runs, you should know the average clear time, gold haul, healing cost, and failure rate. If you do not, you are guessing.
For survival fundamentals, these survival tips for Aliens vs. Predator explain the same discipline of reading enemy pressure and preserving escape options. For PC stability, Steamoz’s locked-FPS settings guide is also useful when Dead in Antares becomes demanding.
A Simple Route Checklist
Before every expedition, repair or equip your primary damage option, leave at least 25 percent inventory space, carry only the healing you expect to use, and confirm the nearest extraction route. During the run, clear dense groups, ignore low-value detours, and watch your stamina as carefully as your health. When the valuable slots are full or your emergency resource is gone, leave. At the settlement, sell duplicates, keep rare components, and buy the upgrade that improves your next route rather than your current ego.
That is the entire Supporter Edition progression engine in miniature: short reliable runs first, damage breakpoints second, carry capacity when the bag fills, and harder zones only when their clear time justifies the risk. Check the official Steam listing for current patches and edition details, and use the Steam Community search to compare route changes after updates. Play conservatively, extract consistently, and your level and gold totals will climb far faster than they will through reckless boss hunting.