
The fastest Borderlands 3 leveling route is simple: finish the story once, unlock Mayhem Mode, jump straight to Mayhem 11 with a temporary high-level weapon, then farm Scraptrap Prime or Graveward while your XP, cash, and gear scale together. For a fresh character, use the story missions and side quests only when they are on-level; for an endgame Vault Hunter, repeatable bosses and The Compactor are far more efficient than roaming the map.
This guide separates three things players often mix together: reaching level 72, earning cash for SDUs, and building a character that can survive Mayhem. The best farm changes depending on whether you own the Moxxi's Heist of the Handsome Jackpot DLC, whether you have a second character already geared, and whether you want pure XP or useful loot as well. You can verify the current game version and DLC packages on the official Steam page for Borderlands 3.

Start with the fastest path to level 72
Don't waste your first playthrough trying to clear every named enemy and optional mission. Borderlands 3's campaign gives you enough XP to stay close to the story's intended level curve, but completionism can leave you overleveled in some zones and undergeared in others. Push the main missions, grab nearby side quests when your level falls behind the recommended mission level, and save most optional content for True Vault Hunter Mode or Mayhem.
Choose a leveling-friendly action skill rather than a perfect endgame build. Amara's Phasegrasp and Mystical Assault skills provide reliable crowd control, Moze's Iron Bear deals excellent damage even with imperfect gear, Zane's Digi-Clone can duplicate strong weapons, and FL4K's Fade Away deletes priority targets. The key is avoiding a build that requires several specific legendaries before it functions.
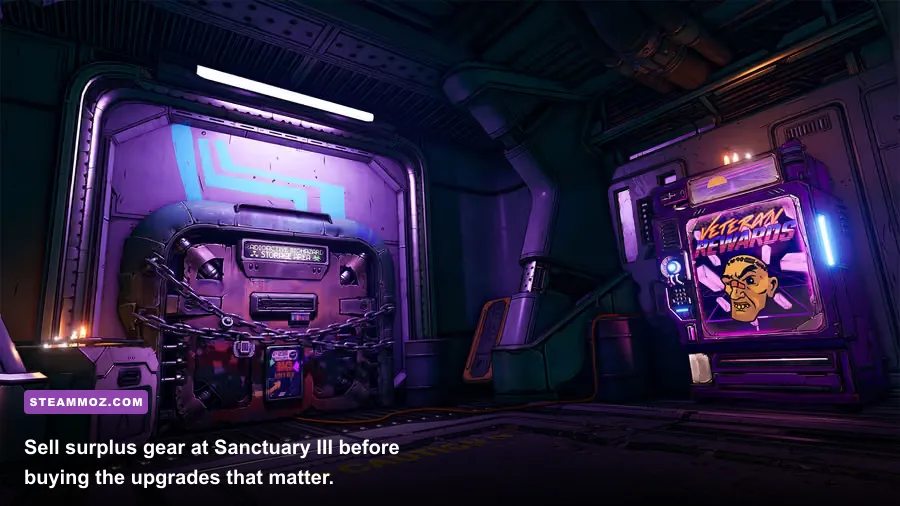
At Sanctuary III, spend Eridium at Crazy Earl's Veteran Rewards machine only when the item is a direct upgrade. Cash should go toward SDUs first. Bigger backpack, grenade, and ammunition capacities reduce downtime, but you don't need every upgrade immediately. Keep one weapon for each useful damage type, sell the rest, and don't hoard underleveled legendaries simply because their orange text looks exciting.
Once the story is complete, activate Mayhem Mode from the console on Sanctuary III. Mayhem 1 through 10 add escalating enemy health, damage, and modifiers; Mayhem 11 has the same enemy scaling as Mayhem 10 but removes the active modifiers while reducing some rewards. That cleaner ruleset is ideal for farming if your build already has the damage to handle it.
| Stage | Best Activity | What to Prioritize | Why It Works |
|---|---|---|---|
| Levels 1-15 | Main missions | On-level guns and class skills | Story XP is faster than detouring across the map |
| Levels 15-30 | Story plus nearby side quests | Weapon replacement every few levels | Prevents damage falloff without excessive farming |
| Levels 30-40 | Campaign finish | Build-defining skill trees | Late missions deliver strong XP and cash payouts |
| Post-story | Mayhem boss farming | Mayhem-scaled weapons | Enemy and gear levels rise with the selected Mayhem tier |
| Level 72 | Mayhem 11 endgame farms | God-roll gear and SDUs | All future XP becomes optional progression rather than level power |
If you have a level-72 friend, cooperative boosting is even quicker. Let the high-level player kill enemies while you stay alive and collect the XP. Split-screen and online co-op can make the campaign much less painful, but remember that loot mode matters: Cooperative Mode gives everyone their own drops, while Cooperation uses shared loot rules and can create arguments over orange beams.
🎮 Borderlands 3
Looking to experience this game? Grab your digital key directly on our store for $5.99.
View on Steammoz Store →Scraptrap Prime is the best repeatable XP farm
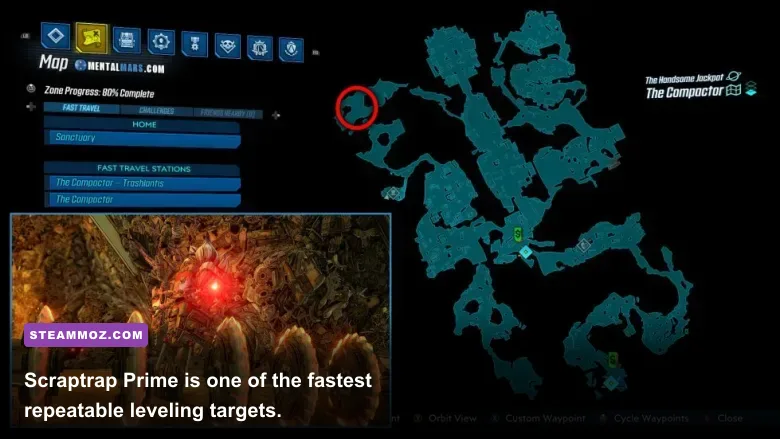
For players who own Moxxi's Heist of the Handsome Jackpot, Scraptrap Prime in The Compactor is the most convenient repeatable leveling farm in Borderlands 3. The arena fills with Scraptrap enemies in waves, followed by the boss itself. They spawn in a tight area, so explosive splash damage, ricocheting bullets, and action skills that clear groups can produce enormous XP bursts with very little travel.
Travel to The Compactor and reach the Scraptrap Nest. Kill the first wave, focus Scraptrap Prime, collect cash and useful drops, then leave the arena through the nearby exit route. The important trick is not to fast-travel away. Walk far enough from the nest to unload the area, then return. If the enemies have despawned, the encounter can be started again. If the nest remains active, move farther away or reload the map.
Moze is especially comfortable here with Short Fuse, Means of Destruction, and Fire in the Skag Den. Her splash damage turns clustered Scraptraps into a chain reaction, while Iron Bear can rescue a weak build. Amara benefits from Phasezerker or Brawl-focused setups that combine Phasegrasp control with Ties That Bind. Zane's Clone using a Sand Hawk or high-damage shotgun can erase waves while the real character stays mobile. FL4K should use Fade Away for critical-hit bursts against Scraptrap Prime, then clear the smaller enemies with a strong assault rifle or shotgun.
Use a level-72 weapon before changing to Mayhem 11. The easiest method is to set Mayhem 11, visit vending machines on Sanctuary III, and buy any high-level gun that appears. It doesn't need to be legendary. A Mayhem-scaled purple shotgun, SMG, or launcher can be enough to kill early targets, after which the farm supplies better replacements. This temporary shopping trick is one of the biggest time savers in the entire game.
| Scraptrap Tool | Strong Examples | Best Use | Warning |
|---|---|---|---|
| Splash weapon | Flipper, Plasma Coil, Faisor | Clearing clustered waves | Watch for self-damage with Moze splash builds |
| Boss killer | Backburner, Free Radical, Monarch | Burning down Scraptrap Prime | Match element to the boss's current health bar |
| Action skill | Iron Bear, Phasegrasp, Digi-Clone | Maintaining damage during reloads | Don't spend the skill on one weak enemy |
| Survivability | Re-Volter, Transformer, Stop-Gap | Surviving crowded waves | Shield choice should match your build's damage type |
Scraptrap Prime also makes money quickly because the arena showers you with guns, grenades, shields, and class mods. Pick up anything valuable, sell it after several runs, and leave low-value white gear on the floor once your backpack fills. The farm is only fast when inventory management doesn't consume half the session.
Graveward is the best base-game boss farm

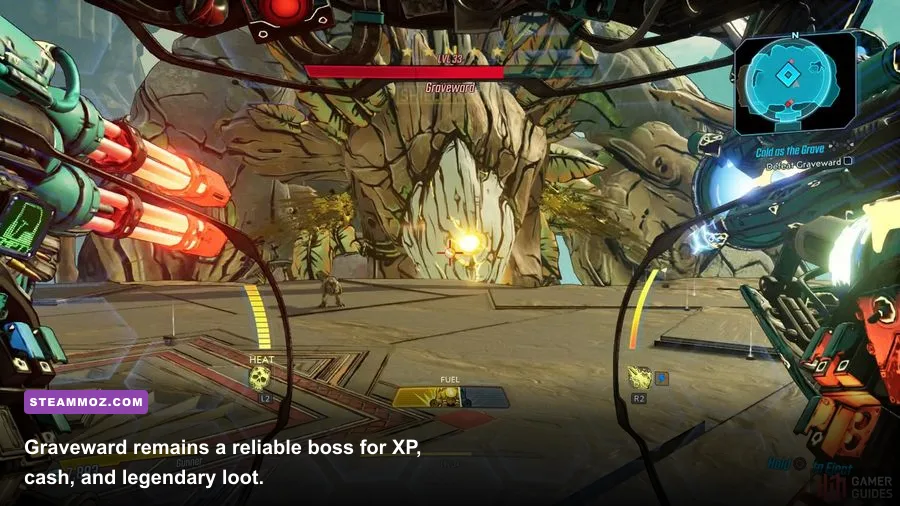
If you don't own the Handsome Jackpot DLC, Graveward in The Floating Tomb is your most dependable all-purpose farm. The boss has a large critical area, predictable attacks, a short route from the fast-travel station, and a generous loot pool. It is also a strong choice for cash because every kill produces a wide spread of equipment to sell.
Graveward's main telegraphs are easy to read. When it leans forward, prepare for the beam attack and move laterally along the platform. When it slams an arm down, jump over the shockwave or move toward the safe side of the arena. During the tilt, stay alert for falling debris and avoid standing near the platform edge. The fight becomes dangerous when players tunnel on the boss's health bar and ignore the floor's movement.
Use corrosive damage for Graveward's armor bar, then switch to incendiary when the health bar appears. Radiation works well for groups of spawned enemies but is less important than raw single-target damage here. A Monarch, Sand Hawk, Rowan's Call, Hellwalker, or Free Radical can all perform well when properly scaled to your Mayhem level. Don't assume a famous weapon is automatically best: a fresh Mayhem 11 blue gun is often stronger than a level-50 legendary.
For Moze, a Fire in the Skag Den splash build and a strong launcher can end the fight quickly. FL4K's Fade Away lets you hit Graveward's weak points repeatedly, while Zane can use the Clone to maintain pressure during beam attacks. Amara's Phasecast or Phaseflare can work, although positioning matters because Graveward's arena gives her fewer easy crowd-control targets.
| Boss Attack | Telegraph | Counter | Useful Damage Window |
|---|---|---|---|
| Energy beam | Graveward leans across the arena | Sprint sideways and keep moving | After the beam passes |
| Arm slam | Arm rises above the platform | Jump the shockwave | Weak point exposed after impact |
| Platform tilt | Arena visibly angles | Move uphill and avoid the edge | Head and chest remain targetable |
| Falling debris | Ground markers appear | Leave marked circles immediately | Short pause after debris lands |
Kill Graveward, collect the drops, sell the unwanted gear, and save-quit to reset the encounter. On PC, a fast loadout and an SSD make this loop particularly smooth. On console, the load is longer, so Scraptrap may still win on XP per minute if you have access to the DLC.
Turn Mayhem Mode into a cash multiplier
Cash farming in Borderlands 3 is mostly a loot-selling problem, not a dedicated currency exploit. Enemy drops and boss rewards become more valuable at higher levels, so farming level-72 Mayhem gear and selling what you don't need is safer and more productive than hunting random money chests. Gold keys, Vault Cards, and Eridium are separate currencies; they won't pay for SDUs or vending-machine purchases.
Before each run, equip a Loaded Dice artifact only if you understand the trade-off. Its increased luck does not replace a damage artifact, and the shield penalty can make Mayhem farming slower or riskier. In most cases, a Victory Rush, Company Man, Pearl of Ineffable Knowledge, or elemental-damage artifact earns more money indirectly by shortening every kill.
Use the lost loot machine on Sanctuary III between runs. It stores missed blue, purple, and legendary gear, but its capacity depends on the associated SDU, and it cannot rescue every item in every situation. Empty it regularly, inspect class mods and artifacts first, then sell duplicate weapons. Class mods can have valuable passive bonuses even when their main skill points are imperfect, so don't trash them automatically.
Money is best spent in this order: character SDUs, ammunition capacity for your main weapon type, grenade capacity, and then the remaining backpack and bank upgrades. The bank matters if you maintain several Vault Hunters, but a brand-new character gets more practical value from ammunition and backpack space. Buy from Marcus's vending machine only when the item fixes a genuine weakness; ordinary vendor guns are rarely worth purchasing once boss farms begin.
| Cash Source | Efficiency | Best Practice | Common Mistake |
|---|---|---|---|
| Scraptrap loot | Very high with DLC | Sell duplicate guns after each few runs | Picking up every white item forever |
| Graveward loot | High in base game | Save-quit after selling unwanted drops | Ignoring Mayhem scaling |
| Vending machines | Moderate | Check every machine for upgrades and cash items | Buying underleveled gear |
| Cash pickups | Low to moderate | Collect during normal farming routes | Running dedicated chest routes |
| Golden Keys | Not a cash source | Use for emergency gear while leveling | Expecting keys to refill your wallet |
The official Borderlands website is useful for checking current announcements, while the 2K Borderlands support hub covers platform and account issues. For build inspiration, our Borderlands PC settings guide also explains why stable frame pacing matters when farming bosses repeatedly.
Build for speed, survival, and repeatable damage
A farming build doesn't need to win a raid boss speedrun. It needs to kill regular enemies quickly, survive a bad Mayhem modifier, and avoid long cooldown gaps. Put points into your main damage loop first, then add survivability. A perfect shield with no damage support won't improve your cash per hour, and a glass cannon that constantly enters Fight For Your Life is equally inefficient.
Moze should consider Short Fuse in Demolition Woman, Fire in the Skag Den in Bottomless Mags, and a splash-friendly weapon such as the Flipper or Faisor. Amara can combine Ties That Bind with Stillness of Mind or a Phasecast setup, using elemental weapons to keep action-skill damage consistent. Zane's Violent Momentum rewards constant movement, while Playing Dirty and Seein' Red help maintain kill-skill uptime. FL4K can build around Fade Away, Interplanetary Stalker, and Leave No Trace for critical bursts and ammunition sustain.
Elemental matching still matters. Shock strips shields, corrosive cuts through armor, incendiary burns flesh, and cryo slows or freezes non-resistant targets. Radiation spreads damage between nearby enemies. Against Graveward, corrosive and incendiary swaps are practical; against Scraptraps, corrosive and splash options are usually more important than a rigid element rotation. Keep a non-elemental weapon available for targets with awkward resistances.
| Vault Hunter | Fast-Farm Core | Gear Priority | Playstyle |
|---|---|---|---|
| Moze | Short Fuse, Fire in the Skag Den, Means of Destruction | Splash gun, grenade, Iron Bear support | Explode groups and sustain ammunition |
| Amara | Ties That Bind, Laid Bare, Ascendant | Elemental SMG or shotgun, action-skill bonuses | Group enemies, then spread elemental damage |
| Zane | Violent Momentum, Playing Dirty, Seein' Red | Clone weapon, movement bonuses, Re-Volter | Stay mobile and let Clone multiply pressure |
| FL4K | Fade Away, Interplanetary Stalker, Leave No Trace | Critical-hit weapon, pet survivability | Delete bosses during critical windows |
Finally, don't farm forever for a theoretical god roll while your build is already killing efficiently. Once you reach level 72, secure a reliable shield, class mod, artifact, and two boss-killing weapons. Then invest the cash into SDUs and use the remaining time for challenges, True Trials, or DLC content. Borderlands 3 rewards momentum: the best farming route is the one you can repeat without dying, sorting every item, or constantly rebuilding your character.
For more practical build and performance advice, compare this route with our fast leveling and gold farming guide, browse our weapon-focused RPG recommendations, or check the PC troubleshooting guide if Borderlands 3 is stuttering during long sessions.