The absolute best starting build for Dead by Daylight survivors relies on combining Meg Thomas's Sprint Burst for mobility, Claudette Morel's Self-Care or Bond for sustainability, Bill Overbeck's Borrowed Time for endgame safety, and resilience or kindred for overall aura awareness, while killers should prioritize Trapper or Wraith with foundational regression perks like Jolt and Sloppy Butcher to control generator repair speeds early on. Stepping into the asymmetrical horror lobbies of Dead by Daylight can feel immensely overwhelming for fresh players due to the sheer volume of characters, perks, and obscure game mechanics. When you are just starting out, your Bloodpoints are scarce, and your pool of available Teachables is virtually empty. Understanding how to construct an efficient foundational loadout can bridge the gap between getting repeatedly sacrificed in the basement and consistently escaping through the exit gates.
Understanding the Basics of Perk Synergies in Dead by Daylight
Before assembling your very first loadout, you must understand how perks interact with your core gameplay loops as either a Survivor or a Killer. Perks are divided into distinct categories: information gathering, mobility, stealth, healing, and generator regression. A well-rounded starting build never stacks four perks that serve the exact same function. For example, running four different healing perks leaves you completely vulnerable during chases, whereas packing a mix of speed, information, and utility ensures you can handle multiple phases of a trial.
For players transitioning from other multiplayer titles or seeking out general gaming fundamentals, checking out comprehensive resources like roblox best beginner tips and tricks can help frame how resource management works in modern service games. In Dead by Daylight, your primary resource is time. Every second spent wandering aimlessly or failing skill checks tips the balance in favor of the Killer. Your starting build must mitigate your mistakes while you learn tile layouts, loop structures, and timing windows for pallet drops.
The Ultimate Free-to-Play Survivor Starting Build
When you first boot up the game, you have access to a set of original survivors: Dwight Fairfield, Meg Thomas, Claudette Morel, Jake Park, and Nea Karlsson (along with licensed free additions like Bill Overbeck depending on your platform). To build the strongest possible kit using only free characters without pouring hundreds of hours into Prestige grinding, you want to collect and equip the following four perks:
1. Sprint Burst (Meg Thomas)
Sprint Burst is arguably the strongest mobility perk available to beginners. When you start running, you instantly break into a 150% running speed sprint for 3 seconds, granting a massive distance boost away from the killer. While it requires you to manage your exhaustion carefully—meaning you cannot walk everywhere while holding the shift key—it completely bails you out of bad positioning mistakes.
2. Kindred (General Perk)
Kindred is a universal perk that appears randomly in everyone's Bloodweb. When any survivor is hooked, all other survivors see each other's auras, and if the Killer is lingering within an 8-meter radius, the Killer's aura is revealed to everyone as well. This eliminates solo-queue guesswork, stopping those frustrating moments where three teammates all abandon generators to attempt an unhook simultaneously.
3. Borrowed Time (Bill Overbeck)
Endgame altruism is where most matches are won or lost. Borrowed Time extends the Endurance status effect to survivors you unhook within the Killer's Terror Radius for 10 seconds. If the Killer decides to tunnel the newly unhooked survivor, the hit will deep-wound them instead of putting them straight down to the dying state, effectively neutralizing camping strategies.
4. We'll Make It (General Perk)
Another incredible universal perk that rewards altruistic play. Whenever you successfully unhook a survivor, you gain a 100% healing speed bonus for the next 90 seconds. This allows you to pick up teammates from the ground and patch them back to full health in record time, keeping pressure off the remaining generators and maintaining team momentum.

The Ultimate Free-to-Play Killer Starting Build
Playing Killer requires an entirely different mindset. You are managing four opponents simultaneously across vast maps while trying to protect seven generators. If you are playing foundational killers like The Trapper, The Wraith, or The Hillbilly, your default perks can feel remarkably weak. However, by utilizing general perks and early baseline powers, you can lock down matches effectively.
For players who enjoy mastering complex class synergies and tactical loadouts across different genres, comparing strategies with tekken 8 best team comp synergy guide highlights how important it is to pick characters whose traits naturally complement your chosen gear. In Dead by Daylight, your killer choice dictates how your build performs.
1. Jolt / Surge (General / Demogorgon Teachable)
Jolt causes any basic attack down to trigger an explosion on all generators within a 32-meter radius, instantly causing them to regress by 8%. This is an amazing passive regression perk that doesn't require you to kick generators manually, saving you precious seconds of travel time.
2. Sloppy Butcher (General Perk)
Sloppy Butcher inflicts the Mangled and Hemorrhage status effects on survivors you hit with basic attacks. Mangled increases the time it takes to heal by 25%, while Hemorrhage causes regression in healing progress if survivors stop patching themselves up midway. It slows down the entire pace of the match significantly.
3. Bitter Murmur (General Perk)
Every time a generator is powered, the auras of all survivors are revealed to you for 5 seconds. When the final generator is completed, all survivors' auras are revealed for 10 seconds. This perk turns the endgame exit gate phase into an absolute slaughterhouse by removing guesswork.
4. Spies from the Shadows (General Perk)
When a survivor disturbs a crow within 36 meters of your location, you receive a loud noise notification. On dense indoor maps like Lery's Memorial Institute or mid-sized loops, this acts as a subtle radar system that alerts you to hidden survivors crouching behind cover.

Optimizing Your Bloodweb Progression Strategy
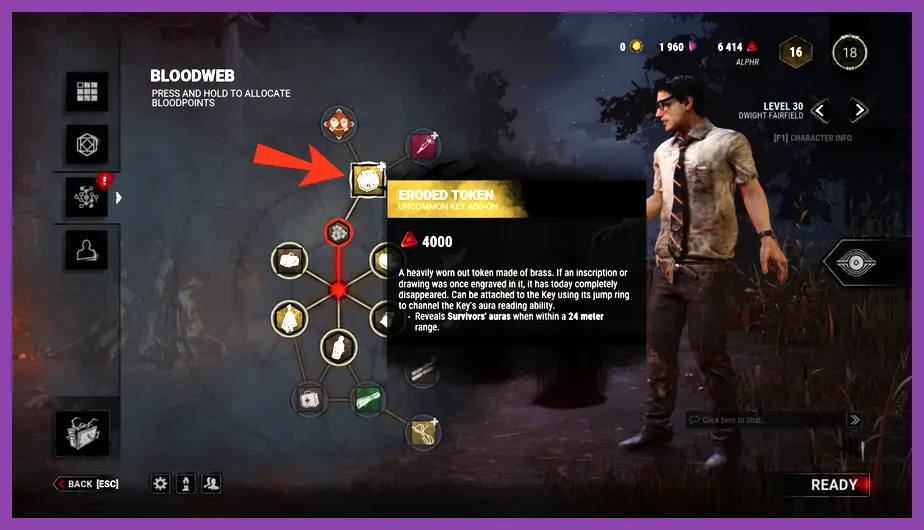
Building your ideal loadout means nothing if you do not know how to spend your Bloodpoints efficiently. Beginners often make the mistake of buying every single offering, flashlight, and yellow toolbox they see in the center of the web. Instead, focus entirely on pathing toward your target perks as quickly as possible. The Entity will consume nodes automatically once you clear enough paths, so plotting the shortest route saves thousands of Bloodpoints per level.
To deepen your understanding of progression systems in competitive titles, take a look at squad busters tier list all characters ranked for 2026 to see how meta prioritization shifts your long-term success. Similarly, prioritizing your first main survivor (such as leveling Meg to Prestige 1 to unlock Sprint Burst across all other survivors) should be your immediate priority in Dead by Daylight.

Advanced Tips for Mastering Your First Build
Once you have your starting build equipped, your mechanical execution determines your escape or kill rate. As a survivor running Sprint Burst, learn to walk around the map when you suspect the killer is near rather than running everywhere; this preserves your exhaustion meter for when you actually need to break a chase. Pay attention to audio cues, look behind you while running by moving your mouse or right stick, and practice fast-vaulting windows at a 90-degree angle to trigger fast vault animations without bumping into walls.
For killers, avoid getting lured into prolonged chases around strong safety shacks or multi-pallet jungle gyms against seasoned survivors. If a survivor is outplaying you at a specific loop, break the pallet, abandon the chase, and pressure the generators where other survivors are likely working. Maintaining map pressure is vastly superior to securing a single ego-driven hook down while three generators pop on the opposite side of the map.
For additional reading on game mechanics and developer updates, check out the official Behavior Interactive website and consult community databases like the Dead by Daylight Wiki to stay ahead of patch notes, character reworks, and meta shifts.