Jumping into Roblox on PC is not like booting up a standard Steam release; you are stepping into a massive, user-generated creation engine wrapped inside a desktop launcher that defaults to an aggressive 60 FPS cap, clunky camera mechanics, and two entirely distinct Windows installations. If you casually grab the first version you spot and launch right into a fast-paced shooter like Frontlines or a punishing action RPG like Deepwoken, you will immediately hit floaty input latency, locked aspect ratios, and visual stutter. To get the competitive, butter-smooth experience PC gaming is known for, you have to bypass the defaults, tune your engine settings, and understand how the platform actually operates beneath its colorful exterior.
Before you spend a single dollar on cosmetics or lose hours fighting awkward keybindings, you need a firm grasp on the underlying architecture. Between choosing the correct desktop client, unlocking frame rates, enabling critical movement toggles like Shift Lock, and dodging ruthless web-based credential theft, setting up Roblox on PC requires real mechanical preparation. Here is everything you need to dial in before clicking into your first server.
The Client Dilemma: Standalone Bootstrapper vs Microsoft Store App
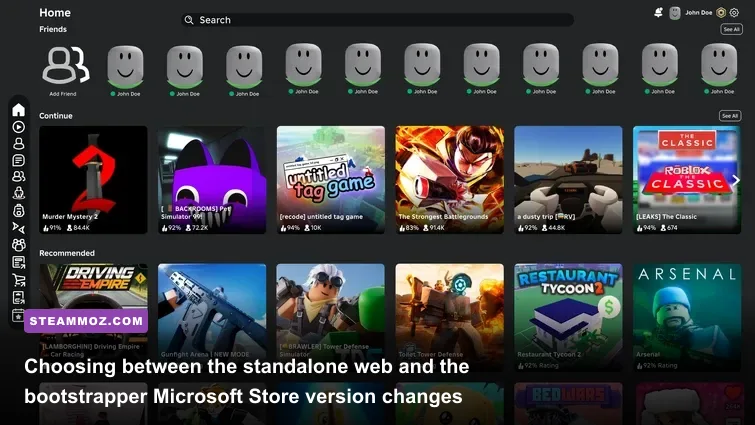
The very first trap PC newcomers encounter happens on the download screen. On Windows, Roblox exists in two fundamentally different versions: the standalone desktop client installed directly through the official browser launcher via Roblox, and the Universal Windows Platform (UWP) version available on the Microsoft Store. While they access the exact same game servers and character inventories, their technical performance is night and day.
The Microsoft Store UWP app is essentially a ported mobile build dressed up for desktop windows. It forces vsync with heavy input lag, limits peripheral polling rates, regularly breaks custom mouse dpi scaling, and completely locks you out of advanced modding tools or wrapper scripts. Worse, camera panning can hitch when your cursor crosses the invisible boundary of the window. In contrast, the standalone bootstrapper downloads directly to your local AppData directory, interacts cleanly with Windows display drivers, handles raw mouse input without smoothing interference, and lets you modify launch behavior. If you want maximum performance and responsiveness, the standalone web-installed client is the only version you should consider.
| Feature / Parameter | Standalone Web Client | Microsoft Store (UWP) App | Bloxstrap (Custom Wrapper) |
|---|---|---|---|
| Input Latency | Ultra Low (Raw Mouse Input) | Moderate to High (Forced VSync) | Lowest (Bypasses Frame Queues) |
| Framerate Limit | Configurable up to 240 Hz | Hard-locked at 60 Hz | Completely Uncapped (FastFlags) |
| FastFlag Support | Manual ClientAppSettings file | Blocked completely | Built-in Graphic GUI Editor |
| Multi-Instance Launching | Supported via Third-Party Tools | Native Support (Account Switch) | Native Built-In Multi-Client |
| Crash Resilience | High (Clean Crash Logs) | Low (Frequent Silent Suspensions) | High (Direct Exception Tracking) |
For users who want total command over their experience, the community standard has shifted heavily toward Bloxstrap. Bloxstrap is an open-source, lightweight launcher wrapper that interacts directly with the official standalone client. It does not tamper with game binaries—meaning it is fully compliant with engine rules—but it gives you direct access to FastFlags, custom audio files, Discord Rich Presence integration, and custom rendering backends like Vulkan or DirectX 11. Much like troubleshooting baseline engine drops in our breakdown of Elex PC fixes that stop crashes and rescue your FPS, running the proper wrapper eliminates client-level overhead right from the starting gate.
Uncapping Frame Rates and Masterminding Roblox Physics
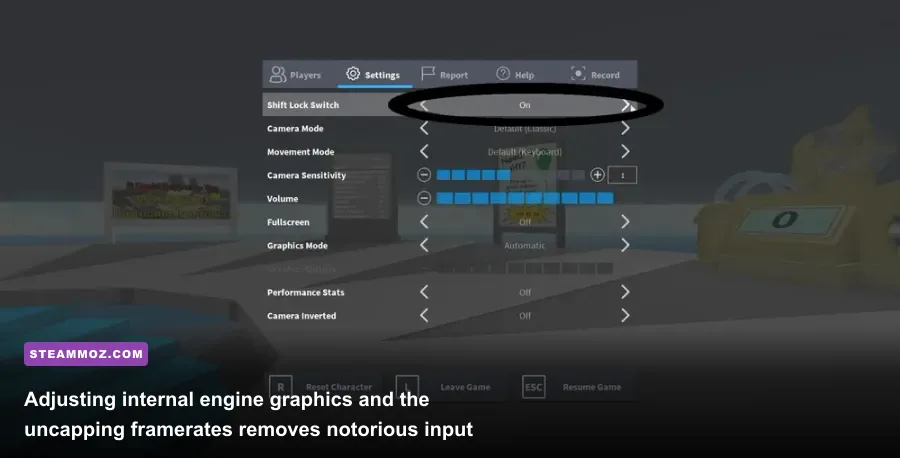
Historically, the Roblox client locked every single user to 60 frames per second. While the physics sub-steps calculate on a distinct 240 Hz tick rate internally, rendering visually past 60 Hz was impossible without running background injector tools like rbxfpsunlocker. While modern standalone updates finally added native maximum framerate dropdowns inside the in-game Esc menu—allowing choices of 60, 120, 144, and 240 Hz—the engine still requires active tuning to avoid visual frame-pacing stutter.
First, verify your in-game framerate target immediately upon loading in. Press Shift + F5 inside any experience to bring up the internal render statistics. Here you will see your current frames per second alongside the ping, packet reception, and memory usage. If your framerate refuses to push past 60 despite your high-refresh monitor, you must navigate to the in-game Escape menu, toggle Settings, and adjust the 'Maximum Frame Rate' slider to match your display refresh rate (e.g., 144 Hz or 240 Hz). Running at higher framerates dramatically lowers input lag on modern gaming mice, allowing micro-adjustments in high-intensity aim scenarios that feel identical to competitive tactical shooters.
However, running uncapped frames can occasionally alter physics interactions in older experiences built specifically around 60 Hz logic. In rare obstacle courses (known across the platform as 'obbies'), certain jump geometries, conveyor belts, and vehicle suspension scripts can react unpredictably if you hit 240 FPS. If you notice your avatar sliding off standard edges or ragdoll bounces becoming wildly erratic, lowering the cap back down to 120 or 60 Hz resolves the collision desync instantly. If you run into stubborn game client freezes when switching render windows, reviewing solutions like our EscapeVR The Basement crashing and low FPS fixes will give you handy insights into how Windows manages background thread priorities during fullscreen-windowed transitions.
Crucial In-Game Configurations: Shift Lock, Sensitivities, and Debugging
Out of the box, Roblox PC control schemes feel like an awkward relic of early 2000s browser gaming. By default, moving your character requires the classic W, A, S, D layout while your camera drifts freely, forcing you to hold down the right mouse button constantly just to aim your perspective. To play like a modern PC gamer, the very first setting you must alter is Shift Lock Switch.
Head into the in-game menu by pressing Escape, go to Settings, and locate the Shift Lock Switch option. Toggle it to On. Now, pressing your left Shift key instantly locks your third-person camera directly behind your avatar's shoulder and summons a permanent crosshair on your screen. Your character will instantly turn to face wherever your mouse points, turning clumsy rotational physics into razor-sharp, strafe-ready third-person combat. In sword-fighting titles, third-person shooters, and precision platformers, playing without Shift Lock is an insurmountable handicap.
| Setting Name | Default State | Competitive Recommended | Why It Matters |
|---|---|---|---|
| Shift Lock Switch | Off | On (Toggled via Left Shift) | Locks reticle to camera; vital for strafing, precision jumping, and melee tracking. |
| Camera Mode | Classic | Follow or Classic | Classic preserves free rotation until Shift Lock is activated; Follow snaps to movement vector. |
| Movement Mode | Keyboard | Keyboard | Standard WASD vector input; keep mouse-click-to-move disabled to avoid misclicks. |
| Graphics Mode | Automatic | Manual (Level 1 to 10) | Manual prevents dynamic resolution drops and visual asset pop-in during heavy fights. |
| MicroProfiler | Off | On during frame drops (Ctrl+F7) | Displays real-time CPU/GPU frame time graphs to locate script bottlenecks vs hardware limits. |
Another major trap is the in-game mouse sensitivity slider. Roblox uses an arbitrary numerical scalar rather than raw dots-per-inch (DPI) matching. Sliding your sensitivity too high introduces noticeable pixel skipping. Keep your internal Roblox camera sensitivity between 0.15 and 0.35, adjusting your physical mouse DPI between 800 and 1600 to find a true 1:1 aiming feel. If you hit visual frame drops in massive combat servers, manually drop the Graphics Quality from 10 down to level 5 or 7; levels 8 through 10 primarily ramp up aggressive screen-space ambient occlusion and extreme view-distance rendering that tax lower-tier graphics cards with little tactical benefit. Dialing in graphic profiles here mirrors the balancing act found in our Filament Marmalade Edition settings for higher FPS guide.
When severe stutter strikes, do not guess whether it is your internet or your graphics card: open the MicroProfiler by pressing Ctrl + F7 (or toggling it in the settings menu). This tool prints a continuous, moving color bar across the top of your screen detailing render frames, scene updates, and network data packets. If the orange and yellow bars spike upward off the chart, client-side Lua scripts inside that specific game are lagging your CPU. If the graph remains flat while your ping counter shoots past 200 ms, your network connection to the developer's server node is dropping packets.
Account Hardening: Evading Cookie Theft, Phishing, and Rogue Extensions
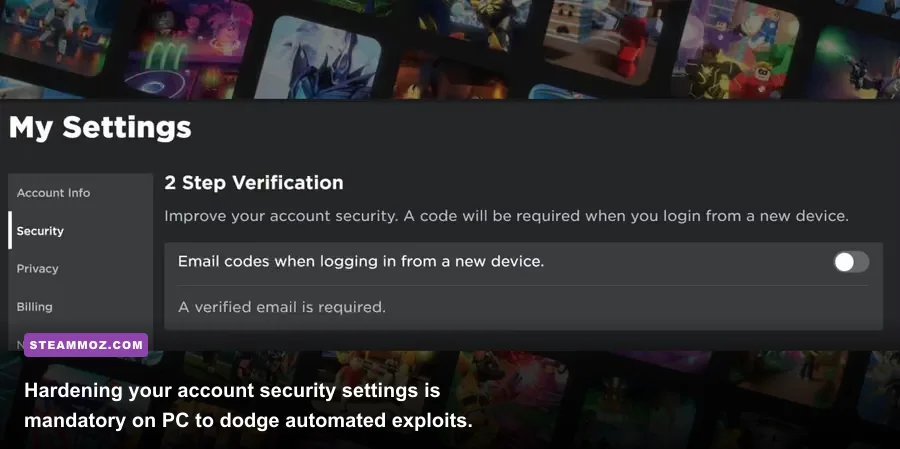
The reality of PC Roblox is that account security requires significantly more vigilance than standard platforms like Steam or Epic Games. Because Roblox runs primarily through your desktop web browser, your logged-in credentials rely heavily on a browser session token called .ROBLOSECURITY. This cookie holds total, unmitigated access to your account, completely bypassing password inputs and traditional Two-Factor Authentication if intercepted.
Cybercriminals targeting the Roblox ecosystem use deceptive methods known as 'cookie-logging' or 'beaming.' This is rarely an brute-force hack; instead, players are tricked into dragging custom JavaScript bookmarks into their browser bar (disguised as avatar rendering tools or trade value calculators), inspecting element code during a trade stream, or installing compromised Chrome browser extensions. If a script reads your .ROBLOSECURITY string and sends it to a remote webhook, attackers can clone your active web session in seconds, draining your avatar inventory, trading away limited items, and changing recovery credentials before an email alert even triggers.
To protect your account effectively, implement these safety protocols immediately:
- Enable Hardware Security Keys or Authenticator App 2FA: Navigate to your Account Settings, open the Security tab, and tie your account to a dedicated authenticator app like Google Authenticator or a physical hardware key (FIDO2/WebAuthn). Avoid relying strictly on SMS 2FA, which is vulnerable to SIM-swapping. You can study official defense workflows directly on the Roblox Account Security Guidelines.
- Never Paste JavaScript into Console or Bookmarks: Any website, Discord bot, or user asking you to run a
javascript:snippet or inspect network response headers (har files) is executing a session-theft script. - Audit Browser Extensions: Third-party trading extensions and cosmetic skin changers frequently get sold off to malicious developers who push silent, malicious updates. Use only trusted open-source tools with long-standing community reputations.
- Use Account Session Auditing: Inside the Security tab on Roblox, scroll down to 'Where You're Logged In.' Regularly review this list. If you see unfamiliar geographic locations or rogue browser instances, click 'Log Out of All Other Sessions' immediately. This immediately revokes every active
.ROBLOSECURITYtoken across the web.
Securing your account guarantees that all your progression, unlocks, and farmed resources remain intact, letting you focus purely on high-level gameplay without worrying about account takeovers.
Managing the Robux Economy, Premium Subscriptions, and Pay-to-Win Traps
Roblox experiences operate on an entirely decentralized developer monetization model. Unlike a standard PC title where monetization is governed by unified publisher standards, every individual Roblox creator dictates their own balance between fair play and aggressive pay-to-win mechanics. Understanding how the virtual currency (Robux) works on PC—and where your money actually goes—will save you from throwing cash into bottomless progress grinds.
First, never purchase Robux through mobile apps if you play on PC. When buying currency through iOS or Android storefronts, the prices often reflect platform fee surcharges. Buying directly on the official desktop website gives you the maximum raw currency return per transaction tier. Even better, if you find yourself spending money monthly, subscribing to Roblox Premium is vastly more cost-effective than buying standalone Robux packs. Premium awards an upfront monthly lump sum of currency, grants an automatic 10% bonus on all additional Robux purchases, and unlocks the ability to trade collectible Limited items with other users in the platform economy.
Second, recognize the technical distinction between Gamepasses and Developer Products before clicking confirm on purchase prompts:
- Gamepasses: These are one-time, permanent purchases tied to your inventory. They typically grant permanent abilities, extra weapon slots, VIP access, or double XP multipliers. If a game disappears, your gamepass is gone, but the developer cannot force you to rebuy it within that specific experience.
- Developer Products: These are consumable microtransactions—such as buying in-game gold, instant respawns, or temporary stat buffs. Many predatory games design intentionally exhausting, slow progression loops to entice players into repeatedly buying consumable developer products.
If you encounter experiences that lock basic mobility or core combat viability behind consumable Robux purchases, do not waste your wallet. The best experiences on PC—such as Doors, Arcane Odyssey, or Phantom Forces—focus on cosmetic unlocks, player skill, and fair progression loops. For players accustomed to maximizing efficiency and resource accumulation without paying real cash, check out our tactical strategies in the Level Fast and Farm Zeni in Kakarot Master Edition guide and our optimization walkthrough for Empires of the Undergrowth fast leveling and gold farming to see how disciplined grinding outclasses lazy spending habits.
Optimizing Audio and Pushing Performance Further
Once you have your client locked down and your controls configured, the final layer of Roblox PC mastery comes down to audio spatialization and render profiling. By default, the Roblox sound engine processes game audio via basic stereo channels. In competitive scenarios, hearing footsteps, spell charges, or reload clicks across vertical axes is paramount. Navigating into your Windows Sound Control Panel and toggling 'Windows Sonic for Headphones' (or Dolby Atmos if you hold a license) bridges the gap between Roblox's native sound design and true directional audio.
For players driving high-end desktop rigs with modern GPUs, you can push the engine's graphical fidelity far past its basic limits. While the standard in-game slider tops out at level 10, developers can create environments featuring Future Lighting—a proprietary dynamic shadow and illumination engine that rivals mid-tier commercial releases. However, Future Lighting experiences can introduce micro-stutter if your graphics card throttles back clock speeds during low-utilization scenes. Force your GPU power management mode inside the Nvidia Control Panel or AMD Adrenalin software to 'Prefer Maximum Performance' specifically for the RobloxPlayerBeta.exe executable.
Roblox on PC is as deep, fast, and competitive as you choose to make it. By bypassing the sluggish Microsoft Store version, pairing the standalone web client with Bloxstrap, uncapping your framerate past 60 Hz, binding Shift Lock, and locking down your account with hardware-grade authentication, you eliminate every friction point that holds newcomers back. Treat the platform like the fully featured PC engine it truly is, and you will dominate servers while casual players are still wrestling with their camera controls.