
Jumping into Joel and Ellie's brutal American cross-country trek on PC without proper preparation is a fast track to frustrating deaths and stuttering frametimes. While Naughty Dog's masterpiece offers one of the most poignant narratives in gaming history, the PC release demands respect both on the system level and inside its unforgiving survival sandbox. If you want a smooth, cinematic experience rather than a slideshow of death screens, you need to let your shaders build completely, balance your VRAM budget ruthlessly, prioritize weapon holsters over raw firepower, and horde your shivs exclusively for locked supply rooms. Mouse-and-keyboard precision radically transforms the shooting mechanics, but it won't save you if your resource economy is broken before you even reach Pittsburgh.
Taming the PC Port: Shaders, VRAM Budgeting, and Performance Tuning
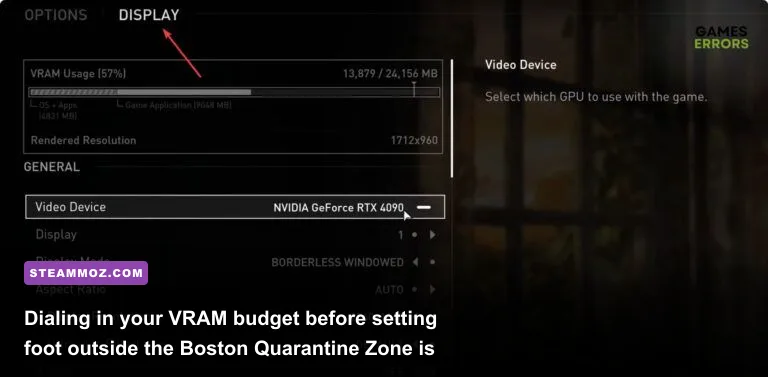
When you launch The Last of Us Part 1 on Steam for the very first time, step away from your desk and let the shader building finish. Do not press Start Game. Do not tinker with the prologue. The shader compilation process pushes modern multi-core CPUs to near-100% saturation, and trying to play while background threads churn through pipeline assets causes horrific frame hitching, audio desync, and outright desktop crashes. Let that progress bar in the bottom right hit 100%. Depending on your CPU's instruction throughput and core count, this takes anywhere from 10 to 30 minutes, but it eliminates 90% of the micro-stuttering that plagued the game's launch build.
Once you are past shaders, open the display menu to check the dynamic VRAM meter. Unlike console setups with unified memory architectures, the PC port treats video memory like an all-you-can-eat buffet. If you push beyond your graphics card's physical VRAM limit, the engine dumps overflowing data into your system RAM, tanking your framerate into single digits. If you're on an 8GB GPU like an RTX 3070 or RX 6600 XT, running Ultra textures is out of the question; drop Texture Quality down to High or Medium. Much like dialing in settings for max FPS in other heavy open-world titles, the visual difference between High and Ultra textures in motion is virtually imperceptible, but the VRAM savings keep your frametime pacing rock solid.
| Graphic Setting | Recommended Value | VRAM & Performance Impact | Tactical / Visual Benefit |
|---|---|---|---|
| Texture Quality | High (8GB VRAM) / Ultra (12GB+) | Massive VRAM consumption | Maintains environmental grit without triggering memory leaks. |
| Volumetric Lighting | Medium | Moderate GPU frame drop | Clears up screen noise during moody, foggy spore corridors. |
| Dynamic Reflections | Low / Off | High GPU overhead | Standard screen-space reflections look great without cutting FPS. |
| Shadow Resolution | High | Moderate VRAM / GPU impact | Sharpens enemy silhouettes, crucial for spotting Stalkers in pitch black. |
| Upscaling (DLSS / FSR) | Quality Mode | +25% to +40% FPS boost | Stabilizes framerates in dense foliage and urban water scenes. |
Keep an eye on unexpected performance hiccups by reviewing proven PC fixes to rescue your FPS if your hardware exhibits sudden degradation over longer gaming sessions. The PC port also supports NVIDIA DLSS, AMD FSR 2.2, and Intel XeSS; setting up DLSS or FSR to "Quality" at 1440p or 4K yields phenomenal edge reconstruction while giving your graphics card the thermal breathing room it needs to sustain high refresh rates.
The Supplement Economy: Which Skills to Upgrade First
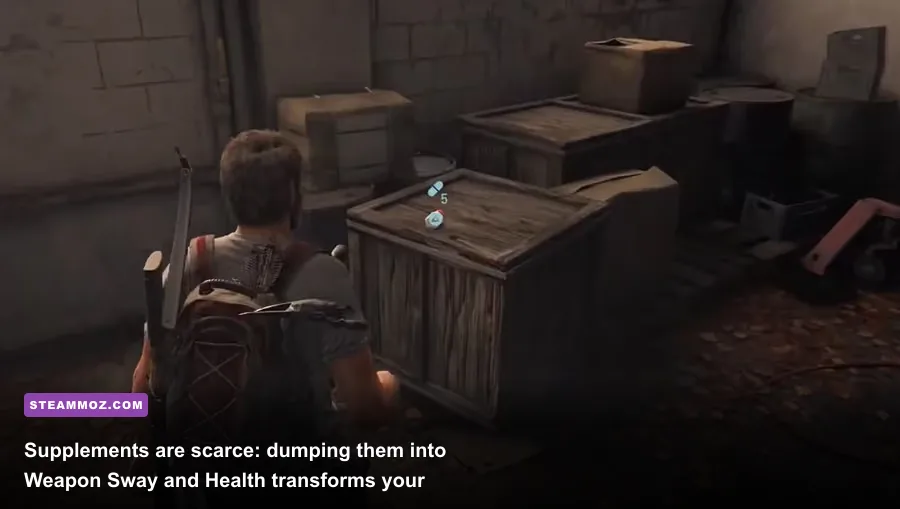
Supplements (the little medicine bottles scattered across bathrooms, abandoned bedrooms, and medical tents) allow Joel to enhance his physical capabilities. However, on moderate to high difficulties like Hard, Survivor, and Grounded, pill yields are severely constrained. Wasting your first 100 supplements on filler skills will cripple your combat effectiveness when human factions start aggressively flanking you.
Your absolute number one priority must be Weapon Sway. While console players have historically relied on aim-assist to drag crosshairs onto targets, PC gamers rely on raw mouse input. The default weapon sway on Joel's handguns and hunting rifle is violently aggressive—the reticle bobbles around the screen like a ship in a storm. Investing 50 pills into Weapon Sway Level 1 immediately tightens reticle recoil and drift, turning headshots from erratic gambles into dependable, one-tap kills that conserve your precious 9mm and revolver ammunition.
| Skill Name | Pill Cost | Priority Tier | Gameplay Impact & Strategic Value |
|---|---|---|---|
| Weapon Sway I & II | 50 / 100 | S-Tier | Eliminates erratic mouse drift; mandatory for reliable headshots. |
| Maximum Health I & II | 50 / 100 | A-Tier | Extends your health bar and acts as a free instant full heal upon purchase. |
| Shiv Master | 75 / 150 | B-Tier (Situational) | Lets you expend a shiv to survive Clicker grabs; expensive on high difficulties. |
| Listen Mode Distance | 20 / 30 / 40 | C-Tier | Useful for beginners, but completely disabled on Survivor and Grounded. |
| Healing Speed | 40 / 50 | D-Tier | Joel shouldn't heal under active fire; smoke bombs and repositioning work better. |
A pro-tip for leveling Maximum Health: do not buy this upgrade while Joel is sitting at full health. Whenever you unlock Maximum Health Level 1 or 2 at an upgrade bench, the game immediately refills Joel's current HP bar to its new maximum cap for free. If you stumble through an encounter on a sliver of life with zero medkits in your inventory, hold off on using a precious rag and alcohol bottle; instead, pop the skill upgrade to instantly restore your entire health pool without burning crafting resources.
Workbench Discipline: Holsters, Tool Levels, and Weapon Priority
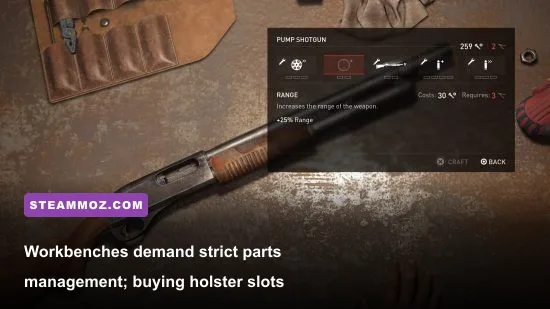
Parts are the cold, mechanical currency of the wasteland, and you will never find enough of them to max out every firearm. Many newcomers make the catastrophic mistake of pouring their early parts into boosting the Revolver's fire rate or expanding the Shotgun's magazine tube. This is a trap. The single most vital investment at any early workbench is unlocking your Holsters.
By default, Joel can only hotkey one small arm and one long gun. Swapping to an unholstered weapon requires him to kneel, unzip his canvas backpack, and slowly fish the gun out—an animation that takes nearly three seconds. In the middle of an infected swarm where a Bloater is charging and Runners are closing the gap, those three seconds mean a death screen. Crafting the Long Gun Holster (75 parts) and Pistol Holster (50 parts) maps your second primary and secondary weapons directly to number keys or mouse buttons for instantaneous hot-swapping. You can blast an armored hunter with the pump-action shotgun, instantly hit 2 to switch to your hunting rifle, and drop a distant sniper without ever breaking your stride.
Furthermore, workbench upgrades are strictly gated by Tool Boxes scattered through the world. There are five Tool Levels in total, and missing one permanently restricts your weapon capabilities for entire chapters. Keep your eyes peeled in these exact locations:
- Tool Level 1: Bill's Town inside the church armory basement right after meeting Bill.
- Tool Level 2: Pittsburgh in the first garage after the ambush, sitting right beside the smoke bomb spawn.
- Tool Level 3: The Suburbs sewer network, resting in the flooded control room directly following the sound-trap puzzle.
- Tool Level 4: The University, tucked into the science building's second floor behind a locked shiv door.
- Tool Level 5: Salt Lake City Bus Depot, resting inside the mobile triage medical tent past the giraffe encounter.
Much like hunting down secret locations and hidden rewards across vast maps, sweeping every corner of these hub zones ensures you never arrive at a late-game workbench locked out of critical reload-speed or armor-piercing upgrades. Don't waste parts on reload speed for weapons with small capacities until your Hunting Rifle has armor piercing, which allows rounds to punch straight through high-tier military helmets.
Shiv Doors and Crafting Math: The Hidden Value of Bricks

Crafting items in The Last of Us Part 1 shares ingredients across multiple lethal tools. Blades and Binding make Shivs, but they also build Melee Weapon Upgrades. Alcohol and Rags make Medkits, but they are also consumed by Molotov Cocktails. Sugar and Explosive powder create Smoke Bombs and Nail Bombs. Because these components are strictly finite, every craft is a trade-off that dictates your tactical options for the next two chapters.
Here is an ironclad rule: Never craft a shiv to silently kill an ordinary enemy. Save your shivs exclusively for the 13 Shiv Doors hidden throughout the campaign. Behind these locked wooden and steel barriers lie colossal stockpiles of ammunition, Tool Boxes, large caches of parts, training manuals, and dozens of supplements. If you waste your last shiv on a Clicker stealth takedown, you lock yourself out of these treasure troves, setting your progression back substantially. Searching for these rooms is just as vital as seeking out hidden rewards worth hunting in classic loot-heavy RPGs.
How do you deal with Clickers without burning shiv durability? Use the absolute best weapon in the game: The Brick.
Do not throw your bricks as distractions unless you have no other choice. If you equip a brick in your hand and charge a Clicker or Runner, pressing your melee key executes a lightning-fast three-hit blunt combo. The third smash instantly shatters the Clicker's fungal armor and kills it outright without spending a single piece of ammunition or blade fragment. Glass bottles, while useful for causing an auditory distraction or stunning an entire group of Hunters so you can torch them with a single Molotov, cannot perform this three-hit execution. Always prioritize holding a brick in your inventory over a bottle whenever you have the option.
Combat Doctrine: Mouse Aim, Stealth Resets, and Enemy Types
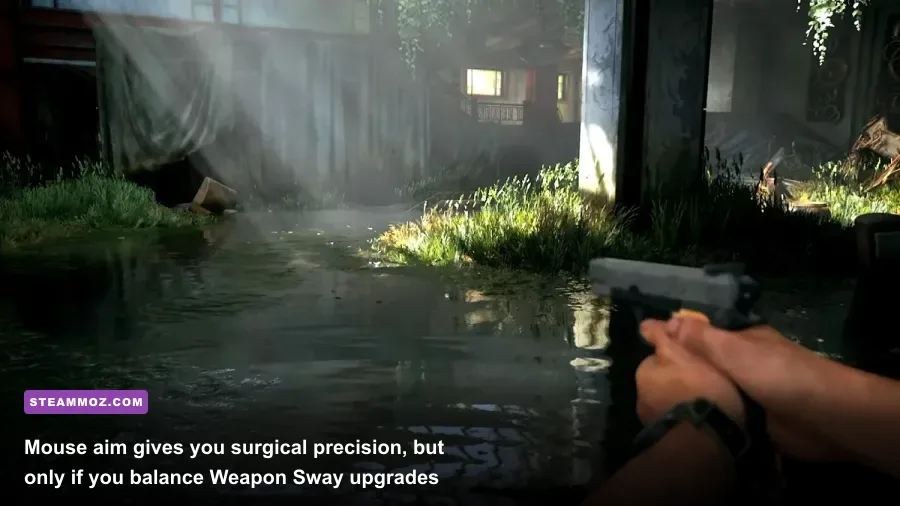
The combat sandbox of Naughty Dog's masterpiece shifts dramatically when shifting from analog sticks to mouse control. On consoles, combat is defined by deliberate, heavy, panicked shots. On PC, low-latency mouse aiming turns Joel into a terrifyingly efficient marksman—provided you understand how enemy behavior models work.
Human hunters, military guards, and infected variants operate under vastly different sensory rules:
- Runners: Retain sight and hearing. If one spots you, its screeches alert every nearby infected, turning a stealth crawl into a frantic melee dogfight. Prioritize silent chokeholds from behind.
- Clickers: Completely blind, but possess hyper-sensitive echolocation. You can crouch-walk at full speed directly in front of their faces as long as you make zero noise. If you bump an obstacle or sprint, they will rush your location and kill you in a single unblockable grapple.
- Stalkers: The most terrifying enemy in the game. Unlike other infected, Stalkers actively break line of sight, take cover, do not register clearly on Listen Mode, and attempt to ambush you from your blind spots. When dealing with them in the Pittsburgh hotel basement, back yourself into a corner with your shotgun ready.
- Bloaters: Massive, walking tank units that hurl corrosive spore pods. Never engage Bloaters with standard handgun fire. Hit them with a Molotov Cocktail to burn off their outer fungal plates, then switch to high-damage tools like the Shotgun, Hunting Rifle, or Nail Bombs to blow through their health bars.
Understanding which tools counter which threats is just as crucial as ranking your arsenal in classic shooters. Don't forget that combat states aren't binary. If an encounter goes south and human enemies pin you behind concrete barriers, throw a Smoke Bomb. Smoke completely breaks enemy line-of-sight and disrupts their firing routines. You can sprint through the cloud, break into a sprint around a flanking corner, and drop back into stealth while the AI wastes ammunition blindly firing into the smoke.
Essential PC Settings and Accessibility Toggles to Enable
Before leaving the title screen, dig deep into the comprehensive settings menu that PlayStation PC and Naughty Dog engineered. Several default settings can make the game feel sluggish or artificially difficult on a desktop monitor.
First, adjust the Field of View (FOV) slider. The original console release locked the camera tightly over Joel's right shoulder, designed for players sitting ten feet away from a television screen. On an ultrawide monitor or a desktop display sitting two feet from your face, that cramped FOV induces severe tunnel vision and motion sickness. Bumping the slider up gives you peripheral vision to spot flanking infected without breaking the cinematic framing of combat.
Next, visit the Accessibility Menu. Even if you want a hardcore, pristine survival horror run, toggle on Auto-Pickup Loot. By default, Joel must manually face and press the pickup key for every individual bullet, blade fragment, bottle of pills, and scrap of parts scattered in drawers. Over a 15-hour campaign, you will press the grab key thousands of times. Auto-pickup simply vacuums up resources as you walk near them, preserving your mechanical switches and your wrists without changing combat mechanics or resource density in any way.
Finally, if you have a DualSense controller, plug it directly into your PC via a USB-C cable. While mouse aim offers unmatched mechanical speed, PlayStation PC features include full native support for DualSense adaptive triggers and haptic feedback. The tension of pulling back the bowstring, the distinct mechanical clicks of Joel cocking a revolver, and the tactile rumble of falling rain in your palms elevate the immersion to astronomical heights. Take your time, let your hardware breathe, scavenge every corner, and treat every bullet like your last—the journey to the Firefly lab is brutal, but master these rules, and you'll survive it.