
BloodRayne: Terminal Cut does not have character levels, experience points, or a gold currency to farm. The fastest way to become stronger is to preserve Blood Rage, refill health and blood through controlled executions, collect weapon ammunition, and replay short combat rooms for score and practice. Treat this as a resource-and-score route, not an RPG grind: Rayne's permanent advantage comes from learning her movement, feeding safely, and using the right weapon against each enemy.
That distinction matters because plenty of searches for a BloodRayne: Terminal Cut fast leveling and gold farming guide assume the game works like a loot-driven action RPG. It doesn't. The Terminal Cut release keeps the original campaign's linear structure and arcade-style combat loop. There is no XP bar to fill, no merchant economy, no gear rarity, and no gold total that unlocks upgrades. If a guide tells you to repeat a mission for coins or spend skill points on Rayne, it's describing a different game—or inventing systems that simply aren't here.
What You Can Actually Farm in Terminal Cut
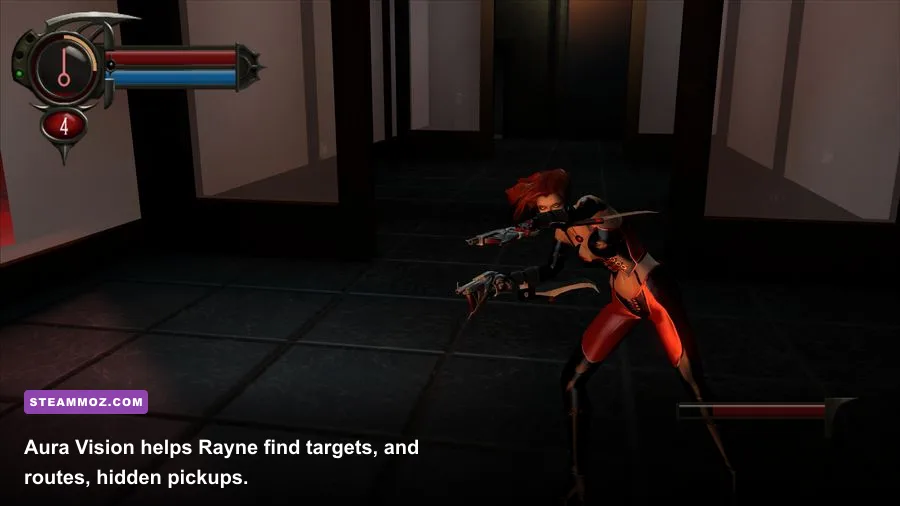
The useful currencies in BloodRayne are practical rather than financial. Health, blood, ammunition, Blood Rage, and positional advantage determine whether Rayne controls a room or gets shredded by gunfire. The game also rewards stylish, efficient killing through its score-driven action design. You can replay chapters to improve completion performance, but you won't convert a high score into a permanent level or gold balance.
Rayne begins with her signature arm blades and dhampir abilities. Her blades are always available, deal dependable close-range damage, and allow her to finish weakened enemies without spending ammunition. Her blood-based abilities let her recover from damage and maintain momentum, while firearms solve problems that are unsafe to handle at point-blank range. The best farming route therefore looks like this: enter a room, identify the ranged threat, close distance using cover or a quick approach, kill that threat, execute when safe, and leave with more resources than you spent.
| Resource | How to replenish it | Best farming habit | What to avoid |
|---|---|---|---|
| Health | Blood-based recovery and level pickups | Finish isolated enemies instead of trading hits | Starting executions in crossfire |
| Blood | Feeding on suitable enemies and pickups | Feed only after the room's main threat is controlled | Draining while another enemy has a clear shot |
| Ammunition | Weapon pickups placed through chapters | Use guns on armored, distant, or clustered targets | Spending rare ammo on basic melee fodder |
| Blood Rage | Combat momentum and the game's blood resource loop | Save it for dense groups and dangerous elites | Activating it to finish one weak enemy |
| Score | Fast kills, continued combat, and efficient encounters | Replay compact rooms and cut out travel mistakes | Risking a death for a marginal combo |
For the exact PC version details, check the BloodRayne: Terminal Cut Steam page. It is also worth checking the developer and publisher information on Ziggurat Interactive's official site before assuming a modern patch added RPG systems.

🎮 BloodRayne: Terminal Cut
Looking to experience this game? Grab your digital key directly on our store for $5.99.
View on Steammoz Store →The Fastest Real Progression Route

Because there is no leveling curve, progression means making each chapter safer and faster. Start by learning the room order on a normal run. Don't restart every time you lose a little health; use that first pass to mark where ranged enemies appear, which targets can be reached from the side, and where ammunition or recovery pickups sit. Your second run is the farming run, because you now know which fights deserve Blood Rage and which can be cleared with blades.
Step one: clear ranged threats first
Gunfire is the biggest reason a seemingly profitable room becomes a resource sink. Rayne's melee offense is strongest when she can stay on one target, but ranged enemies punish long animations and blind approaches. Use Aura Vision before entering an unfamiliar space. It helps you read the room, locate living targets, and avoid wandering into a fight without knowing where the pressure is coming from.
Approach from an angle rather than crossing an open floor in a straight line. If an enemy is isolated, close in and use blades. If several shooters overlap their lines of fire, spend a firearm burst or Blood Rage to break the formation. The goal isn't maximum kills per second on the opening move; it is eliminating the enemy that can interrupt every other action.
Step two: convert kills into recovery
Once a room's ranged threat is gone, use the remaining enemies to stabilize. Feeding and executions are most valuable when performed with space around Rayne. Move the fight away from doorways, ledges, explosive hazards, and the next spawn trigger. A safe recovery is worth more than a flashy kill because it lets you enter the next encounter with your resources intact.
Step three: leave before the route turns bad
There is no reason to grind an entire chapter if one compact encounter gives you the practice or score improvement you want. For a farming loop, choose the first room with a predictable enemy mix, clear it cleanly, and reload the checkpoint or replay the chapter if the game places you at a convenient restart. Confirm the exact checkpoint behavior in your build rather than assuming every pickup respawns identically. Terminal Cut is old-school software, and checkpoint logic can feel less generous than modern action games.
| Run type | Objective | Combat plan | Success benchmark |
|---|---|---|---|
| Route-learning run | Map enemies and pickups | Use blades, Aura Vision, and conservative movement | Reach the next checkpoint without emergency resource use |
| Resource run | Finish with health, blood, and ammo intact | Kill shooters first and feed in safe pockets | No unnecessary healing or wasted heavy ammunition |
| Score run | Improve speed and combat flow | Chain close-range kills and reserve Blood Rage for groups | Fewer pauses, missed targets, and damage trades |
| Practice run | Master a difficult enemy or arena | Repeat one encounter until its telegraphs are familiar | Clear the room without panic activation |
This is the same mindset that makes other action games click. Our Blood Rush secrets guide covers a similar principle: route knowledge beats blind repetition when rewards are tied to exploration and execution rather than a conventional XP ladder.
Weapons and Abilities That Save the Most Resources

Rayne's arm blades should be your default tool. They cost no ammunition, keep pressure on nearby enemies, and are the cleanest way to preserve your ranged inventory. Their weakness is commitment: if you attack without watching the room, another enemy can interrupt you. Strike isolated targets, reposition after a kill, and don't stay locked onto a disposable enemy while a shooter remains active.
Rayne's firearms are valuable because they compress dangerous encounters. Pistols are useful for finishing a target at range and interrupting a threat while you reposition. The harpoon is especially useful when an enemy's position matters more than raw damage: pulling or controlling a target can prevent it from maintaining a safe firing lane. Explosive and heavy weapons should be reserved for clustered enemies, armored threats, or moments when melee would expose Rayne to several simultaneous attacks.
Blood Rage is your emergency accelerator, not a button to press whenever it is available. Activate it when a room contains multiple high-priority targets, when an elite enemy is about to be surrounded, or when you need to force a fast kill before incoming fire overwhelms you. A single weak enemy is a poor trade. Save the resource, create space, and let the blades do the cheap work.
| Tool | Best target | Why it improves farming | Common mistake |
|---|---|---|---|
| Arm blades | Isolated standard enemies | Reliable damage with no ammo cost | Ignoring nearby shooters during the attack |
| Pistols | Distant or fleeing targets | Finishes threats without a dangerous approach | Dumping ammunition into low-risk melee enemies |
| Harpoon | Position-sensitive enemies | Disrupts firing lanes and controls spacing | Using it without checking the room behind Rayne |
| Heavy explosives | Groups and armored targets | Shortens encounters that would drain health | Firing at one enemy when a melee kill is safe |
| Blood Rage | Dense, dangerous encounters | Turns a bad room into a controlled burst | Wasting it for speed with no real threat present |
Terminal Cut's combat rewards rhythm. Hit, reposition, check the room, then commit again. The fastest player isn't the one who attacks constantly; it's the one who spends the least time recovering from a bad decision.
Chapter Farming: Louisiana, Argentina, and Germany

The campaign moves through distinct areas rather than a repeatable dungeon system. That makes chapter selection more important than searching for a mythical gold farm. Louisiana is a strong early practice environment because its encounters teach spacing, approach angles, and the danger of entering a new section without checking for ranged enemies. Use it to learn the blade-and-feed loop before trying to force high-score runs in later chapters.
Argentina introduces more demanding layouts and enemy combinations. Don't treat every pickup as permission to spend the matching resource immediately. If you already have enough ammunition for the next dangerous room, keep using blades on basic targets. Save the expensive tools for a formation that would otherwise force you to absorb damage.
Germany's castle and industrial sections are where greedy farming tends to collapse. Enemy placement, narrow approaches, and overlapping attacks make it harder to recover after a mistake. Clear the first wave, identify the next activation point, and enter each new space with your camera and Aura Vision working for you. If the route's score matters, practice the chapter in segments instead of resetting a successful run after one imperfect encounter.
| Chapter area | Best training focus | Preferred resource plan | Farm safely by |
|---|---|---|---|
| Louisiana | Blade spacing and feeding | Keep ammunition for emergencies | Separate targets before committing to attacks |
| Argentina | Weapon selection and route memory | Use firearms on distant or awkward threats | Read the next arena before spending Blood Rage |
| Germany | Threat prioritization under pressure | Enter difficult rooms with a reserve | Practice checkpoints and avoid blind door entries |
For broader route-planning habits, compare this approach with our Banners of Ruin fast-leveling guide. That game really does have an economy, while BloodRayne's resource loop is intentionally immediate and combat-focused. The lesson is useful precisely because the systems are different: never farm a currency the game doesn't track.
How to Maximize Score Without Throwing Runs Away
If your goal is the closest thing BloodRayne has to leveling, chase better chapter performance. Speed, damage avoidance, continuous combat, and efficient kills are more valuable than stopping to search every corner for nonexistent gold. Start with survival, then add speed. A dead run produces no score, no practice, and no useful route data.
Use a three-pass method. On pass one, clear the chapter safely and note every enemy trigger. On pass two, remove hesitation: pre-aim your approach, know which target dies first, and reserve the correct weapon before the fight begins. On pass three, push the timer and combat flow. If you lose health or ammunition faster than expected, revert to the previous pass instead of forcing the aggressive line.
Don't confuse a long combo with a good run. A combo that requires standing in an open area while shooters fire is usually a trap. Keep moving, use environmental geometry, and finish targets in an order that reduces incoming damage. When the room is safe, feed or execute to restore your position. When it isn't safe, kill the threat first—even if that breaks the stylish sequence.
PC players should also keep the presentation stable. The original game is not a demanding modern title, but consistent frame pacing is more important than chasing maximum image quality. Use a stable display mode, avoid unnecessary background overlays, and test controller or mouse sensitivity before starting a score attempt. A missed turn or delayed camera correction costs more than a modest visual setting change.
| Priority | What to optimize | Why it matters | Score-run rule |
|---|---|---|---|
| 1 | Survival | Deaths erase route progress and practice | Never trade a full run for one risky kill |
| 2 | Threat order | Ranged enemies interrupt every other action | Remove the enemy that controls the room |
| 3 | Movement | Good positioning reduces healing and ammo use | Attack from angles, not across open fire |
| 4 | Speed | Shorter encounters improve repeatability | Cut pauses only after the safe route is learned |
| 5 | Style | Combos are useful but risky when forced | Take stylish kills when the room is already controlled |
What Not to Do When Farming
First, don't reload the same room expecting gold to appear. There is no shop loop waiting at the end of the chapter. Second, don't burn every pickup because it is available. Pickups are an opportunity to build a reserve, not a command to spend. Third, don't feed in the middle of a crowd. The animation may restore you, but the damage you take during it can erase the benefit.
Don't use Blood Rage as a panic substitute for target priority. If the real problem is one shooter behind Rayne, eliminate that shooter or break the line of sight. Rage can rescue a room, but it can't repair a route where every encounter is entered without a plan. Finally, don't judge progress by an imaginary level number. Judge it by whether you can clear the same section with fewer hits taken, fewer bullets spent, and less hesitation.
That mindset also keeps Terminal Cut in perspective. It is a compact, old-school action game built around Rayne's violent movement and resource management—not an endless-service grind. If you're looking for a genuine RPG progression loop, our Blackguards beginner build guide is the better fit. If you want more vampire-flavored role-playing, try our recommendations for games like Cabernet.
The Bottom Line on Terminal Cut Farming
There is no fast leveling exploit or gold farm in BloodRayne: Terminal Cut because the game has neither system. The efficient route is brutally simple: learn each room, kill ranged enemies first, use arm blades on safe targets, feed only when the area is controlled, preserve ammunition, and trigger Blood Rage for dense or genuinely dangerous encounters. Replay short, predictable sections to sharpen score and execution rather than searching for permanent stats.
Once you stop looking for an RPG economy, Terminal Cut's progression becomes much clearer. Every clean room is a measurable upgrade in your own execution. Every saved bullet gives you more control later. Every safe feeding opportunity keeps the next encounter from becoming a scramble. Rayne doesn't level up—but your route, timing, and threat recognition absolutely do.
For platform-specific patch information and ownership details, use the official Steam listing and the publisher's BloodRayne information. Those sources are safer than third-party farming pages that mix Terminal Cut with unrelated BloodRayne releases.